2010 MERCEDES-BENZ GL fog light
[x] Cancel search: fog lightPage 180 of 380
The air conditioning uses the refrigerant
R134a. This refrigerant is free of CFCs which
are harmful to the ozone layer.
! If the air conditioning cannot be activated
again, this indicates that the air
conditioning is losing refrigerant. The
compressor has turned off.
Have the air conditioning checked at the
nearest authorized Mercedes-Benz Center.
Automatic mode
When operating the climate control system in
automatic mode, the interior air temperature,
air volume and air distribution are adjusted
automatically.
In automatic mode, cooling with
dehumidification is switched on. This function
can be switched off if necessary.
GWarning!
If you switch off the air conditioning, the
vehicle will not be cooled when weather
conditions are warm. The windows can fog up
more quickly. Window fogging may impair
visibility and endanger you and others.
XSet the desired temperature
( Y page 178).XActivating: Press button Ã.
The indicator lamp in the button comes on.
The air volume and air distribution are
adjusted automatically.
i The settings for the passenger side are
also used for the rear passenger
compartment.
XDeactivating: Press button I or K .
The indicator lamp in button à goes out.
The automatic operation of air volume
switches off. The selected blower speed isshown in air volume display G
( Y page 175).
or
XPress air distribution button ¯, P , or
O .
The indicator lamp in button à goes out.
The automatic operation of air distribution
switches off.
Setting the temperature
You can adjust the air temperature on each
side of the passenger compartment. You
should raise or lower the temperature setting
in small increments, preferably starting at
72‡ (22†).
XIncreasing/decreasing: Turn
temperature control : and/or C
( Y page 175) slightly clockwise or
counterclockwise.
Adjusting air distribution
The air distribution can be adjusted manually.
The symbols on the buttons represent the
following functions:
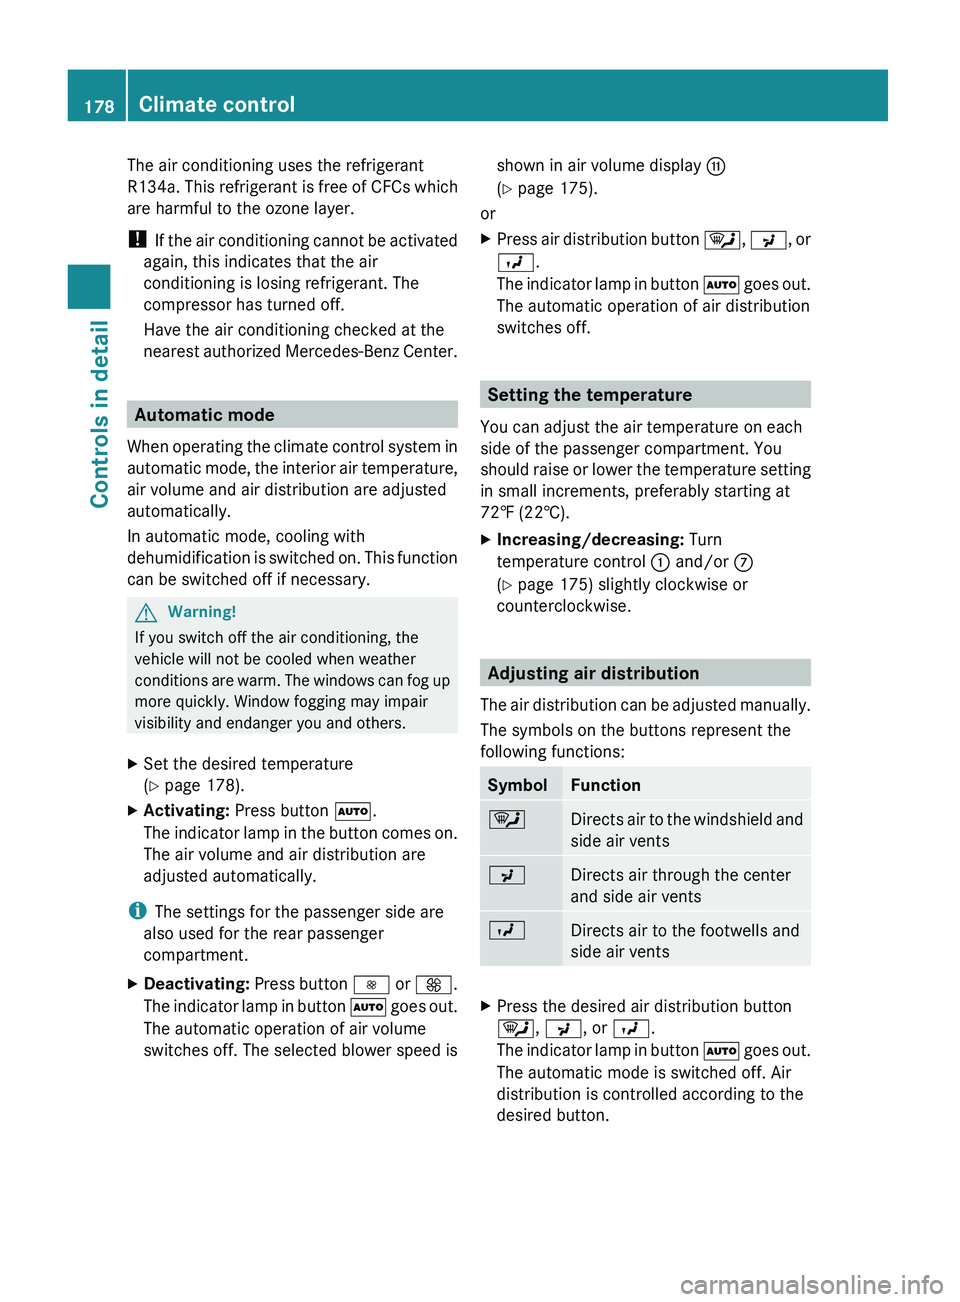
SymbolFunction¯Directs air to the windshield and
side air ventsPDirects air through the center
and side air ventsODirects air to the footwells and
side air ventsXPress the desired air distribution button
¯ , P , or O .
The indicator lamp in button à goes out.
The automatic mode is switched off. Air
distribution is controlled according to the
desired button.178Climate controlControls in detail
X164_AKB; 5; 31, en-USd2ureepe,Version: 2.11.8.12009-09-11T12:30:16+02:00 - Seite 178
Page 181 of 380
Adjusting air volumeXDecreasing/increasing: Press button
I or K .
The automatic mode is switched off. The
selected blower speed is shown in air
volume display G (Y page 175).
When using the Voice Control System, the
blower speed reduces automatically. When
the Voice Control System is not used
anymore, the blower speed increases to the
previously selected level.
Front defroster
You can use this setting to defrost the
windshield, for example if it is iced up.
You can also defog the windshield and the
side windows.
i Keep this setting selected only until the
windshield or the side windows are clear
again.
Activating
XPress button ¦.
The indicator lamp in the button comes on.
The climate control switches to the
following functions automatically:
R most efficient blower speed and heating
power, depending on outside
temperature
R air flows onto the windshield and the
front door windows (side air vents must
be open)
R the air conditioning compressor
switches on at outside temperatures
above approximately 41‡ (5†) for air-
drying
Adjustments
You can adjust the air volume and the
temperature when the front defroster is
switched on. The air flow will remain on the
windshield and front door windows.
XPress button I to decrease or button
K to increase air volume to the desired
level.
The air volume decreases/increases to the
next lower/higher blower speed and
heating switches to the temperature that
was set before the front defroster was
switched on.
The indicator lamp in button ¦ goes out.
The indicator lamp in button Á comes
on.
or
XTurn temperature control : and/or C
( Y page 175) slightly in any direction.
Heating switches to the temperature that
was set before the front defroster was
switched on.
The indicator lamp in button ¦ goes out.
The indicator lamp in button Á comes
on.
i The air conditioning compressor remains
on even if the indicator lamp in button
¦ goes out. This helps to prevent the
windshield from fogging.
Deactivating
XPress button ¦ again.
The indicator lamp in the button goes out.
Defrosting is turned off.
The previous settings are once again in
effect. The air conditioning compressor
remains switched on.
i To deactivate, you can also press button
^ or à .
Windshield fogged on the outside
XSwitch the windshield wipers on
( Y page 103).XPress air distribution button P or O .Climate control179Controls in detailX164_AKB; 5; 31, en-USd2ureepe,Version: 2.11.8.12009-09-11T12:30:16+02:00 - Seite 179Z
Page 192 of 380
was set before the front defroster was
switched on.
The indicator lamp in button ¦ goes out.
The indicator lamp in button Á comes
on.
or
XTurn temperature control : and/or C
(USA only) ( Y page 181) or : and/or E
(Canada only) ( Y page 183) slightly in any
direction.
Heating switches to the temperature that
was set before the front defroster was
switched on.
The indicator lamp in button ¦ goes out.
The indicator lamp in button Á comes
on.
i The air conditioning compressor remains
on even if the indicator lamp in button
¦ goes out. This helps to prevent the
windshield from fogging.
Deactivating
XPress button ¦ once more.
The indicator lamp in the button goes out.
Defrosting is turned off.
The previous settings are once again in
effect. The air conditioning compressor
remains switched on.
i To deactivate, you can also press button
^ or à .
Windshield fogged on the outside
XSwitch the windshield wipers on
( Y page 103).XPress button Ã.
The indicator lamp in the button goes out.
Air volume and air distribution are
controlled separately for each zone.
If the automatic air volume and air
distribution are switched off:
XPress buttons O/c 16
and P /
\ 16
.
Air recirculation mode
Switch to air recirculation mode to prevent
unpleasant odors from entering the vehicle
from the outside (e. g. before driving through
a tunnel). This setting cuts off the intake of
outside air and recirculates the air in the
passenger compartment.
GWarning!
Fogged windows impair visibility,
endangering you and others. If the windows
begin to fog on the inside, switching off the
air recirculation mode immediately should
clear interior window fogging. If interior
window fogging persists, make sure the air
conditioning is activated, or press button
¦ .
XActivating: Press button d.
The indicator lamp in the button comes on.
i The air recirculation mode is activated
automatically at high outside
temperatures.
The indicator lamp in button d is not lit
when the air recirculation mode is switched
on automatically.
A quantity of outside air is added after
approximately 30 minutes.
If you have turned off the air conditioning
or the outside temperature is below 41‡
(5†), the air recirculation mode will not
switch on automatically.
XDeactivating: Press button d.
The indicator lamp in the button goes out.16 Canada only1903-zone automatic climate controlControls in detail
X164_AKB; 5; 31, en-USd2ureepe,Version: 2.11.8.12009-09-11T12:30:16+02:00 - Seite 190
Page 312 of 380
Center. After AdBlue®
was refilled, the
engine can be started again.
Lamps
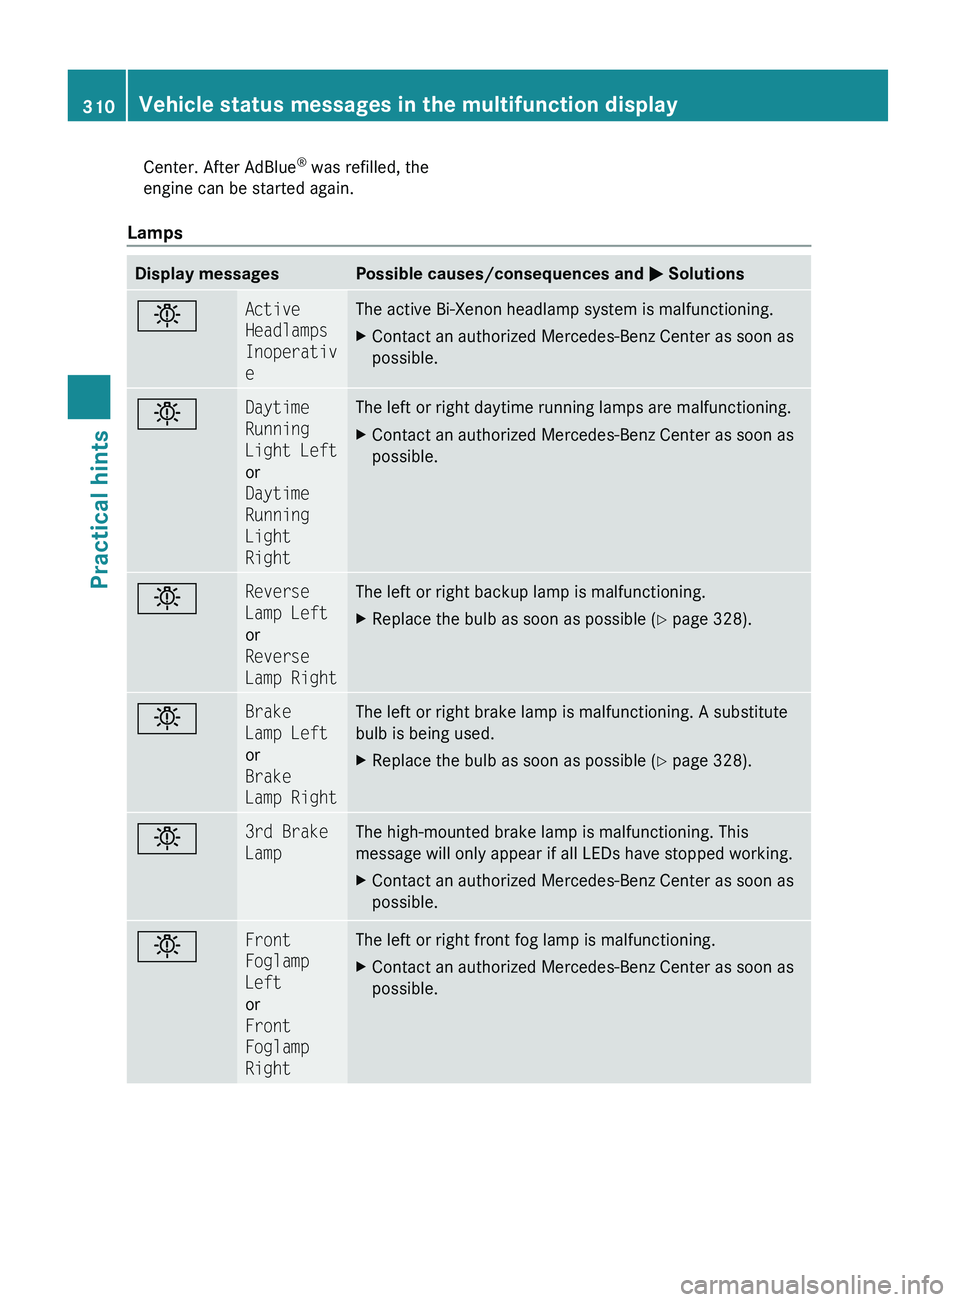
Display messagesPossible causes/consequences and M SolutionsbActive
Headlamps
Inoperativ
eThe active Bi-Xenon headlamp system is malfunctioning.XContact an authorized Mercedes-Benz Center as soon as
possible.bDaytime
Running
Light Left
or
Daytime
Running
Light
RightThe left or right daytime running lamps are malfunctioning.XContact an authorized Mercedes-Benz Center as soon as
possible.bReverse
Lamp Left
or
Reverse
Lamp RightThe left or right backup lamp is malfunctioning.XReplace the bulb as soon as possible ( Y page 328).bBrake
Lamp Left
or
Brake
Lamp RightThe left or right brake lamp is malfunctioning. A substitute
bulb is being used.XReplace the bulb as soon as possible ( Y page 328).b3rd Brake
LampThe high-mounted brake lamp is malfunctioning. This
message will only appear if all LEDs have stopped working.XContact an authorized Mercedes-Benz Center as soon as
possible.bFront
Foglamp
Left
or
Front
Foglamp
RightThe left or right front fog lamp is malfunctioning.XContact an authorized Mercedes-Benz Center as soon as
possible.310Vehicle status messages in the multifunction displayPractical hints
X164_AKB; 5; 31, en-USd2ureepe,Version: 2.11.8.12009-09-11T12:30:16+02:00 - Seite 310
Page 314 of 380
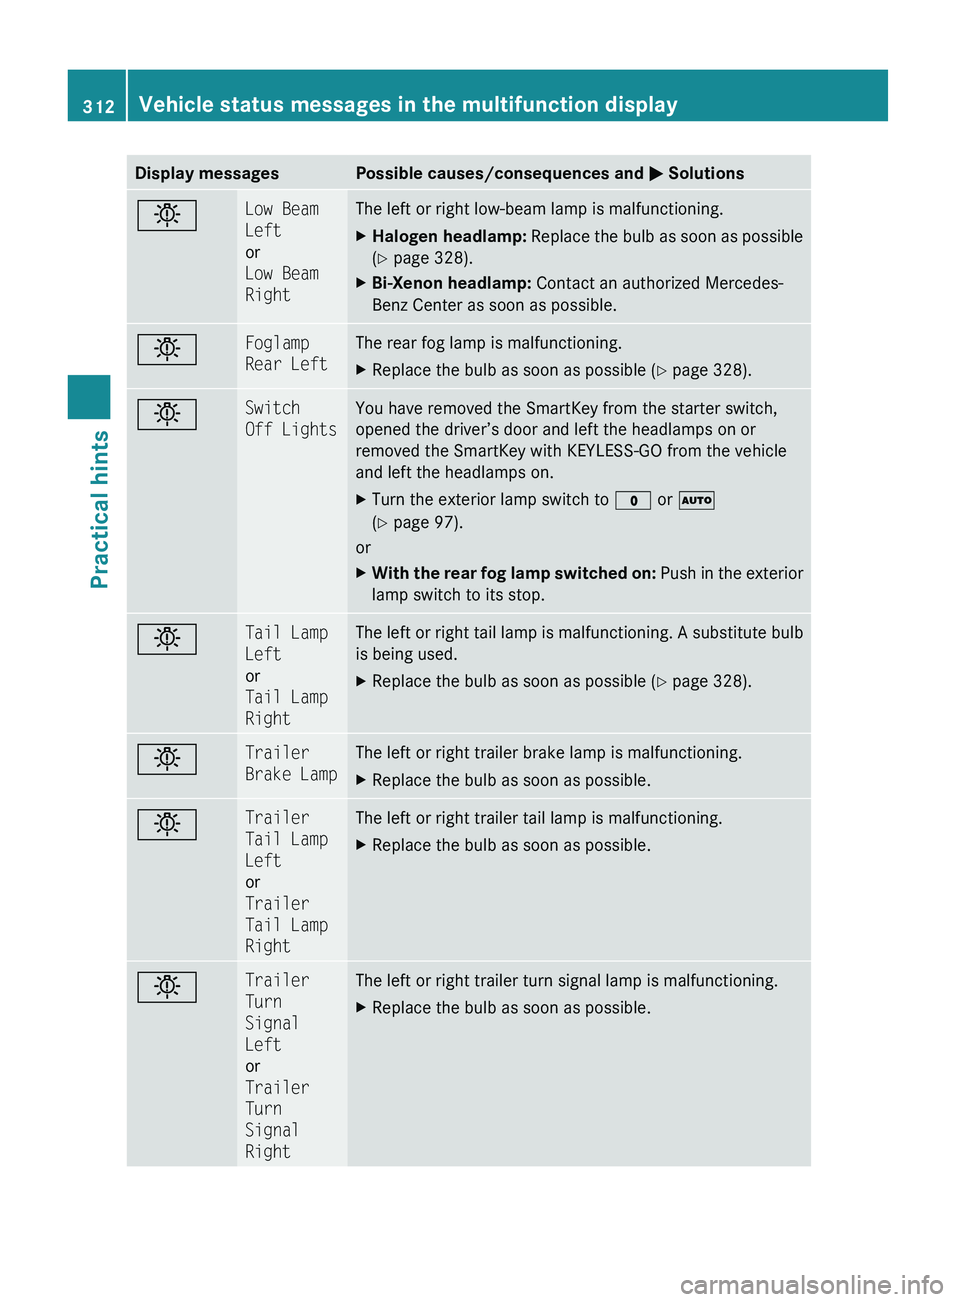
Display messagesPossible causes/consequences and M SolutionsbLow Beam
Left
or
Low Beam
RightThe left or right low-beam lamp is malfunctioning.XHalogen headlamp: Replace the bulb as soon as possible
( Y page 328).XBi-Xenon headlamp: Contact an authorized Mercedes-
Benz Center as soon as possible.bFoglamp
Rear LeftThe rear fog lamp is malfunctioning.XReplace the bulb as soon as possible ( Y page 328).bSwitch
Off LightsYou have removed the SmartKey from the starter switch,
opened the driver’s door and left the headlamps on or
removed the SmartKey with KEYLESS-GO from the vehicle
and left the headlamps on.XTurn the exterior lamp switch to $ or Ã
( Y page 97).
or
XWith the rear fog lamp switched on: Push in the exterior
lamp switch to its stop.bTail Lamp
Left
or
Tail Lamp
RightThe left or right tail lamp is malfunctioning. A substitute bulb
is being used.XReplace the bulb as soon as possible ( Y page 328).bTrailer
Brake LampThe left or right trailer brake lamp is malfunctioning.XReplace the bulb as soon as possible.bTrailer
Tail Lamp
Left
or
Trailer
Tail Lamp
RightThe left or right trailer tail lamp is malfunctioning.XReplace the bulb as soon as possible.bTrailer
Turn
Signal
Left
or
Trailer
Turn
Signal
RightThe left or right trailer turn signal lamp is malfunctioning.XReplace the bulb as soon as possible.312Vehicle status messages in the multifunction displayPractical hints
X164_AKB; 5; 31, en-USd2ureepe,Version: 2.11.8.12009-09-11T12:30:16+02:00 - Seite 312
Page 330 of 380
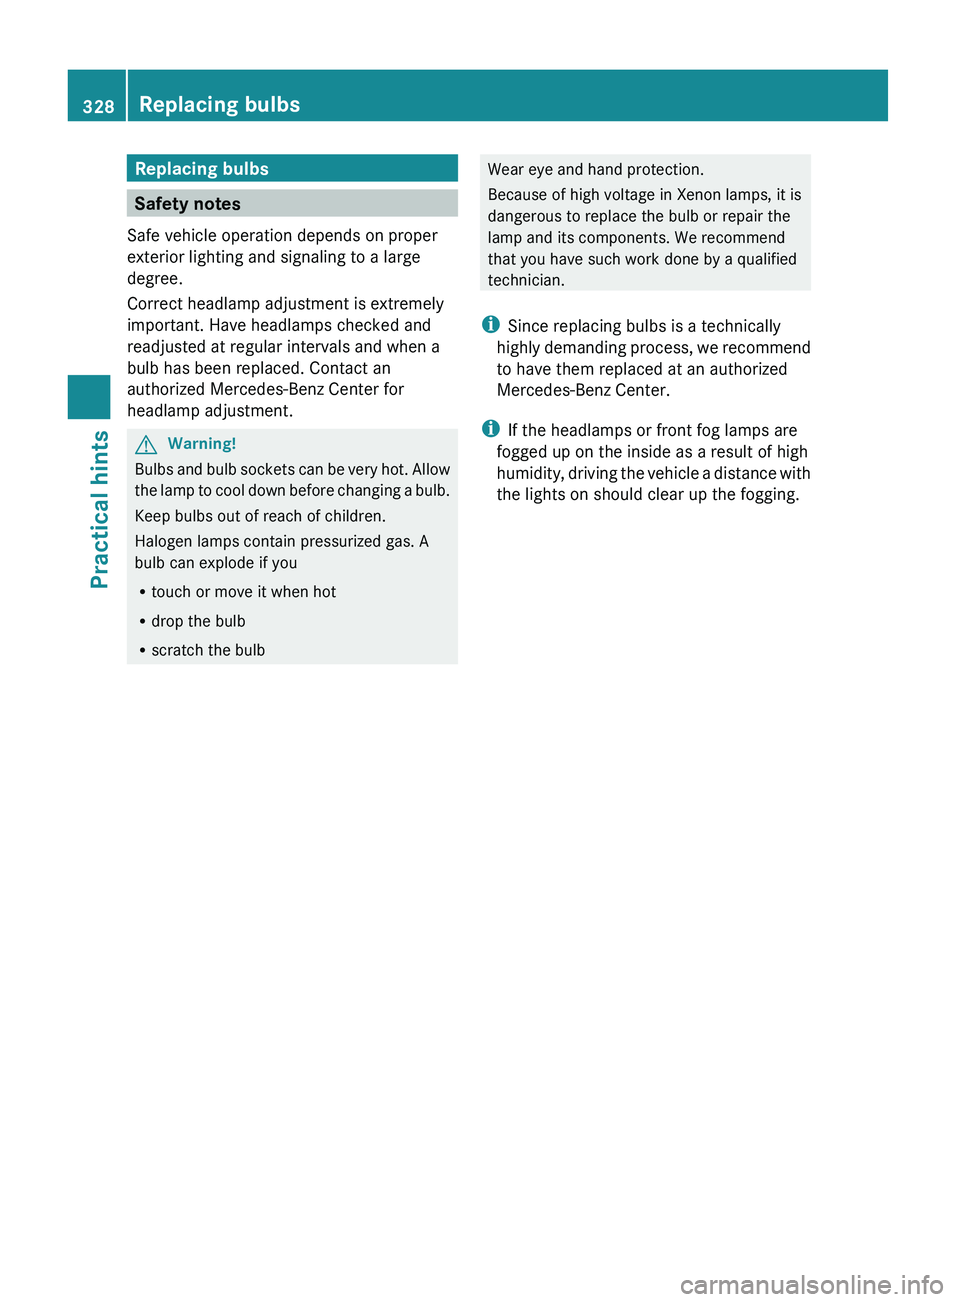
Replacing bulbs
Safety notes
Safe vehicle operation depends on proper
exterior lighting and signaling to a large
degree.
Correct headlamp adjustment is extremely
important. Have headlamps checked and
readjusted at regular intervals and when a
bulb has been replaced. Contact an
authorized Mercedes-Benz Center for
headlamp adjustment.
GWarning!
Bulbs and bulb sockets can be very hot. Allow
the lamp to cool down before changing a bulb.
Keep bulbs out of reach of children.
Halogen lamps contain pressurized gas. A
bulb can explode if you
R touch or move it when hot
R drop the bulb
R scratch the bulb
Wear eye and hand protection.
Because of high voltage in Xenon lamps, it is
dangerous to replace the bulb or repair the
lamp and its components. We recommend
that you have such work done by a qualified
technician.
i Since replacing bulbs is a technically
highly demanding process, we recommend
to have them replaced at an authorized
Mercedes-Benz Center.
i If the headlamps or front fog lamps are
fogged up on the inside as a result of high
humidity, driving the vehicle a distance with
the lights on should clear up the fogging.328Replacing bulbsPractical hints
X164_AKB; 5; 31, en-USd2ureepe,Version: 2.11.8.12009-09-11T12:30:16+02:00 - Seite 328
Page 332 of 380
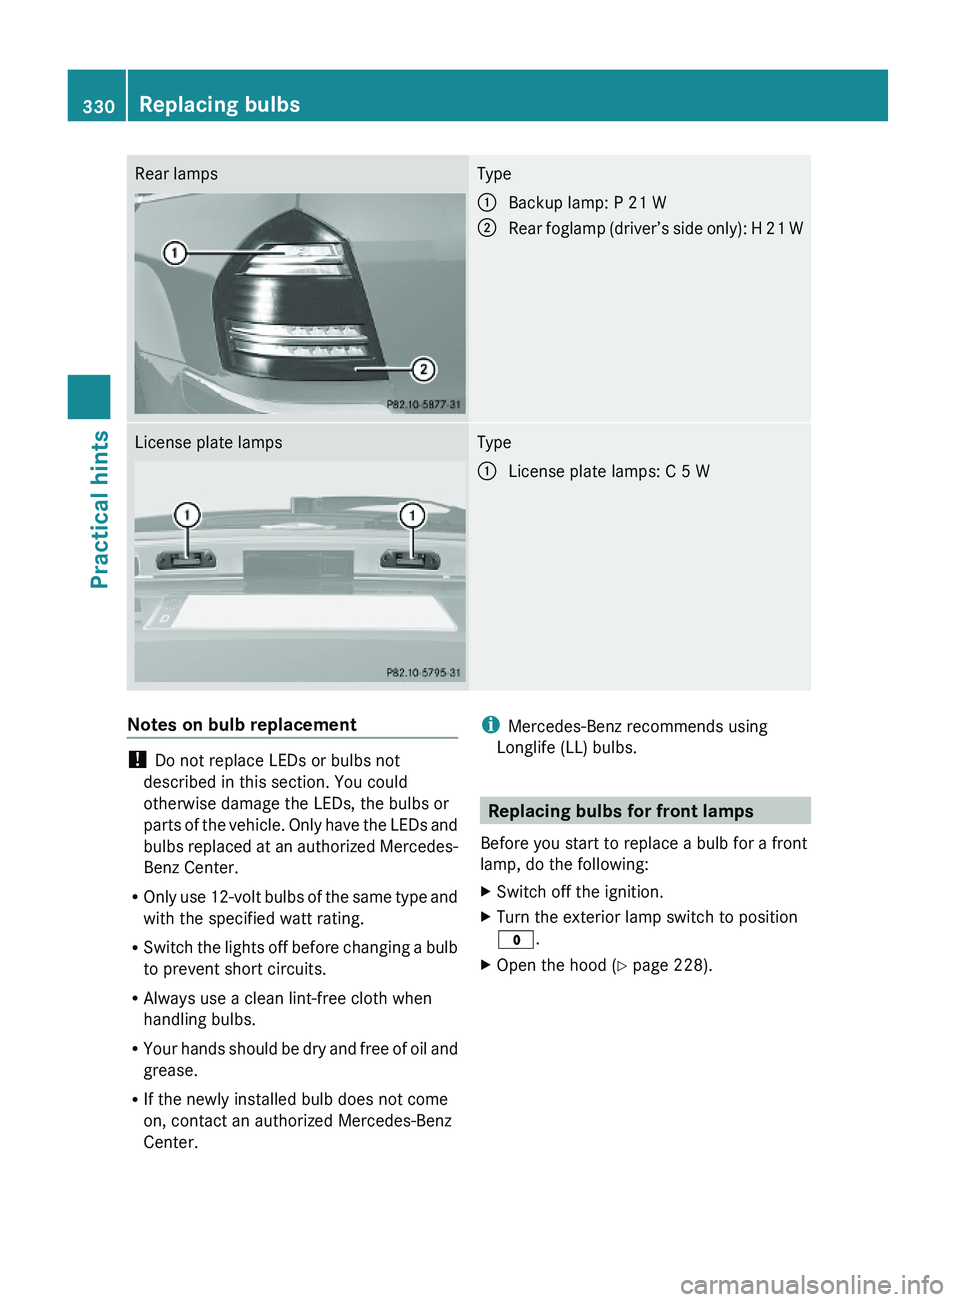
Rear lampsType:Backup lamp: P 21 W;Rear foglamp (driver’s side only): H 21 WLicense plate lampsType:License plate lamps: C 5 WNotes on bulb replacement
! Do not replace LEDs or bulbs not
described in this section. You could
otherwise damage the LEDs, the bulbs or
parts of the vehicle. Only have the LEDs and
bulbs replaced at an authorized Mercedes-
Benz Center.
ROnly use 12-volt bulbs of the same type and
with the specified watt rating.
RSwitch the lights off before changing a bulb
to prevent short circuits.
RAlways use a clean lint-free cloth when
handling bulbs.
RYour hands should be dry and free of oil and
grease.
RIf the newly installed bulb does not come
on, contact an authorized Mercedes-Benz
Center.
iMercedes-Benz recommends using
Longlife (LL) bulbs.
Replacing bulbs for front lamps
Before you start to replace a bulb for a front
lamp, do the following:
XSwitch off the ignition.XTurn the exterior lamp switch to position
$.
XOpen the hood (Y page 228).330Replacing bulbsPractical hints
X164_AKB; 5; 31, en-USd2ureepe,Version: 2.11.8.12009-09-11T12:30:16+02:00 - Seite 330