2010 MERCEDES-BENZ CLS63AMG engine
[x] Cancel search: enginePage 257 of 308
might deploy unexpectedly and unnecessarily
which could also result in injury.
Problem
Possible causes/consequences and
X Solutionsd
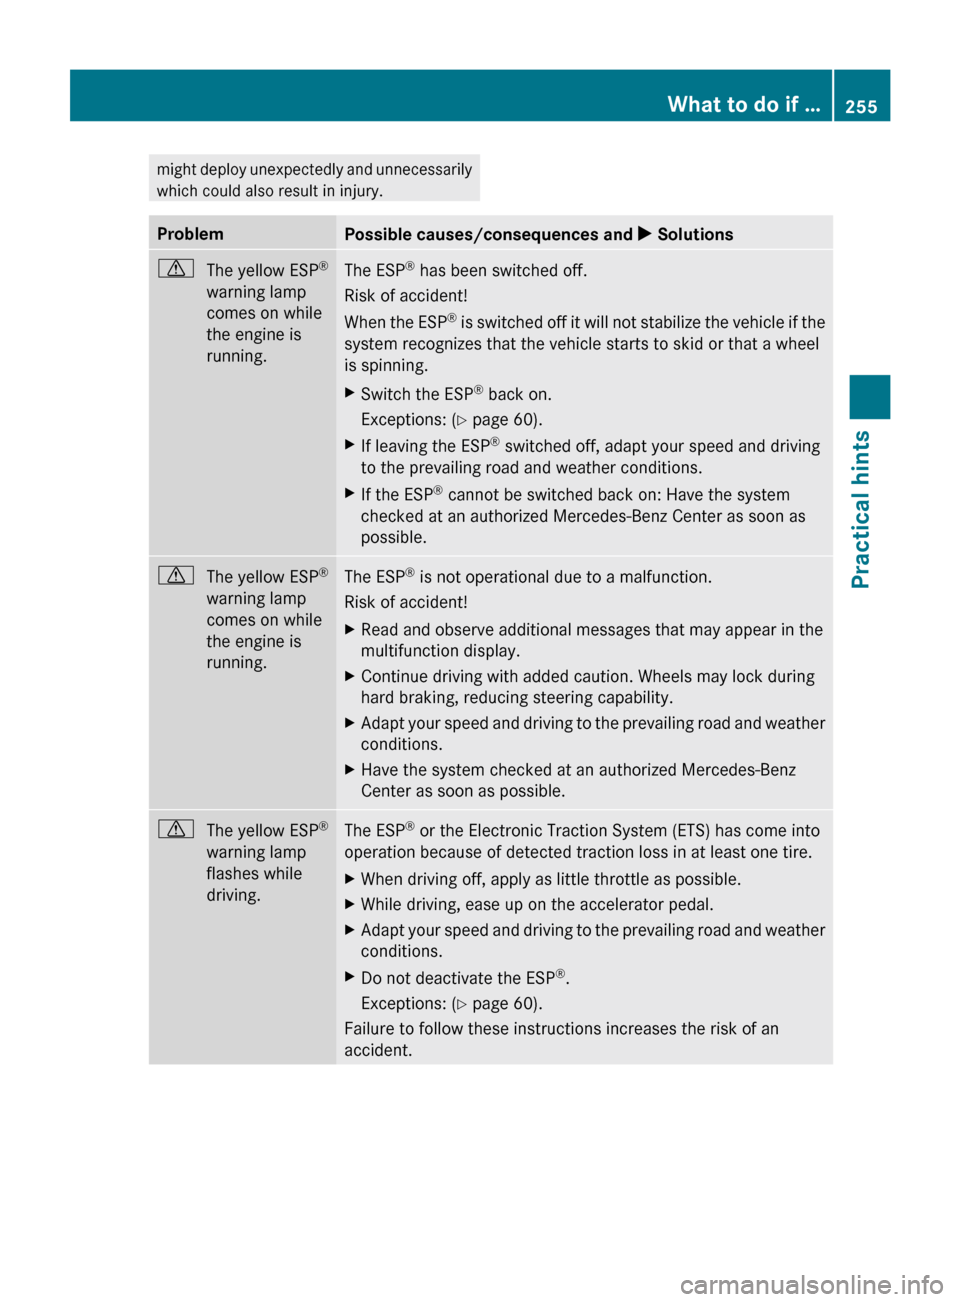
The yellow ESP ®
warning lamp
comes on while
the engine is
running. The ESP
®
has been switched off.
Risk of accident!
When
the ESP ®
is switched off it will not stabilize the vehicle if the
system recognizes that the vehicle starts to skid or that a wheel
is spinning.
X Switch the ESP ®
back on.
Exceptions:
(Y page 60).
X If leaving the ESP ®
switched off, adapt your speed and driving
to the prevailing road and weather conditions.
X If the ESP ®
cannot be switched back on: Have the system
checked at an authorized Mercedes-Benz Center as soon as
possible. d
The yellow ESP ®
warning lamp
comes on while
the engine is
running. The ESP
®
is not operational due to a malfunction.
Risk of accident!
X Read and observe additional messages that may appear in the
multifunction display.
X Continue driving with added caution. Wheels may lock during
hard braking, reducing steering capability.
X Adapt your speed and driving to the prevailing road and weather
conditions.
X Have the system checked at an authorized Mercedes-Benz
Center as soon as possible. d
The yellow ESP ®
warning lamp
flashes while
driving. The ESP
®
or the Electronic Traction System (ETS) has come into
operation because of detected traction loss in at least one tire.
X When driving off, apply as little throttle as possible.
X While driving, ease up on the accelerator pedal.
X Adapt your speed and driving to the prevailing road and weather
conditions.
X Do not deactivate the ESP ®
.
Exceptions:
(Y page 60).
Failure to follow these instructions increases the risk of an
accident. What to do if …
255
Practical hints
219_AKB; 4; 54, en-US
d2ureepe, Version: 2.11.8.1 2009-05-11T16:21:02+02:00 - Seite 255 Z
Page 258 of 308
Driving systems
Problem
Possible causes/consequences and
X Solutions·
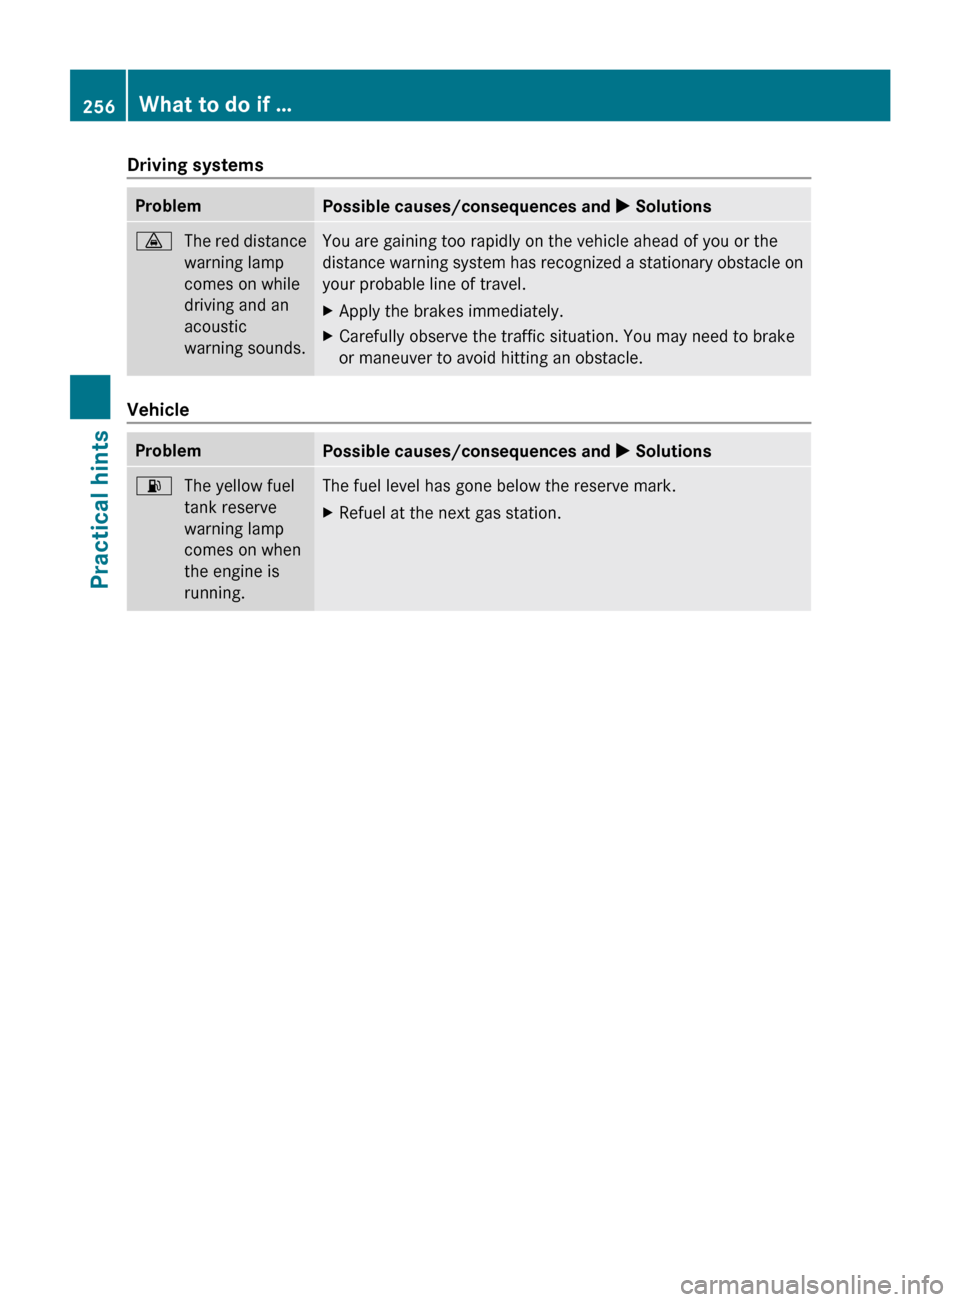
The red distance
warning lamp
comes on while
driving and an
acoustic
warning sounds. You are gaining too rapidly on the vehicle ahead of you or the
distance
warning system has recognized a stationary obstacle on
your probable line of travel.
X Apply the brakes immediately.
X Carefully observe the traffic situation. You may need to brake
or maneuver to avoid hitting an obstacle. Vehicle
Problem
Possible causes/consequences and
X Solutions6
The yellow fuel
tank reserve
warning lamp
comes on when
the engine is
running. The fuel level has gone below the reserve mark.
X
Refuel at the next gas station. 256
What to do if …
Practical hints
219_AKB; 4; 54, en-US
d2ureepe,
Version: 2.11.8.1 2009-05-11T16:21:02+02:00 - Seite 256
Page 259 of 308
Engine
Problem
Possible causes/consequences and
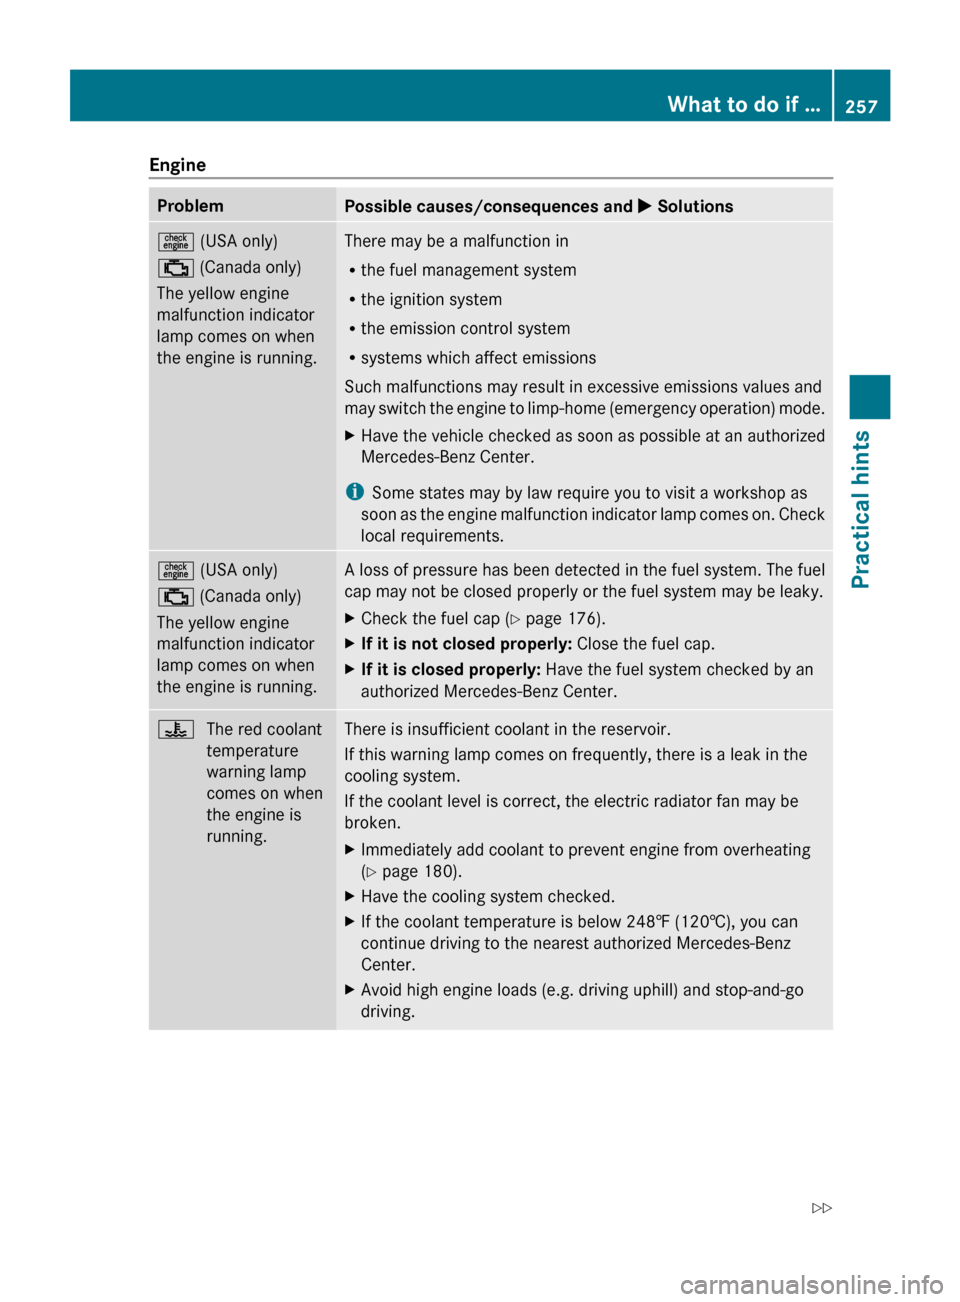
X Solutions= (USA only)
; (Canada only)
The yellow engine
malfunction indicator
lamp comes on when
the engine is running. There may be a malfunction in
R
the fuel management system
R the ignition system
R the emission control system
R systems which affect emissions
Such malfunctions may result in excessive emissions values and
may
switch the engine to limp-home (emergency operation) mode.
X Have the vehicle checked as soon as possible at an authorized
Mercedes-Benz Center.
i Some states may by law require you to visit a workshop as
soon
as the engine malfunction indicator lamp comes on. Check
local requirements. = (USA only)
; (Canada only)
The yellow engine
malfunction indicator
lamp comes on when
the engine is running. A loss of pressure has been detected in the fuel system. The fuel
cap may not be closed properly or the fuel system may be leaky.
X
Check the fuel cap ( Y page 176).
X If it is not closed properly: Close the fuel cap.
X If it is closed properly: Have the fuel system checked by an
authorized Mercedes-Benz Center. ?
The red coolant
temperature
warning lamp
comes on when
the engine is
running. There is insufficient coolant in the reservoir.
If this warning lamp comes on frequently, there is a leak in the
cooling system.
If the coolant level is correct, the electric radiator fan may be
broken.
X
Immediately add coolant to prevent engine from overheating
(Y page 180).
X Have the cooling system checked.
X If the coolant temperature is below 248‡ (120†), you can
continue driving to the nearest authorized Mercedes-Benz
Center.
X Avoid high engine loads (e.g. driving uphill) and stop-and-go
driving. What to do if …
257
Practical hints
219_AKB; 4; 54, en-US
d2ureepe, Version: 2.11.8.1 2009-05-11T16:21:02+02:00 - Seite 257 Z
Page 260 of 308

Problem
Possible causes/consequences and
X Solutions?
The red coolant
temperature
warning lamp
comes on when
the engine is
running and an
acoustic
warning sounds. The coolant temperature has exceeded 248‡ (120†).
X
Stop in a safe location as soon as possible and allow the engine
and coolant to cool down. G
Warning!
Driving when your engine is overheated can
cause some fluids which may have leaked into
the engine compartment to catch fire. You
could be seriously burned.
Steam from an overheated engine can cause
serious burns which can occur just by opening the engine hood. Stay away from the engine
if you see or hear steam coming from it.
Stop the vehicle in a safe location away from
other
traffic. Turn off the engine, get out of the
vehicle and do not stand near the vehicle until
the engine has cooled down. 258
What to do if …
Practical hints
219_AKB; 4; 54, en-US
d2ureepe,
Version: 2.11.8.1 2009-05-11T16:21:02+02:00 - Seite 258
Page 272 of 308
Replacing wiper blades
Safety notes
G
Warning!
For safety reasons, switch off the wipers and
remove the SmartKey from the starter switch
(vehicles with KEYLESS-GO: Make sure the
vehicle’s on-board electronics have status 0)
before replacing a wiper blade. Otherwise, the
wiper motor could suddenly turn on and cause
injury. G
Warning!
Wiper blades are components that are subject
to wear and tear. Replace the wiper blades
twice a year, preferably in the spring and fall.
Otherwise the windshield will not be wiped
properly. As a result, you may not be able to
observe surrounding traffic conditions and
could cause an accident.
! To avoid damage to the hood, the wiper
arms should only be folded forward when
in the vertical position.
! Never open the hood when a wiper arm is
folded forward.
Hold on to the wiper when folding a wiper
arm back. If released, the force of the
impact from the tensioning spring could
crack the windshield.
Do not allow a wiper arm to contact the
windshield glass without a wiper blade
inserted.
Mercedes-Benz recommends that you have
this work carried out at an authorized
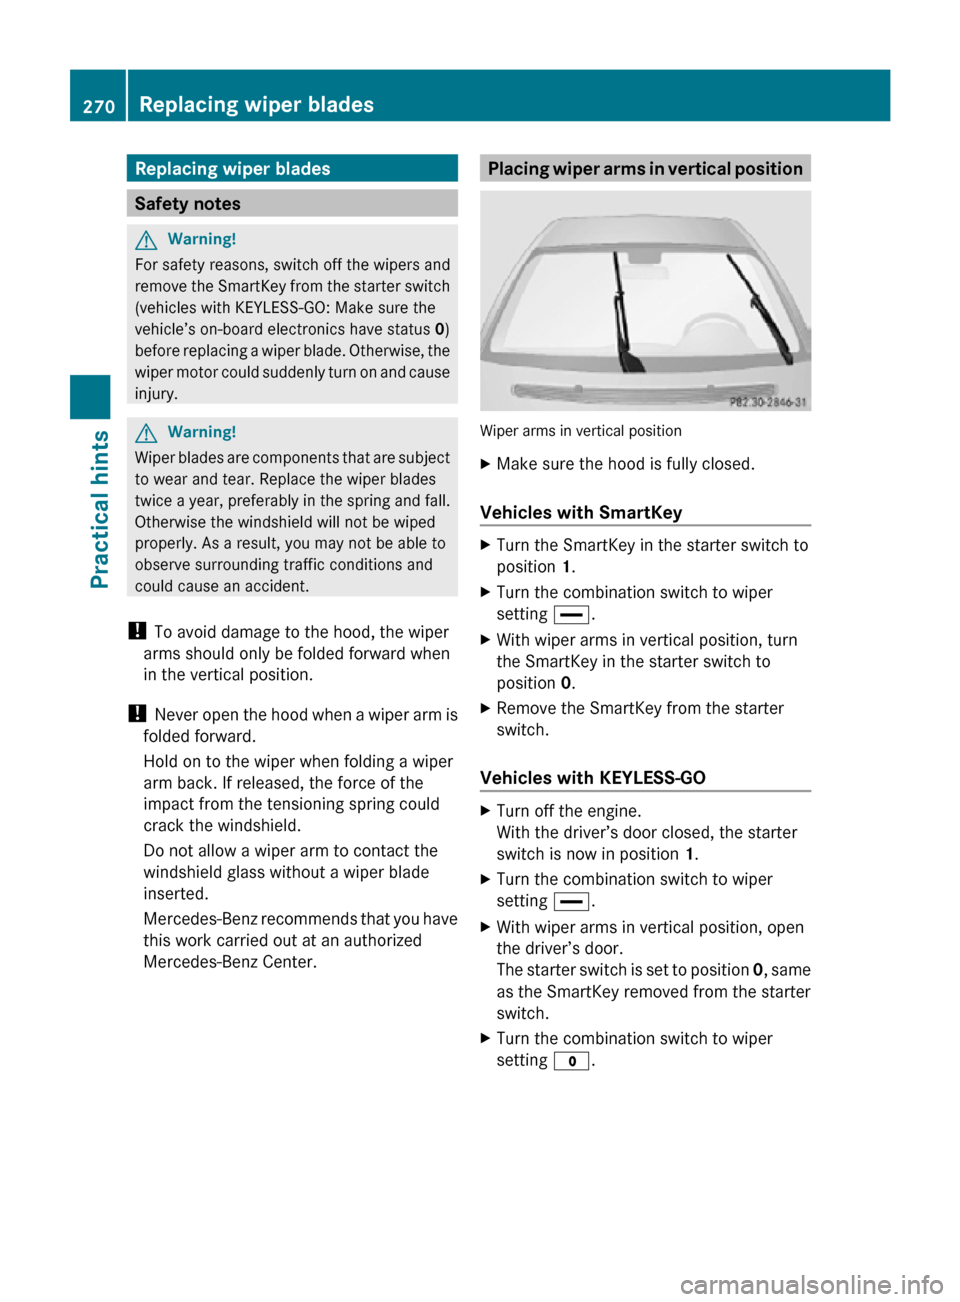
Mercedes-Benz Center. Placing wiper arms in vertical position
Wiper arms in vertical position
X
Make sure the hood is fully closed.
Vehicles with SmartKey X
Turn the SmartKey in the starter switch to
position 1.
X Turn the combination switch to wiper
setting °.
X With wiper arms in vertical position, turn
the SmartKey in the starter switch to
position 0.
X Remove the SmartKey from the starter
switch.
Vehicles with KEYLESS-GO X
Turn off the engine.
With the driver’s door closed, the starter
switch is now in position 1.
X Turn the combination switch to wiper
setting °.
X With wiper arms in vertical position, open
the driver’s door.
The starter switch is set to position 0, same
as the SmartKey removed from the starter
switch.
X Turn the combination switch to wiper
setting $. 270
Replacing wiper bladesPractical hints
219_AKB; 4; 54, en-US
d2ureepe,
Version: 2.11.8.1 2009-05-11T16:21:02+02:00 - Seite 270
Page 273 of 308
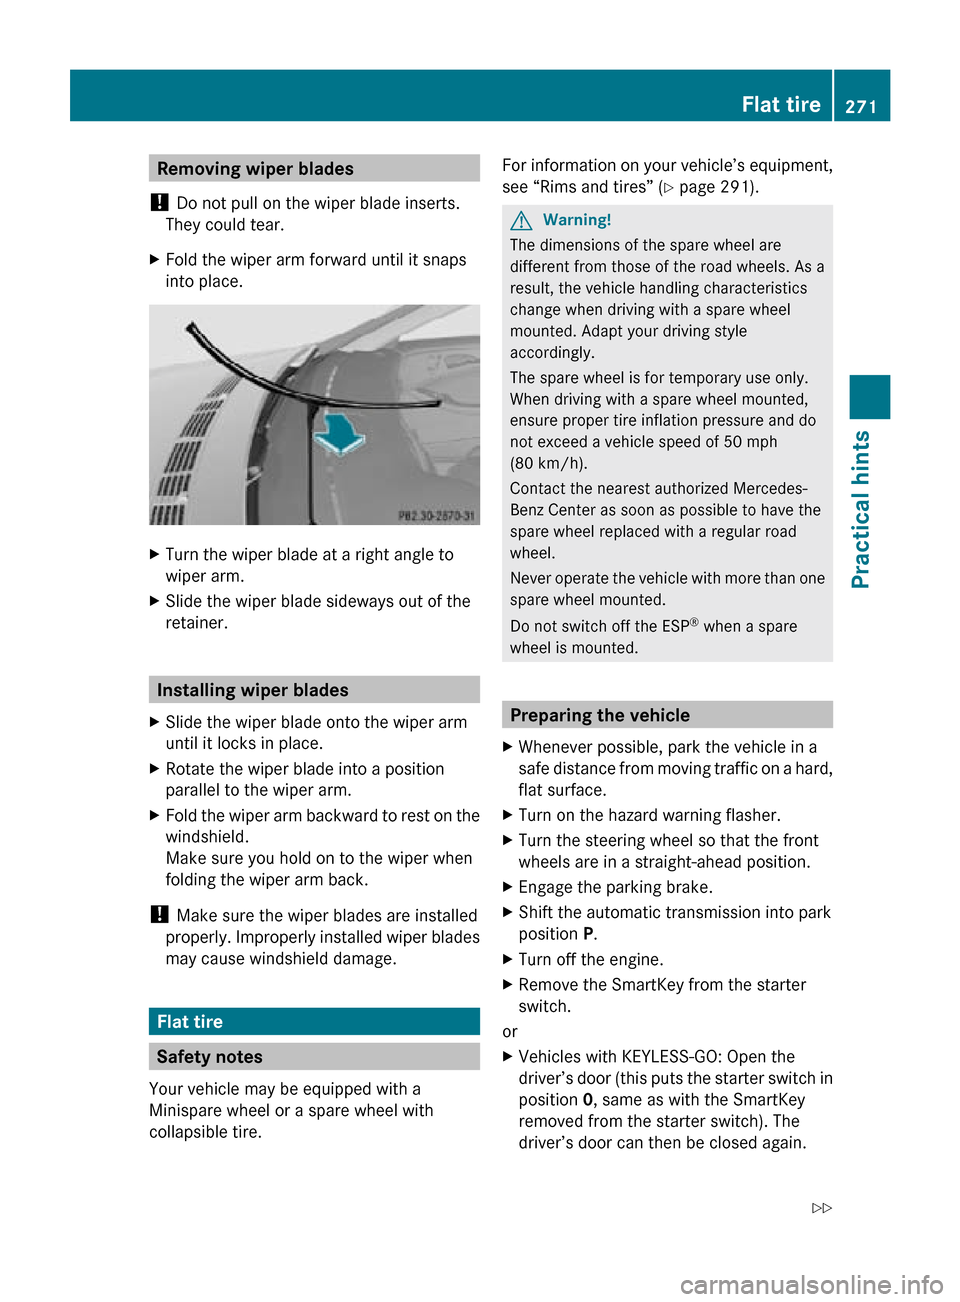
Removing wiper blades
! Do not pull on the wiper blade inserts.
They could tear.
X Fold the wiper arm forward until it snaps
into place. X
Turn the wiper blade at a right angle to
wiper arm.
X Slide the wiper blade sideways out of the
retainer. Installing wiper blades
X Slide the wiper blade onto the wiper arm
until it locks in place.
X Rotate the wiper blade into a position
parallel to the wiper arm.
X Fold the wiper arm backward to rest on the
windshield.
Make sure you hold on to the wiper when
folding the wiper arm back.
! Make sure the wiper blades are installed
properly. Improperly installed wiper blades
may cause windshield damage. Flat tire
Safety notes
Your vehicle may be equipped with a
Minispare wheel or a spare wheel with
collapsible tire. For information on your vehicle’s equipment,
see “Rims and tires” (
Y page 291). G
Warning!
The dimensions of the spare wheel are
different from those of the road wheels. As a
result, the vehicle handling characteristics
change when driving with a spare wheel
mounted. Adapt your driving style
accordingly.
The spare wheel is for temporary use only.
When driving with a spare wheel mounted,
ensure proper tire inflation pressure and do
not exceed a vehicle speed of 50 mph
(80 km/h).
Contact the nearest authorized Mercedes-
Benz Center as soon as possible to have the
spare wheel replaced with a regular road
wheel.
Never operate the vehicle with more than one
spare wheel mounted.
Do not switch off the ESP ®
when a spare
wheel is mounted. Preparing the vehicle
X Whenever possible, park the vehicle in a
safe distance from moving traffic on a hard,
flat surface.
X Turn on the hazard warning flasher.
X Turn the steering wheel so that the front
wheels are in a straight-ahead position.
X Engage the parking brake.
X Shift the automatic transmission into park
position P.
X Turn off the engine.
X Remove the SmartKey from the starter
switch.
or
X Vehicles with KEYLESS-GO: Open the
driver’s door (this puts the starter switch in
position 0, same as with the SmartKey
removed from the starter switch). The
driver’s door can then be closed again. Flat tire
271Practical hints
219_AKB; 4; 54, en-US
d2ureepe, Version: 2.11.8.1 2009-05-11T16:21:02+02:00 - Seite 271 Z
Page 275 of 308
with the jack. Do not disengage the parking
brake while the vehicle is raised.
Make sure that the ground on which the
vehicle is standing and where you place the
jack is solid, level and not slippery. If
necessary, use a large underlay. On slippery
surfaces, such as tiled floors, you should use
a non-slip underlay, for example a rubber mat.
Do not use wooden blocks or similar objects
to support the jack. Otherwise the jack may
not be able to achieve its load-bearing
capacity if it is not at its full height.
Never start the engine when the vehicle is
raised.
Also observe the notes on the jack.
X Prevent the vehicle from rolling away by
blocking wheels with wheel chocks or other
sizeable objects.
When your vehicle is equipped with a wheel
chock, it is included with the vehicle tool kit
(Y page 224). For information on setting up
the collapsible wheel chock, see
(Y page 225).
When changing a wheel on a level surface:
X Place a wheel chock or other sizeable
object in front of and another wheel chock
or other sizeable object behind the wheel
that is diagonally opposite to the wheel
being changed.
Always try lifting the vehicle using the jack on
a level surface. However, should
circumstances require you to do so on a hill:
X Place wheel chocks or other sizeable
objects on the downhill side in front of both
wheels on the side opposite to the side on
which the wheel is to be changed. G
Warning!
Only jack up the vehicle on level ground or on
slight inclines/declines. Otherwise, the
vehicle could fall off the jack and injure you or
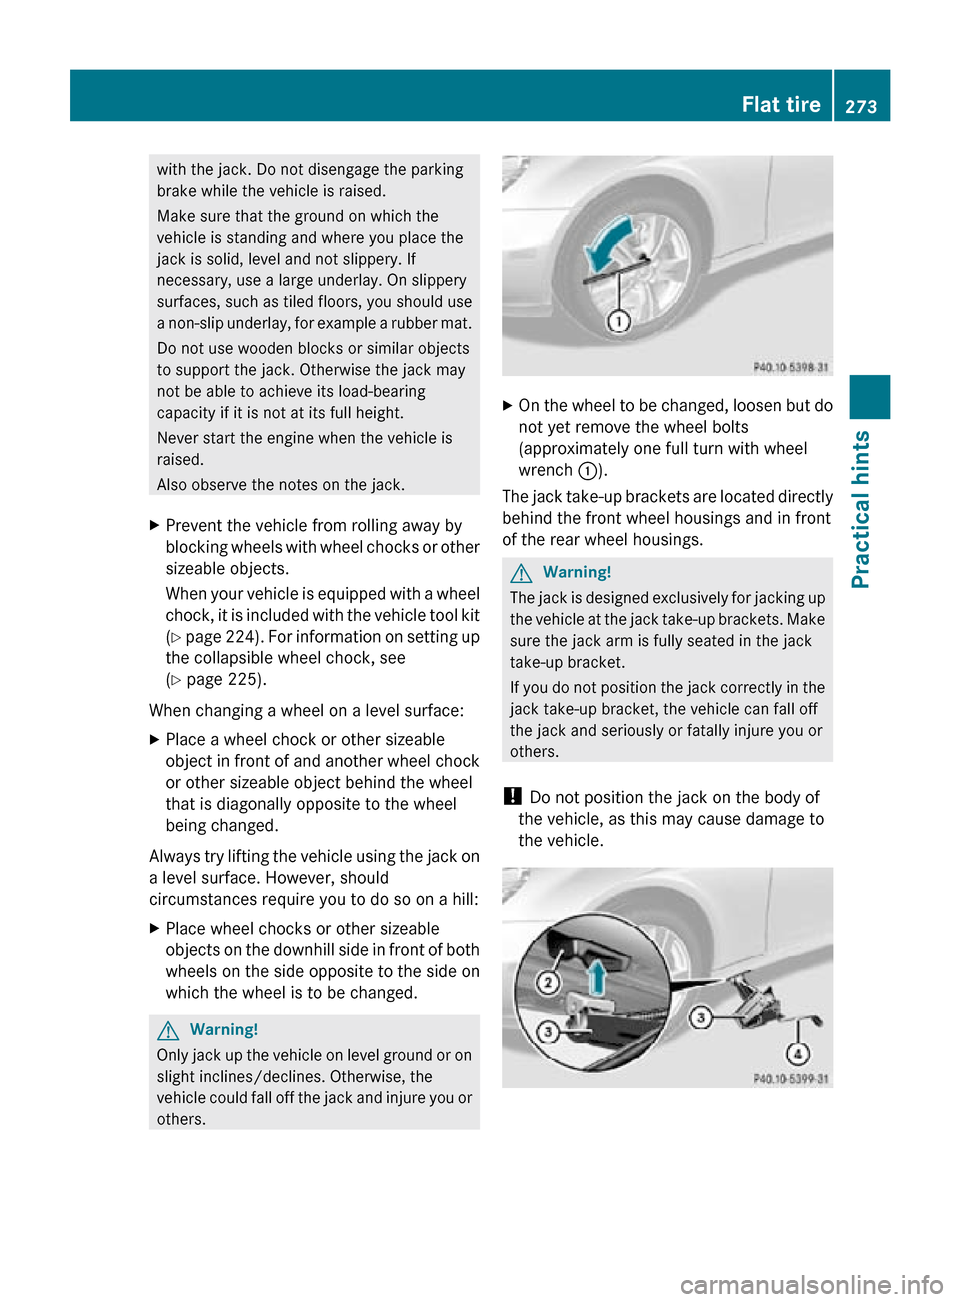
others. X
On the wheel to be changed, loosen but do
not yet remove the wheel bolts
(approximately one full turn with wheel
wrench :).
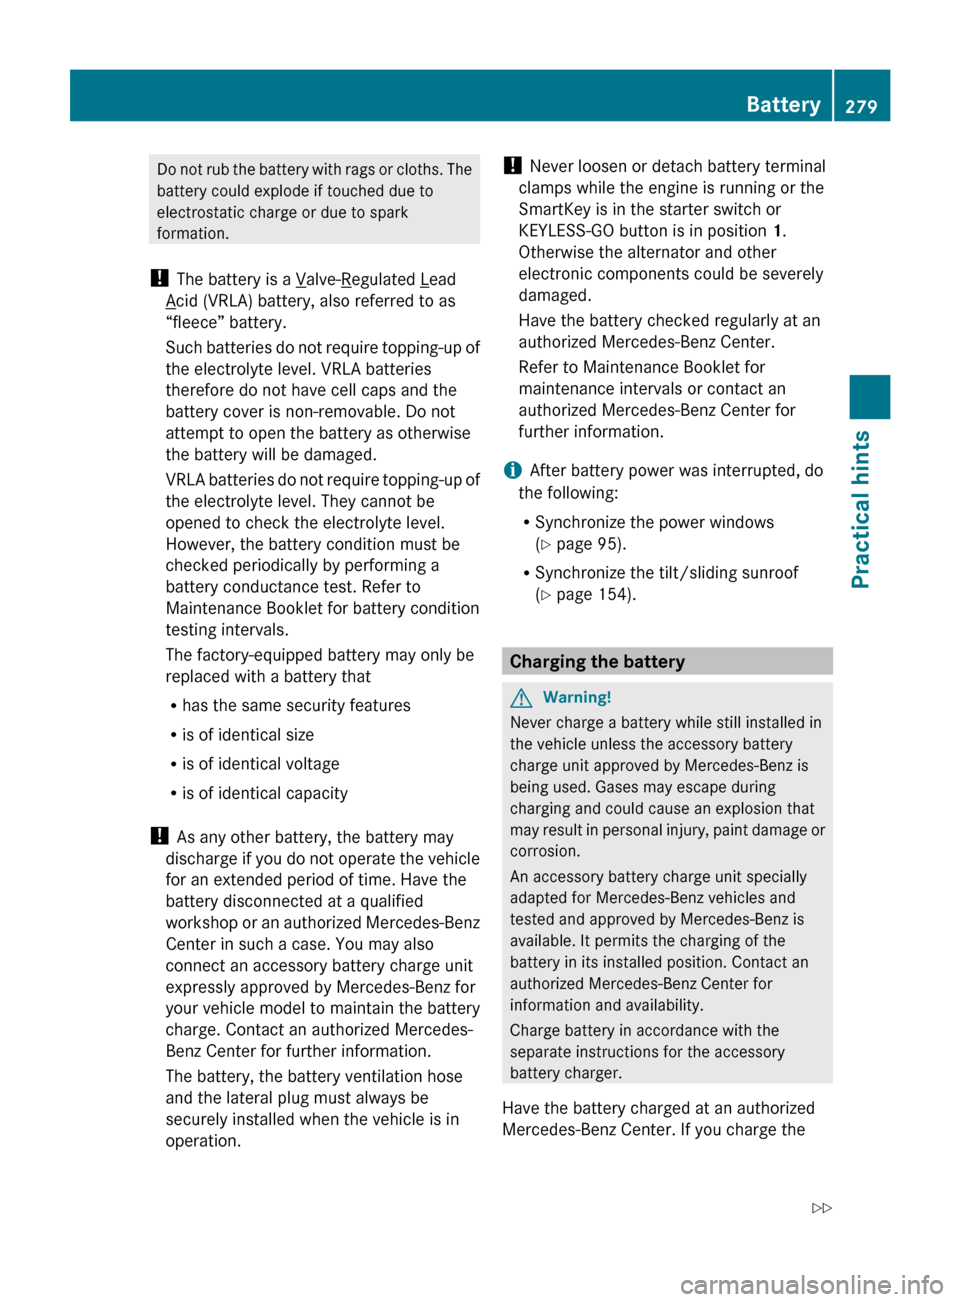
The jack take-up brackets are located directly
behind the front wheel housings and in front
of the rear wheel housings. G
Warning!
The jack is designed exclusively for jacking up
the vehicle at the jack take-up brackets. Make
sure the jack arm is fully seated in the jack
take-up bracket.
If you do not position the jack correctly in the
jack take-up bracket, the vehicle can fall off
the jack and seriously or fatally injure you or
others.
! Do not position the jack on the body of
the vehicle, as this may cause damage to
the vehicle. Flat tire
273Practical hints
219_AKB; 4; 54, en-US
d2ureepe, Version: 2.11.8.1 2009-05-11T16:21:02+02:00 - Seite 273 Z
Page 281 of 308
Do not rub the battery with rags or cloths. The
battery could explode if touched due to
electrostatic charge or due to spark
formation.
! The battery is a Valve- Regulated Lead
Acid (VRLA) battery, also referred to as
“fleece” battery.
Such
batteries do not require topping-up of
the electrolyte level. VRLA batteries
therefore do not have cell caps and the
battery cover is non-removable. Do not
attempt to open the battery as otherwise
the battery will be damaged.
VRLA batteries do not require topping-up of
the electrolyte level. They cannot be
opened to check the electrolyte level.
However, the battery condition must be
checked periodically by performing a
battery conductance test. Refer to
Maintenance Booklet for battery condition
testing intervals.
The factory-equipped battery may only be
replaced with a battery that
R has the same security features
R is of identical size
R is of identical voltage
R is of identical capacity
! As any other battery, the battery may
discharge if you do not operate the vehicle
for an extended period of time. Have the
battery disconnected at a qualified
workshop or an authorized Mercedes-Benz
Center in such a case. You may also
connect an accessory battery charge unit
expressly approved by Mercedes-Benz for
your vehicle model to maintain the battery
charge. Contact an authorized Mercedes-
Benz Center for further information.
The battery, the battery ventilation hose
and the lateral plug must always be
securely installed when the vehicle is in
operation. !
Never loosen or detach battery terminal
clamps while the engine is running or the
SmartKey is in the starter switch or
KEYLESS-GO button is in position 1.
Otherwise the alternator and other
electronic components could be severely
damaged.
Have the battery checked regularly at an
authorized Mercedes-Benz Center.
Refer to Maintenance Booklet for
maintenance intervals or contact an
authorized Mercedes-Benz Center for
further information.
i After battery power was interrupted, do
the following:
R Synchronize the power windows
(Y page 95).
R Synchronize the tilt/sliding sunroof
(Y page 154). Charging the battery
G
Warning!
Never charge a battery while still installed in
the vehicle unless the accessory battery
charge unit approved by Mercedes-Benz is
being used. Gases may escape during
charging and could cause an explosion that
may
result in personal injury, paint damage or
corrosion.
An accessory battery charge unit specially
adapted for Mercedes-Benz vehicles and
tested and approved by Mercedes-Benz is
available. It permits the charging of the
battery in its installed position. Contact an
authorized Mercedes-Benz Center for
information and availability.
Charge battery in accordance with the
separate instructions for the accessory
battery charger.
Have the battery charged at an authorized
Mercedes-Benz Center. If you charge the Battery
279
Practical hints
219_AKB; 4; 54, en-US
d2ureepe, Version: 2.11.8.1 2009-05-11T16:21:02+02:00 - Seite 279 Z