2010 MERCEDES-BENZ CLS63AMG warning
[x] Cancel search: warningPage 110 of 308
program mode symbol
M in the multifunction
display. Thus you can drive at the maximum
engine speed for each gear without
overrevving the engine.
X Shift the automatic transmission from
current gear : into the next higher gear.
The fuel supply will otherwise be
interrupted to prevent the engine from
overrevving.
Downshifting G
Warning!
On slippery road surfaces, never downshift in
order to obtain braking action. This could
result
in drive wheel slip and reduced vehicle
control. Your vehicle’s ABS will not prevent
this type of loss of control.
X Briefly press the gear selector lever to the
left in the D- direction.
or
X Briefly pull left gearshift control :
(Y page 106).
The automatic transmission shifts into the
next lower gear.
i For maximum acceleration, press and
hold
the gear selector lever to the left in the
D- direction or pull and hold the left
gearshift control. Depending on the engine
speed the automatic transmission selects
the optimal gear for maximum
acceleration.
i When you brake or stop, the automatic
transmission shifts down into a gear from
which you can easily accelerate or take off.
Kickdown Using the kickdown while driving in manual
program mode
M is not possible. Deactivating manual shift program X
Press the program mode selector switch
repeatedly until C or S appears in the
multifunction display.
or
X Restart the engine.
The automatic transmission will go to
automatic program mode C.
Manual program mode M is not stored. Emergency operation (limp-home
mode)
If vehicle acceleration becomes less
responsive or sluggish or the automatic
transmission no longer shifts, the automatic
transmission is most likely operating in limp-
home (emergency operation) mode. In this
mode only second gear and reverse gear R
can be selected.
X Stop the vehicle in a safe location.
X Shift the automatic transmission into park
position P.
X Turn off the engine.
X Wait at least 10 seconds before restarting.
X Restart the engine.
X Shift the automatic transmission into drive
position D
(for second gear) or reverse gear
R.
X Have the automatic transmission checked
at
an authorized Mercedes-Benz Center as
soon as possible. Instrument cluster
Introduction
For a full view illustration of the instrument
cluster, see “Instrument cluster”
(Y page 28). 108
Instrument cluster
Controls in detail
219_AKB; 4; 54, en-US
d2ureepe,
Version: 2.11.8.1 2009-05-11T16:21:02+02:00 - Seite 108
Page 111 of 308
G
Warning!
No messages will be displayed if either the
instrument cluster or the multifunction
display is inoperative.
As a result, you will not be able to see
information about your driving conditions,
such as
R speed
R outside temperature
R warning/indicator lamps
R malfunction/warning messages
R failure of any systems
Driving characteristics may be impaired.
If you must continue to drive, do so with added
caution. Contact an authorized Mercedes-
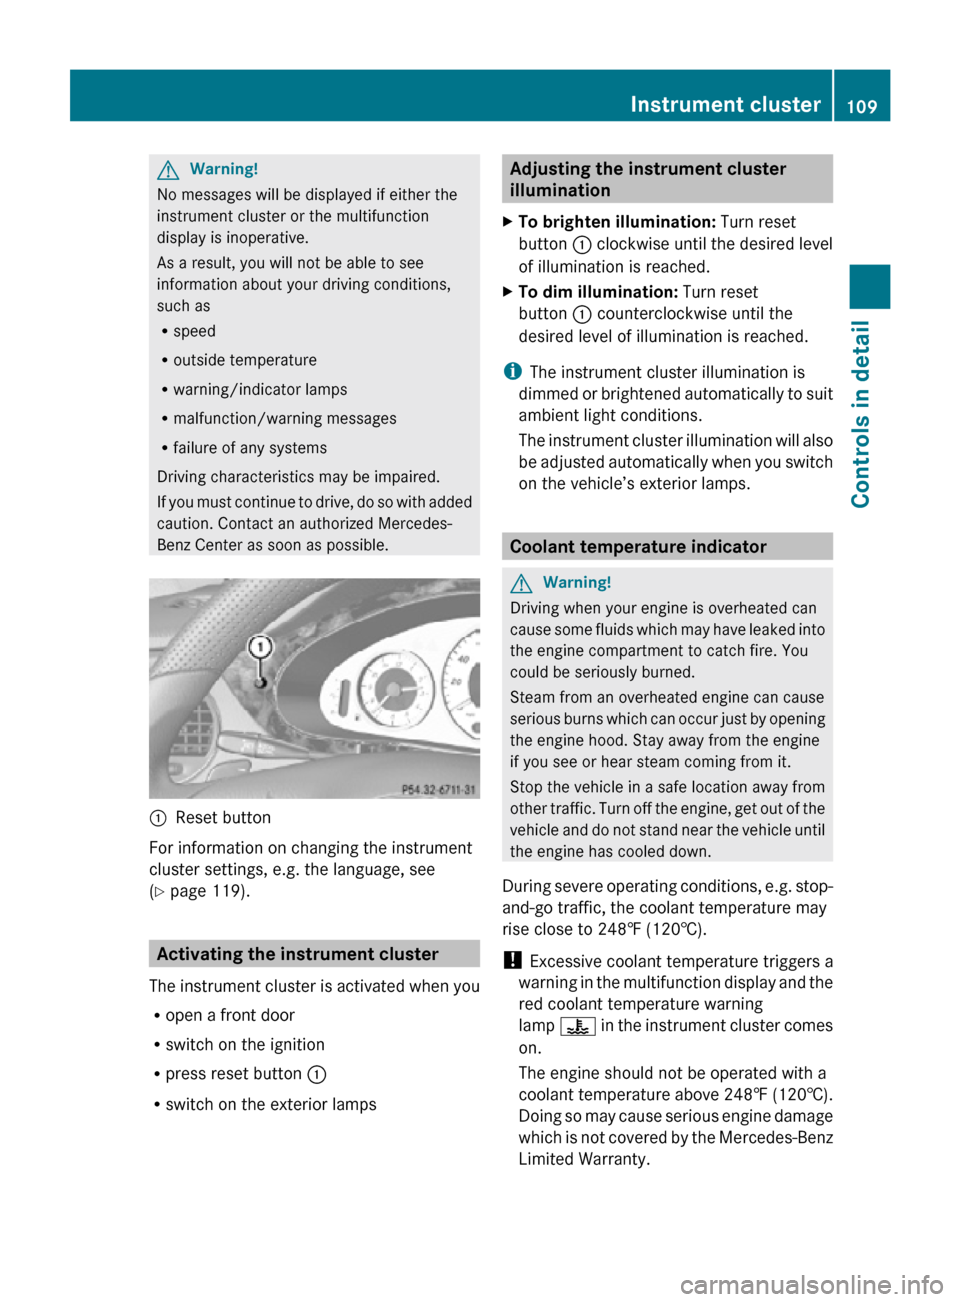
Benz Center as soon as possible. :
Reset button
For information on changing the instrument
cluster settings, e.g. the language, see
(Y page 119). Activating the instrument cluster
The instrument cluster is activated when you
R open a front door
R switch on the ignition
R press reset button :
R switch on the exterior lamps Adjusting the instrument cluster
illumination
X To brighten illumination: Turn reset
button : clockwise until the desired level
of illumination is reached.
X To dim illumination: Turn reset
button : counterclockwise until the
desired level of illumination is reached.
i The instrument cluster illumination is
dimmed or brightened automatically to suit
ambient light conditions.
The instrument cluster illumination will also
be adjusted automatically when you switch
on the vehicle’s exterior lamps. Coolant temperature indicator
G
Warning!
Driving when your engine is overheated can
cause some fluids which may have leaked into
the engine compartment to catch fire. You
could be seriously burned.
Steam from an overheated engine can cause
serious burns which can occur just by opening
the engine hood. Stay away from the engine
if you see or hear steam coming from it.
Stop the vehicle in a safe location away from
other traffic. Turn off the engine, get out of the
vehicle and do not stand near the vehicle until
the engine has cooled down.
During severe operating conditions, e.g. stop-
and-go traffic, the coolant temperature may
rise close to 248‡ (120†).
! Excessive coolant temperature triggers a
warning in the multifunction display and the
red coolant temperature warning
lamp ? in the instrument cluster comes
on.
The engine should not be operated with a
coolant temperature above 248‡ (120†).
Doing so may cause serious engine damage
which is not covered by the Mercedes-Benz
Limited Warranty. Instrument cluster
109Controls in detail
219_AKB; 4; 54, en-US
d2ureepe, Version: 2.11.8.1 2009-05-11T16:21:02+02:00 - Seite 109 Z
Page 112 of 308

Resetting trip odometer
X Make sure you are viewing the standard
display ( Y page 112) in the multifunction
display.
X Press and hold the reset button in the
instrument cluster (Y page 108) until the
trip odometer is reset. Tachometer
The red marking on the tachometer
(Y page 28) denotes excessive engine speed.
! Avoid driving at excessive engine speeds,
as it may result in serious engine damage
that is not covered by the Mercedes-Benz
Limited Warranty.
To help protect the engine, the fuel supply is
interrupted if the engine is operated within
the red marking. Control system
Introduction
The control system is activated as soon as the
starter switch is in position 1.
The control system enables you to call up
information about your vehicle and to change
vehicle settings.
For example, you can use the control system
to find out when your vehicle is next due for
maintenance service, to set the language for
messages in the instrument cluster display,
and much more. G
Warning!
A driver’s attention to the road and traffic
conditions must always be his/her primary
focus when driving.
For your safety and the safety of others,
selecting features through the multifunction
steering wheel should only be done by the driver when traffic and road conditions permit
it to be done safely.
Bear in mind that at a speed of just 30 mph
(approximately 50 km/h), your vehicle is
covering a distance of 44 feet (approximately
14 m) every second.
The control system relays information to the
multifunction display. Multifunction steering wheel
The displays in the multifunction display and
the settings in the control system are
controlled by using the buttons on the
multifunction steering wheel. :
Multifunction display
;
Press button
W
X
to select submenus in the
Settings menu
to set values
to operate the RACETIMER
7
to set the volume 7
AMG vehicles only. 110
Control systemControls in detail
219_AKB; 4; 54, en-US
d2ureepe,
Version: 2.11.8.1 2009-05-11T16:21:02+02:00 - Seite 110
Page 115 of 308
X
If you see another display, press button
V or U repeatedly until the standard
display appears.
X Press button & or * to select the
functions in the Standard display menu.
The following functions are available:
R Restarting the tire pressure loss warning
system (Y page 187) (Canada only)
R Restarting the TPMS (Y page 189) (USA
only)
R Checking tire inflation pressure with the
Advanced TPMS (Y page 190) (Canada
only)
R Calling up digital speedometer or outside
temperature ( Y page 113)
R Calling up maintenance service indicator
display ( Y page 215)
Calling up digital speedometer or
outside temperature Depending on the chosen setting for the
standard display (Y page 120) you can call
up the other display here. G
Warning!
The outside temperature indicator is not
designed to serve as an ice-warning device
and is therefore unsuitable for that purpose.
Indicated temperatures just above the
freezing point do not guarantee that the road
surface is free of ice. The road may still be icy,
especially in wooded areas or on bridges.
X Press button & or * repeatedly until
the digital speedometer or the outside
temperature appears in the multifunction
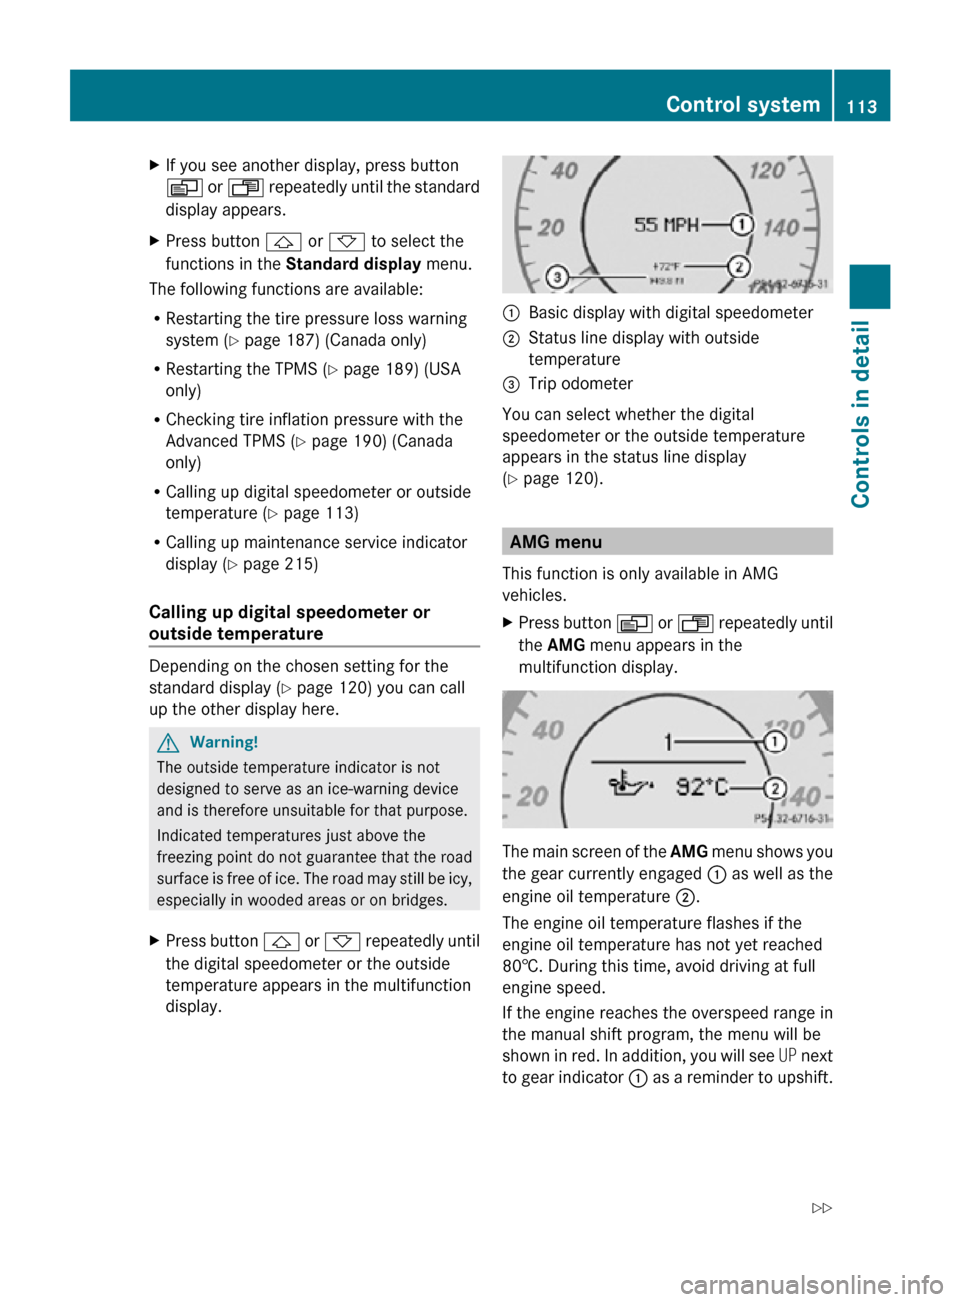
display. :
Basic display with digital speedometer
; Status line display with outside
temperature
= Trip odometer
You can select whether the digital
speedometer or the outside temperature
appears in the status line display
(Y page 120). AMG menu
This function is only available in AMG
vehicles.
X Press button V or U repeatedly until
the AMG menu appears in the
multifunction display. The main screen of the
AMG menu shows you
the gear currently engaged : as well as the
engine oil temperature ;.
The engine oil temperature flashes if the
engine oil temperature has not yet reached
80†. During this time, avoid driving at full
engine speed.
If the engine reaches the overspeed range in
the manual shift program, the menu will be
shown in red. In addition, you will see UP next
to gear indicator : as a reminder to upshift. Control system
113Controls in detail
219_AKB; 4; 54, en-US
d2ureepe, Version: 2.11.8.1 2009-05-11T16:21:02+02:00 - Seite 113 Z
Page 116 of 308
Use buttons & or * to select the
following functions in the AMG menu:
R Vehicle supply voltage ( Y page 114)
R RACETIMER (Y page 114)
R Overall analysis ( Y page 115)
R Lap analysis (Y page 115)
Vehicle supply voltage X
Press button V or U repeatedly until
the AMG menu appears in the
multifunction display.
X Press button & repeatedly until the
vehicle supply voltage appears in the
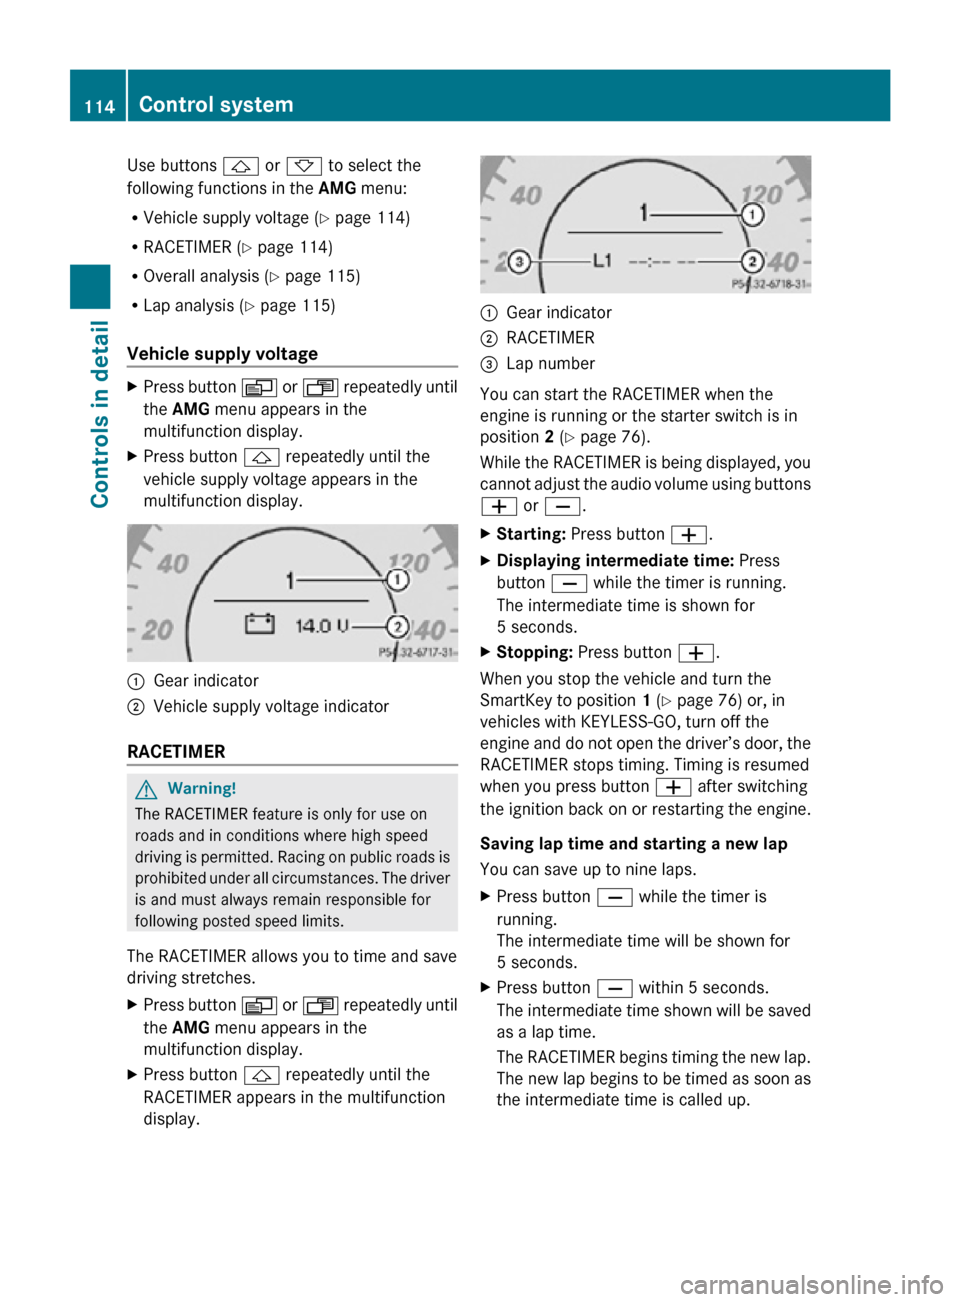
multifunction display. :
Gear indicator
; Vehicle supply voltage indicator
RACETIMER G
Warning!
The RACETIMER feature is only for use on
roads and in conditions where high speed
driving is permitted. Racing on public roads is
prohibited under all circumstances. The driver
is and must always remain responsible for
following posted speed limits.
The RACETIMER allows you to time and save
driving stretches.
X Press button V or U repeatedly until
the AMG menu appears in the
multifunction display.
X Press button & repeatedly until the
RACETIMER appears in the multifunction
display. :
Gear indicator
; RACETIMER
= Lap number
You can start the RACETIMER when the
engine is running or the starter switch is in
position 2 (Y page 76).
While the RACETIMER is being displayed, you
cannot adjust the audio volume using buttons
W or X.
X Starting: Press button W.
X Displaying intermediate time: Press
button X while the timer is running.
The intermediate time is shown for
5 seconds.
X Stopping: Press button W.
When you stop the vehicle and turn the
SmartKey to position 1 (Y page 76) or, in
vehicles with KEYLESS-GO, turn off the
engine and do not open the driver’s door, the
RACETIMER stops timing. Timing is resumed
when you press button W after switching
the ignition back on or restarting the engine.
Saving lap time and starting a new lap
You can save up to nine laps.
X Press button X while the timer is
running.
The intermediate time will be shown for
5 seconds.
X Press button X within 5 seconds.
The intermediate time shown will be saved
as a lap time.
The RACETIMER begins timing the new lap.
The new lap begins to be timed as soon as
the intermediate time is called up. 114
Control systemControls in detail
219_AKB; 4; 54, en-US
d2ureepe,
Version: 2.11.8.1 2009-05-11T16:21:02+02:00 - Seite 114
Page 119 of 308
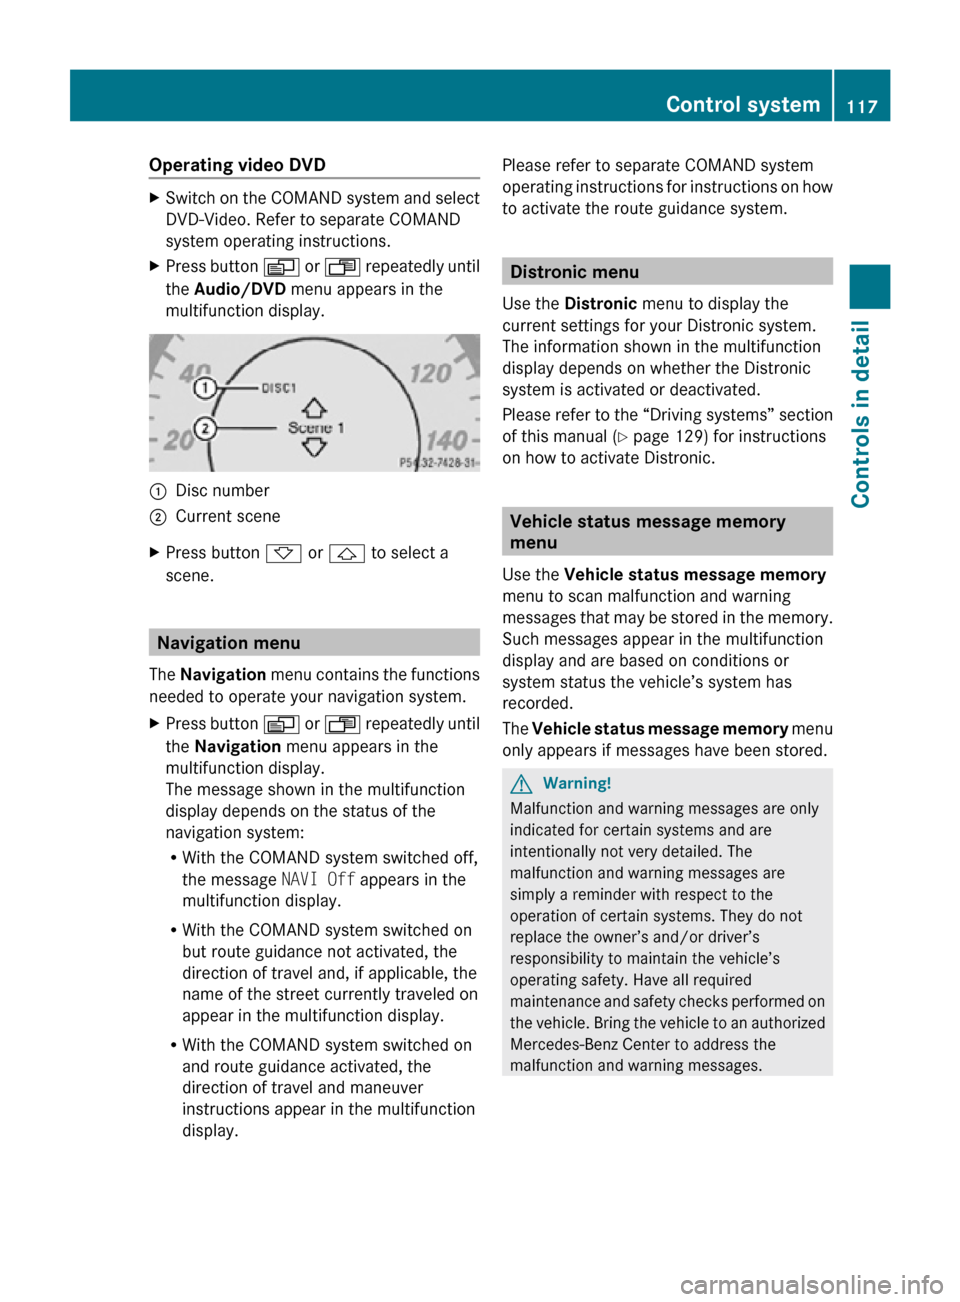
Operating video DVD
X
Switch on the COMAND system and select
DVD-Video. Refer to separate COMAND
system operating instructions.
X Press button V or U repeatedly until
the Audio/DVD menu appears in the
multifunction display. :
Disc number
; Current scene
X Press button * or & to select a
scene. Navigation menu
The Navigation menu contains the functions
needed to operate your navigation system.
X Press button V or U repeatedly until
the Navigation menu appears in the
multifunction display.
The message shown in the multifunction
display depends on the status of the
navigation system:
R With the COMAND system switched off,
the message NAVI Off appears in the
multifunction display.
R With the COMAND system switched on
but route guidance not activated, the
direction of travel and, if applicable, the
name of the street currently traveled on
appear in the multifunction display.
R With the COMAND system switched on
and route guidance activated, the
direction of travel and maneuver
instructions appear in the multifunction
display. Please refer to separate COMAND system
operating instructions for instructions on how
to activate the route guidance system. Distronic menu
Use the Distronic menu to display the
current settings for your Distronic system.
The information shown in the multifunction
display depends on whether the Distronic
system is activated or deactivated.
Please refer to the “Driving systems” section
of this manual ( Y page 129) for instructions
on how to activate Distronic. Vehicle status message memory
menu
Use the Vehicle status message memory
menu to scan malfunction and warning
messages that may be stored in the memory.
Such messages appear in the multifunction
display and are based on conditions or
system status the vehicle’s system has
recorded.
The Vehicle status message memory menu
only appears if messages have been stored. G
Warning!
Malfunction and warning messages are only
indicated for certain systems and are
intentionally not very detailed. The
malfunction and warning messages are
simply a reminder with respect to the
operation of certain systems. They do not
replace the owner’s and/or driver’s
responsibility to maintain the vehicle’s
operating safety. Have all required
maintenance and safety checks performed on
the vehicle. Bring the vehicle to an authorized
Mercedes-Benz Center to address the
malfunction and warning messages. Control system
117Controls in detail
219_AKB; 4; 54, en-US
d2ureepe, Version: 2.11.8.1 2009-05-11T16:21:02+02:00 - Seite 117 Z
Page 120 of 308
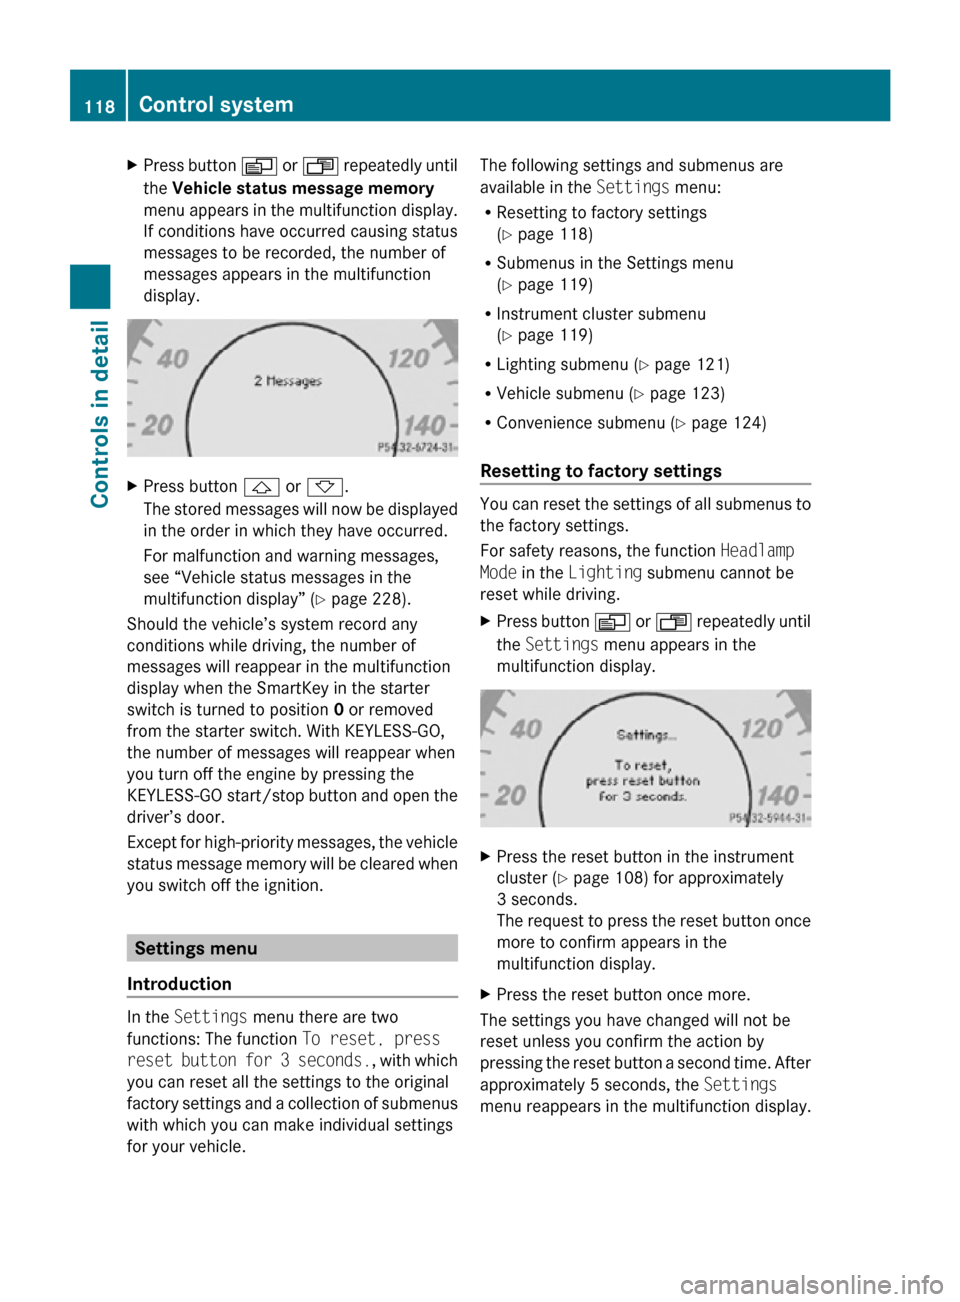
X
Press button V or U repeatedly until
the Vehicle status message memory
menu appears in the multifunction display.
If conditions have occurred causing status
messages to be recorded, the number of
messages appears in the multifunction
display. X
Press button & or *.
The stored messages will now be displayed
in the order in which they have occurred.
For malfunction and warning messages,
see “Vehicle status messages in the
multifunction display” ( Y page 228).
Should the vehicle’s system record any
conditions while driving, the number of
messages will reappear in the multifunction
display when the SmartKey in the starter
switch is turned to position 0 or removed
from the starter switch. With KEYLESS-GO,
the number of messages will reappear when
you turn off the engine by pressing the
KEYLESS-GO start/stop button and open the
driver’s door.
Except for high-priority messages, the vehicle
status message memory will be cleared when
you switch off the ignition. Settings menu
Introduction In the
Settings menu there are two
functions: The function To reset, press
reset button for 3 seconds. , with which
you can reset all the settings to the original
factory settings and a collection of submenus
with which you can make individual settings
for your vehicle. The following settings and submenus are
available in the
Settings menu:
R Resetting to factory settings
(Y page 118)
R Submenus in the Settings menu
(Y page 119)
R Instrument cluster submenu
(Y page 119)
R Lighting submenu ( Y page 121)
R Vehicle submenu ( Y page 123)
R Convenience submenu ( Y page 124)
Resetting to factory settings You can reset the settings of all submenus to
the factory settings.
For safety reasons, the function
Headlamp
Mode in the Lighting submenu cannot be
reset while driving.
X Press button V or U repeatedly until
the Settings menu appears in the
multifunction display. X
Press the reset button in the instrument
cluster (Y page 108) for approximately
3 seconds.
The request to press the reset button once
more to confirm appears in the
multifunction display.
X Press the reset button once more.
The settings you have changed will not be
reset unless you confirm the action by
pressing the reset button a second time. After
approximately 5 seconds, the Settings
menu reappears in the multifunction display. 118
Control systemControls in detail
219_AKB; 4; 54, en-US
d2ureepe,
Version: 2.11.8.1 2009-05-11T16:21:02+02:00 - Seite 118
Page 126 of 308
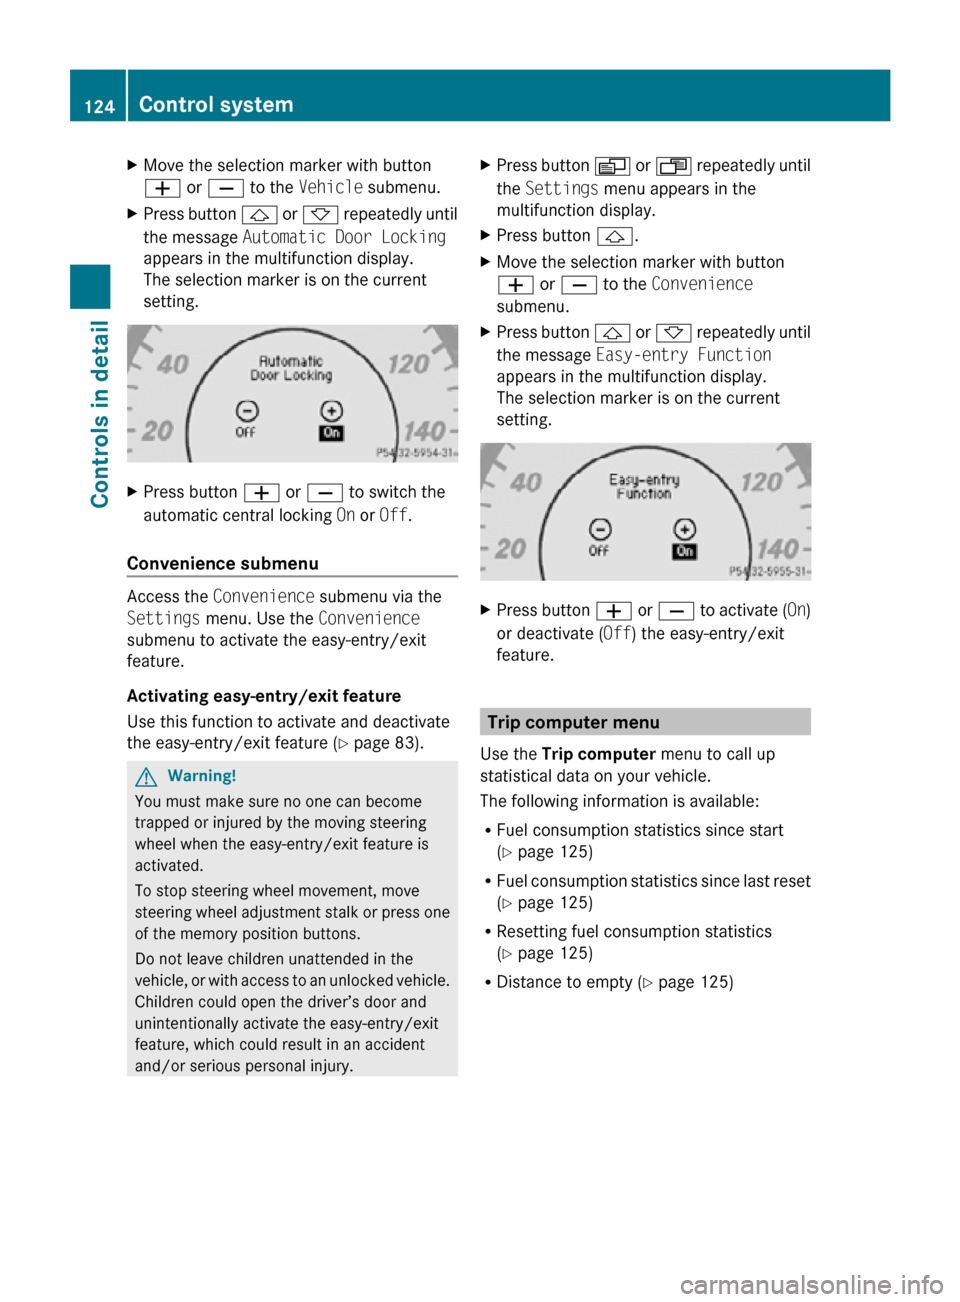
X
Move the selection marker with button
W or X to the Vehicle submenu.
X Press button & or * repeatedly until
the message Automatic Door Locking
appears in the multifunction display.
The selection marker is on the current
setting. X
Press button W or X to switch the
automatic central locking On or Off.
Convenience submenu Access the
Convenience submenu via the
Settings menu. Use the Convenience
submenu to activate the easy-entry/exit
feature.
Activating easy-entry/exit feature
Use this function to activate and deactivate
the easy-entry/exit feature (Y page 83). G
Warning!
You must make sure no one can become
trapped or injured by the moving steering
wheel when the easy-entry/exit feature is
activated.
To stop steering wheel movement, move
steering wheel adjustment stalk or press one
of the memory position buttons.
Do not leave children unattended in the
vehicle, or with access to an unlocked vehicle.
Children could open the driver’s door and
unintentionally activate the easy-entry/exit
feature, which could result in an accident
and/or serious personal injury. X
Press button V or U repeatedly until
the Settings menu appears in the
multifunction display.
X Press button &.
X Move the selection marker with button
W or X to the Convenience
submenu.
X Press button & or * repeatedly until
the message Easy-entry Function
appears in the multifunction display.
The selection marker is on the current
setting. X
Press button W or X to activate ( On)
or deactivate (Off) the easy-entry/exit
feature. Trip computer menu
Use the Trip computer menu to call up
statistical data on your vehicle.
The following information is available:
R Fuel consumption statistics since start
(Y page 125)
R Fuel consumption statistics since last reset
(Y page 125)
R Resetting fuel consumption statistics
(Y page 125)
R Distance to empty ( Y page 125)124
Control systemControls in detail
219_AKB; 4; 54, en-US
d2ureepe,
Version: 2.11.8.1 2009-05-11T16:21:02+02:00 - Seite 124