2010 MERCEDES-BENZ CLS ABS
[x] Cancel search: ABSPage 98 of 308
Summer opening feature
When the weather is warm, you can ventilate
the vehicle before driving off by
simultaneously
R opening the door windows
R opening the tilt/sliding sunroof
R switching on the seat ventilation for the
driver’s seat
The summer opening feature can only be
activated via the remote control of the
SmartKey. The SmartKey must be in close
proximity to the driver’s outside door handle.
X Aim the transmitter eye of the SmartKey at
the driver’s outside door handle.
X Press and hold button % on the
SmartKey until the door windows and the
tilt/sliding sunroof have reached the
desired position.
The vehicle unlocks.
X Release button % on the SmartKey to
interrupt the opening procedure. Convenience closing feature
When locking the vehicle, you can
simultaneously close the door windows and
the tilt/sliding sunroof. G
Warning!
When closing the door windows and the tilt/
sliding
sunroof, make sure there is no danger
of anyone being harmed by the closing
procedure.
If potential danger exists, proceed as follows:
R Release button & to stop the closing
procedure. To open, press and hold button
%. To continue the closing procedure
after making sure that there is no danger of anyone being harmed by the closing
procedure, press and hold button
&.
Vehicles with KEYLESS-GO:
R Release
the lock button on the outside door
handle to stop the closing procedure.
R Immediately pull on the same outside door
handle and hold firmly. The door windows
and the tilt/sliding sunroof will open for as
long as the door handle is held but the door
not opened.
With SmartKey The SmartKey must be in close proximity to
the driver’s outside door handle.
X
Aim transmitter eye of the SmartKey at the
driver’s outside door handle.
X Press and hold button & on the
SmartKey until the door windows and the
tilt/sliding sunroof are closed completely.
With KEYLESS-GO The SmartKey with KEYLESS-GO must be
located outside the vehicle within
approximately 3 ft (1 m) of a door.
X
Close all doors.
X Press and hold the lock button on an
outside door handle
(Y page 69) until the
door windows and the tilt/sliding sunroof
are closed completely.
X Release the lock button on the outside door
handle to interrupt the closing procedure. Driving and parking
Safety notes
G
Warning!
Make sure absolutely no objects are
obstructing the pedals’ range of movement.
Keep the driver’s footwell clear of all
obstacles. If there are any floormats or 96
Driving and parking
Controls in detail
219_AKB; 4; 54, en-US
d2ureepe,
Version: 2.11.8.1 2009-05-11T16:21:02+02:00 - Seite 96
Page 100 of 308
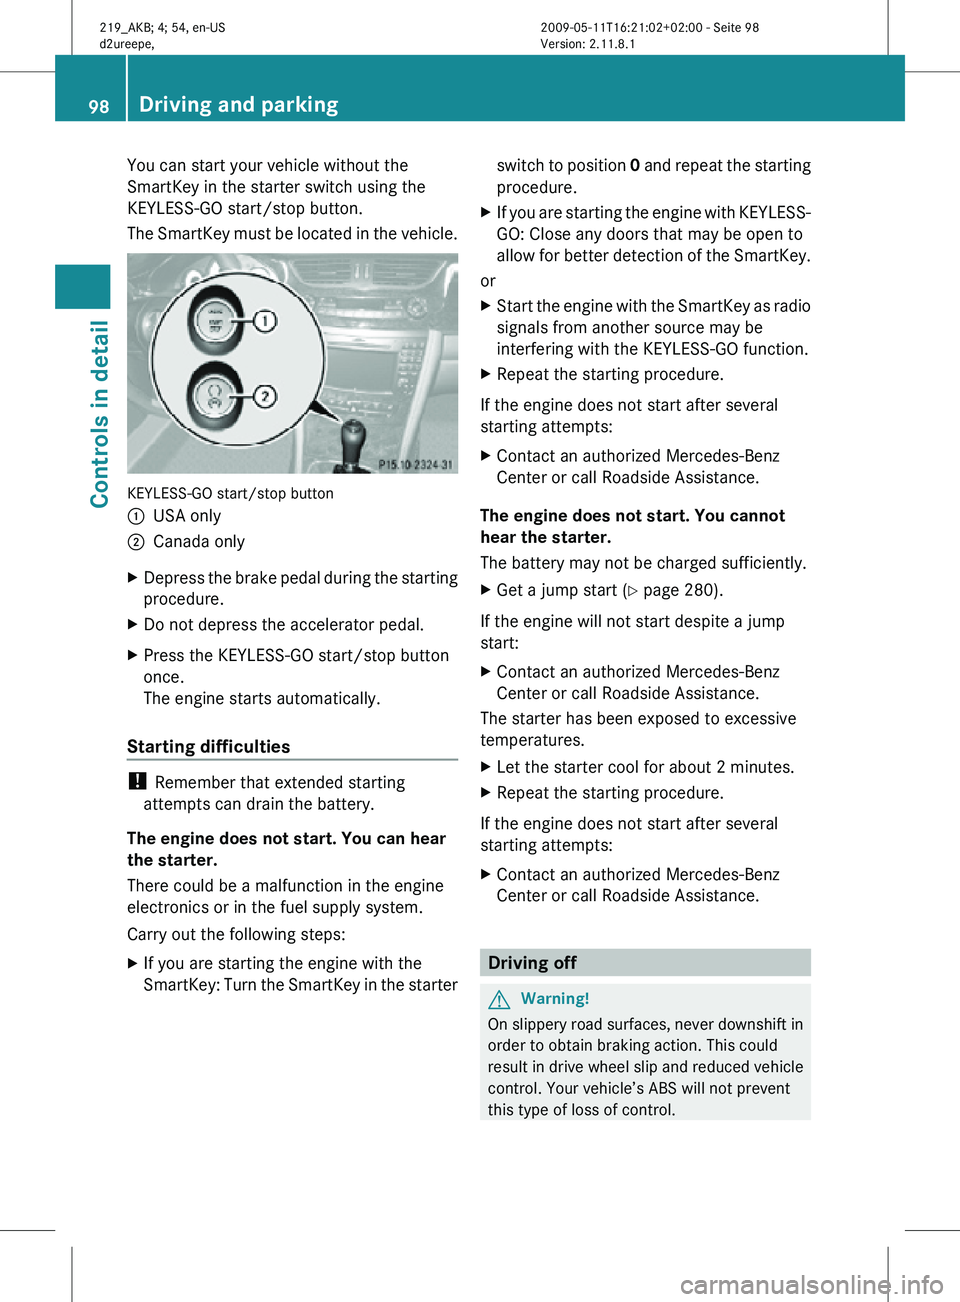
You can start your vehicle without the
SmartKey in the starter switch using the
KEYLESS-GO start/stop button.
The SmartKey must be located in the vehicle.
KEYLESS-GO start/stop button
:
USA only
; Canada only
X Depress the brake pedal during the starting
procedure.
X Do not depress the accelerator pedal.
X Press the KEYLESS-GO start/stop button
once.
The engine starts automatically.
Starting difficulties !
Remember that extended starting
attempts can drain the battery.
The engine does not start. You can hear
the starter.
There could be a malfunction in the engine
electronics or in the fuel supply system.
Carry out the following steps:
X If you are starting the engine with the
SmartKey: Turn the SmartKey in the starter switch to position
0 and repeat the starting
procedure.
X If you are starting the engine with KEYLESS-
GO: Close any doors that may be open to
allow for better detection of the SmartKey.
or
X Start the engine with the SmartKey as radio
signals from another source may be
interfering with the KEYLESS-GO function.
X Repeat the starting procedure.
If the engine does not start after several
starting attempts:
X Contact an authorized Mercedes-Benz
Center or call Roadside Assistance.
The engine does not start. You cannot
hear the starter.
The battery may not be charged sufficiently.
X Get a jump start (Y page 280).
If the engine will not start despite a jump
start:
X Contact an authorized Mercedes-Benz
Center or call Roadside Assistance.
The starter has been exposed to excessive
temperatures.
X Let the starter cool for about 2 minutes.
X Repeat the starting procedure.
If the engine does not start after several
starting attempts:
X Contact an authorized Mercedes-Benz
Center or call Roadside Assistance. Driving off
G
Warning!
On slippery road surfaces, never downshift in
order to obtain braking action. This could
result in drive wheel slip and reduced vehicle
control. Your vehicle’s ABS will not prevent
this type of loss of control. 98
Driving and parkingControls in detail
219_AKB; 4; 54, en-US
d2ureepe,
Version: 2.11.8.1 2009-05-11T16:21:02+02:00 - Seite 98
Page 103 of 308
G
Warning!
When leaving the vehicle, always remove the
SmartKey from the starter switch, take it with
you, and lock the vehicle. Do not leave
children unattended in the vehicle, or with
access to an unlocked vehicle. Children could
release the parking brake and/or shift the
automatic transmission out of park position
P, either of which could result in an accident
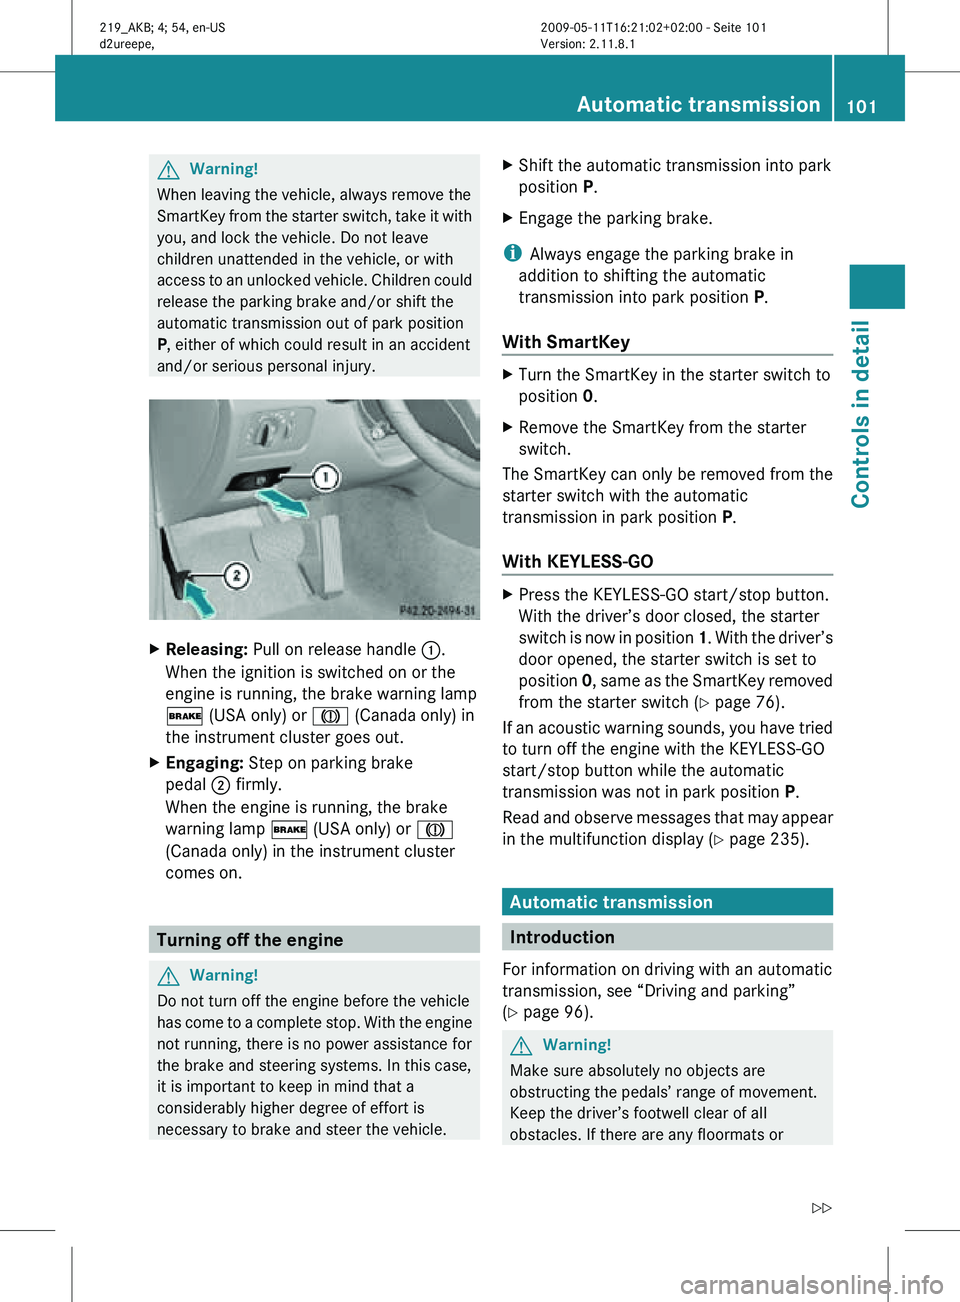
and/or serious personal injury. X
Releasing: Pull on release handle :.
When the ignition is switched on or the
engine is running, the brake warning lamp
$ (USA only) or J (Canada only) in
the instrument cluster goes out.
X Engaging: Step on parking brake
pedal ; firmly.
When the engine is running, the brake
warning lamp $ (USA only) or J
(Canada only) in the instrument cluster
comes on. Turning off the engine
G
Warning!
Do not turn off the engine before the vehicle
has come to a complete stop. With the engine
not running, there is no power assistance for
the brake and steering systems. In this case,
it is important to keep in mind that a
considerably higher degree of effort is
necessary to brake and steer the vehicle. X
Shift the automatic transmission into park
position P.
X Engage the parking brake.
i Always engage the parking brake in
addition to shifting the automatic
transmission into park position P.
With SmartKey X
Turn the SmartKey in the starter switch to
position 0.
X Remove the SmartKey from the starter
switch.
The SmartKey can only be removed from the
starter switch with the automatic
transmission in park position P.
With KEYLESS-GO X
Press the KEYLESS-GO start/stop button.
With the driver’s door closed, the starter
switch is now in position 1. With the driver’s
door opened, the starter switch is set to
position 0, same as the SmartKey removed
from the starter switch (Y page 76).
If an acoustic warning sounds, you have tried
to turn off the engine with the KEYLESS-GO
start/stop button while the automatic
transmission was not in park position P.
Read and observe messages that may appear
in the multifunction display ( Y page 235). Automatic transmission
Introduction
For information on driving with an automatic
transmission, see “Driving and parking”
(Y page 96). G
Warning!
Make sure absolutely no objects are
obstructing the pedals’ range of movement.
Keep the driver’s footwell clear of all
obstacles. If there are any floormats or Automatic transmission
101Controls in detail
219_AKB; 4; 54, en-US
d2ureepe, Version: 2.11.8.1 2009-05-11T16:21:02+02:00 - Seite 101 Z
Page 108 of 308
mode
C or S, you can limit or extend the gear
range using the gear selector lever or the
steering wheel gearshift control.
Steering wheel gearshift control is available
on vehicles with AMG Sport Package and on
CLS 63 AMG only.
CLS 63 AMG: For information on using the
gear selector lever or the steering wheel
gearshift control in manual program mode
M, see “Manual shift program”
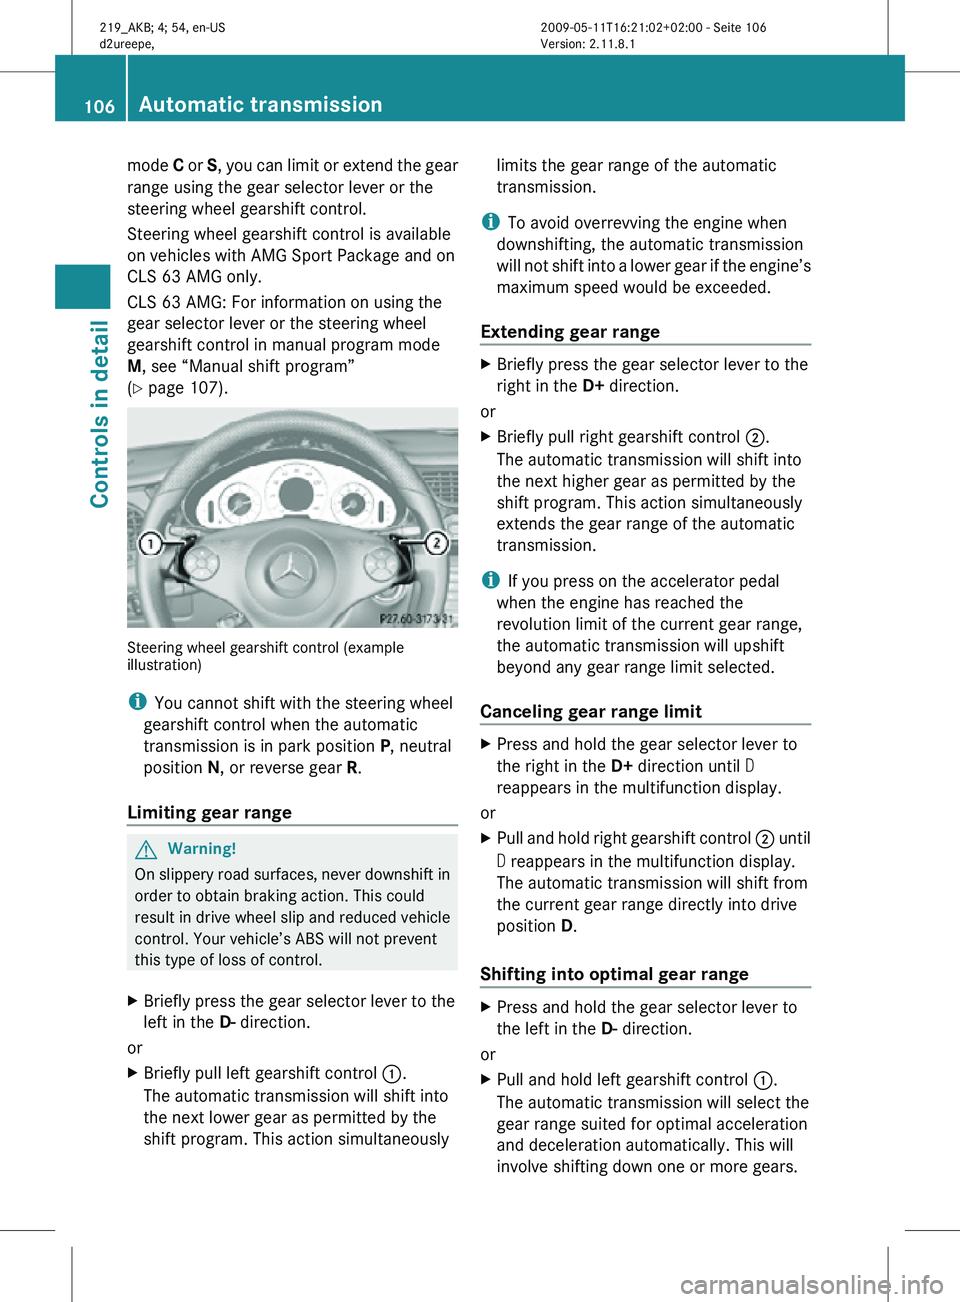
(Y page 107). Steering wheel gearshift control (example
illustration)
i
You cannot shift with the steering wheel
gearshift control when the automatic
transmission is in park position P, neutral
position N, or reverse gear R.
Limiting gear range G
Warning!
On slippery road surfaces, never downshift in
order to obtain braking action. This could
result in drive wheel slip and reduced vehicle
control. Your vehicle’s ABS will not prevent
this type of loss of control.
X Briefly press the gear selector lever to the
left in the D- direction.
or
X Briefly pull left gearshift control :.
The automatic transmission will shift into
the next lower gear as permitted by the
shift program. This action simultaneously limits the gear range of the automatic
transmission.
i To avoid overrevving the engine when
downshifting, the automatic transmission
will not shift into a lower gear if the engine’s
maximum speed would be exceeded.
Extending gear range X
Briefly press the gear selector lever to the
right in the D+ direction.
or
X Briefly pull right gearshift control ;.
The automatic transmission will shift into
the next higher gear as permitted by the
shift program. This action simultaneously
extends the gear range of the automatic
transmission.
i If you press on the accelerator pedal
when the engine has reached the
revolution limit of the current gear range,
the automatic transmission will upshift
beyond any gear range limit selected.
Canceling gear range limit X
Press and hold the gear selector lever to
the right in the D+ direction until D
reappears in the multifunction display.
or
X Pull and hold right gearshift control ; until
D reappears in the multifunction display.
The automatic transmission will shift from
the current gear range directly into drive
position D.
Shifting into optimal gear range X
Press and hold the gear selector lever to
the left in the D- direction.
or
X Pull and hold left gearshift control :.
The automatic transmission will select the
gear range suited for optimal acceleration
and deceleration automatically. This will
involve shifting down one or more gears. 106
Automatic transmissionControls in detail
219_AKB; 4; 54, en-US
d2ureepe,
Version: 2.11.8.1 2009-05-11T16:21:02+02:00 - Seite 106
Page 109 of 308
Manual shift program
The manual shift program is available on
CLS 63 AMG only.
Manual program mode M differs with regard
to spontaneity, response time, and shifting
smoothness from automatic program mode
S.
In manual program mode M, system-
controlled automatic gearshifting is switched
off. You need to change the gears by manually
upshifting or downshifting using the gear
selector lever or the steering wheel gearshift
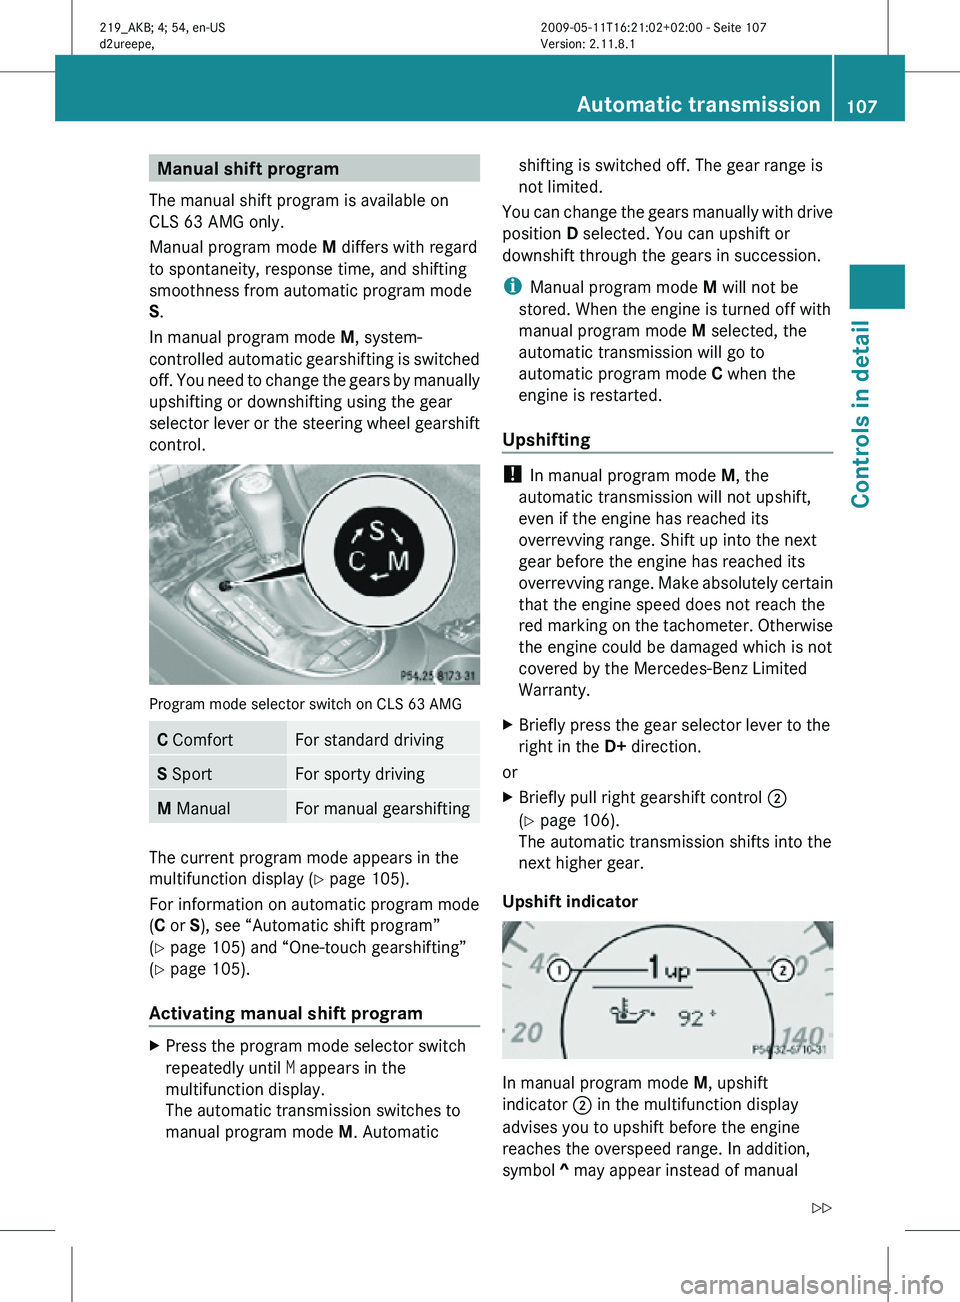
control. Program mode selector switch on CLS 63 AMG
C Comfort For standard driving
S Sport For sporty driving
M Manual For manual gearshifting
The current program mode appears in the
multifunction display (
Y page 105).
For information on automatic program mode
(C or S), see “Automatic shift program”
(Y page 105) and “One-touch gearshifting”
(Y page 105).
Activating manual shift program X
Press the program mode selector switch
repeatedly until M appears in the
multifunction display.
The automatic transmission switches to
manual program mode M. Automatic shifting is switched off. The gear range is
not limited.
You can change the gears manually with drive
position D selected. You can upshift or
downshift through the gears in succession.
i Manual program mode M will not be
stored. When the engine is turned off with
manual program mode M selected, the
automatic transmission will go to
automatic program mode C when the
engine is restarted.
Upshifting !
In manual program mode M, the
automatic transmission will not upshift,
even if the engine has reached its
overrevving range. Shift up into the next
gear before the engine has reached its
overrevving range. Make absolutely certain
that the engine speed does not reach the
red marking on the tachometer. Otherwise
the engine could be damaged which is not
covered by the Mercedes-Benz Limited
Warranty.
X Briefly press the gear selector lever to the
right in the D+ direction.
or
X Briefly pull right gearshift control ;
(Y page 106).
The automatic transmission shifts into the
next higher gear.
Upshift indicator In manual program mode
M, upshift
indicator ; in the multifunction display
advises you to upshift before the engine
reaches the overspeed range. In addition,
symbol ^ may appear instead of manual Automatic transmission
107Controls in detail
219_AKB; 4; 54, en-US
d2ureepe, Version: 2.11.8.1 2009-05-11T16:21:02+02:00 - Seite 107 Z
Page 110 of 308
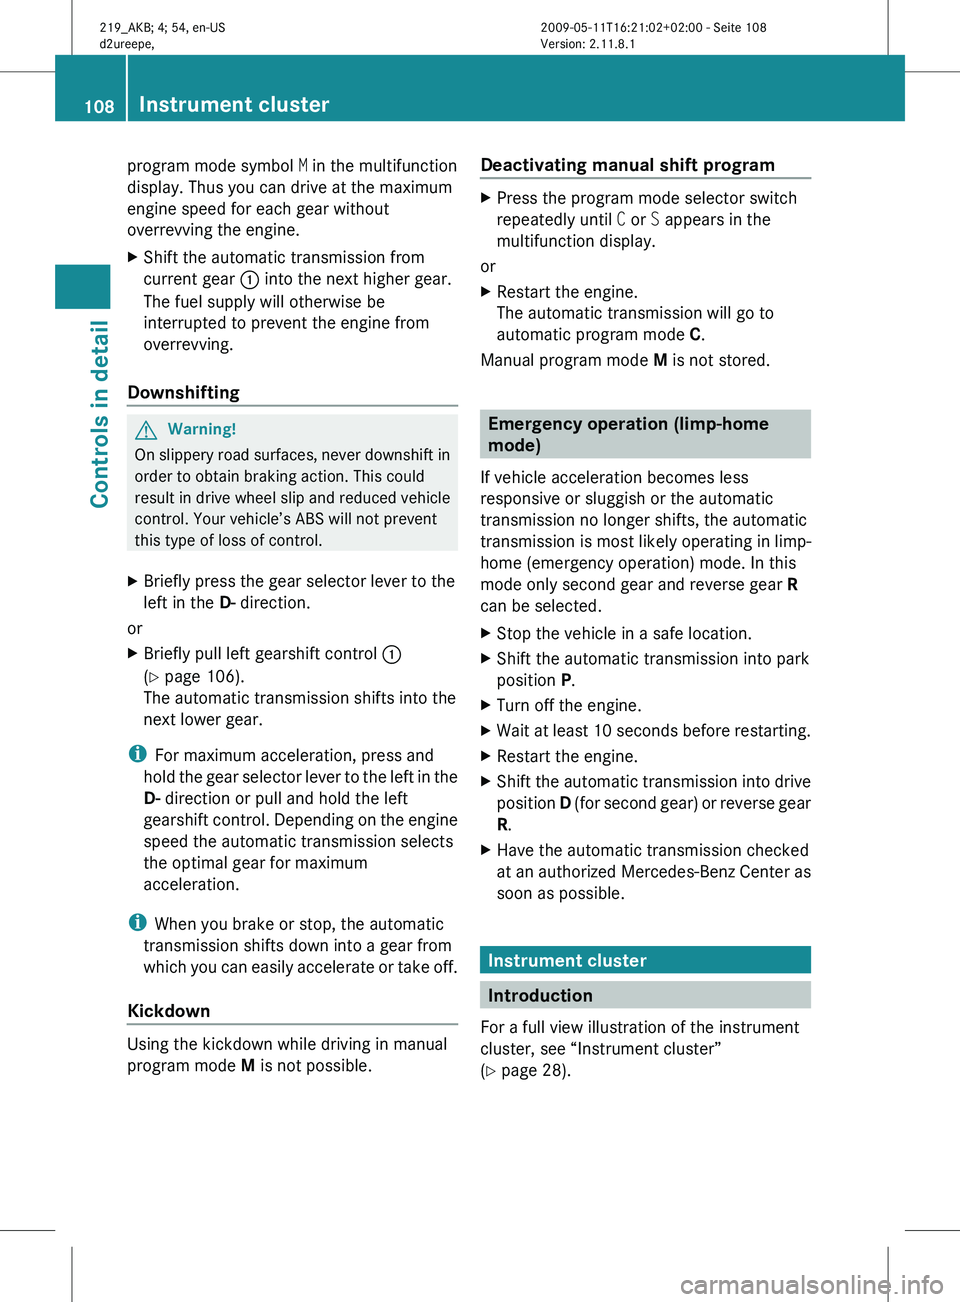
program mode symbol
M in the multifunction
display. Thus you can drive at the maximum
engine speed for each gear without
overrevving the engine.
X Shift the automatic transmission from
current gear : into the next higher gear.
The fuel supply will otherwise be
interrupted to prevent the engine from
overrevving.
Downshifting G
Warning!
On slippery road surfaces, never downshift in
order to obtain braking action. This could
result
in drive wheel slip and reduced vehicle
control. Your vehicle’s ABS will not prevent
this type of loss of control.
X Briefly press the gear selector lever to the
left in the D- direction.
or
X Briefly pull left gearshift control :
(Y page 106).
The automatic transmission shifts into the
next lower gear.
i For maximum acceleration, press and
hold
the gear selector lever to the left in the
D- direction or pull and hold the left
gearshift control. Depending on the engine
speed the automatic transmission selects
the optimal gear for maximum
acceleration.
i When you brake or stop, the automatic
transmission shifts down into a gear from
which you can easily accelerate or take off.
Kickdown Using the kickdown while driving in manual
program mode
M is not possible. Deactivating manual shift program X
Press the program mode selector switch
repeatedly until C or S appears in the
multifunction display.
or
X Restart the engine.
The automatic transmission will go to
automatic program mode C.
Manual program mode M is not stored. Emergency operation (limp-home
mode)
If vehicle acceleration becomes less
responsive or sluggish or the automatic
transmission no longer shifts, the automatic
transmission is most likely operating in limp-
home (emergency operation) mode. In this
mode only second gear and reverse gear R
can be selected.
X Stop the vehicle in a safe location.
X Shift the automatic transmission into park
position P.
X Turn off the engine.
X Wait at least 10 seconds before restarting.
X Restart the engine.
X Shift the automatic transmission into drive
position D
(for second gear) or reverse gear
R.
X Have the automatic transmission checked
at
an authorized Mercedes-Benz Center as
soon as possible. Instrument cluster
Introduction
For a full view illustration of the instrument
cluster, see “Instrument cluster”
(Y page 28). 108
Instrument cluster
Controls in detail
219_AKB; 4; 54, en-US
d2ureepe,
Version: 2.11.8.1 2009-05-11T16:21:02+02:00 - Seite 108
Page 129 of 308
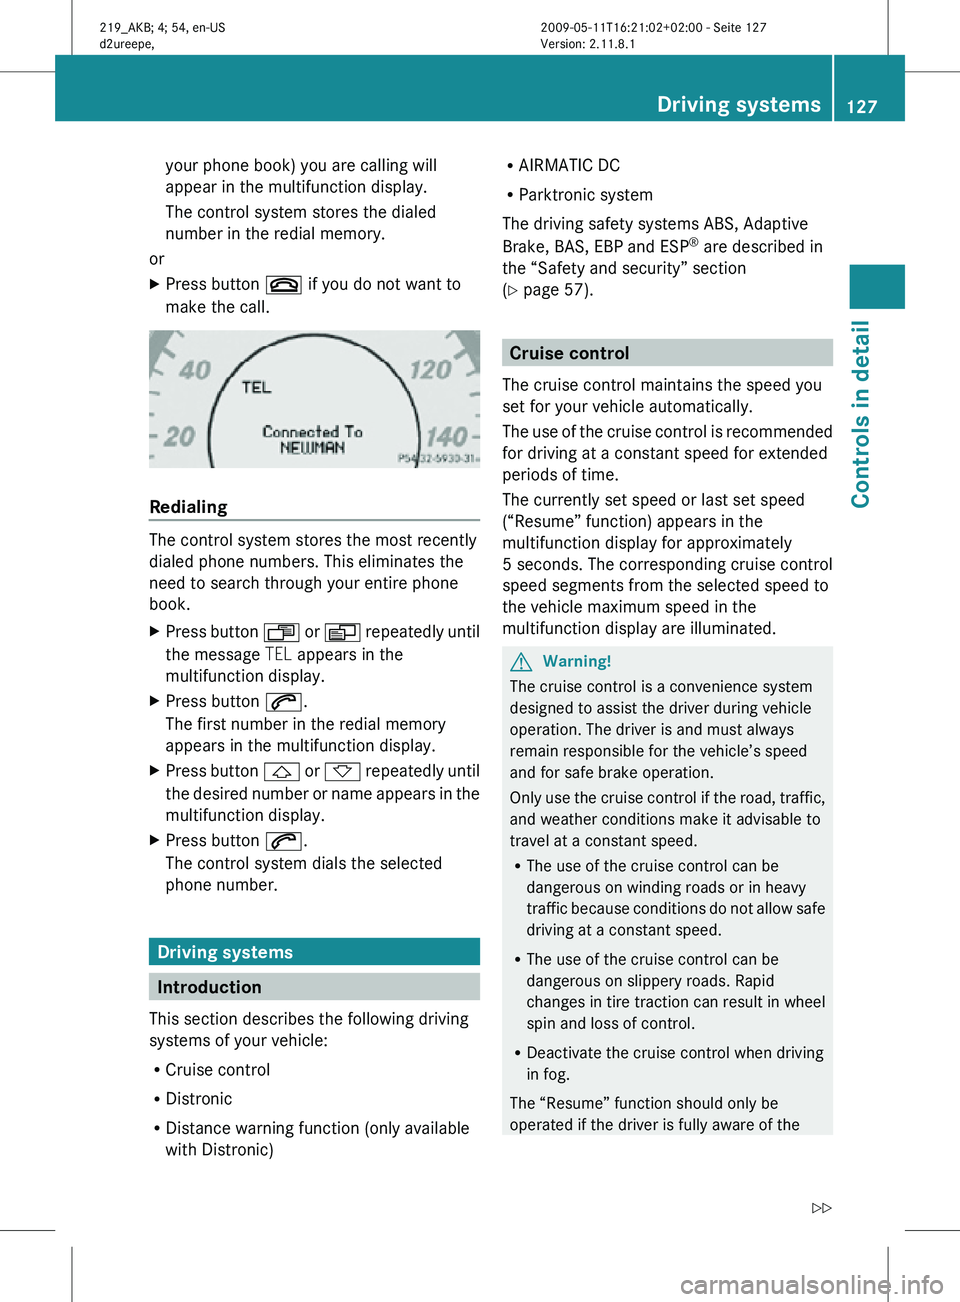
your phone book) you are calling will
appear in the multifunction display.
The control system stores the dialed
number in the redial memory.
or
X Press button ~ if you do not want to
make the call. Redialing
The control system stores the most recently
dialed phone numbers. This eliminates the
need to search through your entire phone
book.
X
Press button U or V repeatedly until
the message TEL appears in the
multifunction display.
X Press button 6.
The first number in the redial memory
appears in the multifunction display.
X Press button & or * repeatedly until
the desired number or name appears in the
multifunction display.
X Press button 6.
The control system dials the selected
phone number. Driving systems
Introduction
This section describes the following driving
systems of your vehicle:
R Cruise control
R Distronic
R Distance warning function (only available
with Distronic) R
AIRMATIC DC
R Parktronic system
The driving safety systems ABS, Adaptive
Brake, BAS, EBP and ESP ®
are described in
the “Safety and security” section
(Y page 57). Cruise control
The cruise control maintains the speed you
set for your vehicle automatically.
The use of the cruise control is recommended
for driving at a constant speed for extended
periods of time.
The currently set speed or last set speed
(“Resume” function) appears in the
multifunction display for approximately
5 seconds. The corresponding cruise control
speed segments from the selected speed to
the vehicle maximum speed in the
multifunction display are illuminated. G
Warning!
The cruise control is a convenience system
designed to assist the driver during vehicle
operation. The driver is and must always
remain responsible for the vehicle’s speed
and for safe brake operation.
Only use the cruise control if the road, traffic,
and weather conditions make it advisable to
travel at a constant speed.
R The use of the cruise control can be
dangerous on winding roads or in heavy
traffic because conditions do not allow safe
driving at a constant speed.
R The use of the cruise control can be
dangerous on slippery roads. Rapid
changes in tire traction can result in wheel
spin and loss of control.
R Deactivate the cruise control when driving
in fog.
The “Resume” function should only be
operated if the driver is fully aware of the Driving systems
127Controls in detail
219_AKB; 4; 54, en-US
d2ureepe, Version: 2.11.8.1 2009-05-11T16:21:02+02:00 - Seite 127 Z
Page 206 of 308
Index Speed rating
H M+S
11 up to 130 mph (210 km/h)
V M+S
11 up to 149 mph (240 km/h)
i
Not all M+S rated tires provide special
winter performance. Make sure the tires
you use show M+S and the mountain/
snowflakeimarking on the tire
sidewall. These tires meet specific snow
traction performance requirements of the
Rubber Manufacturers Association (RMA)
and the Rubber Association of Canada
(RAC) and have been designed specifically
for use in snow conditions.
An electronic speed limiter prevents your
vehicle from exceeding a speed of:
R 130 mph (210 km/h):
CLS 550
CLS 550 (Sport Package)
R 155 mph (250 km/h):
CLS 63 AMG
R 186 mph (300 km/h):
CLS 63 AMG (Performance Package)
The factory equipped tires on your vehicle
may have a tire speed rating above the
maximum speed permitted by the electronic
speed limiter.
Make sure your tires have the required tire
speed rating as specified for your vehicle in
the “Technical data” section ( Y page 291),
for example when purchasing new tires.
If you are uncertain about the correct reading
of the information given on a tire’s sidewall,
any authorized Mercedes-Benz Center will be
glad to assist you. Load identification
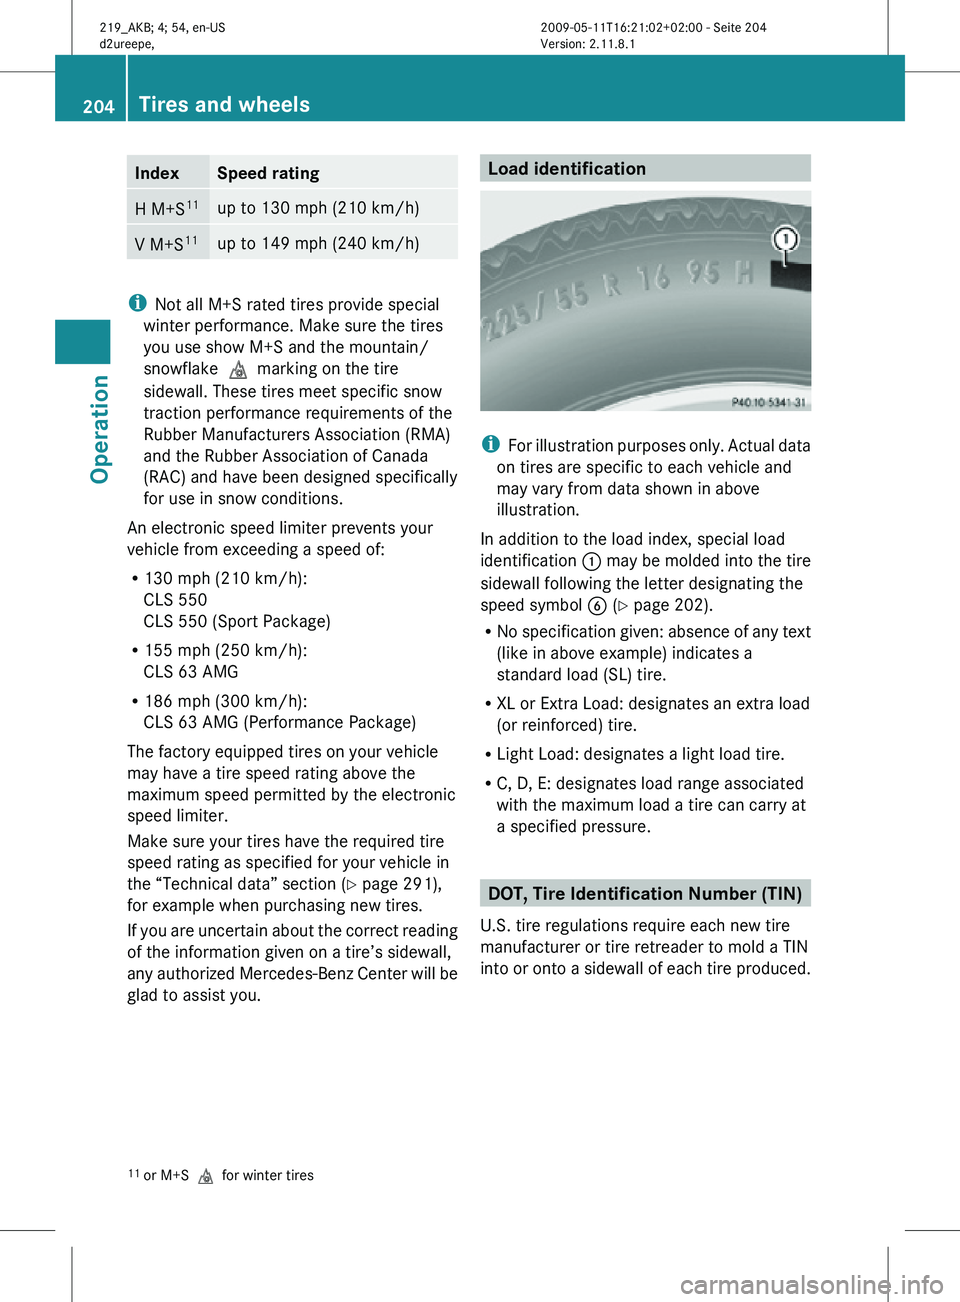
i
For illustration purposes only. Actual data
on tires are specific to each vehicle and
may vary from data shown in above
illustration.
In addition to the load index, special load
identification : may be molded into the tire
sidewall following the letter designating the
speed symbol B (Y page 202).
R No specification given: absence of any text
(like in above example) indicates a
standard load (SL) tire.
R XL or Extra Load: designates an extra load
(or reinforced) tire.
R Light Load: designates a light load tire.
R C, D, E: designates load range associated
with the maximum load a tire can carry at
a specified pressure. DOT, Tire Identification Number (TIN)
U.S. tire regulations require each new tire
manufacturer or tire retreader to mold a TIN
into or onto a sidewall of each tire produced.
11 or M+S ifor winter tires 204
Tires and wheelsOperation
219_AKB; 4; 54, en-US
d2ureepe,
Version: 2.11.8.1 2009-05-11T16:21:02+02:00 - Seite 204