2010 MERCEDES-BENZ CLS COUPE turn signal
[x] Cancel search: turn signalPage 20 of 337
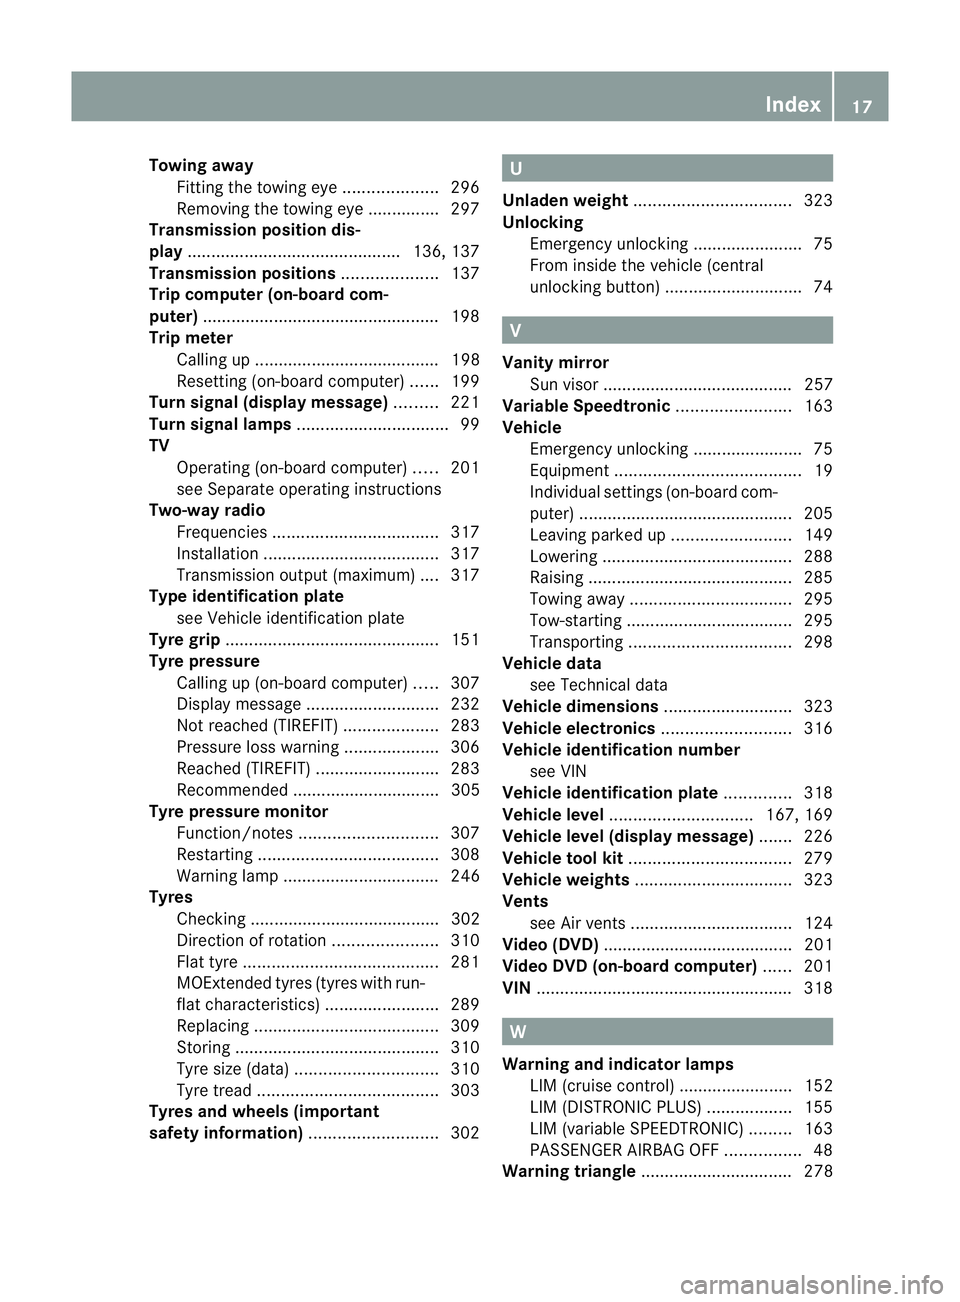
Towing away
Fitting the towing ey e.................... 296
Removing the towing eye. ..............297
Transmission position dis-
play ............................................. 136, 137
Transmission positions ....................137
Trip computer (on-board com-
puter) ................................................. .198
Trip meter Calling up ....................................... 198
Resetting (on-board computer) ......199
Turn signal (display message) .........221
Turn signal lamps ................................ 99
TV Operating (on-board computer) .....201
see Separate operating instructions
Two-way radio
Frequencies ................................... 317
Installatio n..................................... 317
Transmission output (maximum) .... 317
Type identification plate
see Vehicle identification plate
Tyre grip ............................................. 151
Tyre pressure Calling up (on-board computer) .....307
Display message ............................ 232
Not reached (TIREFIT) ....................283
Pressure loss warning ....................306
Reached (TIREFIT) ..........................283
Recommended ............................... 305
Tyre pressure monitor
Function/notes ............................. 307
Restarting ...................................... 308
Warning lamp ................................. 246
Tyres
Checking ........................................ 302
Directio nofrotation ...................... 310
Flat tyre ......................................... 281
MOExtended tyres (tyre swith run-
flat characteristics) ........................289
Replacing ....................................... 309
Storing ........................................... 310
Tyr esize (data) .............................. 310
Tyr etread ...................................... 303
Tyres and wheels (important
safety information) ...........................302 U
Unladen weight ................................. 323
Unlocking Emergency unlocking .......................75
From inside the vehicle (central
unlocking button) ............................. 74 V
Vanity mirror Sun visor ........................................ 257
Variable Speedtronic ........................163
Vehicle Emergency unlocking .......................75
Equipment ....................................... 19
Individual settings (on-board com-
puter) ............................................. 205
Leaving parked up .........................149
Lowering ........................................ 288
Raising ........................................... 285
Towing away .................................. 295
Tow-starting ................................... 295
Transporting .................................. 298
Vehicle data
see Technical data
Vehicle dimensions ...........................323
Vehicle electronics ...........................316
Vehicle identification number see VIN
Vehicle identification plate ..............318
Vehicle level .............................. 167, 169
Vehicle level (display message) .......226
Vehicle tool kit .................................. 279
Vehicle weights ................................. 323
Vents see Air vents .................................. 124
Video (DVD) ........................................ 201
Video DVD (on-board computer) ......201
VIN ...................................................... 318 W
Warning and indicator lamps LIM (cruise control) ........................ 152
LIM (DISTRONIC PLUS) ..................155
LIM (variable SPEEDTRONIC) .........163
PASSENGER AIRBAG OFF ................48
Warning triangle ................................ 278 Index
17
Page 31 of 337
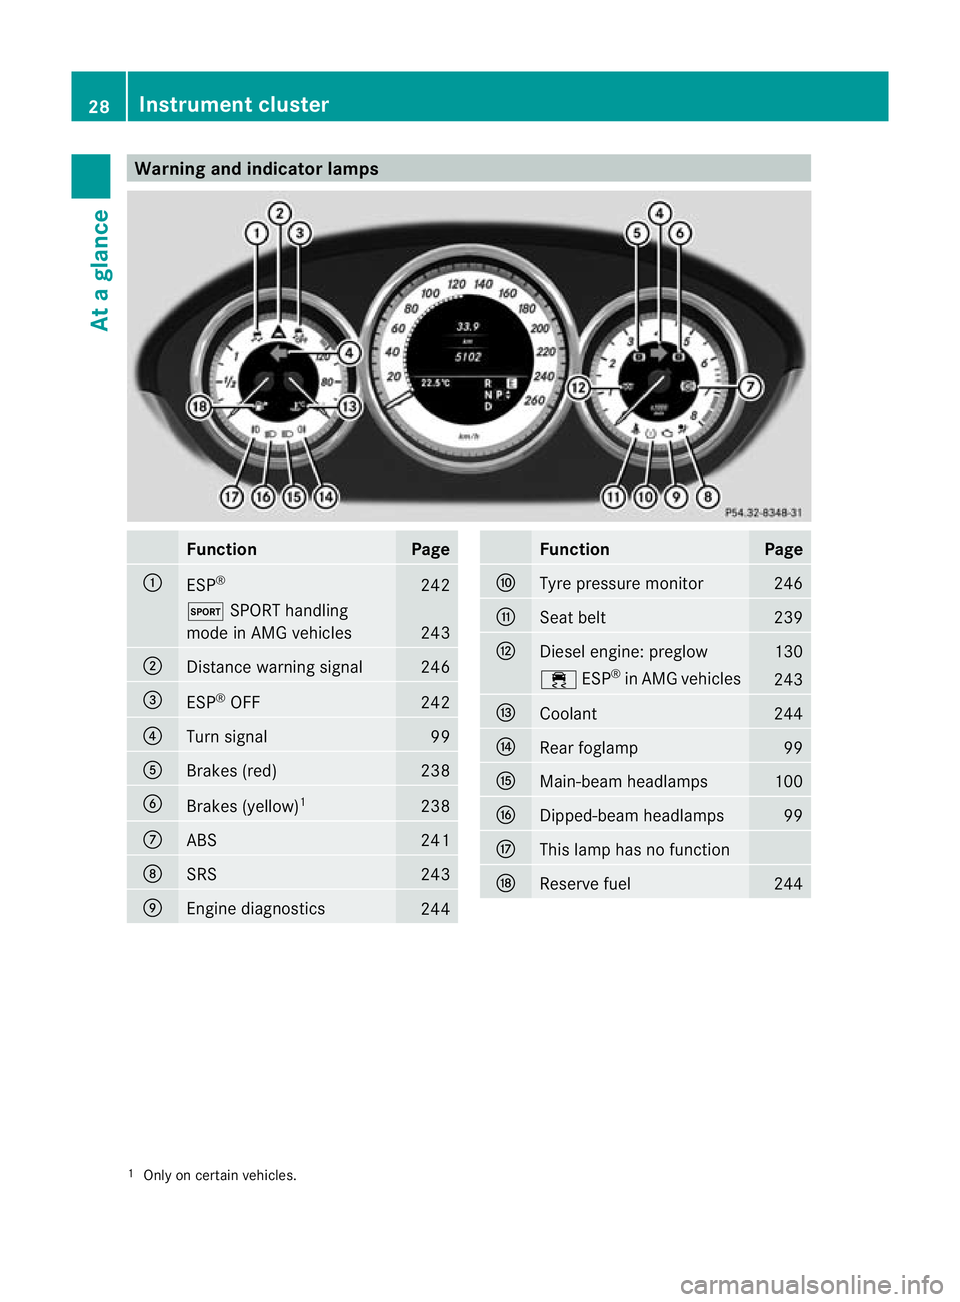
Warning and indicator lamps
Function Page
:
ESP
® 242
M
SPORT handling
mode in AMG vehicles 243
;
Distance warning signal 246
=
ESP
®
OFF 242
?
Turn signal 99
A
Brakes (red) 238
B
Brakes (yellow)
1 238
C
ABS 241
D
SRS 243
E
Engine diagnostics
244 Function Page
F
Tyre pressure monitor 246
G
Seat belt 239
H
Diesel engine: preglow 130
÷
ESP®
in AMG vehicles 243
I
Coolant 244
J
Rea
rfoglamp 99
K
Main-beam headlamps 100
L
Dipped-beam headlamps 99
M
This lamp has no function
N
Reserve fuel 244
1
Only on certain vehicles. 28
Instrument clusterAt a glance
Page 52 of 337
G
Risk of injury
Do not place electronic devices on the front-
passenger seat, e.g.:
R laptops, whe nswitched on
R mobile phones
R cards with transponders, e.g .ski passes or
access cards
Signals from electronic equipment can cause
interference in the automatic child seat rec-
ognitio nsensor system. This can lead to a
system malfunction. This may cause the
4 PASSENGER AIRBAG OFF indicator
lamp to light up without there being a child
seat with automatic child seat recognition fit-
ted, and the front-passenger fron tairbag will
not deploy during an accident .Itis also pos-
sible that the 6SRS warning lamp lights
up and/or the 4PASSENGER AIRBAG OFF
indicator lamp does not light up briefly when
you turn the key in the ignition lock to position
2.
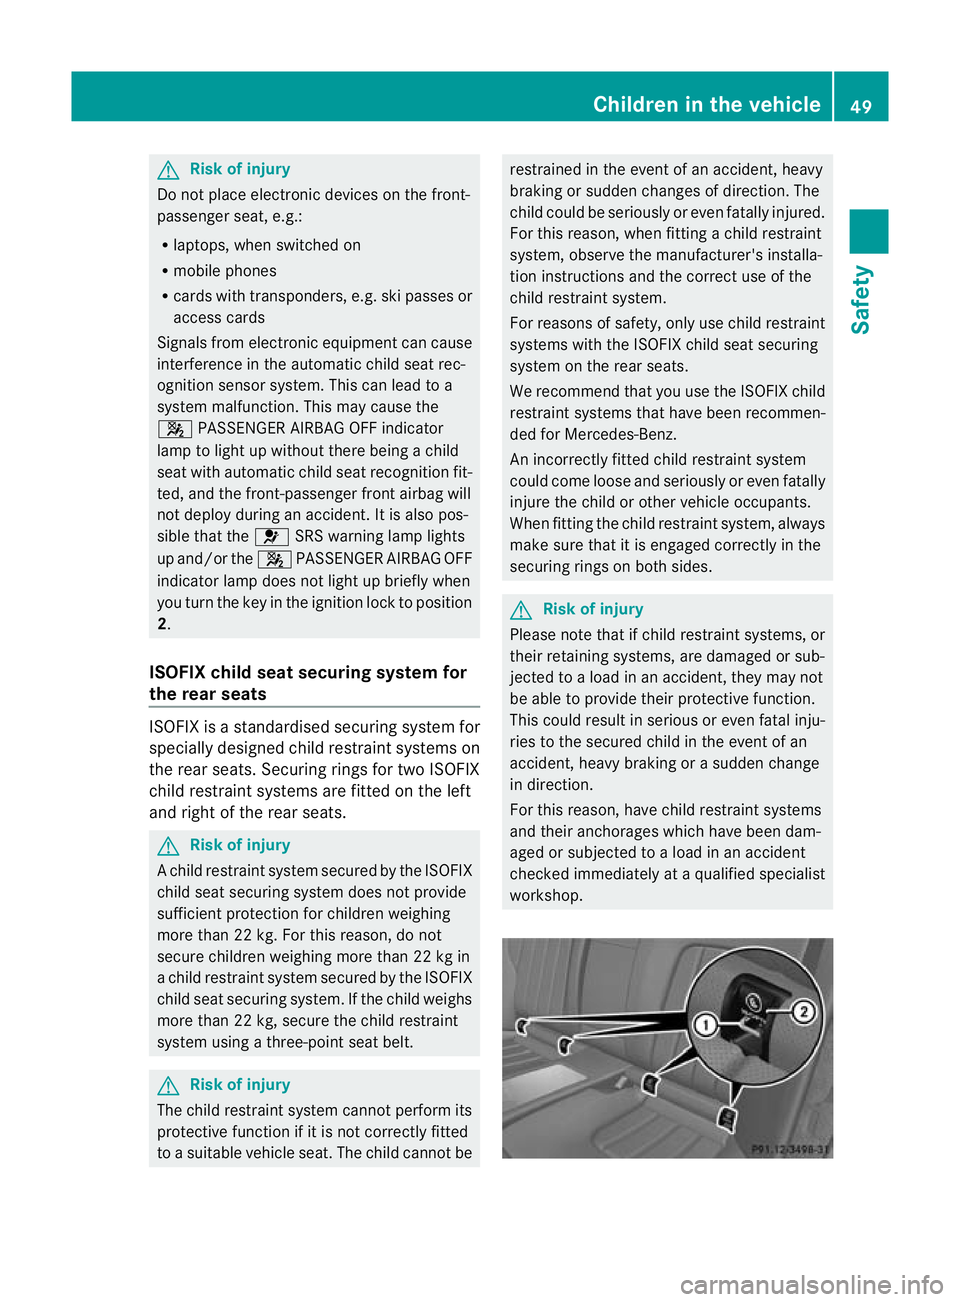
ISOFIX child seat securing system for
the rear seats ISOFIX is a standardised securing system for
specially designed child restraint systems on
the rear seats. Securing rings for two ISOFIX
child restraint systems are fitted on the left
and right of the rear seats. G
Risk of injury
Ac hild restraint system secured by the ISOFIX
child seat securing system does not provide
sufficient protection for children weighing
more than 22 kg. For this reason, do not
secure children weighing more than 22 kg in
a child restraint system secured by the ISOFIX
child seat securing system. If the child weighs
more than 22 kg, secure the child restraint
system using a three-point seat belt. G
Risk of injury
The child restraint system cannot perform its
protective function if it is not correctly fitted
to a suitable vehicle seat. The child cannot be restrained in the event of an accident, heavy
braking or sudden changes of direction. The
child could be seriously or even fatally injured.
For this reason, when fitting a child restraint
system, observe the manufacturer's installa-
tion instructions and the correct use of the
child restraint system.
For reasons of safety, only use child restraint
systems with the ISOFIX child seat securing
system on the rear seats.
We recommend that you use the ISOFIX child
restraint systems that have been recommen-
ded for Mercedes-Benz.
An incorrectly fitted child restraint system
could come loose and seriously or even fatally
injure the child or other vehicle occupants.
When fitting the child restraint system, always
make sure that it is engaged correctly in the
securing rings on both sides. G
Risk of injury
Please note that if child restraint systems, or
their retaining systems, are damaged or sub-
jected to a load in an accident, they may not
be able to provide their protective function.
This could result in serious or even fatal inju-
ries to the secured child in the event of an
accident, heavy braking or a sudden change
in direction.
For this reason, have child restraint systems
and their anchorages which have been dam-
aged or subjected to a load in an accident
checked immediately at a qualified specialist
workshop. Children in the vehicle
49Safety Z
Page 71 of 337
Vehicle equipment
i This manual describes all the standard
and optional equipment of your vehicle
available at the time of publicatio nofthe
Owner's Manual. Country-specific differen-
ces are possible. Please note that your
vehicle may not be equipped with all fea-
tures described. This also applies to safety-
relevant systems and functions. Key
Key functions
Locking and unlocking centrally The key centrally locks/unlocks:
R
the doors
R the boot lid
R the fuel filler flap G
Risk of injury
Only for the United Kingdom: if the vehicle
has been locked with the key, the double lock
function is activated as standard. It is then not
possible to open the doors from inside the
vehicle.
Therefore, do not leave any people behind in
the vehicle, particularly children, elderly peo-
ple or people requiring special assistance, if
the vehicle has been locked with the key. As
a result, they may not be able to free them-
selves in the event of an emergency. They
could be seriously or even fatally injured by
prolonged exposure to extremely high or low
temperatures, for example. In this case, res-
cuing people from outside the vehicle is diffi-
cult.
Deactivate the interior motion sensor before
you lock the vehicle with the key. The doors
can then be opened from the inside after the
vehicle has been locked from the outside with
the key. If the vehicle has been locked with KEYLESS-
GO, the doors can be opened from inside the
vehicle. G
Risk of accident
If children are left unsupervised in the vehicle,
they could:
R open a door from inside the vehicle at any
time, even if it has been locked
R start the vehicle using akey which has been
left in the vehicle
R release the parking brake
They could thereby endanger themselves and
others. Never leave children unsupervised in
the vehicle. Always take the key with you
when leaving the vehicle, even if you are only
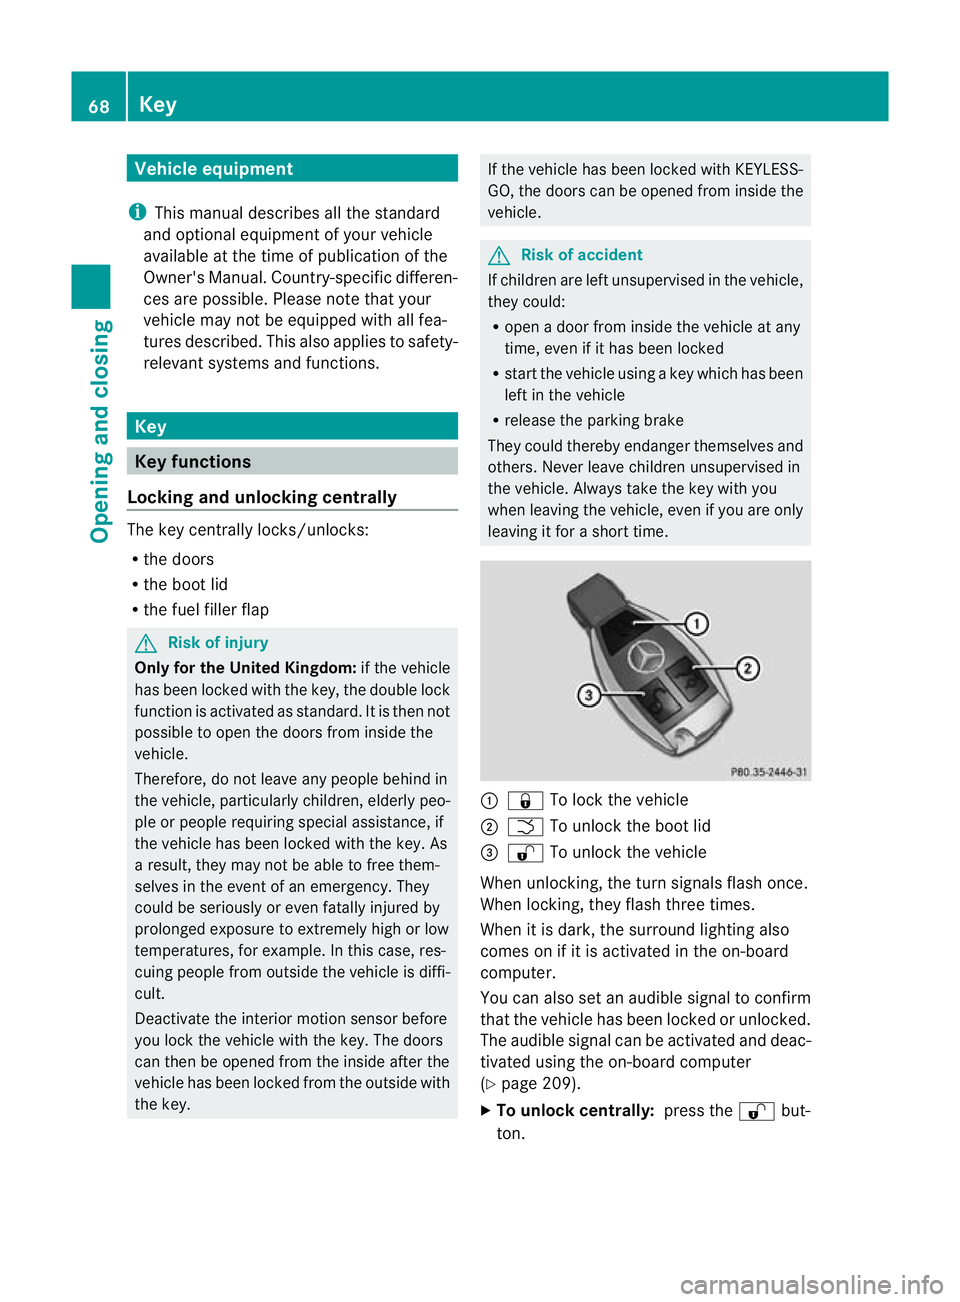
leaving it for a short time. :
& To lock the vehicle
; F To unlock the boot lid
= % To unlock the vehicle
When unlocking, the turn signals flash once.
When locking, they flash three times.
When it is dark, the surround lighting also
comes on if it is activated in the on-board
computer.
You can also set an audible signal to confirm
that the vehicle has been locked or unlocked.
The audible signal can be activated and deac-
tivated using the on-board computer
(Y page 209).
X To unlock centrally: press the%but-
ton. 68
KeyOpening and closing
Page 101 of 337
Vehicle equipment
i This manual describes all the standard
and optional equipment of your vehicle
available at the time of publicatio nofthe
Owner's Manual. Country-specific differen-
ces are possible. Please note that your
vehicle may not be equipped with all fea-
tures described. This also applies to safety-
relevant systems and functions. Exterior lighting
Important safety notes
For reasons of safety, Mercedes-Ben zrecom-
mends that you drive with the lights switched
on even during the daytime. In some coun-
tries, operation of the headlamps varies due
to legal requirements and self-imposed obli-
gations. Notes on driving abroad
Convert to symmetrical dipped beam
when driving abroad: switch the headlamps
to symmetrical dipped beam in countries in
which traffic drives on the opposite side of the
road to the country where the vehicle is reg-
istered. This prevents oncoming traffic from
being dazzled. Symmetrical lights do not illu-
minate as large an area of the edge of the
carriageway.
Convert the headlamps as close to the border
as possible before driving in these countries
(Y page 207).
Convert to asymmetrical dipped beam
after returning: convert the headlamps back
to asymmetrical dipped beam as soon as pos-
sible after crossing the border when returning
(Y page 207).
Vehicles with Intelligent Light System: if
the headlamps are converted to symmetrical
dipped beam, not all light functions are avail-
able. "Motorway mode" and the "extended
range foglamps" are deactivated. Light switch
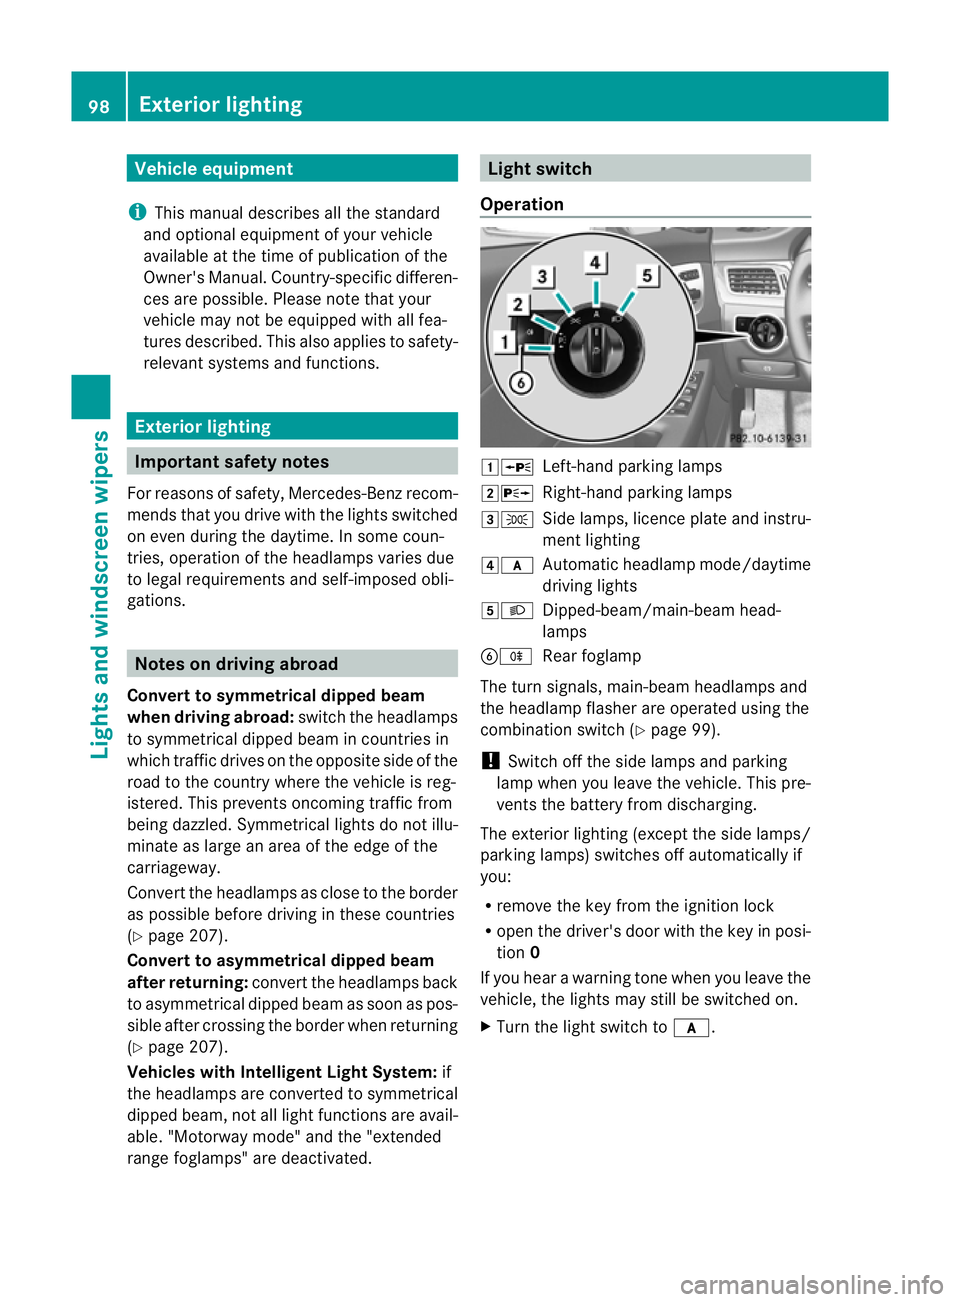
Operation 1W
Left-hand parking lamps
2X Right-hand parking lamps
3T Side lamps, licence plate and instru-
ment lighting
4c Automatic headlamp mode/daytime
driving lights
5L Dipped-beam/main-beam head-
lamps
BR Rear foglamp
The turn signals, main-beam headlamps and
the headlamp flasher are operated using the
combination switch (Y page 99).
! Switch off the side lamps and parking
lamp when you leave the vehicle. This pre-
vents the battery from discharging.
The exterior lighting (except the side lamps/
parking lamps) switches off automatically if
you:
R remove the key from the ignition lock
R open the driver's door with the key in posi-
tion 0
If you hear a warning tone when you leave the
vehicle, the lights may still be switched on.
X Turn the light switch to c.98
Exterior lightingLights and windscreen wipers
Page 102 of 337
Dipped-beam headlamps
X
To switch on the dipped-beam head-
lamps: turn the key in the ignition lock to
position 2or start the engine.
X Tur nthe light switch to L.
The L indicator lamp in the instrument
cluster lights up.
Daytime driving lights You can activate or deactivate the daytime
driving lights function using the on-board
computer (Y page 207).
X Daytime driving lights: activate the day-
time driving lights function using the on-
board computer.
X Turn the light switch to c.
When the engine is on: depending on the
ambient light conditions, the daytime driv-
ing lights or the dipped-beamh eadlamps
are switched on.
When the dipped-beam headlamps are
switched on, the Lindicator lamp in the
instrument cluster lights up.
Automatic headlamps G
Risk of accident
If the light switch is set to c, the dipped-
beam headlamps will not come on automati-
cally if it is foggy. This could endanger you and
others. Therefore, turn the light switch to
L in fog.
The automatic headlamp feature is only an
aid. The driver is responsible for the vehicle's
lighting at all times.
X To switch on automatic headlamp
mode: turn the light switch to c.
Key in position 1in the ignition lock: the
side lamps are switched on or off automat-
ically depending on the brightness of the
ambient light. With the engine running: depending on the
brightness of the ambient light, the daytime
driving lights
21
or the dipped-beam head-
lamps are switched on or off automatically.
When the dipped-beam headlamps are
switched on, the Lindicator lamp in the
instrument cluster lights up.
Rear foglamp X
To switch on the rear foglamp: turn the
key in the ignition lock to position 2or start
the engine.
X Turn the light switch to Lorc.
X Press the Rbutton.
The yellow Rindicator lamp in the
instrument cluster lights up.
X To switch off the rear foglamp: press the
R button.
The yellow Rindicator lamp in the
instrument cluster goes out.
i If you switch the engin eoff (key in posi-
tion 1in the ignition lock) and then restart
it, the previous rear foglamp settings are
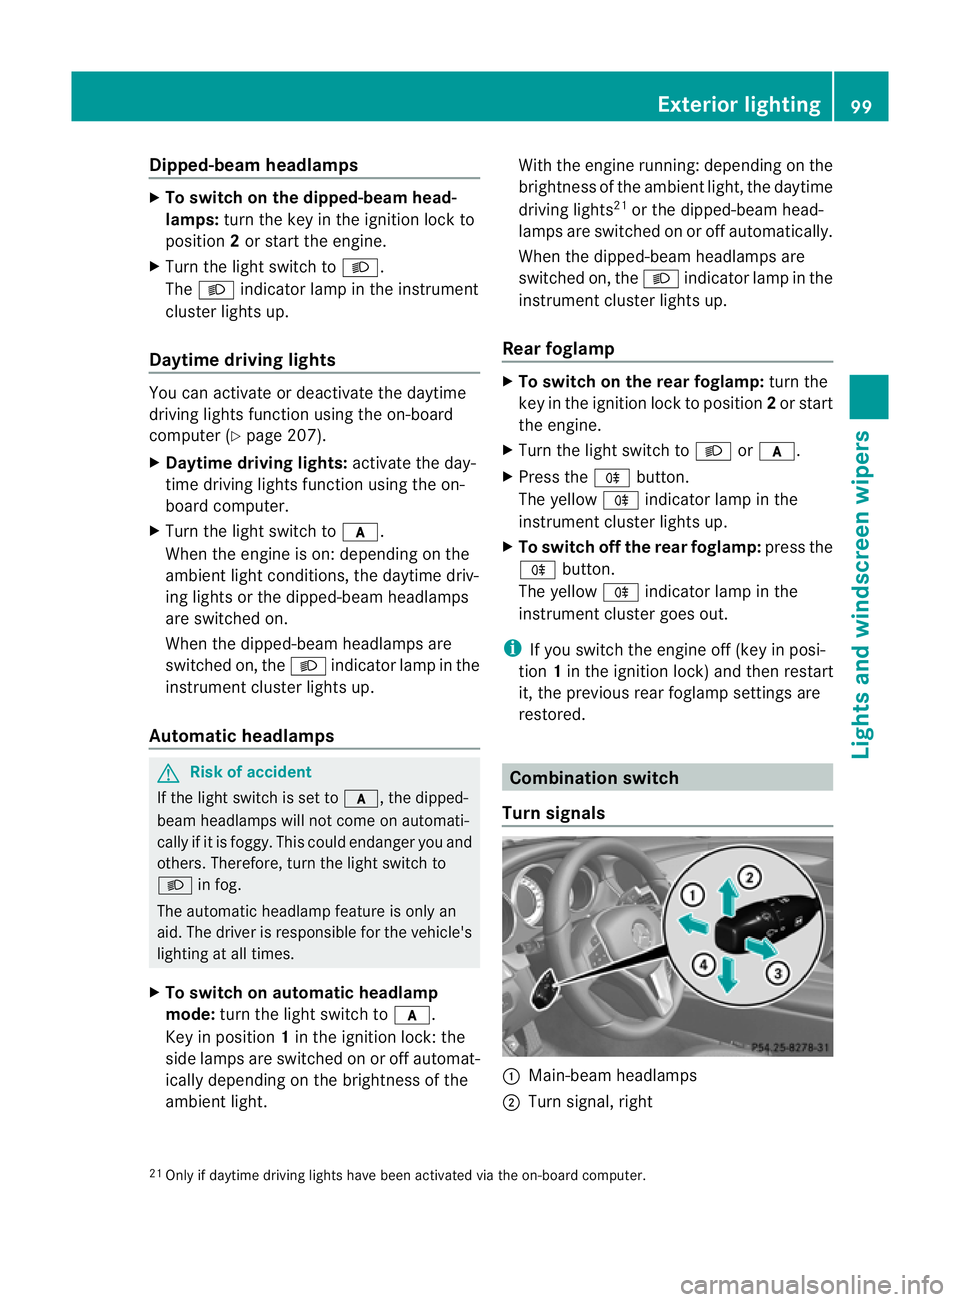
restored. Combination switch
Turn signals :
Main-beam headlamps
; Turn signal, right
21 Only if daytime driving lights have been activated via the on-board computer. Exterior lighting
99Lights and windscreen wipers Z
Page 103 of 337
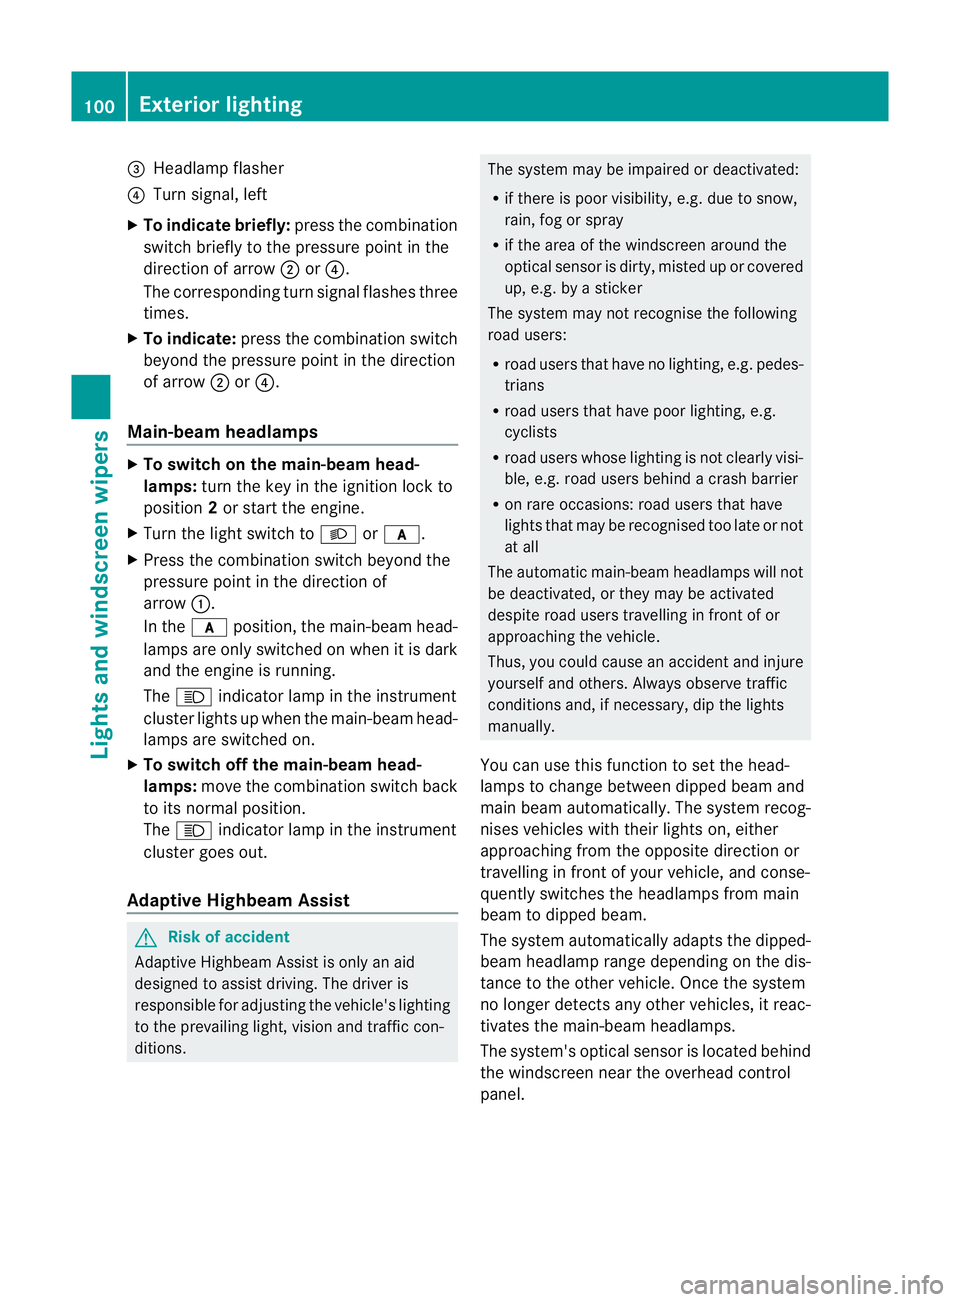
=
Headlamp flasher
? Turn signal, left
X To indicate briefly: press the combination
switch briefly to the pressure point in the
directio nofarrow;or?.
The corresponding turn signal flashes three
times.
X To indicate: press the combination switch
beyond the pressure point in the direction
of arrow ;or?.
Main-beam headlamps X
To switch on the main-beam head-
lamps: turn the key in the ignition lock to
position 2or start the engine.
X Turn the light switch to Lorc.
X Press the combination switch beyond the
pressure point in the direction of
arrow :.
In the cposition, the main-beam head-
lamps are only switched on when it is dark
and the engine is running.
The K indicator lamp in the instrument
cluster lights up when the main-beam head-
lamps are switched on.
X To switch off the main-beam head-
lamps: move the combination switch back
to its normal position.
The K indicator lamp in the instrument
cluster goes out.
Adaptive Highbeam Assist G
Risk of accident
Adaptive Highbeam Assist is only an aid
designed to assist driving. The drive ris
responsible for adjusting the vehicle's lighting
to the prevailing light, visio nand traffic con-
ditions. The system may be impaired or deactivated:
R if there is poor visibility, e.g .due to snow,
rain, fog or spray
R if the area of the windscree naround the
optical sensor is dirty, misted up or covered
up, e.g. by a sticker
The system may not recognise the following
road users:
R road users that have no lighting, e.g. pedes-
trians
R road users that have poor lighting, e.g.
cyclists
R road users whose lighting is not clearly visi-
ble, e.g. road users behind a crash barrier
R on rare occasions: road users that have
lights that may be recognised too late or not
at all
The automatic main-bea mheadlamps will not
be deactivated, or they may be activated
despite road users travelling in fron tofor
approaching the vehicle.
Thus, you could cause an acciden tand injure
yoursel fand others. Alway sobserve traffic
conditions and, if necessary, dip the lights
manually.
You can use this function to set the head-
lamps to change between dipped beam and
main beam automatically. The system recog-
nises vehicles with their lights on, either
approaching from the opposite direction or
travelling in fron tofyour vehicle, and conse-
quently switches the headlamps from main
beam to dipped beam.
The system automatically adapts the dipped-
beam headlamp range depending on the dis-
tance to the other vehicle. Once the system
no longer detects any other vehicles, it reac-
tivates the main-beam headlamps.
The system's optical sensor is located behind
the windscreen near the overhead control
panel. 100
Exterior lightingLights and windscreen wipers
Page 104 of 337
X
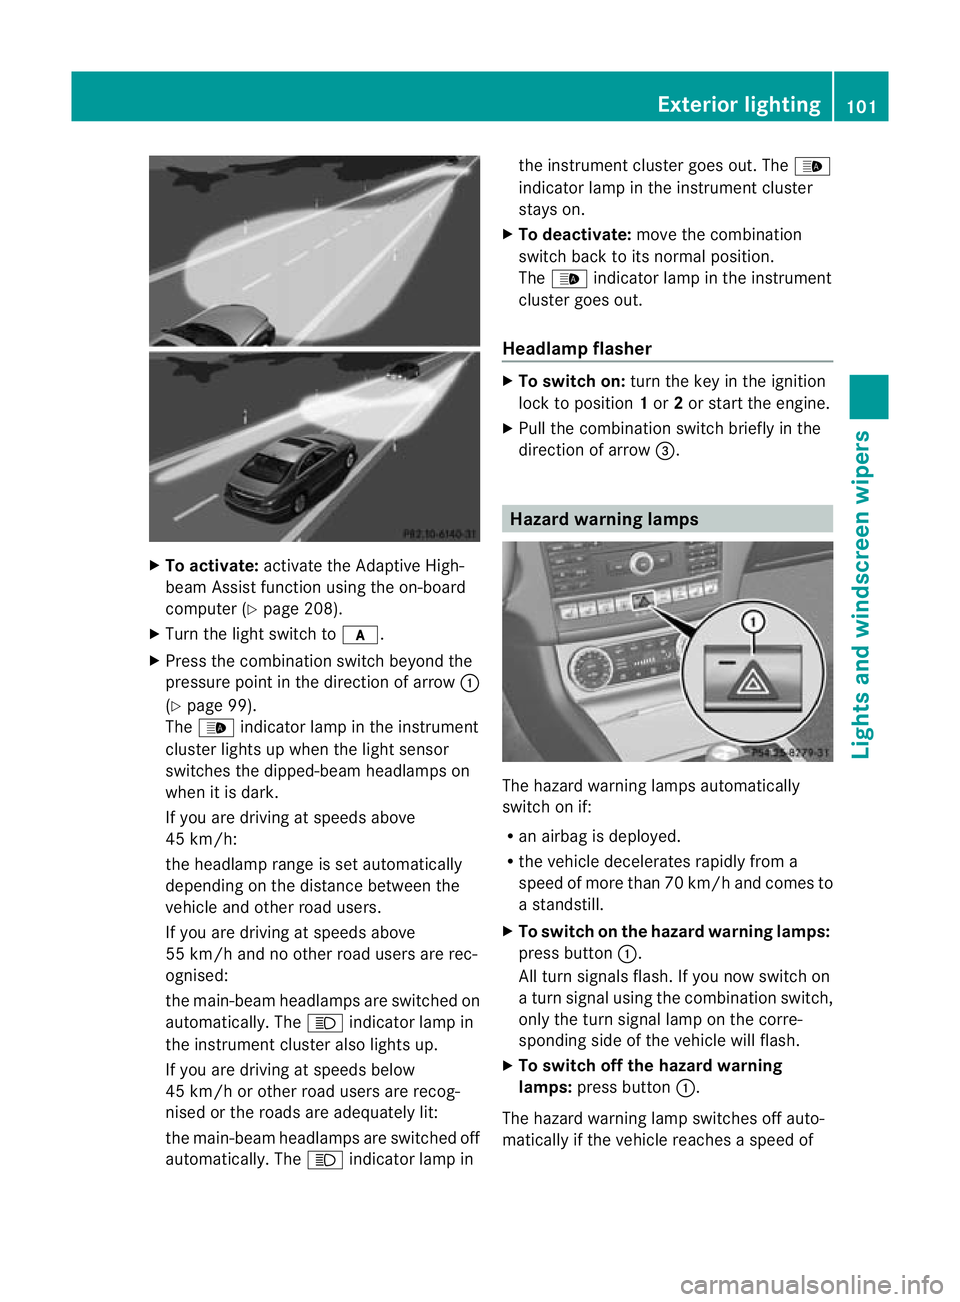
To activate: activate the Adaptive High-
beam Assist functio nusing the on-board
computer (Y page 208).
X Turn the light switch to c.
X Press the combination switch beyond the
pressure point in the direction of arrow :
(Y page 99).
The _ indicator lamp in the instrument
cluster lights up when the light sensor
switches the dipped-beam headlamps on
when it is dark.
If you are driving at speeds above
45 km/h:
the headlamp range is set automatically
depending on the distance between the
vehicle and other road users.
If you are driving at speeds above
55 km/h and no other road users are rec-
ognised:
the main-beam headlamps are switched on
automatically. The Kindicator lamp in
the instrument cluster also lights up.
If you are driving at speeds below
45 km/h or other road users are recog-
nised or the roads are adequately lit:
the main-beam headlamps are switched off
automatically. The Kindicator lamp in the instrument cluster goes out. The
_
indicator lamp in the instrument cluster
stays on.
X To deactivate: move the combination
switch back to its normal position.
The _ indicator lamp in the instrument
cluster goes out.
Headlamp flasher X
To switch on: turn the key in the ignition
lock to position 1or 2or start the engine.
X Pull the combination switch briefly in the
direction of arrow =. Hazard warning lamps
The hazard warning lamps automatically
switch on if:
R
an airbag is deployed.
R the vehicle decelerates rapidlyf rom a
speed of more than 70 km/h and comes to
a standstill.
X To switch on the hazard warnin glamps:
press button :.
All turn signals flash. If you now switch on
a turn signal using the combination switch,
only the turn signal lamp on the corre-
sponding side of the vehicle will flash.
X To switch off the hazard warning
lamps: press button :.
The hazard warning lamp switches off auto-
matically if the vehicle reaches a speed of Exterior lighting
101Lights and windscreen wipers Z