2010 MERCEDES-BENZ CLS-Class format
[x] Cancel search: formatPage 172 of 224

Selecting the Display Language
XSelect System Settings £ Language .
The list of languages appears. A R dot
indicates the current setting.XTo change the setting: Select another
language with the button n or ý on
the remote control.XPress the 9 button.
The rear-seat entertainment system
activates the selected language.
Switching the Display Design
XSelect System settings .XSelect Day Mode , Night Mode or
Automatic .
The ä icon indicates the current setting.XUse the n or ý button to select a
setting.
R Day Mode
The display remains set to day design.
R Night Mode
The display remains set to night design.
R Automatic
The display automatically switches
depending on the instrument cluster
lighting.XPress the 9 button on the remote control.Adjusting the Brightness XSelect System settings £
Brightness .
A scale appears.XTo set the brightness: Press the n or
ý button.
The brightness bar moves up or down. The
image dims or brightens according to the
bar position on the scale.XTo confirm the setting: Press the 9
button on the remote control.
Switching the Display Screen On/Off
Switching Off the Display
XSelect Display off from the system
menu.
Switching On the Display
XPress the 9 button on the remote control.
CD/DVD Audio and MP3 Operation
Safety Instructions
GWarning
The RSE CD/DVD player is a Class 1 laser
product. There is a danger of invisible laser
radiation when you open or damage the cover.
Do not remove the cover. The RSE CD/DVD
player does not contain any parts which can
be serviced by the user. For safety reasons,
have any necessary service work performed
by qualified personnel.
Notes on CDs/DVDs
Please refer to the chapter ”Audio” for
general information about CD/DVD disks and
on the MP3 format ( Y page 132) and
( Y page 130).
170CD/DVD Audio and MP3 OperationRear Seat Entertainment
Page 176 of 224

XTo pause playback: Select «.
The display « changes to X.XTo resume playback: Select X.
The display X changes to «.
Stop function
i This function is only available in audio
DVD mode.
XTo interrupt playback: Select ±.
The playback stops and jumps to the
beginning of the DVD.XTo resume playback: Select X.
The playback continues from the position
where it was stopped.
Setting the Audio Format
It is only possible to set the audio format in
DVD audio mode. The number of available
audio formats is dependent on the DVD. The
content of an audio DVD is called the ‘album’,
which can be divided into a maximum of nine
groups. A group may contain, for example,
music of different sound qualities (stereo and
multi-channel formats) or bonus tracks. Each
group can include up to 99 tracks. If a DVD
audio only comprises one audio format, the
“Group” menu item(s) cannot be selected.
XSelect DVD-A £ Group .
The list of available audio formats appears.
The R dot indicates the format currently
selected.XTo change a setting: Press n or ý
on the remote control.XPress 9 on the remote control.XTo exit the menu: Press , or . on
the remote control.Playback options
The following options are available:
R Normal Track Sequence
You will hear the tracks in the normal
sequence (e.g. track 1, 2, 3, etc.).
R Random Tracks:
You will hear the tracks in random order
(e.g. track 3, 8, 5, etc.).
R Random Folder (MP3 mode only)
The tracks in the currently active folder and
any subfolders are heard in random order.XTo select an option: Switch to CD or DVD-
A or MP3 mode ( Y page 171).XSelect CD or DVD-A or MP3 .
The option list appears. A R dot indicates
the option currently selected.XSelect an option.
The option is switched on. All options
except Normal Track Sequence will be
indicated in the main area.
i If you change the disk, the Normal
Track Sequence option is activated
automatically. If an option is selected, it
remains selected after the rear-seat
entertainment system is switched on or off.
Switching Track Information On/Off
(MP3 Mode Only)
If this function is switched on, folder and track
names are displayed.
If this function is switched off, disk and file
name are displayed.
XSelect Display Track Information .
The function is switched on Ç or off
c depending on the previous status.
DVD Video Operation
Please refer to the chapter ”Audio” for
general information about CD/DVD disks
174DVD Video OperationRear Seat Entertainment
Page 177 of 224

(Y page 132)and on the MP3 format
( Y page 130).
For Safety Instructions refer to section “CD/
DVD Audio and MP3 Operation” .
For special notes on DVDs and DVD playback
conditions refer to chapter “Video”
( Y page 156).
Functional Restrictions
Depending on the DVD, it is possible that
certain functions or actions described in this
section will be temporarily blocked or may not
function at all. As soon as you try to activate
these functions or actions, you will see icon
7 in the display.
Loading and Ejecting DVDs
XProceed as described in the "Audio CD/
DVD and MP3 mode" section .
Switching to DVD mode
XLoad a DVD Video disk.
The rear-seat entertainment system loads
the inserted disk.
The DVD is played according to the
playback options:
Either the film is started automatically or
the DVD menu appears that is stored on the
disk. In the latter case you must start the
film manually.XSelect Disc using the remote control.
DVD mode is activated.
The video DVD meets the playback
criteria: Either the film is started
automatically or the DVD menu appears
that is stored on the disk. In the latter case
you must start the film manually.XTo do so, select the corresponding menu
item in the DVD menu ( Y page 177).
i
If Disc operation was selected last, the
disk is played automatically after loading.
Hiding or Showing the Control Menu XTo display: Press n or ý on the
remote control.XTo hide: Press n or ý on the remote
control.
or
XWait for approximately 8 seconds.
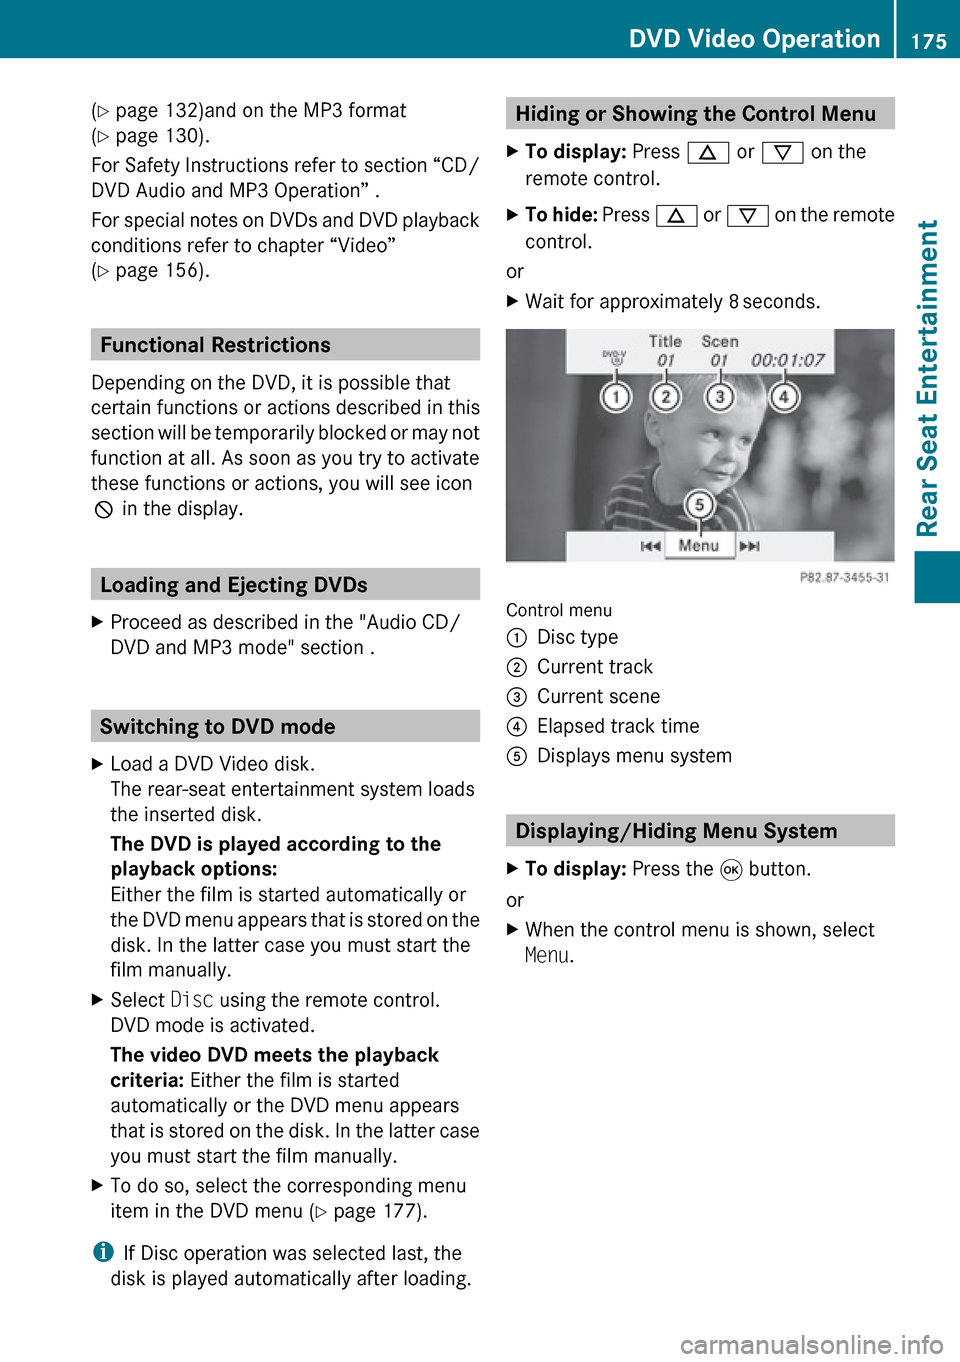
Control menu
1Disc type2Current track3Current scene4Elapsed track time5Displays menu system
Displaying/Hiding Menu System
XTo display: Press the 9 button.
or
XWhen the control menu is shown, select
Menu .DVD Video Operation175Rear Seat EntertainmentZ
Page 179 of 224

XSelect Title Selection in the menu.XTo call up the selection list: Press the
9 button.XSelect a film/track.
Selecting a Film/Track Directly
Example: selecting film 2
XPress number button 2.
After a short while, film 2 begins.
i Film selection may also be possible from
the DVD menu on the DVD itself.
Picture Settings
Adjusting the Brightness, Contrast or
Color
XDisplay the menu system if necessary
( Y page 175).XSelect DVD-V £ Brightness or
Contrast or Colour .XTo change setting: Press n or ý
until the desired setting has been attained.XTo store a setting: Press the 9 button.
Switching Picture Format
XDisplay the menu system if necessary
( Y page 175).XSelect DVD-V.
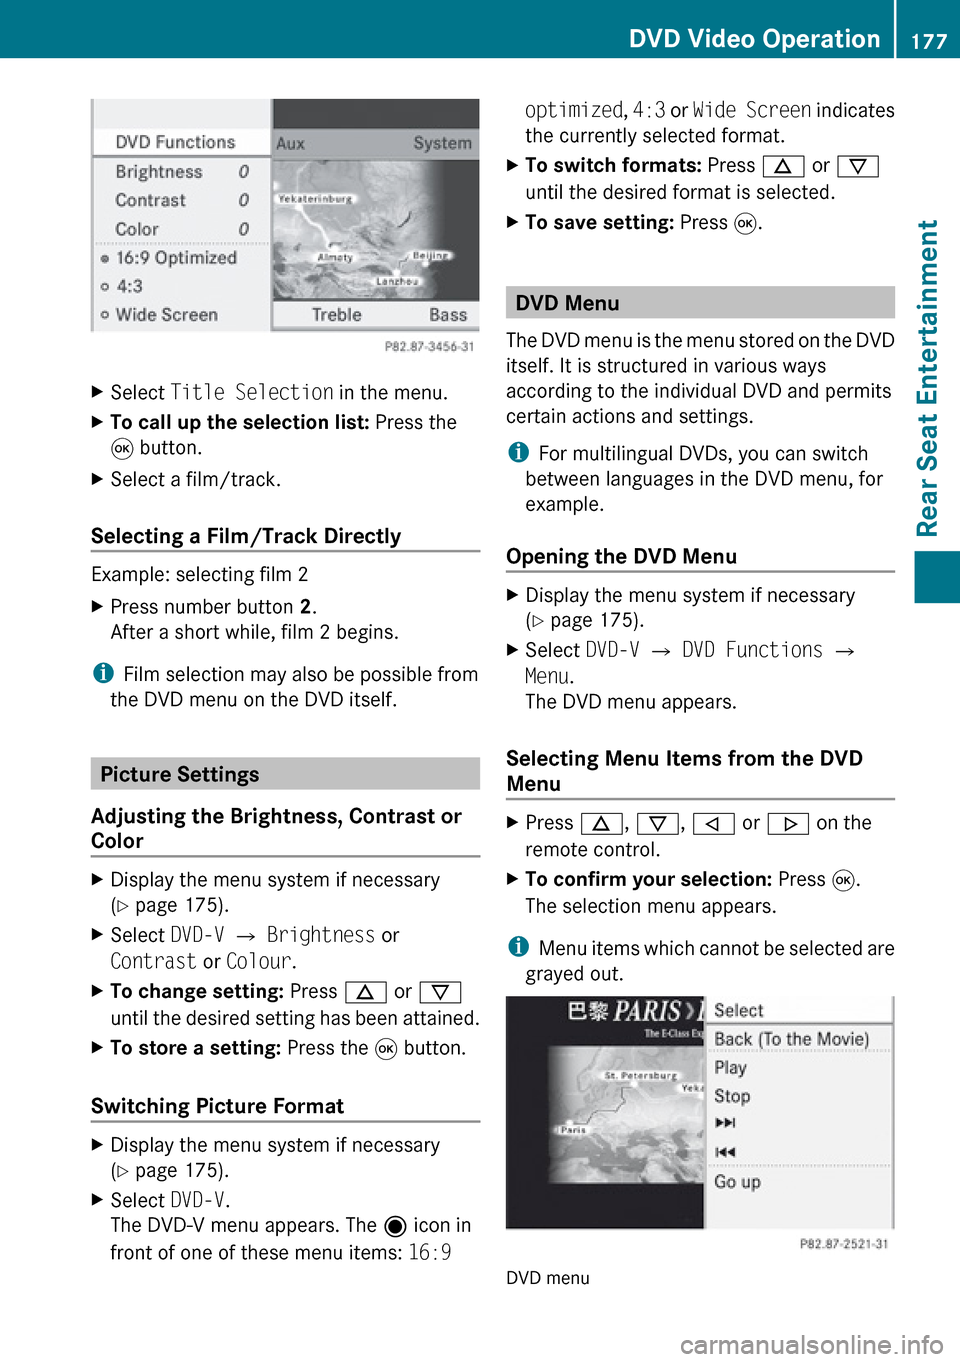
The DVD-V menu appears. The ä icon in
front of one of these menu items: 16:9 optimized, 4:3 or Wide Screen indicates
the currently selected format.XTo switch formats: Press n or ý
until the desired format is selected.XTo save setting: Press 9.
DVD Menu
The DVD menu is the menu stored on the DVD
itself. It is structured in various ways
according to the individual DVD and permits
certain actions and settings.
i For multilingual DVDs, you can switch
between languages in the DVD menu, for
example.
Opening the DVD Menu
XDisplay the menu system if necessary
( Y page 175).XSelect DVD-V £ DVD Functions £
Menu .
The DVD menu appears.
Selecting Menu Items from the DVD
Menu
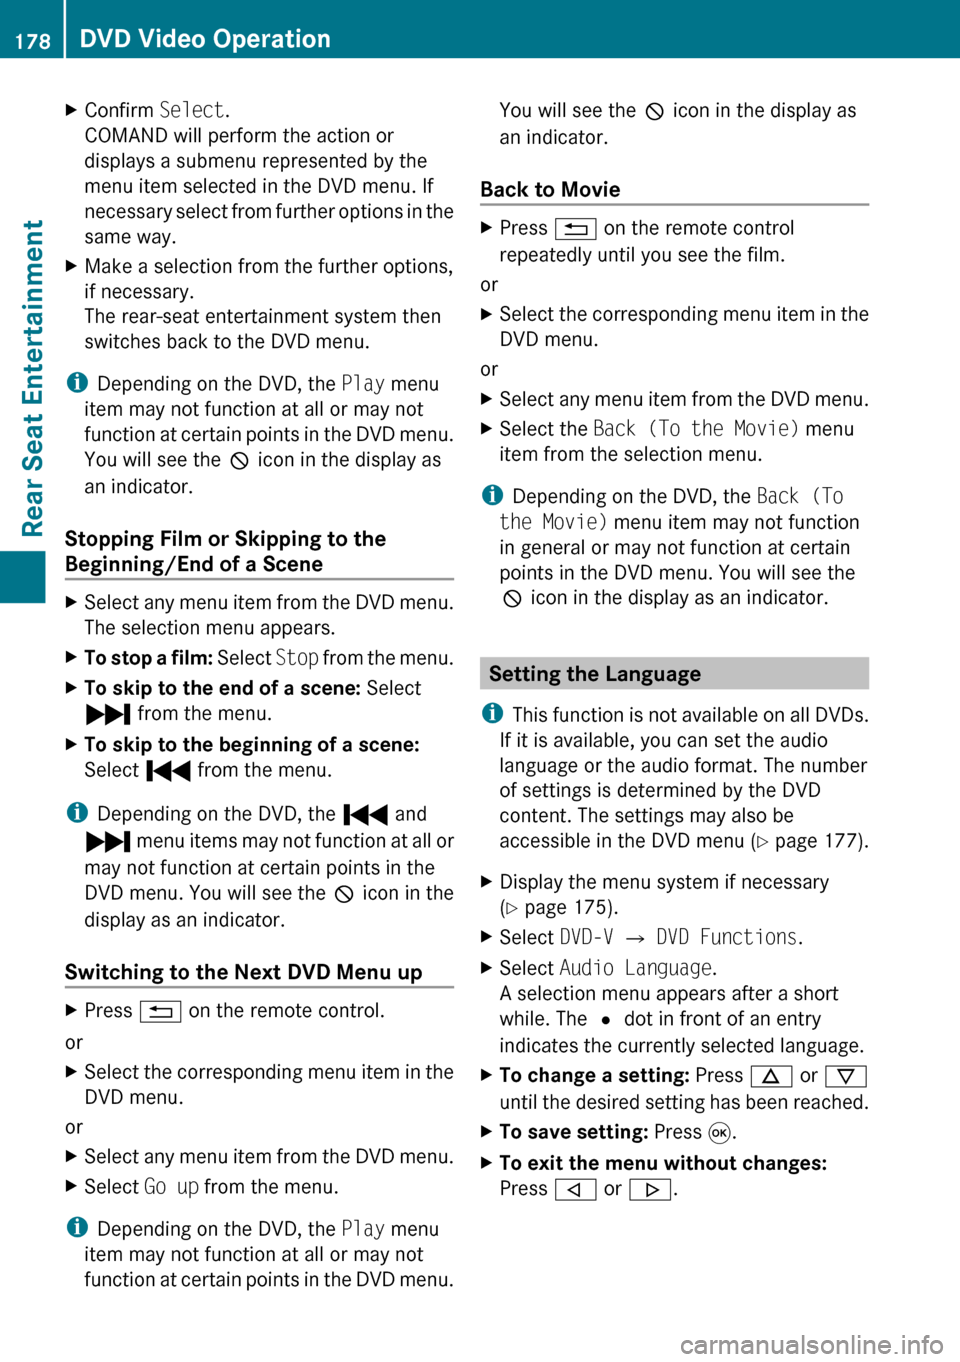
XPress n, ý , , or . on the
remote control.XTo confirm your selection: Press 9.
The selection menu appears.
i Menu items which cannot be selected are
grayed out.
DVD menu
DVD Video Operation177Rear Seat EntertainmentZ
Page 180 of 224

XConfirm Select.
COMAND will perform the action or
displays a submenu represented by the
menu item selected in the DVD menu. If
necessary select from further options in the
same way.XMake a selection from the further options,
if necessary.
The rear-seat entertainment system then
switches back to the DVD menu.
i Depending on the DVD, the Play menu
item may not function at all or may not
function at certain points in the DVD menu.
You will see the 7 icon in the display as
an indicator.
Stopping Film or Skipping to the
Beginning/End of a Scene
XSelect any menu item from the DVD menu.
The selection menu appears.XTo stop a film: Select Stop from the menu.XTo skip to the end of a scene: Select
Ô from the menu.XTo skip to the beginning of a scene:
Select Ó from the menu.
i
Depending on the DVD, the Ó and
Ô menu items may not function at all or
may not function at certain points in the
DVD menu. You will see the 7 icon in the
display as an indicator.
Switching to the Next DVD Menu up
XPress % on the remote control.
or
XSelect the corresponding menu item in the
DVD menu.
or
XSelect any menu item from the DVD menu.XSelect Go up from the menu.
i
Depending on the DVD, the Play menu
item may not function at all or may not
function at certain points in the DVD menu.
You will see the 7 icon in the display as
an indicator.
Back to MovieXPress % on the remote control
repeatedly until you see the film.
or
XSelect the corresponding menu item in the
DVD menu.
or
XSelect any menu item from the DVD menu.XSelect the Back (To the Movie) menu
item from the selection menu.
i Depending on the DVD, the Back (To
the Movie) menu item may not function
in general or may not function at certain
points in the DVD menu. You will see the
7 icon in the display as an indicator.
Setting the Language
i This function is not available on all DVDs.
If it is available, you can set the audio
language or the audio format. The number
of settings is determined by the DVD
content. The settings may also be
accessible in the DVD menu ( Y page 177).
XDisplay the menu system if necessary
( Y page 175).XSelect DVD-V £ DVD Functions .XSelect Audio Language .
A selection menu appears after a short
while. The R dot in front of an entry
indicates the currently selected language.XTo change a setting: Press n or ý
until the desired setting has been reached.XTo save setting: Press 9.XTo exit the menu without changes:
Press , or . .178DVD Video OperationRear Seat Entertainment
Page 181 of 224

Subtitles and Camera Angle
i These functions are not available on all
DVDs. The number of subtitle languages
and camera angles available depends on
the content of the DVD. It is possible that
the settings may also be accessed in the
DVD menu.XDisplay the menu system if necessary
( Y page 175).XSelect DVD-V £ DVD functions .XSelect Subtitles or Camera angle .
Both of these will call up a selection menu
after a few seconds. The R dot in front of
an entry indicates the current setting.XTo change a setting: Press n or ý
until the desired setting has been attained.XTo save setting: Press 9.XTo exit the menu without changes:
Press , or . .
Interactive Content
DVDs can also contain interactive content
(e.g. a video game). In a video game, you may
be able to influence events by selecting and
triggering actions. The type and number of
actions depend on the DVD.
XTo select an action: Press n,
ý , , or . on the remote control.XTo trigger an action: Press 9 on the
remote control.
A menu appears and the first entry,
Select , is highlighted.XPress 9 on the remote control.
Aux Operation
i You can connect two external video
sources to the display screens (Display
Aux) and additionally one video source to
the DVD drive (Drive Aux).
For further information on external video
sources please refer to the operating guide
of the device.
Connecting an Aux Source
Drive Aux
The Aux connectors of the drive are beside
the Eject button on the front panel of the DVD
drive .
Display Aux
The display Aux jacks are located on the side
of the screen .
Connecting an Audio or Video Source
XInsert the audio jacks for the left and the
right signal into the respective connectors
labeled L and R.XInsert the video jack (yellow) into the
connector with the V label.
Switching to Aux Mode
Disk Drive Aux
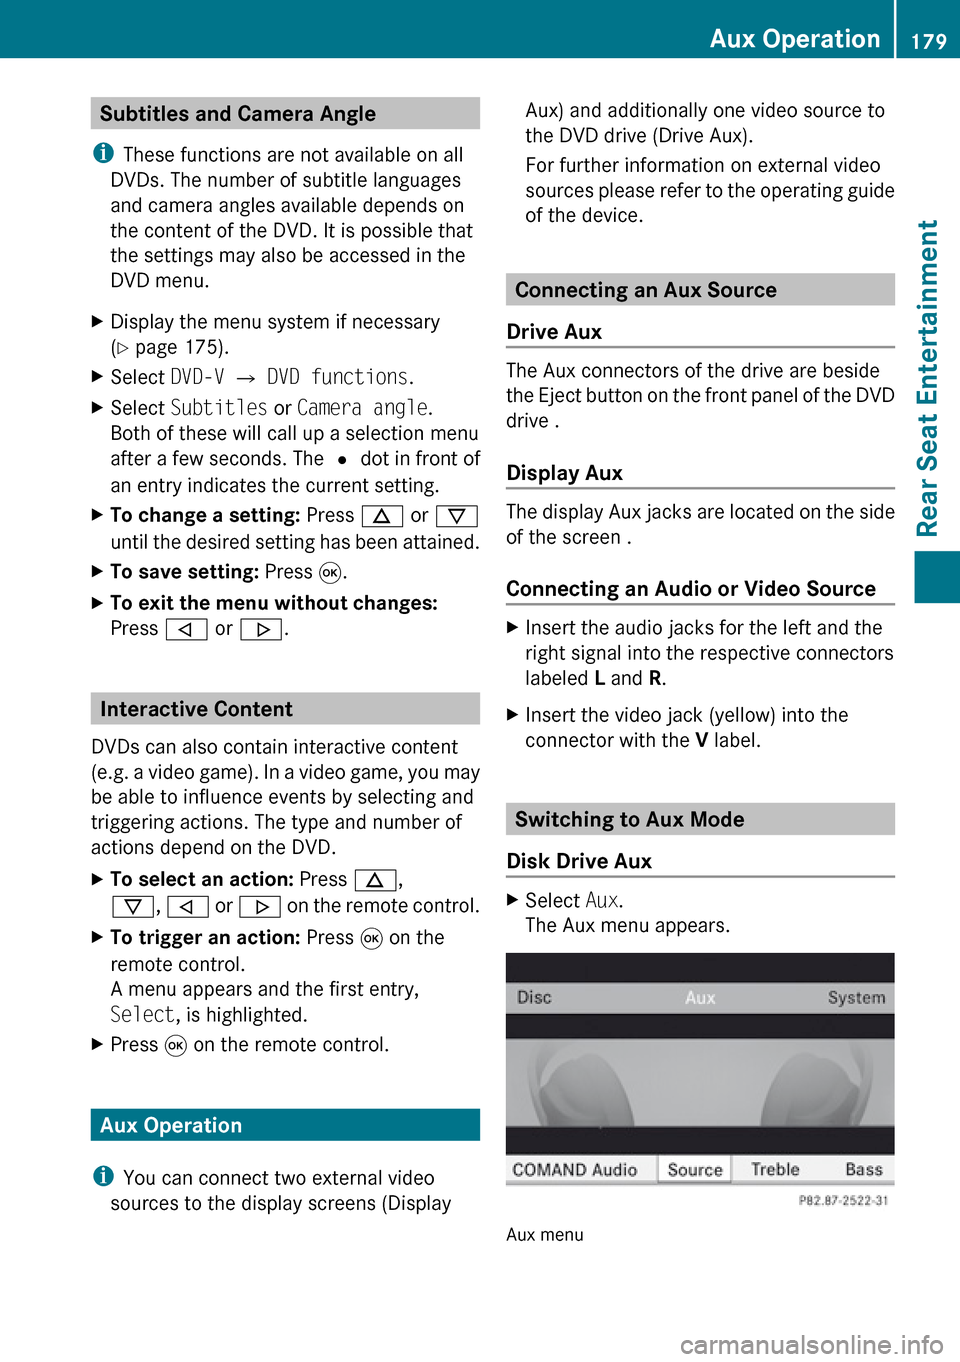
XSelect Aux.
The Aux menu appears.
Aux menu
Aux Operation179Rear Seat EntertainmentZ
Page 183 of 224

Changing the Picture Format XIn the AUX menu, select Display Aux or
Drive Aux .
The ä icon in front of one of these menu
items: 16:9 optimized , 4:3 or Wide
Screen indicates the currently selected
format.XTo switch formats: Press n or ý
until the desired format is selected.XTo save setting: Press 9.Aux Operation181Rear Seat EntertainmentZ
Page 186 of 224

Overview
Operating Safety
GWarning!
Please devote your attention first and
foremost to the traffic situation you are in.
While the system permits hands-free phone
operation, attention to traffic may be diverted
not only by physical operation of a phone, but
also by the distraction of a phone
conversation while driving. As such, for safety
reasons, we encourage the driver to stop the
vehicle in a safe place before answering or
placing a phone call.
For safety reasons, you should only select a
destination when the vehicle is stationary.
While the navigation system provides
directional assistance, the driver must remain
focused on safe driving behavior, especially
pay attention to traffic and street signs, and
should utilize the system’s audio cues while
driving.
The navigation system does not supply any
information on stop signs, yield signs, traffic
regulations or traffic safety rules. Their
observance always remains in the driver’s
personal responsibility. DVD maps do not
cover all areas nor all routes within an area.
Traffic regulations always have priority over
any route recommendations given.
Bear in mind that at a speed of just 30 mph
(approximately 50 km/h), your vehicle is
covering a distance of 44 feet (approximately
14 m) every second.
GWarning
Navigation announcements are intended to
direct you while driving without diverting your
attention from the road and driving.
Please always use this feature instead of
consulting the map display for directions.
Consulting the symbols or map display for
directions may cause you to divert your
attention from driving and increase your risk
of an accident.
GWarning!
Please do not use the Voice Control System
in an emergency, as the tone of your voice
may change in a stressful situation. This could
cause a delay in completing your phone call
in a timely manner. This could distract you in
an emergency situation and cause you to be
involved in an accident.
Vehicle Equipment
i This Operator’s Manual describes all
features, standard or optional, potentially
available for your vehicle at the time of
purchase. Please be aware that your
vehicle might not be equipped with all
features described in this manual.
Symbols Only Used in this Chapter
The following symbols indicate:
sthat you have to say somethingtthat there is a voice output from the
voice controluthat the system shows information on
the display.
Usage
You can use the voice control system to
operate the following systems depending on
the equipment in your vehicle:
R Phone
R Navigation
R Address book
R Audio (radio, satellite radio, DVD changer,
memory card, music register)
Say the commands without pausing between
individual words. If you enter a command that
does not exist or is incorrect, the voice
control system asks you for a new command
with “Please repeat” or “Please repeat your
184OverviewVoice Control