2010 MERCEDES-BENZ CL63AMG steering
[x] Cancel search: steeringPage 336 of 500

look through the windshield. You are always
responsible for safety and must drive in
accordance with traffic conditions.
Otherwise, you could endanger yourself and
others.
The system may be impaired or unavailable
when
R
visibility is poor, e.g. due to snow, rain, fog,
or heavy spray
R the camera area of the windshield is dirty,
fogged up or covered by a sticker for
example
R driving through curves or on inclines or
declines G
Warning!
The Night View Assist cannot record objects
immediately in front of or next to the vehicle.
When maneuvering, continue to look through
the windshield. Make sure no persons or
animals are in the area in which you are
maneuvering. You could otherwise injure
them.
The Night View Assist image in the
multifunction display is not impaired by the
headlamps of approaching vehicles.
As a result, you can better follow the course
of the road and detect obstacles earlier on.
i Infrared light is invisible to the human eye
and thus does not blind. The Night View
Assist can remain switched on
permanently even with oncoming traffic
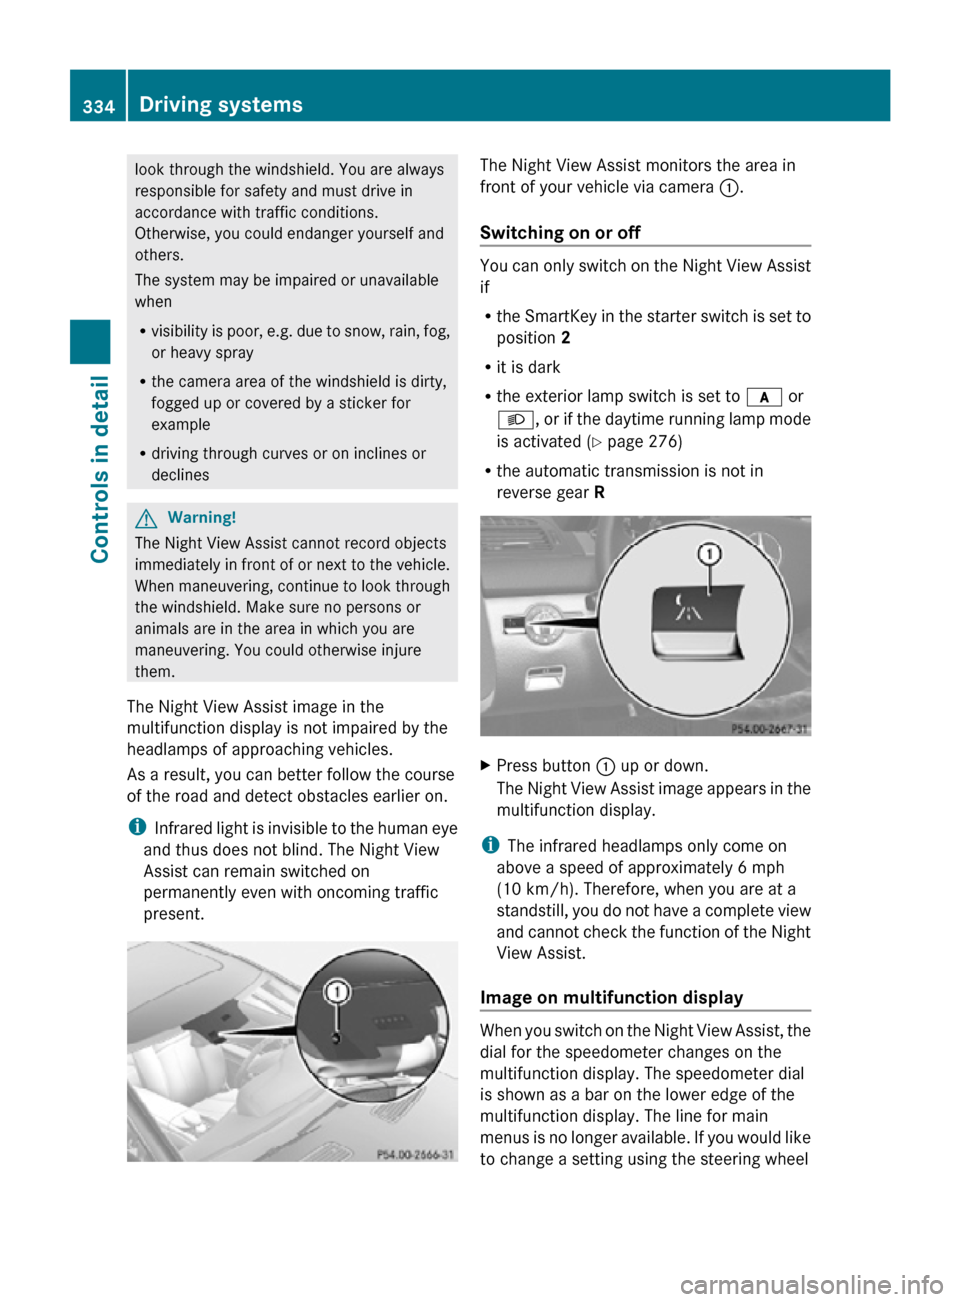
present. The Night View Assist monitors the area in
front of your vehicle via camera
:.
Switching on or off You can only switch on the Night View Assist
if
R
the SmartKey in the starter switch is set to
position 2
R it is dark
R the exterior lamp switch is set to c or
L, or if the daytime running lamp mode
is activated ( Y page 276)
R the automatic transmission is not in
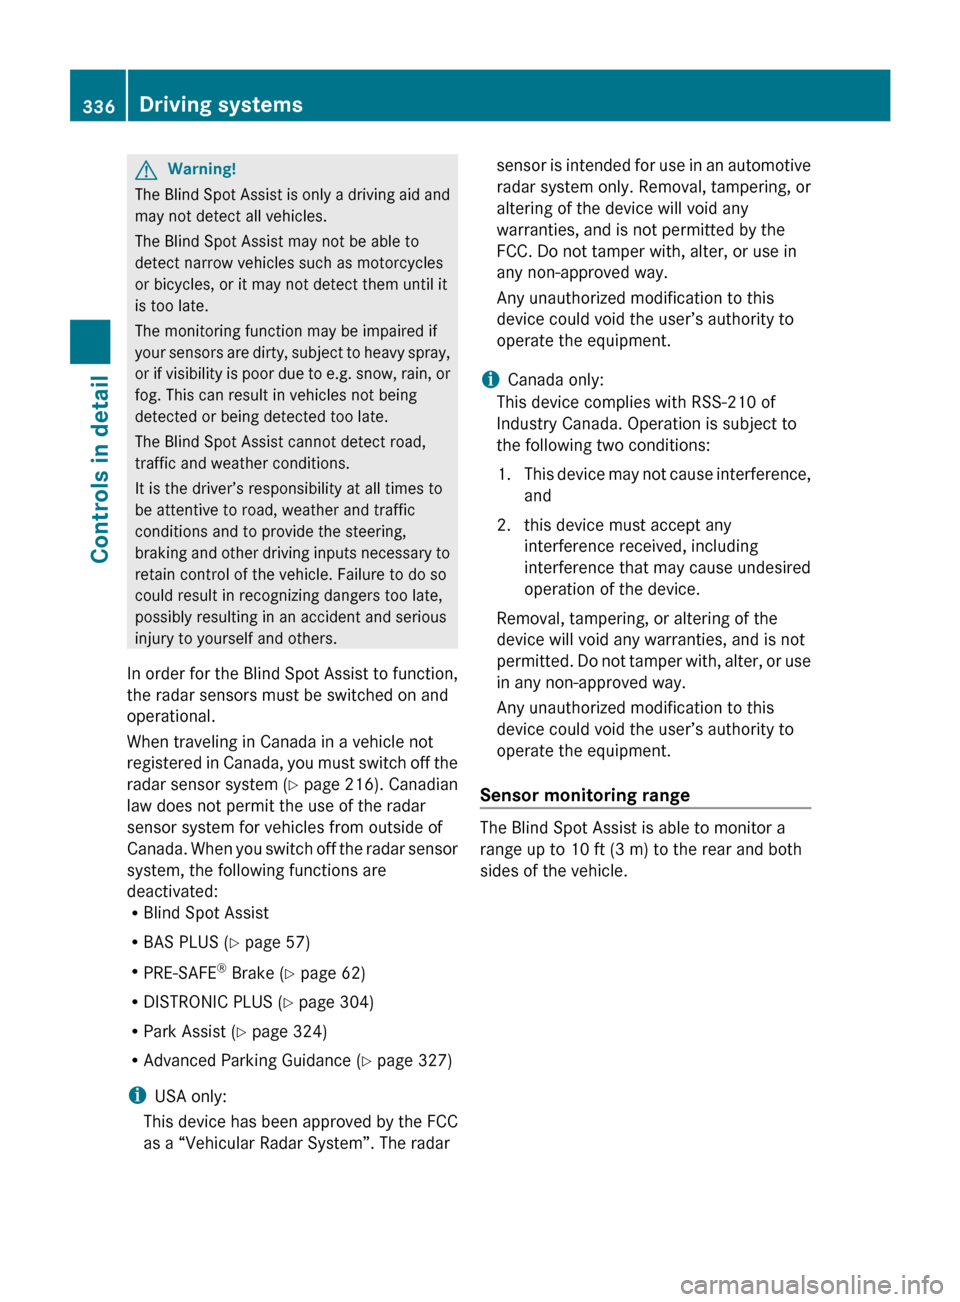
reverse gear R X
Press button : up or down.
The Night View Assist image appears in the
multifunction display.
i The infrared headlamps only come on
above a speed of approximately 6 mph
(10 km/h). Therefore, when you are at a
standstill, you do not have a complete view
and cannot check the function of the Night
View Assist.
Image on multifunction display When you switch on the Night View Assist, the
dial for the speedometer changes on the
multifunction display. The speedometer dial
is shown as a bar on the lower edge of the
multifunction display. The line for main
menus is no longer available. If you would like
to change a setting using the steering wheel334
Driving systemsControls in detail
216_AKB; 3; 90, en-US
d2ureepe,
Version: 2.11.8.1 2009-05-15T11:47:50+02:00 - Seite 334
Page 338 of 500

G
Warning!
The Blind Spot Assist is only a driving aid and
may not detect all vehicles.
The Blind Spot Assist may not be able to
detect narrow vehicles such as motorcycles
or bicycles, or it may not detect them until it
is too late.
The monitoring function may be impaired if
your sensors
are dirty, subject to heavy spray,
or if visibility is poor due to e.g. snow, rain, or
fog. This can result in vehicles not being
detected or being detected too late.
The Blind Spot Assist cannot detect road,
traffic and weather conditions.
It is the driver’s responsibility at all times to
be attentive to road, weather and traffic
conditions and to provide the steering,
braking and other driving inputs necessary to
retain control of the vehicle. Failure to do so
could result in recognizing dangers too late,
possibly resulting in an accident and serious
injury to yourself and others.
In order for the Blind Spot Assist to function,
the radar sensors must be switched on and
operational.
When traveling in Canada in a vehicle not
registered in Canada, you must switch off the
radar sensor system ( Y page 216). Canadian
law does not permit the use of the radar
sensor system for vehicles from outside of
Canada. When you switch off the radar sensor
system, the following functions are
deactivated:
R Blind Spot Assist
R BAS PLUS (Y page 57)
R PRE-SAFE ®
Brake (Y page 62)
R DISTRONIC PLUS (Y page 304)
R Park Assist ( Y page 324)
R Advanced Parking Guidance ( Y page 327)
i USA only:
This device has been approved by the FCC
as a “Vehicular Radar System”. The radar sensor is intended for use in an automotive
radar system only. Removal, tampering, or
altering of the device will void any
warranties, and is not permitted by the
FCC. Do not tamper with, alter, or use in
any non-approved way.
Any unauthorized modification to this
device could void the user’s authority to
operate the equipment.
i Canada only:
This device complies with RSS-210 of
Industry Canada. Operation is subject to
the following two conditions:
1. This device
may not cause interference,
and
2. this device must accept any interference received, including
interference that may cause undesired
operation of the device.
Removal, tampering, or altering of the
device will void any warranties, and is not
permitted. Do not tamper with, alter, or use
in any non-approved way.
Any unauthorized modification to this
device could void the user’s authority to
operate the equipment.
Sensor monitoring range The Blind Spot Assist is able to monitor a
range up to 10 ft (3 m) to the rear and both
sides of the vehicle.336
Driving systems
Controls in detail
216_AKB; 3; 90, en-US
d2ureepe,
Version: 2.11.8.1 2009-05-15T11:47:50+02:00 - Seite 336
Page 339 of 500

G
Warning!
The Blind Spot Assist monitors certain areas
in the immediate vicinity of your vehicle.
Vehicles approaching and passing at speeds
that exceed the speed of your vehicle
significantly will not be detected. There will be
no warning display and no audible warning.
When driving in a very wide lane, the sensors
may not be able to cover the entire width of
the neighboring lane. Vehicles driving on the
outside of the neighboring lane may not be
detected.
It is the driver’s responsibility at all times to
be attentive to road, weather and traffic
conditions and to provide the steering,
braking and other driving inputs necessary to
retain control of the vehicle. Failure to do so
could result in recognizing dangers too late,
possibly resulting in an accident and serious
injury to yourself and others.
When driving in a very narrow lane, the
sensors may detect and display vehicles in the
second lane over. This will be the case if there
are vehicles driving on the inside edge of their
lane.
The system may issue causeless warnings in
the area of guardrails or similar structural
boundaries.
The Blind Spot Assist sensors are built into
the front and rear bumpers. Make sure that the area of the bumpers around the sensors
is free of dirt, ice and snow. The radar sensors
must not be obstructed, for example, by
bicycle carriers or overhanging luggage.
!
In the event of a significant impact or
damage affecting the bumpers, have the
radar sensors checked by a qualified
specialist workshop such as a Mercedes-
Benz Center. Failure to do this can result in
Blind Spot Assist not functioning correctly.
Indicator and warning lamps Exterior rear view mirror, driver’s side
X
Make sure that the radar sensors
(Y page 216) and Blind Spot Assist
(Y page 213) are switched on.
X Switch on the ignition.
Red warning lamps : in the exterior rear
view mirrors come on.
X Start the engine.
Yellow indicator lamps : in the exterior
rear view mirrors come on up to a speed of
20 mph (30 km/h).
Above a speed of 20 mph (30 km/h), yellow
indicator lamps : go out and the Blind Spot
Assist is active. If the Blind Spot Assist
detects a vehicle in its range, red warning
lamp : on the corresponding side of the
vehicle comes on.
When you shift the automatic transmission in
reverse gear R, yellow indicator lamps : in
the exterior rear view mirrors goes out after
approximately 3 seconds. The Blind Spot
Assist is then not active. Driving systems
337Controls in detail
216_AKB; 3; 90, en-US
d2ureepe, Version: 2.11.8.1 2009-05-15T11:47:50+02:00 - Seite 337 Z
Page 340 of 500

The brightness of indicator lamps/warning
lamps
: is controlled automatically
depending on the brightness of the ambient
light. G
Warning!
The Blind Spot Assist is not active at speeds
below approximately 20 mph (30 km/h). The
yellow indicator lamps in the exterior rear
view mirrors are illuminated. You will not be
alerted to the presence of vehicles in the
monitored area at these speeds.
It is the driver’s responsibility at all times to
be attentive to road, weather and traffic
conditions and to provide the steering,
braking and other driving inputs necessary to
retain control of the vehicle. Failure to do so
could result in recognizing dangers too late,
possibly resulting in an accident and serious
injury to yourself and others. Collision warning If a vehicle is detected in the Blind Spot Assist
range and you activate the turn signal, a two-
tone warning will sound once. Red warning
lamp
: on the corresponding side of the
vehicle will flash. G
Warning!
Do not change lanes or make turns, while red
warning lamp : is flashing. Doing so could
result in an accident and serious injury to
yourself and others.
X Remain on the lane that you are currently
on until traffic conditions permit to change.
If the turn signal remains on, red warning
lamp : will flash to indicate that vehicles
have been detected. No further audible
warnings will sound. Climate control system
Control panel
Function Recommendation/Notes
1
Air distribution and
air volume, driver’s
side (automatic
mode) i
Switch on the automatic mode. The
indicator lamp in button à comes on. (Y page 341)
2
Temperature
control, driver’s side i
Set the temperature to 72‡ (22†). (Y page 341)338
Climate control systemControls in detail
216_AKB; 3; 90, en-US
d2ureepe,
Version: 2.11.8.1 2009-05-15T11:47:50+02:00 - Seite 338
Page 356 of 500

Shortly after the completion of your Tele Aid
acquaintance call, you will receive a user ID
and password in the mail. You may use this
password to access the Tele Aid section in
“Owner’s
Online”
at www.mbusa.com (USA
only). The “My Tele Aid” section will give you
access to account information, remote door
unlock and more.
The Tele Aid system is available if
R it has been activated and is operational.
Activation requires a subscription for
monitoring services, connection and
cellular air time
R vehicle battery power is available
R the relevant cellular phone network and
GPS signals are available and pass the
information on to the Customer Assistance
Center
i Location of the vehicle on a map is only
possible if the vehicle is able to receive
signals from the GPS satellite network and
pass the information on to the Customer
Assistance Center.
The Tele Aid system ( Telematic Alarm Identification on Demand)
The Tele Aid system consists of three types
of response:
R Automatic and manual emergency
R Roadside Assistance
R Information
To adjust the speaker volume during a Tele
Aid call do the following:
X Press button W or X on the
multifunction steering wheel.
or
X Use the COMAND volume thumbwheel
H on the lower part of the front center
console (Y page 76).
Be sure to check “Owner’s Online” at
www.mbusa.com (USA only) for more information and a description of all available
features.
System self-test The system performs a self-test after you
have switched on the ignition.
G
Warning!
A malfunction in the system has been
detected if any or all of the following
conditions occur:
R The indicator lamp in the SOS button does
not come on during the system self-test.
R The indicator lamp in Roadside Assistance
button º does not come on during the
system self-test.
R The indicator lamp in Information button
E does not come on during the system
self-test.
R The indicator lamp in the SOS button,
Roadside Assistance button º, or
Information button E remains
illuminated constantly in red after the
system self-test.
R The message Tele Aid Inoperative or
Tele Aid Not Activated appears in the
multifunction display
after the system self-
test
If a malfunction is indicated as outlined above,
the system may not operate as expected. In
case of an emergency, help will have to be
summoned by other means.
Have the system checked at the nearest
Mercedes-Benz Center or contact the
Customer Assistance Center at
1-800-FOR-MERCedes (1-800-367-6372)
(USA only) or 1-888-923-8367 (Canada only)
as soon as possible.
Emergency calls !
In order
to activate the Tele Aid system, a
subscriber agreement must be completed.
To ensure your system is activated and
operational, please press Information 354
Useful features
Controls in detail
216_AKB; 3; 90, en-US
d2ureepe,
Version: 2.11.8.1 2009-05-15T11:47:50+02:00 - Seite 354
Page 358 of 500

X
Wait for a voice connection to the
Customer Assistance Center.
X Close cover ; after the emergency call is
concluded. G
Warning!
If you feel at any way in jeopardy when in the
vehicle (e.g. smoke or fire in the vehicle,
vehicle in a dangerous road location), please
do not wait for voice contact after you have
pressed the emergency button. Carefully
leave the vehicle and move to a safe location.
The Customer Assistance Center will
automatically contact local emergency
officials with the vehicle’s approximate
location if they receive an automatic SOS
signal and cannot make voice contact with the
vehicle occupants.
X Terminating calls: Press button ~ on
the multifunction steering wheel.
or
X Press the respective button for ending a
telephone call on the telephone keypad.
Roadside Assistance button X
Open the storage tray (Y page 349). X
Press and hold Roadside Assistance
button : for longer than 2 seconds.
A call to a Mercedes-Benz Roadside
Assistance dispatcher will be initiated. The
indicator lamp in Roadside Assistance
button : will flash while the call is in
progress. The message Connecting Call will appear in the multifunction
display.
Roadside Assistance
Activated appears in the COMAND
Display. The audio system or the COMAND
system is muted.
When the connection is established, the
message Call Connected appears in the
multifunction display. Roadside
Assistance Activated appears in the
COMAND display. The Tele Aid system will
transmit data generating the vehicle
identification number, model, color and
location (subject to availability of cellular and
GPS signals).
i The COMAND system display indicates
that a Tele Aid call is in progress. While the
call is connected you can change to the
navigation menu by pressing shortcut
button S. Spoken commands are not
available.
A voice connection between the Roadside
Assistance dispatcher and the occupants of
the vehicle will be established.
X Describe the nature of the need for
assistance.
The Mercedes-Benz Roadside Assistance
dispatcher will either dispatch a qualified
Mercedes-Benz technician or arrange to tow
your vehicle to the nearest authorized
Mercedes-Benz Center. For services such as
labor and/or towing, charges may apply.
Refer to the Roadside Assistance manual for
more information.
Sign and Drive services (USA only):
Services such as a jump start, a few gallons
of fuel or the replacement of a flat tire with
the vehicle spare wheel are obtainable at no
charge.
i If the indicator lamp in Roadside
Assistance button : is flashing
continuously and there was no voice
connection to the Customer Assistance
Center established, then the Tele Aid
system could not initiate a Roadside
Assistance call (e.g. the relevant cellular 356
Useful featuresControls in detail
216_AKB; 3; 90, en-US
d2ureepe,
Version: 2.11.8.1 2009-05-15T11:47:50+02:00 - Seite 356
Page 359 of 500

phone network is not available). The
message
Call Failed appears in the
multifunction display. Call could not
be connected! appears in the COMAND
display. Confirm the message pressing W
(Y page 71).
X Terminating calls: Press button ~ on
the multifunction steering wheel.
or
X Press the respective button for ending a
telephone call on the telephone keypad.
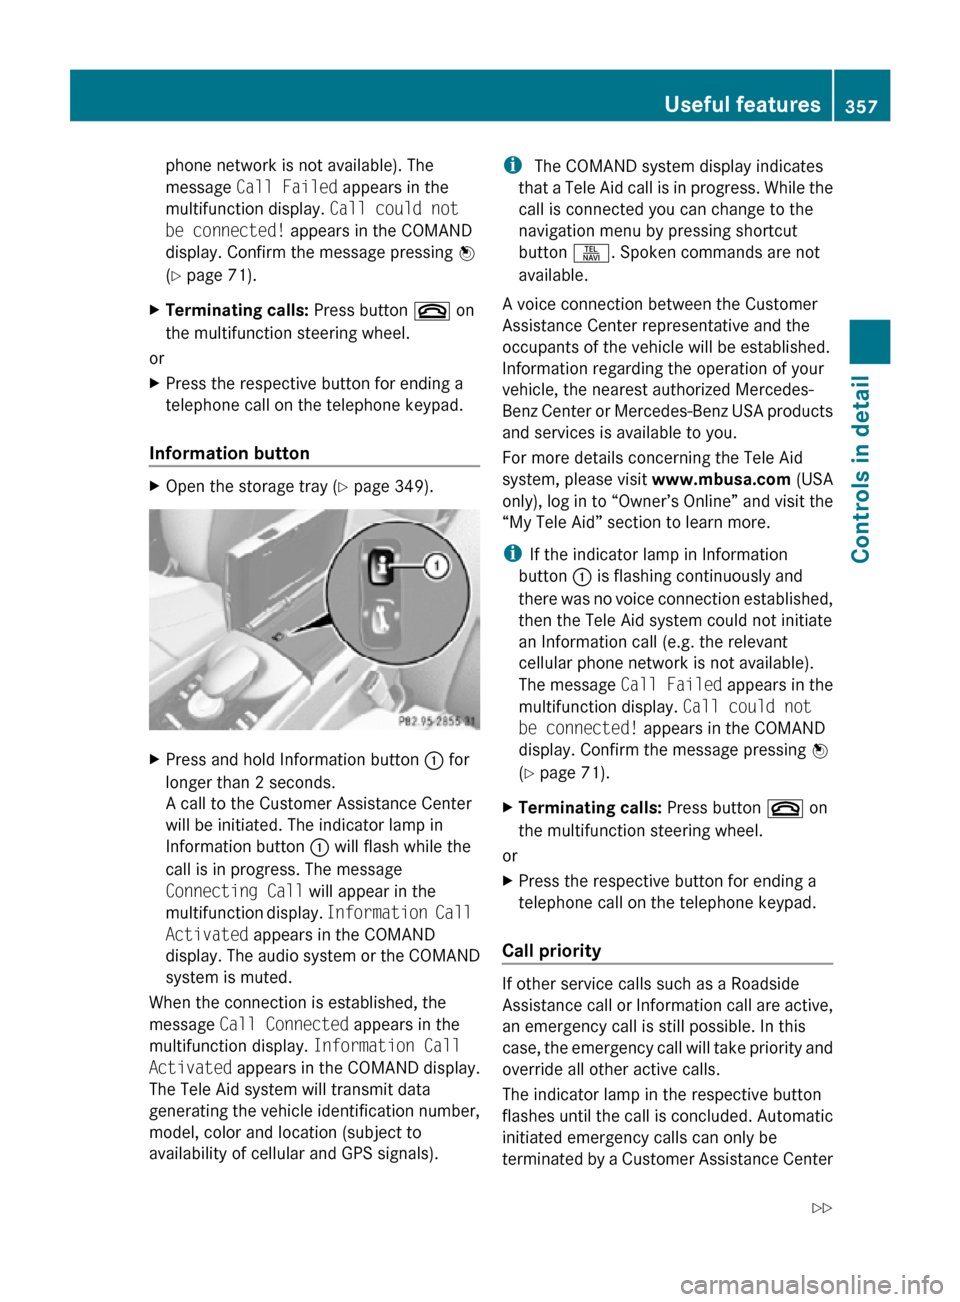
Information button X
Open the storage tray (Y page 349). X
Press and hold Information button : for
longer than 2 seconds.
A call to the Customer Assistance Center
will be initiated. The indicator lamp in
Information button : will flash while the
call is in progress. The message
Connecting Call will appear in the
multifunction display. Information Call
Activated appears in the COMAND
display. The audio system or the COMAND
system is muted.
When the connection is established, the
message Call Connected appears in the
multifunction display. Information Call
Activated appears in the COMAND display.
The Tele Aid system will transmit data
generating the vehicle identification number,
model, color and location (subject to
availability of cellular and GPS signals). i
The COMAND system display indicates
that a Tele Aid call is in progress. While the
call is connected you can change to the
navigation menu by pressing shortcut
button S. Spoken commands are not
available.
A voice connection between the Customer
Assistance Center representative and the
occupants of the vehicle will be established.
Information regarding the operation of your
vehicle, the nearest authorized Mercedes-
Benz Center or Mercedes-Benz USA products
and services is available to you.
For more details concerning the Tele Aid
system, please visit www.mbusa.com (USA
only), log in to “Owner’s Online” and visit the
“My Tele Aid” section to learn more.
i If the indicator lamp in Information
button : is flashing continuously and
there was no voice connection established,
then the Tele Aid system could not initiate
an Information call (e.g. the relevant
cellular phone network is not available).
The message Call Failed appears in the
multifunction display. Call could not
be connected! appears in the COMAND
display. Confirm the message pressing W
(Y page 71).
X Terminating calls: Press button ~ on
the multifunction steering wheel.
or
X Press the respective button for ending a
telephone call on the telephone keypad.
Call priority If other service calls such as a Roadside
Assistance call or Information call are active,
an emergency call is still possible. In this
case, the emergency call will take priority and
override all other active calls.
The indicator lamp in the respective button
flashes until the call is concluded. Automatic
initiated emergency calls can only be
terminated by a Customer Assistance Center Useful features
357Controls in detail
216_AKB; 3; 90, en-US
d2ureepe, Version: 2.11.8.1 2009-05-15T11:47:50+02:00 - Seite 357 Z
Page 360 of 500

representative. All other calls can be
terminated by pressing button ~ on the
multifunction steering wheel or the
respective
button
for ending a telephone call
on the telephone keypad.
Destination Download to the COMAND
system i
The components
and operating principles
of the COMAND system can be found on
(Y page 69).
Destination Download allows you access to a
database of over 10 million points of interest
(POIs) that can be downloaded to your
vehicle’s navigation system. If you know the
destination, the address can be downloaded,
or can be provided with points of interests
near your location.
Route guidance
You will be prompted to confirm that route
guidance to the entered address is to be
started.
X Slide ZVÆ or rotate cVd to select Yes
menu item and confirm by pressing W.
The system calculates the route and
subsequently starts
the route guidance to the
defined address.
i If you select No, you can save the address
to your address book.
i The Destination Download feature is
available if the relevant mobile phone
network is available and data connection is
possible.
Search & Send i
In order to utilize Search & Send your
vehicle must be equipped with Tele Aid,
Navigation, and an active Tele Aid
subscription.
“Search & Send” is a navigation destination
address entry service. A destination address
located using Google Maps ®
or Yahoo Local Maps
®
websites can be delivered via Tele Aid
directly to the Navigation system in your
vehicle.
Specify and Send a Destination Address
i Please refer to any specific instructions
provided by either website regarding
entering or sending an address. Each
website
functions differently and is subject
to change.
X Go to www.maps.google.com or
www.maps.yahoo.com and enter a
destination address in the address entry
field.
X Depending on which website you are using,
click on
the appropriate button to send the
destination address to your Tele Aid
account email address.
X Enter the email address you specified when
you activated your Tele Aid account in the
appropriate field when the “Send” dialog
box appears.
X Click “Send”.
Retrieve Destination Address
X Press the Tele Aid Information button to
begin the download of the destination
address to your vehicle's navigation
system.
i If you have sent more than one
destination address to your vehicle you
must make one Information call for each
destination address download.
X Select Yes when the message appears
asking if
you would like to start navigation.
This will open the start navigation screen.
X Select Start.
or
X Select No if you wish to save the
downloaded destination address in the
From Memory destination list for future
use. 358
Useful features
Controls in detail
216_AKB; 3; 90, en-US
d2ureepe,
Version: 2.11.8.1 2009-05-15T11:47:50+02:00 - Seite 358