Page 72 of 500

The currently selected main function is
highlighted.
Once you have selected a main function, main
area
= is active.
i The layout of the menus may vary
depending on your vehicle’s equipment.
This manual shows the menus for a fully
equipped vehicle.
Adjusting COMAND display illumination X
Increasing the illumination: Turn
knob : clockwise.
X Dimming the illumination: Turn knob :
counterclockwise.
Swiveling COMAND display With button
: or ; you can swivel the
COMAND display to the left or right. Instrument cluster multifunction
display This section describes features and controls
via the COMAND controller, display and
shortcut buttons only.
Related COMAND features are described in
the “Instrument cluster control system”
section (
Y page 201). It contains function
descriptions and operation of the instrument
cluster multifunction display and the
multifunction steering wheel buttons.
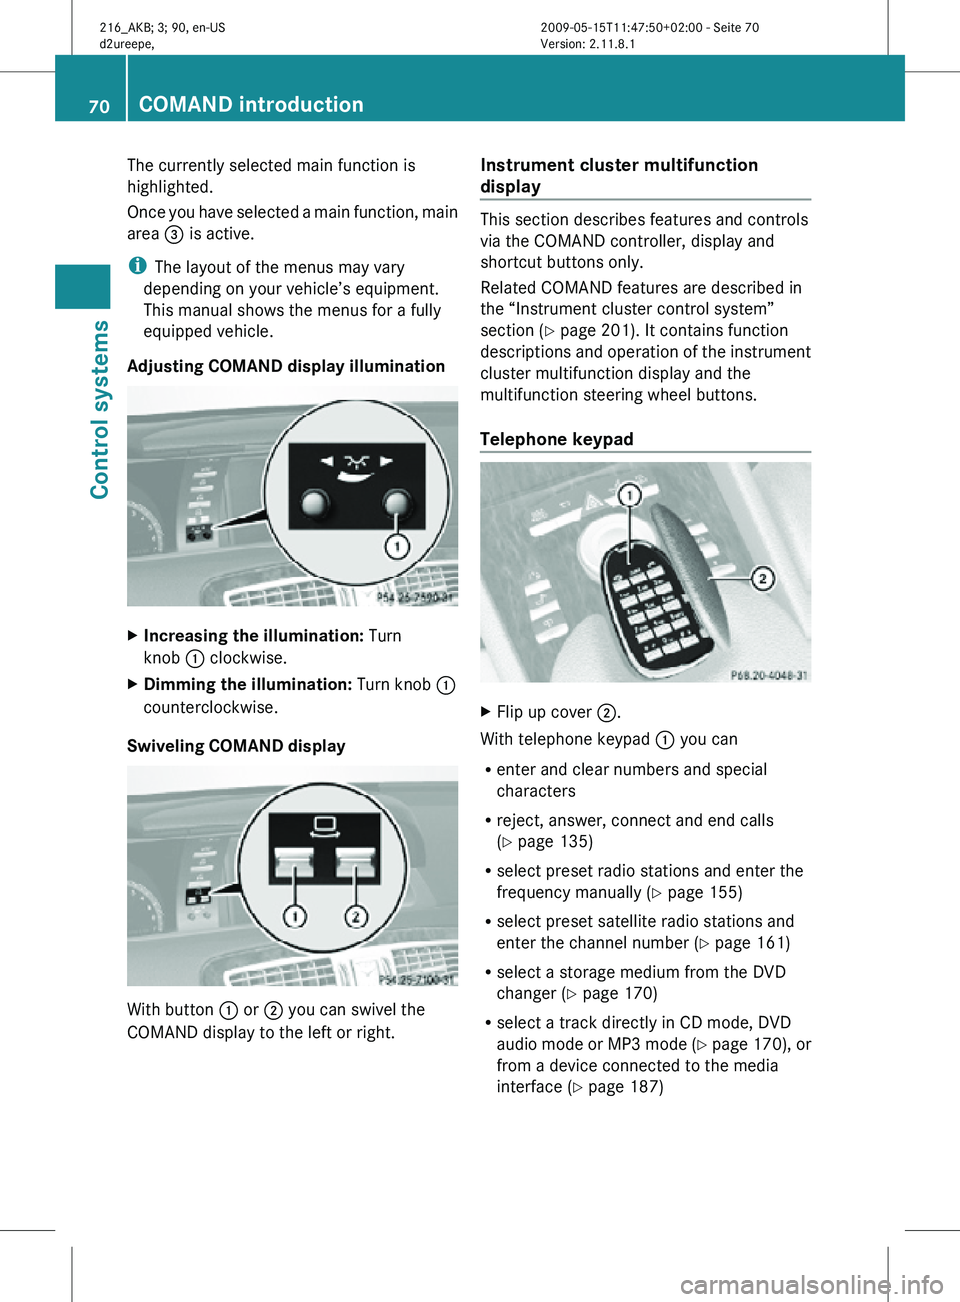
Telephone keypad X
Flip up cover ;.
With telephone keypad : you can
R enter and clear numbers and special
characters
R reject, answer, connect and end calls
(Y page 135)
R select preset radio stations and enter the
frequency manually ( Y page 155)
R select preset satellite radio stations and
enter the channel number (Y page 161)
R select a storage medium from the DVD
changer (Y page 170)
R select a track directly in CD mode, DVD
audio mode or MP3 mode (Y page 170), or
from a device connected to the media
interface (Y page 187) 70
COMAND introductionControl systems
216_AKB; 3; 90, en-US
d2ureepe,
Version: 2.11.8.1 2009-05-15T11:47:50+02:00 - Seite 70
Page 81 of 500

COMAND system settings
System settings submenu overview
i The components and operating principles
of COMAND can be found on ( Y page 68).
System settings can be made in the following
submenus:
R Display Q Day Mode, Night Mode,
Automatic
R Time Q Time, Date, Format, Time Zone
R Text Reader Q Speed Q Fast,
Medium or Slow:
Adjusts the reading speed of the Voice
Control System.
R Voice Control Q Help Window , Start
New Individualization, Delete
Individualization
R Language: Selecting system language
R Favorites Button *: Assigning the
favorite button
R Bluetooth Q Search for Bluetooth
Devices, Bluetooth activated. For
information on the Bluetooth ®
interface
see ( Y page 138).
R Upload/Download Data Q Copy Data
to Storage Medium, Import Data from
Storage Medium (Y page 82)
R Reset: Resetting the COMAND system to
factory settings Display settings
Switching the display on or off X
Switching off: Select Vehicle Q
Display OFF.
X Switching back on: Rotate cVd or slide
ZVÆ, XVY or press W.
or
X Press button u. Setting the display design X
Select Vehicle Q System Q Display. X
Select Day Mode, Night Mode or
Automatic.
i In the Automatic setting, COMAND sets
the display design automatically. The
setting depends on the information
retrieved from the vehicle's light sensor. Time settings
The time of day is set automatically according
to the GPS signal and the selected time zone.
All time information always applies to the
local time at the current vehicle position.
Time information changes when entering a
different time zone.
i The correct time zone, daylight savings
time/standard time and the time itself
must be set for the following navigation
system functions to operate correctly:
R Route guidance on routes with time-
dependent traffic guidance
R Calculation of estimated arrival time
The settings are adopted for the analog
clock in the dashboard. COMAND system settings
79Control systems
216_AKB; 3; 90, en-US
d2ureepe, Version: 2.11.8.1 2009-05-15T11:47:50+02:00 - Seite 79 Z
Page 111 of 500

Entering a destination from the list of
last destinations
X Select Navi Q Destination Q From
Last Destinations.
The list of last destinations appears. The
most recent destination is at the top of the
list.
X Select desired destination.
X Starting route calculation: Select Start,
see also ( Y page 107). Entering a destination from the map
i Depending on the factory settings of the
vehicle, it may not be possible to enter a
destination while the vehicle exceeds a
preset speed. As soon as the vehicles
speed drops to below the preset speed, the
function is available again.
Calling up the map X
In the address input menu, select Map
(Y page 94).
You will see the map with a cross hair. The
map is set to the address set in the address
input menu.
or
X Select Navi Q Destination Q Via
Map.
You will see the map with a cross hair. :
Cross hair
; Details of the cross hair position
= Map scale i
Display ; may be the name of a road, for
example, provided the digital map contains
the necessary data.
If no data is available, display ; shows:
R the coordinates if the Geo
Coordinates display is switched on
(Y page 92)
R no display if the Geo Coordinates
display is switched off ( Y page 92)
Moving the map and selecting the
destination X
Moving map: Slide ZVÆ, XVY or aVb.
X Adjusting map scale: Rotate cVd.
Rotating clockwise enlarges the map,
rotating counterclockwise reduces it.
X Selecting a destination: Press W.
If the cross hair is located off the edge of
the digital map, a route cannot be
calculated to this destination and you will
see the message The destination is
located off the map..
X Select OK.
X Move the map and select a destination
again.
If the destination can be attributed, you will
see the address of the destination. If not,
you will see the display Destination
from map.
X Starting route calculation: Select Start,
see also ( Y page 107). Entering a stopover
When route guidance is active, you can enter
a stopover. Stopovers can be predefined
destinations from the following predefined
categories:
R Mercedes-Benz Service Center
R Hospital
R Gas Station
R Parking Lot COMAND navigation system (entering a destination)
109Control systems
216_AKB; 3; 90, en-US
d2ureepe,Version: 2.11.8.1 2009-05-15T11:47:50+02:00 - Seite 109 Z