2010 MERCEDES-BENZ C300LUX 4MATIC phone
[x] Cancel search: phonePage 138 of 364
Activating easy-entry/exit feature
Use this function to activate and deactivate
the easy-entry/exit feature (Y page 85).
GWarning!
You must make sure no one can become
trapped or injured by the moving steering
wheel when the easy-entry/exit feature is
activated.
To stop steering wheel movement, move
steering wheel adjustment stalk or press one
of the memory position buttons.
Do not leave children unattended in the
vehicle, or with access to an unlocked vehicle.
Children could open the driver’s door and
unintentionally activate the easy-entry/exit
feature, which could result in an accident
and/or serious personal injury.
XPress button = or ; to select the
Settings menu.
XPress button : or 9 to select the
Convenience submenu.
XPress button a.XPress button : or 9 to select the
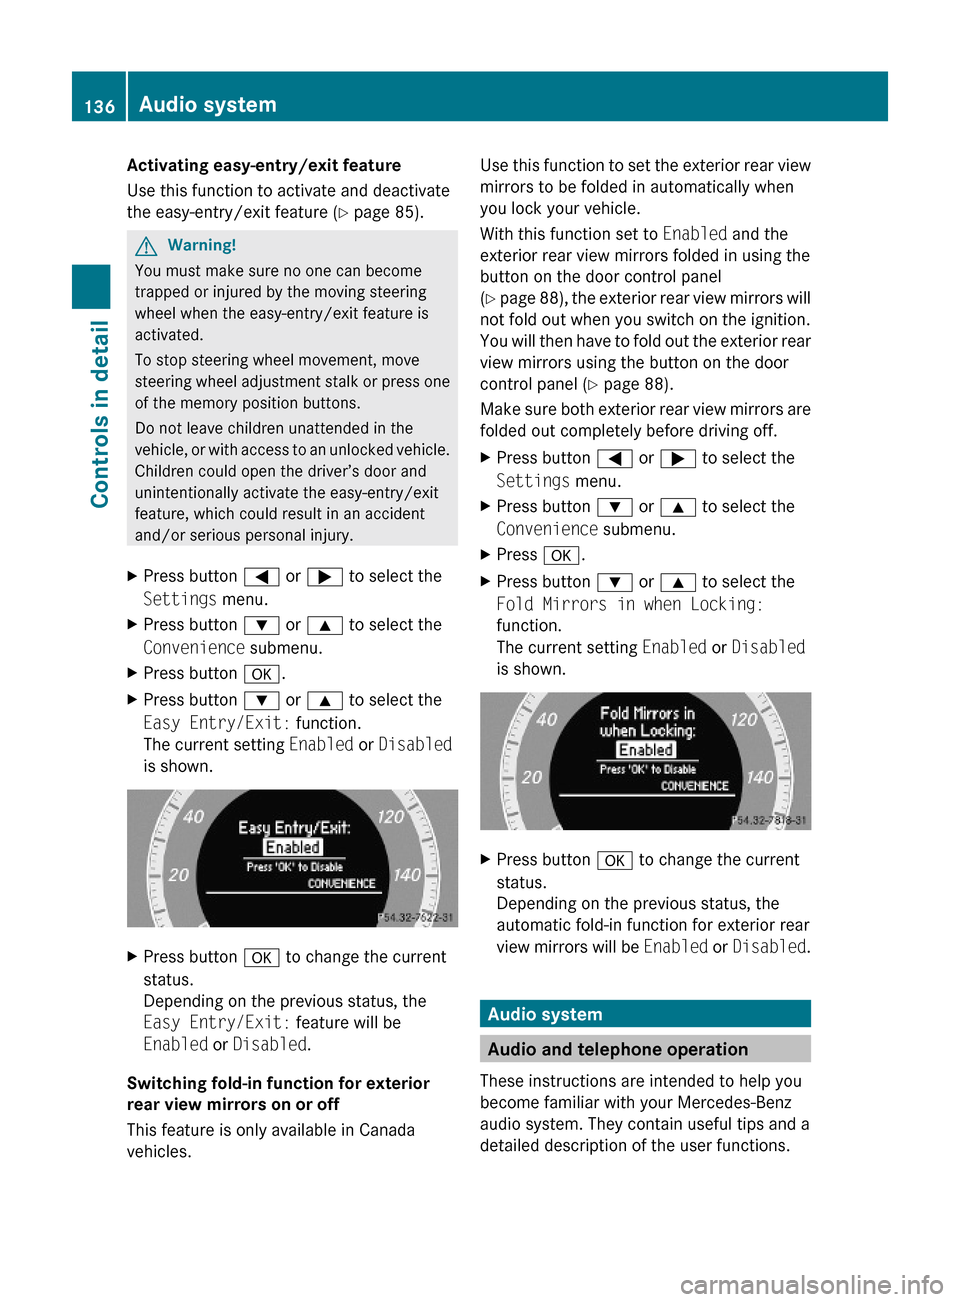
Easy Entry/Exit: function.
The current setting Enabled or Disabled
is shown.
XPress button a to change the current
status.
Depending on the previous status, the
Easy Entry/Exit: feature will be
Enabled or Disabled.
Switching fold-in function for exterior
rear view mirrors on or off
This feature is only available in Canada
vehicles.
Use this function to set the exterior rear view
mirrors to be folded in automatically when
you lock your vehicle.
With this function set to Enabled and the
exterior rear view mirrors folded in using the
button on the door control panel
(Y page 88), the exterior rear view mirrors will
not fold out when you switch on the ignition.
You will then have to fold out the exterior rear
view mirrors using the button on the door
control panel (Y page 88).
Make sure both exterior rear view mirrors are
folded out completely before driving off.
XPress button = or ; to select the
Settings menu.
XPress button : or 9 to select the
Convenience submenu.
XPress a.XPress button : or 9 to select the
Fold Mirrors in when Locking:
function.
The current setting Enabled or Disabled
is shown.
XPress button a to change the current
status.
Depending on the previous status, the
automatic fold-in function for exterior rear
view mirrors will be Enabled or Disabled.
Audio system
Audio and telephone operation
These instructions are intended to help you
become familiar with your Mercedes-Benz
audio system. They contain useful tips and a
detailed description of the user functions.
136Audio systemControls in detail
204_AKB; 5; 23, en-USd2ureepe,Version: 2.11.8.12009-07-16T17:54:06+02:00 - Seite 136
Page 139 of 364
GWarning!
In order to avoid distraction which could lead
to an accident, the driver should enter system
settings with the vehicle at a standstill and
operate the system only when road and traffic
conditions permit. Always pay full attention to
traffic conditions first before operating
system controls while driving.
Bear in mind that at a speed of just 30 mph
(approximately 50 km/h), your vehicle is
covering a distance of 44 feet (approximately
14 m) every second.
Audio system overview
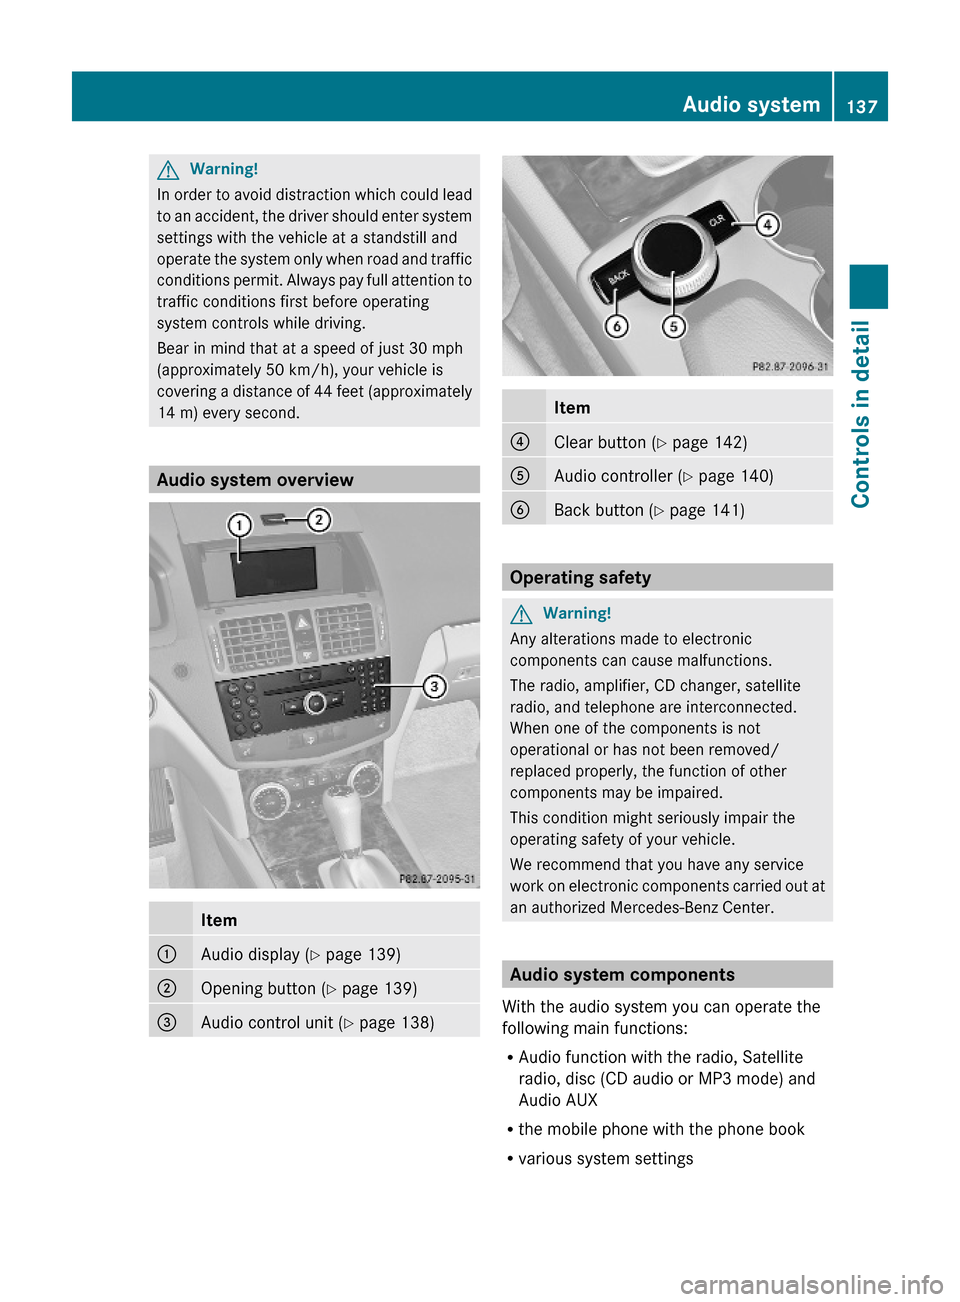
Item:Audio display (Y page 139);Opening button (Y page 139)=Audio control unit (Y page 138)Item?Clear button (Y page 142)AAudio controller (Y page 140)BBack button (Y page 141)
Operating safety
GWarning!
Any alterations made to electronic
components can cause malfunctions.
The radio, amplifier, CD changer, satellite
radio, and telephone are interconnected.
When one of the components is not
operational or has not been removed/
replaced properly, the function of other
components may be impaired.
This condition might seriously impair the
operating safety of your vehicle.
We recommend that you have any service
work on electronic components carried out at
an authorized Mercedes-Benz Center.
Audio system components
With the audio system you can operate the
following main functions:
RAudio function with the radio, Satellite
radio, disc (CD audio or MP3 mode) and
Audio AUX
Rthe mobile phone with the phone book
Rvarious system settings
Audio system137Controls in detail204_AKB; 5; 23, en-USd2ureepe,Version: 2.11.8.12009-07-16T17:54:06+02:00 - Seite 137Z
Page 140 of 364
The audio system consists of the following:
RAudio control unit
RAudio display
RAudio controller with buttons k and
2
In addition, the audio system can also be
operated with the multifunction steering
wheel (Y page 118).
In these instructions, the keypad (right side
of audio control unit) and the function buttons
are referred to as “buttons”.
Audio control unit
With the audio control unit you can
Rswitch the audio system on/off
Radjust the volume
Rselect the operating modes
Renter telephone numbers and accept,
reject, initiate and end telephone calls
Rload and eject CDs
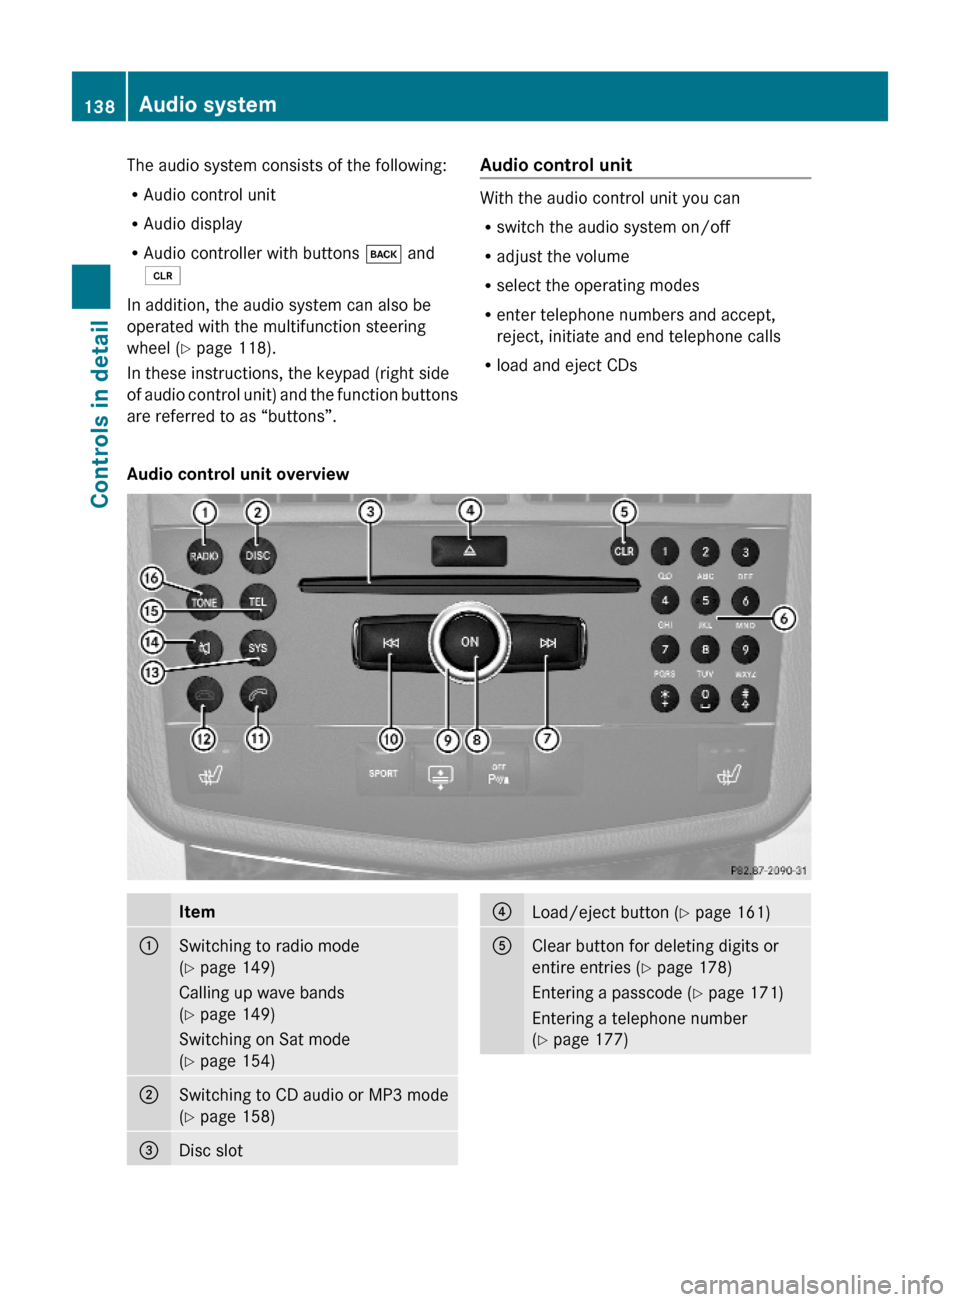
Audio control unit overviewItem:Switching to radio mode
(Y page 149)
Calling up wave bands
(Y page 149)
Switching on Sat mode
(Y page 154)
;Switching to CD audio or MP3 mode
(Y page 158)
=Disc slot?Load/eject button (Y page 161)AClear button for deleting digits or
entire entries (Y page 178)
Entering a passcode (Y page 171)
Entering a telephone number
(Y page 177)
138Audio systemControls in detail
204_AKB; 5; 23, en-USd2ureepe,Version: 2.11.8.12009-07-16T17:54:06+02:00 - Seite 138
Page 141 of 364
BKeypad
Tuning to a station via the station
memory (Y page 150)
Storing stations manually
(Y page 151)
Entering a passcode (Y page 171)
Entering a phone number
(Y page 177)
Sending DTMF tones (Y page 180)
CD changer: Selecting a CD
(Y page 162)
CD: Entering a track number directly
(Y page 164)
CTuning to a station via station search
(Y page 150)
Fast forward (Y page 165)
Skipping forwards to a track
(Y page 165)
DSwitching audio system on/off
(Y page 144)
EAdjusting the volume (Y page 144)FTuning to a station via station search
(Y page 150)
Fast rewind (Y page 165)
Skipping backwards to a track
(Y page 165)
GConfirming a passcode
(Y page 171)
Accepting a call (Y page 179)
Initiating a call (Y page 177)
Redial (Y page 178)
HRejecting a call (Y page 179)
Ending an active call (Y page 179)
IOpening system settings menu
(Y page 147)
JSwitching sound on/off
(Y page 145)
Switching hands-free microphone
on/off (Y page 179)
KSwitching to telephone mode
(Y page 167)
LSound settings (Y page 145)
Audio display
The audio display has a protective cover.
! Do not place any objects on the cover of
the audio display. This may obstruct the
movement when the cover is being
opened/closed. The cover could be
damaged. Do not place any objects in front
of the audio display and/or secure any
objects to the audio display itself. The
audio display could be damaged.
Avoid touching the audio display at all
times. The display has a very sensitive high-
gloss surface, there is a risk of it being
scratched. Do not press directly in the
display face. Otherwise, the audio display
will be damaged.
iFor information about cleaning and care
of the audio display, see “Audio or
COMAND display” (Y page 265).
Audio display cover
Audio system139Controls in detail204_AKB; 5; 23, en-USd2ureepe,Version: 2.11.8.12009-07-16T17:54:06+02:00 - Seite 139Z
Page 142 of 364
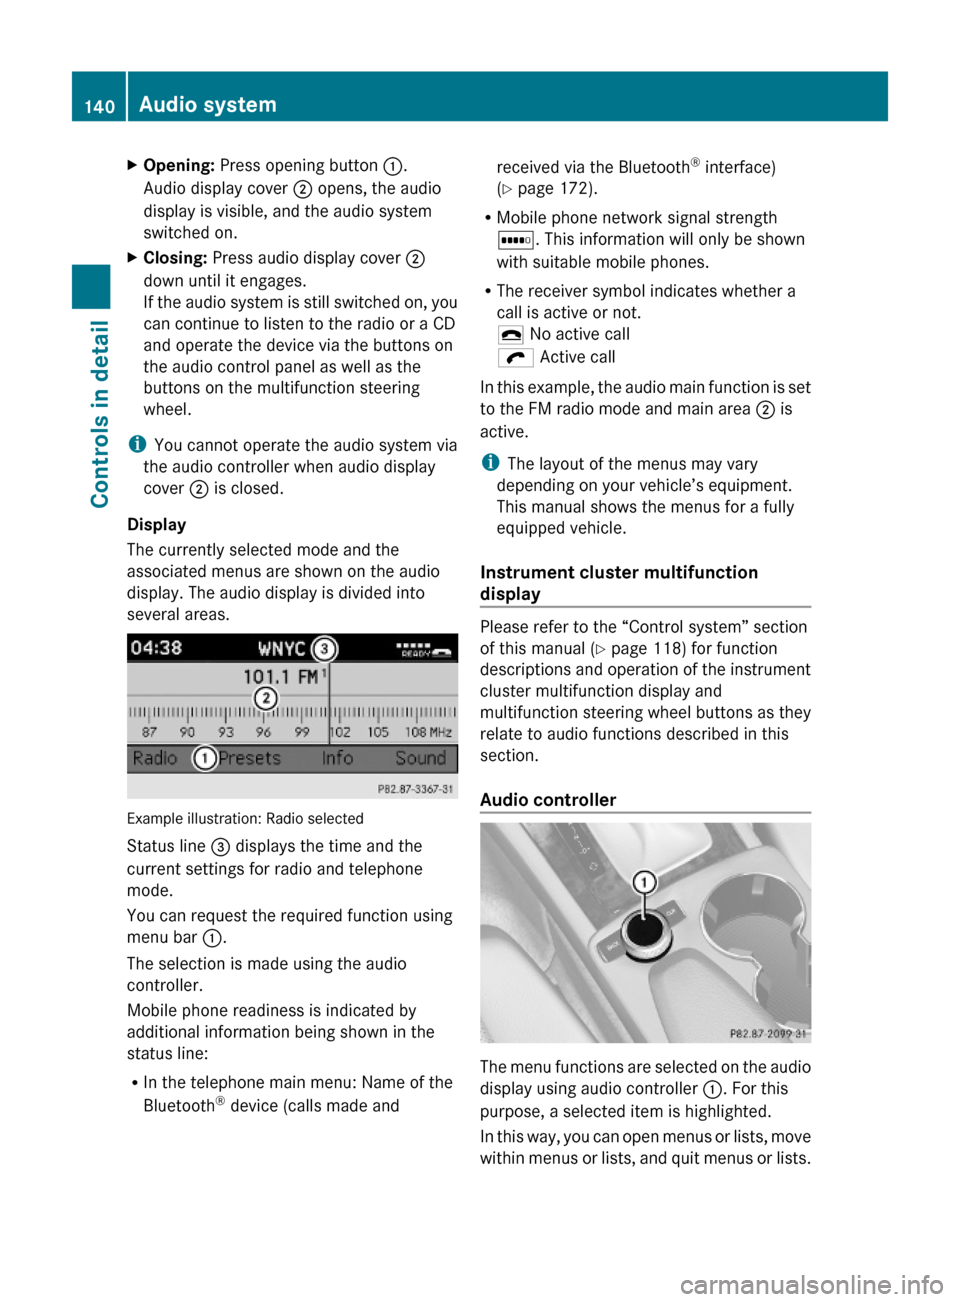
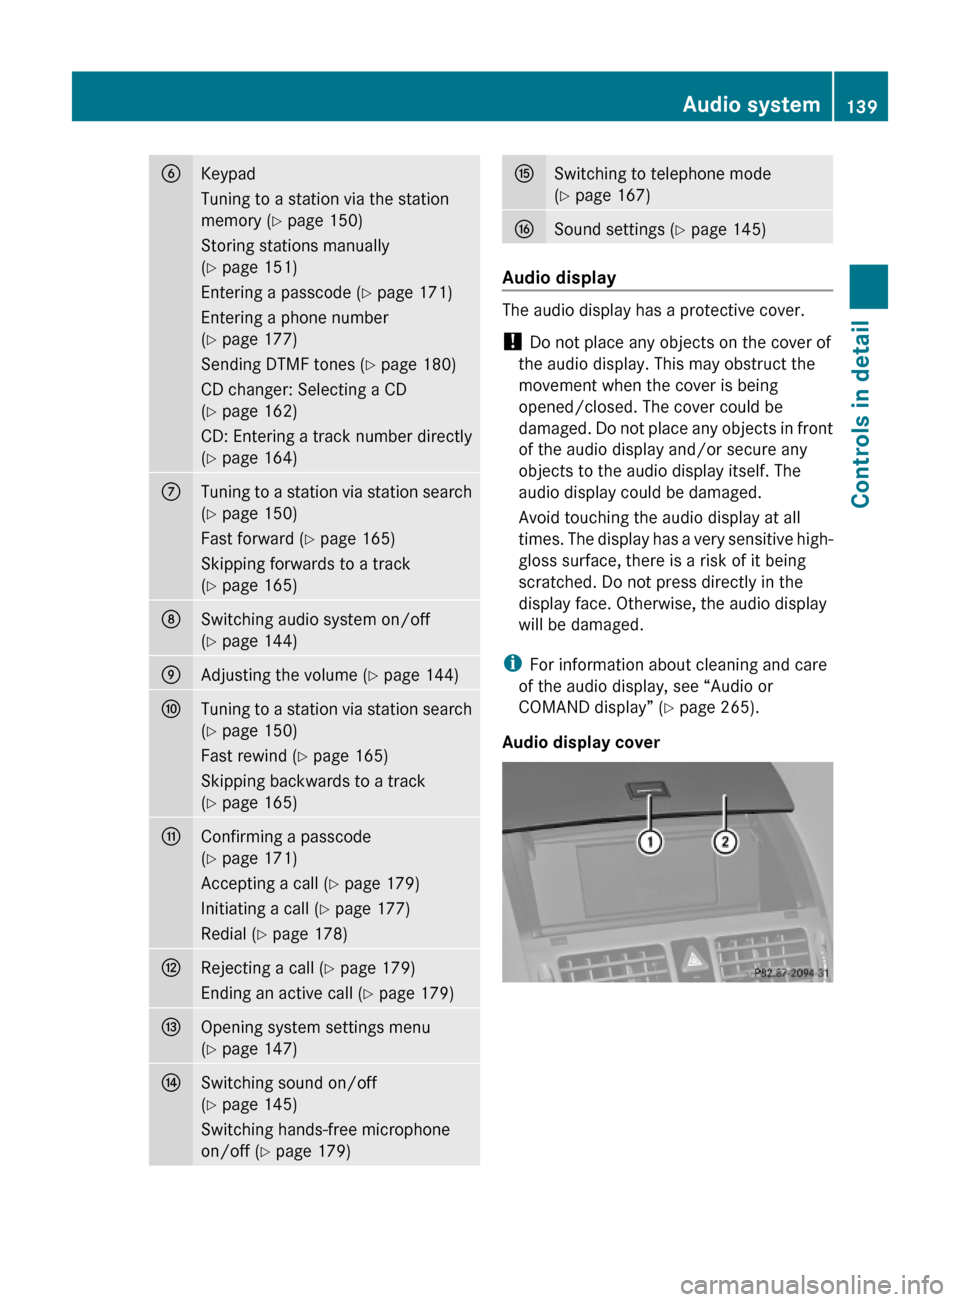
XOpening: Press opening button :.
Audio display cover ; opens, the audio
display is visible, and the audio system
switched on.
XClosing: Press audio display cover ;
down until it engages.
If the audio system is still switched on, you
can continue to listen to the radio or a CD
and operate the device via the buttons on
the audio control panel as well as the
buttons on the multifunction steering
wheel.
iYou cannot operate the audio system via
the audio controller when audio display
cover ; is closed.
Display
The currently selected mode and the
associated menus are shown on the audio
display. The audio display is divided into
several areas.
Example illustration: Radio selected
Status line = displays the time and the
current settings for radio and telephone
mode.
You can request the required function using
menu bar :.
The selection is made using the audio
controller.
Mobile phone readiness is indicated by
additional information being shown in the
status line:
RIn the telephone main menu: Name of the
Bluetooth® device (calls made and
received via the Bluetooth® interface)
(Y page 172).
RMobile phone network signal strength
r. This information will only be shown
with suitable mobile phones.
RThe receiver symbol indicates whether a
call is active or not.
¢ No active call
ö Active call
In this example, the audio main function is set
to the FM radio mode and main area ; is
active.
iThe layout of the menus may vary
depending on your vehicle’s equipment.
This manual shows the menus for a fully
equipped vehicle.
Instrument cluster multifunction
display
Please refer to the “Control system” section
of this manual (Y page 118) for function
descriptions and operation of the instrument
cluster multifunction display and
multifunction steering wheel buttons as they
relate to audio functions described in this
section.
Audio controller
The menu functions are selected on the audio
display using audio controller :. For this
purpose, a selected item is highlighted.
In this way, you can open menus or lists, move
within menus or lists, and quit menus or lists.
140Audio systemControls in detail
204_AKB; 5; 23, en-USd2ureepe,Version: 2.11.8.12009-07-16T17:54:06+02:00 - Seite 140
Page 144 of 364

Clear button XDeleting an individual digit: Briefly press
button 2.
XDeleting an entire entry: Press and hold
button 2 until the entry is deleted.
Menu
The table below shows the structure of the
modes and their menus. Each mode has a
basic menu. Each menu item in turn has
several submenu items.
ButtonMode/Menu$Radio modeRadio (FM/AM) (Y page 148)Weather Band (Y page 149)Satellite radio (Y page 152)Presets (Y page 151)Sound (Y page 145)hDisc modeCD/MP3 (Y page 158)Track list/folder list
(Y page 165)
CD Changer (Y page 162)Sound (Y page 145)%Telephone modeButtonMode/MenuTelephone (Y page 167)Name (Y page 174)Call lists (Y page 176)iSystem settings menuSystem (Y page 147)Language (Y page 148)
Calling up an operating mode
XPress the respective button ($, h,
%, or i) on the audio control unit.
The basic menu of the selected mode
appears in the audio display. The main area
is active. The active area is highlighted.
iThe following screens show the audio
display’s day design. The appearance of the
highlighted items in the menu will vary
depending on the display design.
Illustration: Radio function basic menu
XMoving to the menu bar: Slide VÆ.
Horizontal menus
142Audio systemControls in detail
204_AKB; 5; 23, en-USd2ureepe,Version: 2.11.8.12009-07-16T17:54:06+02:00 - Seite 142
Page 146 of 364
the frequency range. Frequencies within
the current frequency range, but outside
the current frequency step width are
rounded to the next lower allowed
frequency.
XEnter 1045 with the keypad on the audio
control unit.
The audio system tunes in to the frequency
entered.
Operation
In the following description, an operation step
is described as in the example below.
X$ Q Radio Q Enter Frequency
is the short for
XPress button $ on audio control unit
repeatedly until desired wave band has
been selected.
XSlide VÆ.XSlide XV or rotate cVd the audio
controller to select Radio.
XPress the audio controller W.
The Radio menu is selected and a list of
submenus appears.
XSlide ZV or rotate cVd the audio
controller to select Enter Frequency.
XPress the audio controller W.
The Enter Frequency submenu appears
in the audio display.
Switching audio system on or off
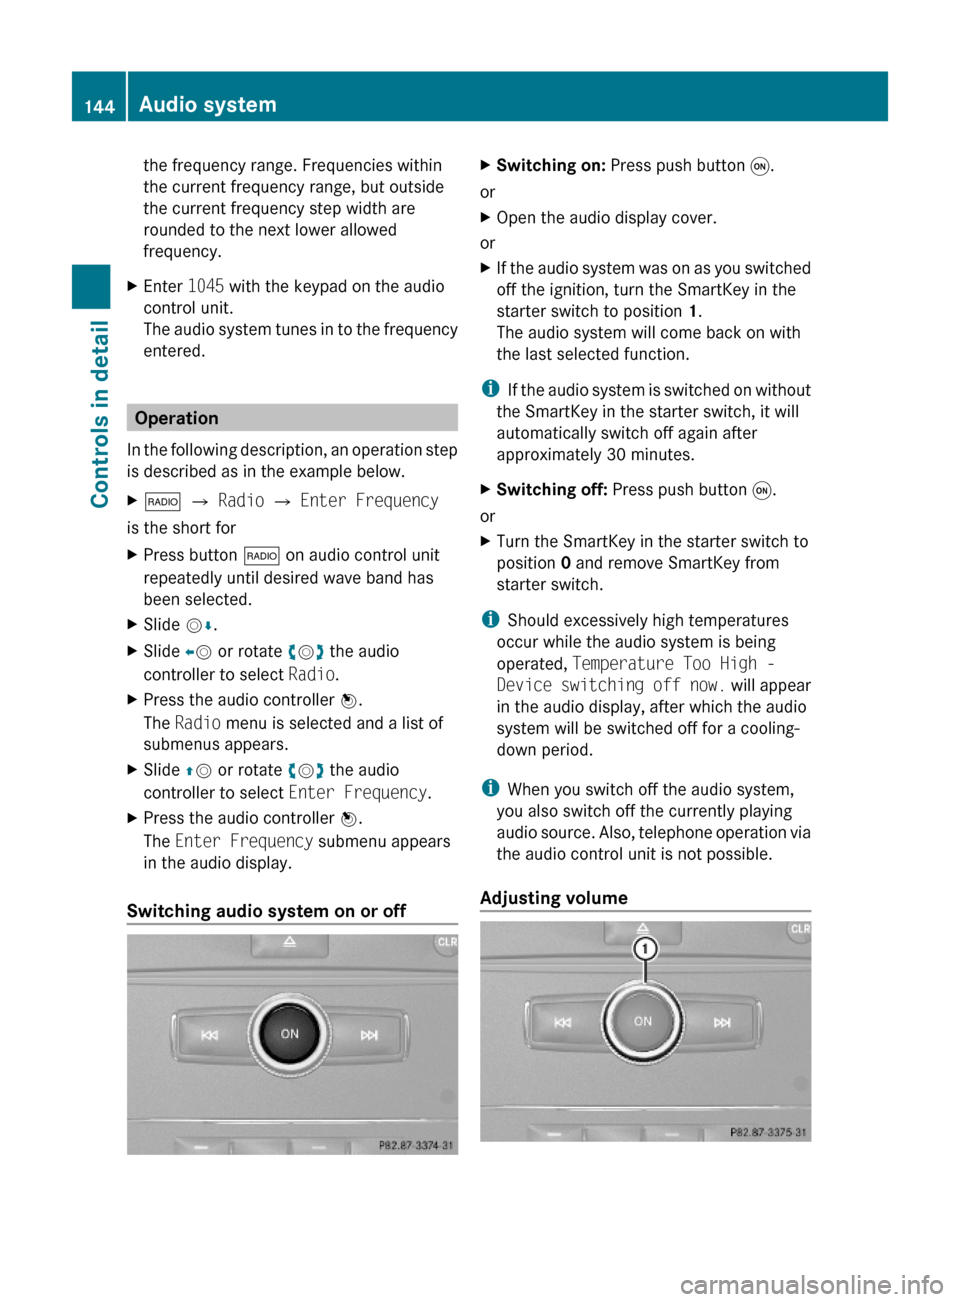
XSwitching on: Press push button q.
or
XOpen the audio display cover.
or
XIf the audio system was on as you switched
off the ignition, turn the SmartKey in the
starter switch to position 1.
The audio system will come back on with
the last selected function.
iIf the audio system is switched on without
the SmartKey in the starter switch, it will
automatically switch off again after
approximately 30 minutes.
XSwitching off: Press push button q.
or
XTurn the SmartKey in the starter switch to
position 0 and remove SmartKey from
starter switch.
iShould excessively high temperatures
occur while the audio system is being
operated, Temperature Too High -
Device switching off now. will appear
in the audio display, after which the audio
system will be switched off for a cooling-
down period.
iWhen you switch off the audio system,
you also switch off the currently playing
audio source. Also, telephone operation via
the audio control unit is not possible.
Adjusting volume
144Audio systemControls in detail
204_AKB; 5; 23, en-USd2ureepe,Version: 2.11.8.12009-07-16T17:54:06+02:00 - Seite 144
Page 147 of 364

XAdjusting: Turn rotary control :.
The volume will increase or decrease
depending on the direction turned.
Adjusting volume for telephone calls
In hands-free mode, you can adjust the
volume of a telephone call while the call is
currently active.
During a telephone call:
XTurn rotary control :.
The volume will increase or decrease
depending on the direction turned.
iThe volume of the audio system or a
telephone call can also be adjusted by
pressing the button W or X on the
multifunction steering wheel (Y page 118).
Sound
XSwitching on/off: Press button 8 on
the audio control unit (Y page 138).
The sound of the current audio source is
switched on or off.
iWhen the sound is switched off, the
symbol 8 appears in the status line.
If you change the audio source, or alter the
volume, the sound is automatically
switched on again.
Selecting sound settings
You can select different bass and treble
settings for each individual audio source. The
particular Sound menu can be opened from
the basic menu for the desired operating
mode, or by pressing the button J on the
audio control unit.
Example:
$ Q Sound Q Bass
Adjusting bass or trebleXPress button J and select Bass or
Treble.
or
XSelect Sound Q Bass or Treble.
A longer and brighter bar indicates the
previously stored setting. The red pointer
indicates the currently selected setting.
Example for adjusting bass
XChanging setting: Slide ÆVZ or rotate
cVd until desired treble or bass setting is
reached.
XExiting menu: Press button k or slide
XVY.
The setting is stored.
Adjusting balance or fader
Balance is used to determine whether the
sound focus should be shifted toward the
driver’s side or the passenger side.
Fader is used to determine whether the sound
focus should be shifted toward the front or
rear of the vehicle.
XPress button J repeatedly until Bal/
Fad appears in the audio display.
or
XSelect Sound Q Bal/Fad.
The current setting is indicated by a red
cross hair symbol.
Audio system145Controls in detail204_AKB; 5; 23, en-USd2ureepe,Version: 2.11.8.12009-07-16T17:54:06+02:00 - Seite 145Z