2010 MERCEDES-BENZ C300LUX 4MATIC traction control
[x] Cancel search: traction controlPage 163 of 364
RWMA Pro
R5.1 Surround
Notes on copyright
The music tracks that you create and play
back in the MP3 and WMA format are
generally subject to copyright protection in
accordance with the applicable international
and national regulations.
In many countries, reproductions are not
permitted without the prior consent of the
copyright holder, not even for private use.
Make sure you know the applicable copyright
regulations and that you comply with these.
If you own these rights yourself, e.g. for your
own compositions and recordings, or the
copyright holder has granted you permission,
these restrictions do not apply.
Operating the CD player
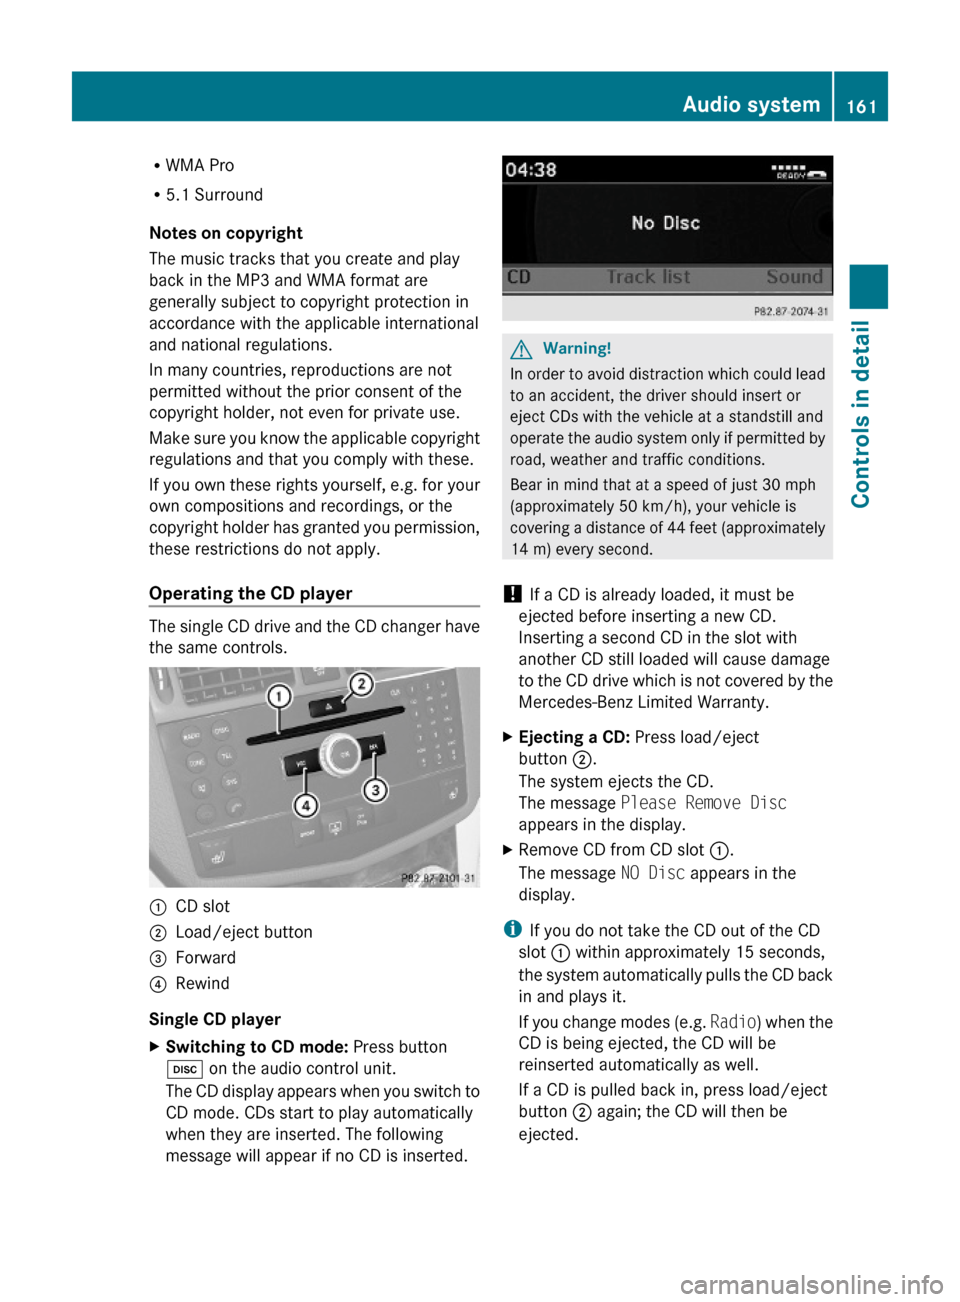
The single CD drive and the CD changer have
the same controls.
:CD slot;Load/eject button=Forward?Rewind
Single CD player
XSwitching to CD mode: Press button
h on the audio control unit.
The CD display appears when you switch to
CD mode. CDs start to play automatically
when they are inserted. The following
message will appear if no CD is inserted.
GWarning!
In order to avoid distraction which could lead
to an accident, the driver should insert or
eject CDs with the vehicle at a standstill and
operate the audio system only if permitted by
road, weather and traffic conditions.
Bear in mind that at a speed of just 30 mph
(approximately 50 km/h), your vehicle is
covering a distance of 44 feet (approximately
14 m) every second.
! If a CD is already loaded, it must be
ejected before inserting a new CD.
Inserting a second CD in the slot with
another CD still loaded will cause damage
to the CD drive which is not covered by the
Mercedes-Benz Limited Warranty.
XEjecting a CD: Press load/eject
button ;.
The system ejects the CD.
The message Please Remove Disc
appears in the display.
XRemove CD from CD slot :.
The message NO Disc appears in the
display.
iIf you do not take the CD out of the CD
slot : within approximately 15 seconds,
the system automatically pulls the CD back
in and plays it.
If you change modes (e.g. Radio) when the
CD is being ejected, the CD will be
reinserted automatically as well.
If a CD is pulled back in, press load/eject
button ; again; the CD will then be
ejected.
Audio system161Controls in detail204_AKB; 5; 23, en-USd2ureepe,Version: 2.11.8.12009-07-16T17:54:06+02:00 - Seite 161Z
Page 164 of 364
iIf the audio CD is printed on one side, this
side must face upwards when loaded. If
neither side is printed, the side to be played
must face downwards.
If a CD has been inserted incorrectly or
cannot be read, Disc Unreadable
appears in the display.
XLoading a CD: Insert CD into CD slot :.
The system automatically pulls the CD into
the CD slot : and starts to play the audio
CD if it has been inserted correctly and is
permissible.
CD changer
The CD changer can hold up to a total of six
audio CDs.
XSwitching to CD mode: Press button
h on the audio control unit.
The CD changer display appears when you
switch to CD changer mode. If there is a CD
in one of the magazine trays, it will start to
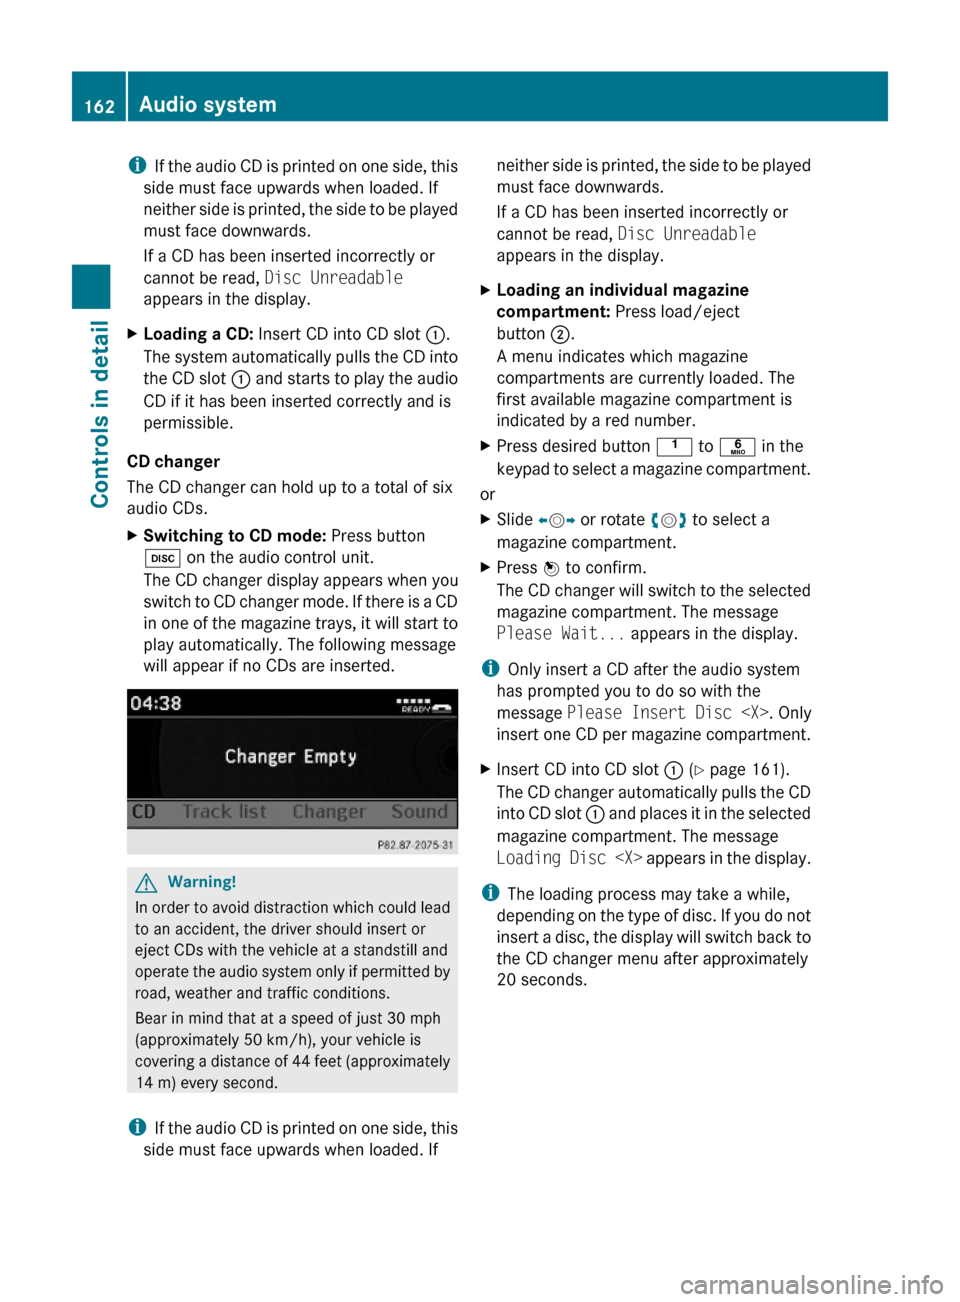
play automatically. The following message
will appear if no CDs are inserted.
GWarning!
In order to avoid distraction which could lead
to an accident, the driver should insert or
eject CDs with the vehicle at a standstill and
operate the audio system only if permitted by
road, weather and traffic conditions.
Bear in mind that at a speed of just 30 mph
(approximately 50 km/h), your vehicle is
covering a distance of 44 feet (approximately
14 m) every second.
iIf the audio CD is printed on one side, this
side must face upwards when loaded. If
neither side is printed, the side to be played
must face downwards.
If a CD has been inserted incorrectly or
cannot be read, Disc Unreadable
appears in the display.
XLoading an individual magazine
compartment: Press load/eject
button ;.
A menu indicates which magazine
compartments are currently loaded. The
first available magazine compartment is
indicated by a red number.
XPress desired button k to p in the
keypad to select a magazine compartment.
or
XSlide XVY or rotate cVd to select a
magazine compartment.
XPress W to confirm.
The CD changer will switch to the selected
magazine compartment. The message
Please Wait... appears in the display.
iOnly insert a CD after the audio system
has prompted you to do so with the
message Please Insert Disc
insert one CD per magazine compartment.
XInsert CD into CD slot : (Y page 161).
The CD changer automatically pulls the CD
into CD slot : and places it in the selected
magazine compartment. The message
Loading Disc
iThe loading process may take a while,
depending on the type of disc. If you do not
insert a disc, the display will switch back to
the CD changer menu after approximately
20 seconds.
162Audio systemControls in detail
204_AKB; 5; 23, en-USd2ureepe,Version: 2.11.8.12009-07-16T17:54:06+02:00 - Seite 162
Page 165 of 364
XPress button h, or load/eject
button ; (Y page 161) on the audio
control unit to finish the loading process.
The CD changer plays the disc if it has been
inserted correctly and is permissible.
XInterrupting loading procedure: Press
load/eject button ; again.
or
XPress button k in the center console
(Y page 141).
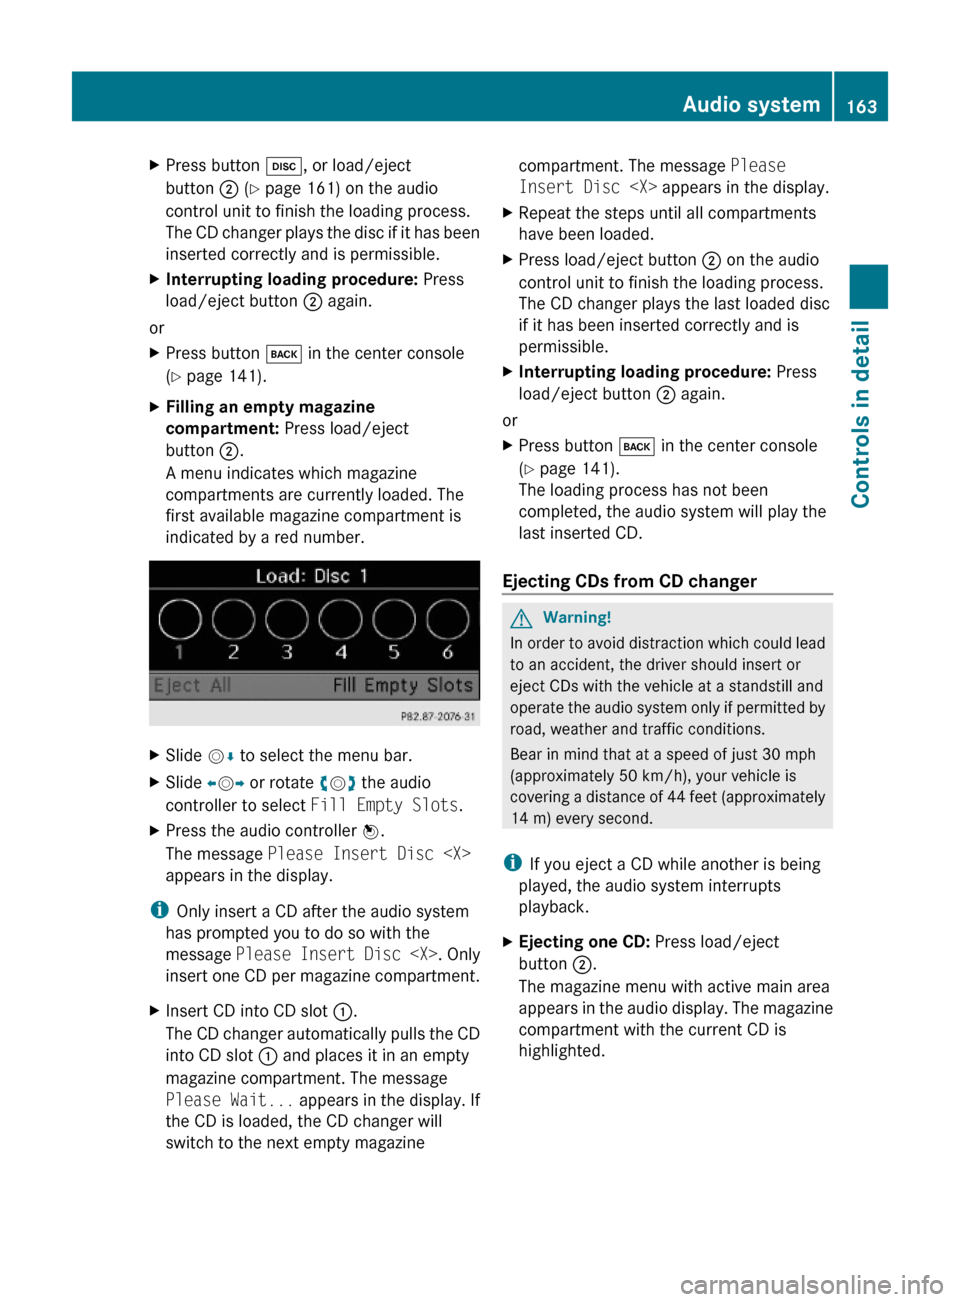
XFilling an empty magazine
compartment: Press load/eject
button ;.
A menu indicates which magazine
compartments are currently loaded. The
first available magazine compartment is
indicated by a red number.
XSlide VÆ to select the menu bar.XSlide XVY or rotate cVd the audio
controller to select Fill Empty Slots.
XPress the audio controller W.
The message Please Insert Disc
appears in the display.
iOnly insert a CD after the audio system
has prompted you to do so with the
message Please Insert Disc
insert one CD per magazine compartment.
XInsert CD into CD slot :.
The CD changer automatically pulls the CD
into CD slot : and places it in an empty
magazine compartment. The message
Please Wait... appears in the display. If
the CD is loaded, the CD changer will
switch to the next empty magazine
compartment. The message Please
Insert Disc
XRepeat the steps until all compartments
have been loaded.
XPress load/eject button ; on the audio
control unit to finish the loading process.
The CD changer plays the last loaded disc
if it has been inserted correctly and is
permissible.
XInterrupting loading procedure: Press
load/eject button ; again.
or
XPress button k in the center console
(Y page 141).
The loading process has not been
completed, the audio system will play the
last inserted CD.
Ejecting CDs from CD changer
GWarning!
In order to avoid distraction which could lead
to an accident, the driver should insert or
eject CDs with the vehicle at a standstill and
operate the audio system only if permitted by
road, weather and traffic conditions.
Bear in mind that at a speed of just 30 mph
(approximately 50 km/h), your vehicle is
covering a distance of 44 feet (approximately
14 m) every second.
iIf you eject a CD while another is being
played, the audio system interrupts
playback.
XEjecting one CD: Press load/eject
button ;.
The magazine menu with active main area
appears in the audio display. The magazine
compartment with the current CD is
highlighted.
Audio system163Controls in detail204_AKB; 5; 23, en-USd2ureepe,Version: 2.11.8.12009-07-16T17:54:06+02:00 - Seite 163Z
Page 182 of 364
Sending DTMF tones
iThis function is not possible with all
mobile phones.
Answering machines or other devices can be
controlled via DTMF tones, e.g. for remote
query functions.
XTransmitting individual characters:
During a call select the required
characters.
or
XPress the corresponding button on the
audio control unit.
Every selected character is transmitted
immediately.
XTransmitting a phone number of a
phone book entry as a sequence of
characters: Select Name.
XSelect the desired phone book entry.
The entry is transmitted immediately as a
sequence of characters.
XSwitching back to call display: Select
Back.
Driving systems
Introduction
This section describes the following driving
systems of your vehicle:
RCruise control
RHill-start assist system
RAll-wheel drive (4MATIC)
RDynamic handling package with sport
driving mode
RParktronic system, Canada only
RRear view camera
The driving safety systems ABS, Adaptive
Brake, BAS, EBP and ESP® are described in
the “Safety and security” section
(Y page 60).
Cruise control
The cruise control maintains the speed you
set for your vehicle automatically.
The use of the cruise control is recommended
for driving at a constant speed for extended
periods of time.
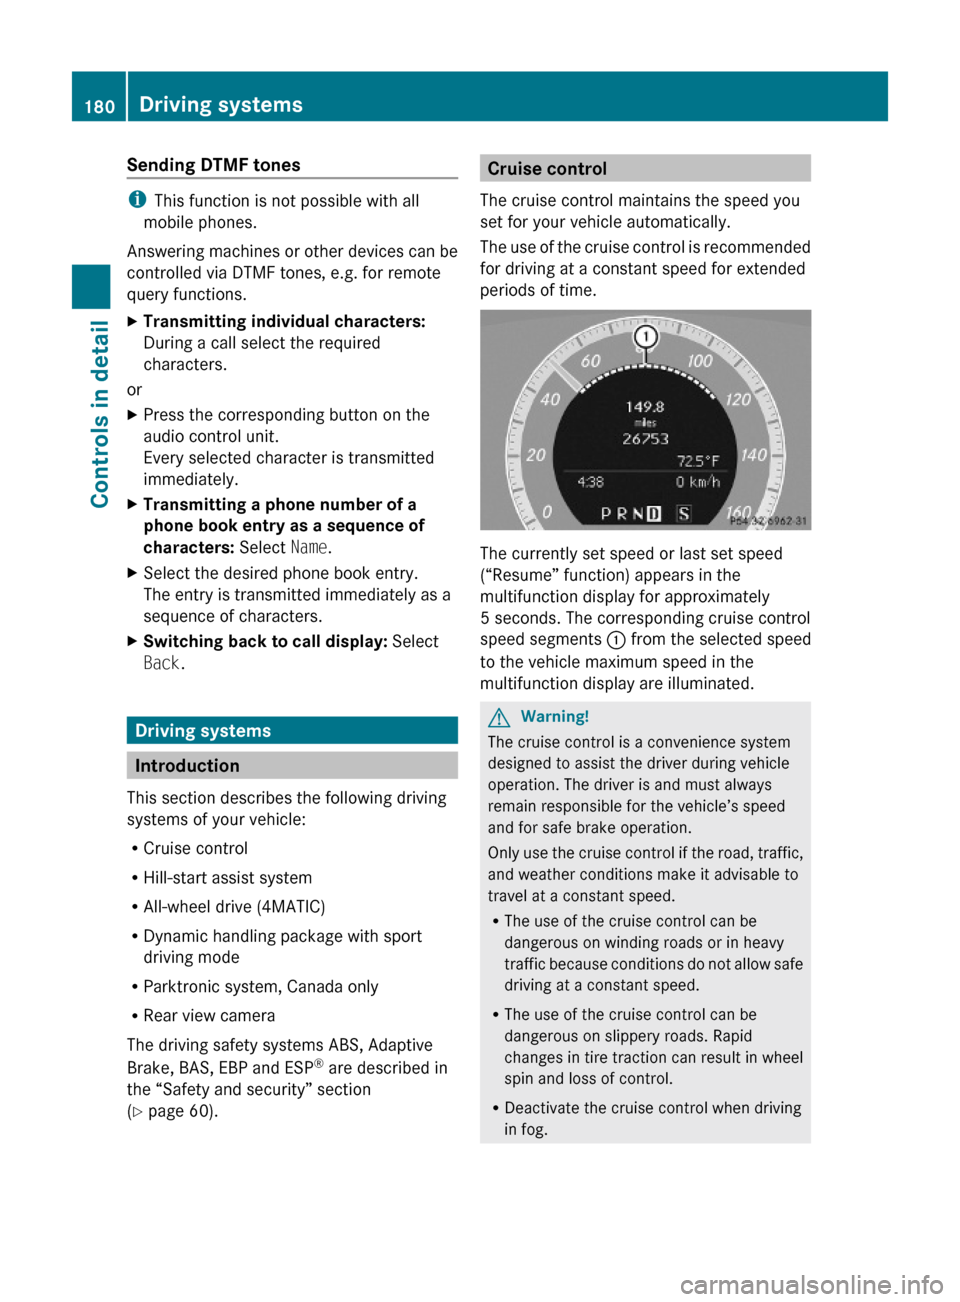
The currently set speed or last set speed
(“Resume” function) appears in the
multifunction display for approximately
5 seconds. The corresponding cruise control
speed segments : from the selected speed
to the vehicle maximum speed in the
multifunction display are illuminated.
GWarning!
The cruise control is a convenience system
designed to assist the driver during vehicle
operation. The driver is and must always
remain responsible for the vehicle’s speed
and for safe brake operation.
Only use the cruise control if the road, traffic,
and weather conditions make it advisable to
travel at a constant speed.
RThe use of the cruise control can be
dangerous on winding roads or in heavy
traffic because conditions do not allow safe
driving at a constant speed.
RThe use of the cruise control can be
dangerous on slippery roads. Rapid
changes in tire traction can result in wheel
spin and loss of control.
RDeactivate the cruise control when driving
in fog.
180Driving systemsControls in detail
204_AKB; 5; 23, en-USd2ureepe,Version: 2.11.8.12009-07-16T17:54:06+02:00 - Seite 180
Page 185 of 364
Setting stored speed (Resume
function) GWarning!
The set speed stored in memory should only
be set again if prevailing road conditions and
legal speed limits permit. Possible
acceleration or deceleration differences
arising from returning to the preset speed
could cause an accident and/or serious injury
to you and others.
XBriefly pull the cruise control lever in
direction of arrow ?.
If no speed is stored, the current speed is
set and stored.XRemove your foot from the accelerator
pedal.
The last stored speed is deleted from memory
when the engine is turned off.
Hill-start assist system
On uphill grades, the hill-start assist system
maintains the pressure in the brake system
for approximately 1 second after you have
released the brake pedal. Therefore, you can
start off smoothly without the vehicle moving
immediately after releasing the brake pedal.
GWarning!
The hill-start assist system is not designed to
function as a parking brake. It does not
prevent the vehicle from moving when parked
on an incline.
Always engage the parking brake in addition
to shifting the automatic transmission into
park position P (manual transmission: shift
into 1st gear or reverse gear R).
XDepress the brake pedal.XManual transmission: Shift into 1st gear
or reverse gear R.XSlowly release the clutch pedal, removing
your foot from the brake pedal at the sametime, and carefully depress the accelerator
pedal.XAutomatic transmission: Shift into drive
position D or reverse position R.XRelease the brake pedal.XCarefully depress the accelerator pedal.
The hill-start assist system is inactive
R when starting off on a level road or downhill
grades
R with the automatic transmission in neutral
position N
R with the parking brake engaged
R if the ESP ®
has switched off due to a
malfunction
All-wheel drive (4MATIC)
In vehicles with all-wheel drive (4MATIC),
both axles are powered at all times when the
vehicle is being operated. The 4MATIC
improves traction in conjunction with the
ESP ®
( Y page 62) and the Electronic Traction
System (ETS/4-ETS) ( Y page 63).
GWarning!
If a drive wheel is spinning due to insufficient
traction:
R While driving off, apply as little throttle as
possible.
R While driving, ease up on the accelerator
pedal.
R Adapt your speed and driving style to the
prevailing road conditions.
Failure to observe these guidelines could
cause the vehicle to skid.
The 4MATIC cannot prevent accidents
resulting from excessive speed.
! Do not tow with one axle raised. Doing so
could damage the transfer case, which is
not covered by the Mercedes-Benz Limited
Warranty. All wheels must be on or off the
Driving systems183Controls in detail204_AKB; 5; 23, en-USd2ureepe,Version: 2.11.8.12009-07-16T17:54:06+02:00 - Seite 183Z
Page 245 of 364
Tire care and maintenanceGWarning!
Regularly check the tires for damage.
Damaged tires can cause tire inflation
pressure loss. As a result, you could lose
control of your vehicle.
Worn, old tires can cause accidents. If the tire
tread is worn to minimum tread depth, or if
the tires have sustained damage, replace
them.
Check the tire inflation pressure at least once
a month. For more information on checking
tire inflation pressure, see “Recommended
tire inflation pressure” (Y page 230).
Tire inspection
Every time you check the tire inflation
pressure, you should also inspect your tires
for the following:
Rexcessive treadwear (Y page 243)
Rcord or fabric showing through the tire’s
rubber
Rbumps, bulges, cuts, cracks or splits in the
tread or side of the tire
Replace the tire if you find any of the above
conditions.
Make sure you also inspect the spare tire
periodically for condition and inflation. Spare
tires will age and become worn over time even
if never used, and thus should be inspected
and replaced when necessary.
Life of tire
GWarning!
Tires and spare tire should be replaced after
6 years, regardless of the remaining tread.
The service life of a tire is dependent upon
varying factors including but not limited to:
RDriving style
RTire inflation pressure
RDistance driven
Tread depth GWarning!
Although the applicable federal motor vehicle
safety laws consider a tire to be worn when
the treadwear indicators (TWI) become visible
at approximately 1/16 in (1.6 mm), we
recommend that you do not allow your tires
to wear down to that level. As tread depth
approaches 1/8 in (3 mm), the adhesion
properties on a wet road are sharply reduced.
Depending upon the weather and/or road
surface (conditions), the tire traction varies
widely.
Do not allow your tires to wear down too far.
Adhesion properties on wet roads are sharply
reduced at tread depths of less than 1/8 in
(3 mm).
Treadwear indicators (TWI) are required by
law. These indicators are located in six places
on the tread circumference and become
visible at a tread depth of approximately1/16 in (1.6 mm), at which point the tire is
considered worn and should be replaced.
The recommended minimum tire tread depth
for summer tires is 1/8 in (3 mm). The
recommended minimum tire tread depth for
winter tires is 1/6 in (4 mm).
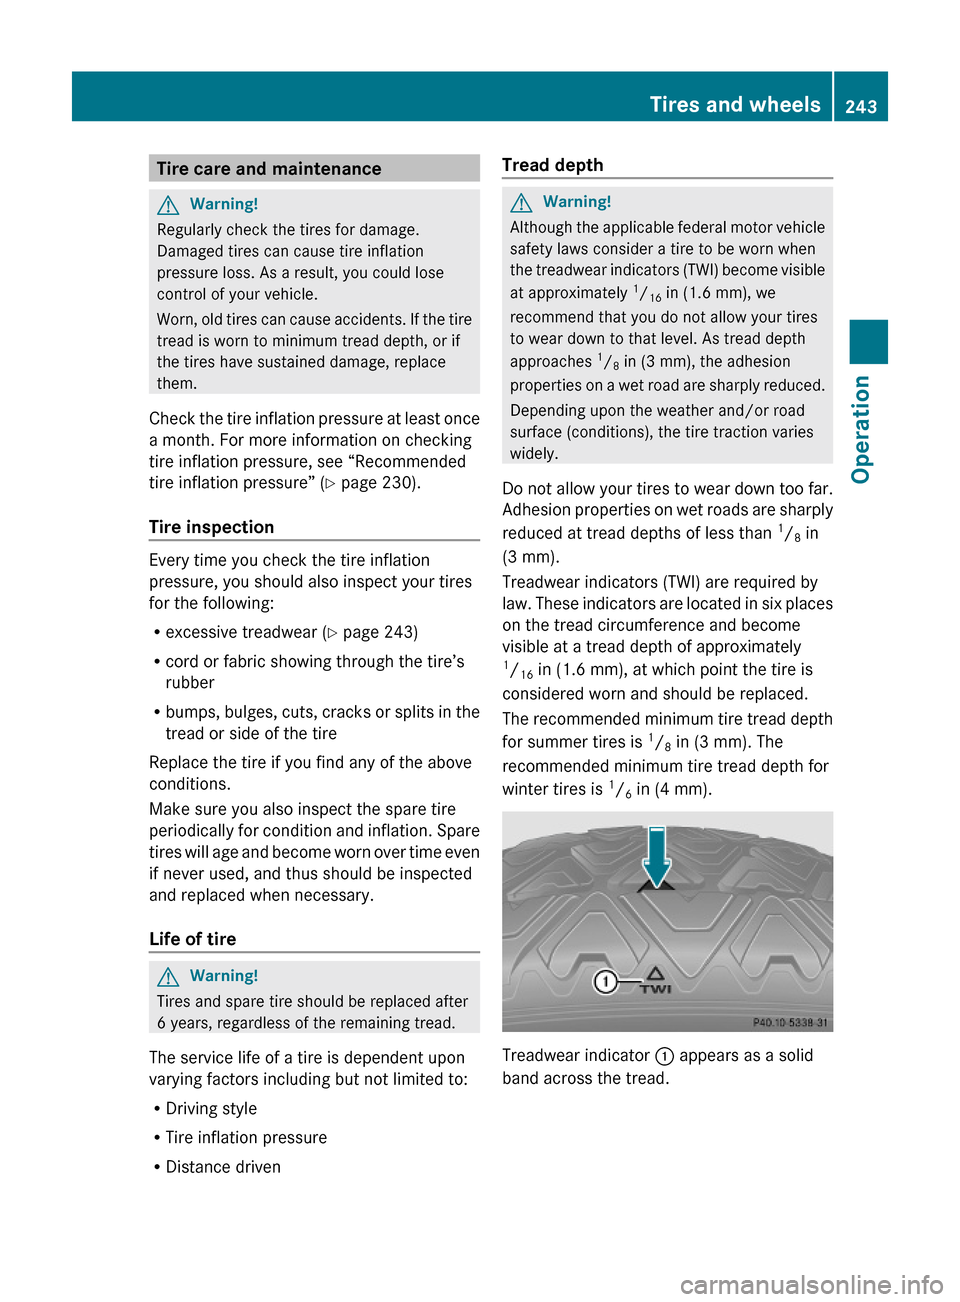
Treadwear indicator : appears as a solid
band across the tread.
Tires and wheels243Operation204_AKB; 5; 23, en-USd2ureepe,Version: 2.11.8.12009-07-16T17:54:06+02:00 - Seite 243Z
Page 246 of 364
Storing tires
! Keep unmounted tires in a cool, dry place
with as little exposure to light as possible.
Protect tires from contact with oil, grease
and fuels.
Cleaning tires
! Never use a round nozzle to power wash
tires. The intense jet of water can result in
damage to the tire.
Always replace a damaged tire.
Uniform Tire Quality Grading
Standards
The Uniform Tire Quality Grading is a U.S.
Government requirement designed to give
drivers consistent and reliable information
regarding tire performance. Tire
manufacturers are required to grade tires
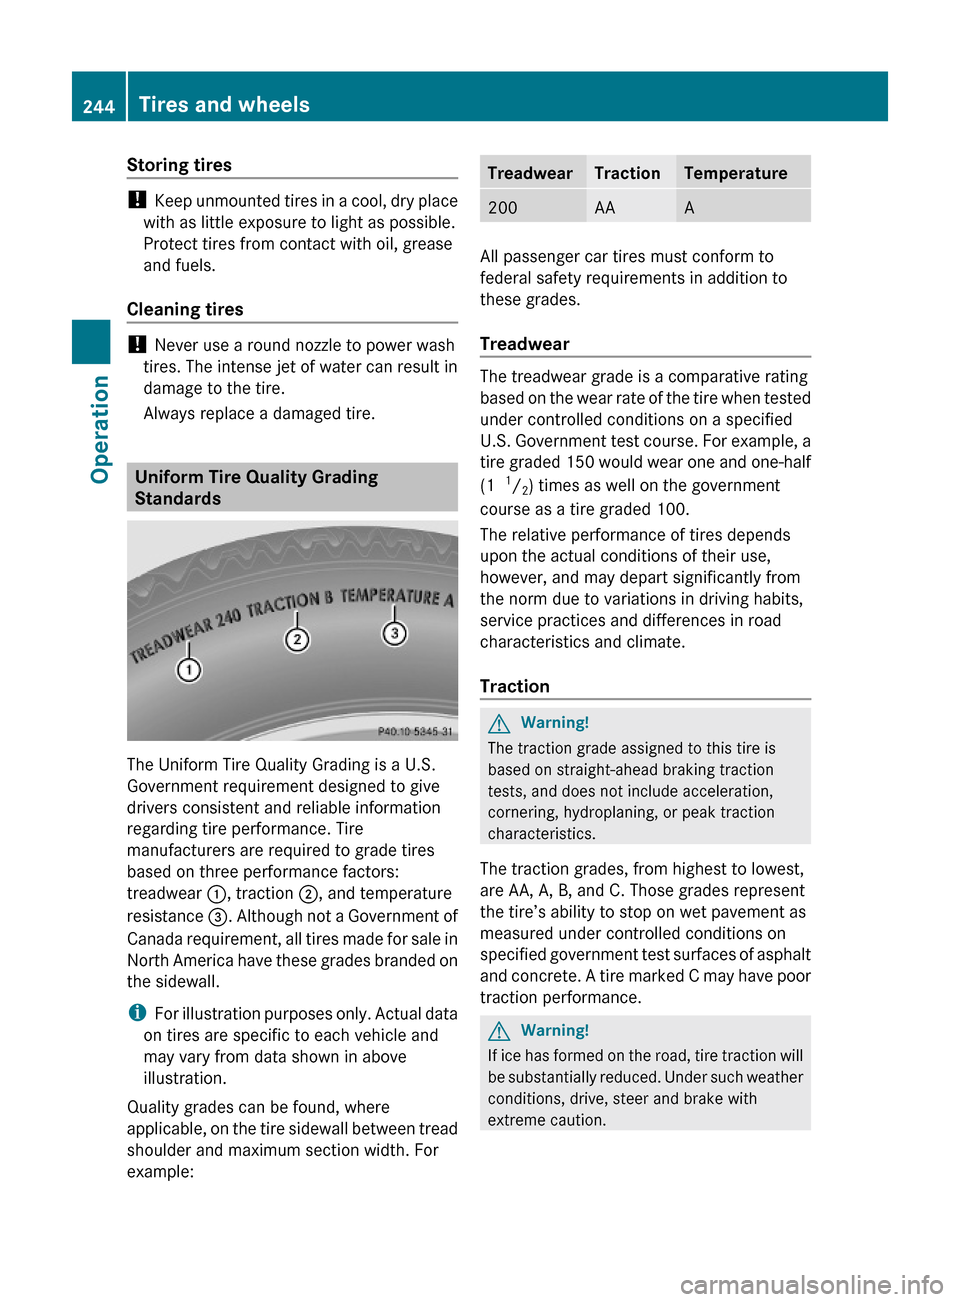
based on three performance factors:
treadwear :, traction ;, and temperature
resistance =. Although not a Government of
Canada requirement, all tires made for sale in
North America have these grades branded on
the sidewall.
iFor illustration purposes only. Actual data
on tires are specific to each vehicle and
may vary from data shown in above
illustration.
Quality grades can be found, where
applicable, on the tire sidewall between tread
shoulder and maximum section width. For
example:
TreadwearTractionTemperature200AAA
All passenger car tires must conform to
federal safety requirements in addition to
these grades.
Treadwear
The treadwear grade is a comparative rating
based on the wear rate of the tire when tested
under controlled conditions on a specified
U.S. Government test course. For example, a
tire graded 150 would wear one and one-half
(1 1/2) times as well on the government
course as a tire graded 100.
The relative performance of tires depends
upon the actual conditions of their use,
however, and may depart significantly from
the norm due to variations in driving habits,
service practices and differences in road
characteristics and climate.
Traction
GWarning!
The traction grade assigned to this tire is
based on straight-ahead braking traction
tests, and does not include acceleration,
cornering, hydroplaning, or peak traction
characteristics.
The traction grades, from highest to lowest,
are AA, A, B, and C. Those grades represent
the tire’s ability to stop on wet pavement as
measured under controlled conditions on
specified government test surfaces of asphalt
and concrete. A tire marked C may have poor
traction performance.
GWarning!
If ice has formed on the road, tire traction will
be substantially reduced. Under such weather
conditions, drive, steer and brake with
extreme caution.
244Tires and wheelsOperation
204_AKB; 5; 23, en-USd2ureepe,Version: 2.11.8.12009-07-16T17:54:06+02:00 - Seite 244