2010 MERCEDES-BENZ C300LUX 4MATIC fog light
[x] Cancel search: fog lightPage 96 of 364
and
R the windshield wipers have wiped the
windshield with washer fluid for the first
time
The headlamps are cleaned every tenth time
the windshield is washed with washer fluid.
The counter resets when you switch off the
ignition.
For information on filling up the washer
reservoir, see “Washer system and headlamp
cleaning system” ( Y page 228).
Corner-illuminating front fog lamps
The corner-illuminating front fog lamps
improve illumination of the area in the
direction into which you are turning.
The corner-illuminating front fog lamps will
only operate
R in low ambient lighting conditions
R at vehicle speeds below 25 mph
(40 km/h)
R with the front fog lamps switched off
R when the engine is running
Switching on
XTurn the exterior lamp switch to position
L or c .
or
XActivate the daytime running lamp mode
( Y page 91).XSwitch on the left or right turn signal,
depending on whether you are turning left
or right.
The respective front fog lamp comes on. If
you have switched on the turn signal for
one side but turn the steering wheel in the
other direction, the corner-illuminatingfront fog lamp on the side of the turn signal
comes on.
or
XTurn the steering wheel in the desired
direction.
Driving forward: The front fog lamp on the
side of your steering direction comes on.
Driving in reverse: The front fog lamp
opposite to your steering direction comes
on.
The corner-illuminating front fog lamps will
come on automatically depending on the
steering angle, even if you did not switch on
either turn signal. If the corner-illuminating
front fog lamps came on automatically, they
will also go out automatically depending on
the steering angle and vehicle speed.
The corner-illuminating front fog lamps
temporarily come on on both sides of the
vehicle if you turn the steering wheel in one
direction and then again in the other direction
shortly thereafter.
The corner-illuminating front fog lamp
remains lit for a short time only. It then goes
out automatically.
Switching off
XSwitch off the left or right turn signal.
or
XSteer straight ahead.
i There may be a brief delay before the
corner-illuminating front fog lamps go out.
94LightingControls in detail
204_AKB; 5; 23, en-USd2ureepe,Version: 2.11.8.12009-07-16T17:54:06+02:00 - Seite 94
Page 136 of 364
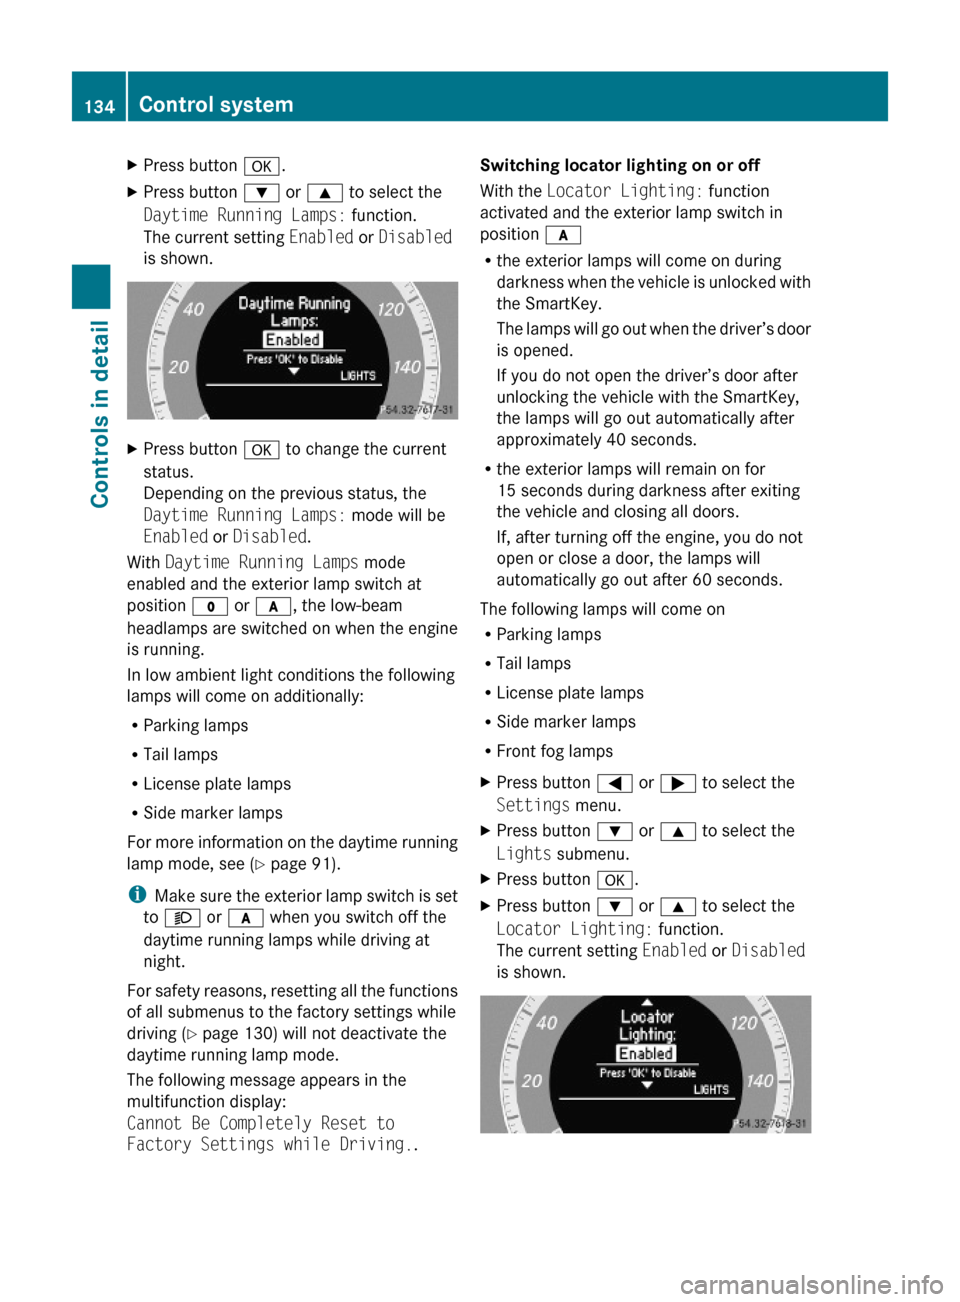
XPress button a.XPress button : or 9 to select the
Daytime Running Lamps: function.
The current setting Enabled or Disabled
is shown.
XPress button a to change the current
status.
Depending on the previous status, the
Daytime Running Lamps: mode will be
Enabled or Disabled.
With Daytime Running Lamps mode
enabled and the exterior lamp switch at
position $ or c, the low-beam
headlamps are switched on when the engine
is running.
In low ambient light conditions the following
lamps will come on additionally:
RParking lamps
RTail lamps
RLicense plate lamps
RSide marker lamps
For more information on the daytime running
lamp mode, see (Y page 91).
iMake sure the exterior lamp switch is set
to M or c when you switch off the
daytime running lamps while driving at
night.
For safety reasons, resetting all the functions
of all submenus to the factory settings while
driving (Y page 130) will not deactivate the
daytime running lamp mode.
The following message appears in the
multifunction display:
Cannot Be Completely Reset to
Factory Settings while Driving..
Switching locator lighting on or off
With the Locator Lighting: function
activated and the exterior lamp switch in
position c
Rthe exterior lamps will come on during
darkness when the vehicle is unlocked with
the SmartKey.
The lamps will go out when the driver’s door
is opened.
If you do not open the driver’s door after
unlocking the vehicle with the SmartKey,
the lamps will go out automatically after
approximately 40 seconds.
Rthe exterior lamps will remain on for
15 seconds during darkness after exiting
the vehicle and closing all doors.
If, after turning off the engine, you do not
open or close a door, the lamps will
automatically go out after 60 seconds.
The following lamps will come on
RParking lamps
RTail lamps
RLicense plate lamps
RSide marker lamps
RFront fog lamps
XPress button = or ; to select the
Settings menu.
XPress button : or 9 to select the
Lights submenu.
XPress button a.XPress button : or 9 to select the
Locator Lighting: function.
The current setting Enabled or Disabled
is shown.
134Control systemControls in detail
204_AKB; 5; 23, en-USd2ureepe,Version: 2.11.8.12009-07-16T17:54:06+02:00 - Seite 134
Page 190 of 364

XSwitch off the ignition.XClean the Parktronic system sensors
(Y page 263).
XSwitch on the ignition.
or
XCheck the Parktronic system operation at
another location to rule out interference
from outside radio or ultrasonic signals.
Rear view camera
The rear view camera is an optical parking aid.
The area behind the vehicle appears in the
COMAND system display as a mirror image,
like in the rear view mirror.
GWarning!
Make sure no persons or animals are in or
near the area in which you are parking/
maneuvering. Otherwise, they could be
injured.
GWarning!
The rear view camera is only an aid and may
display obstacles
Rfrom a distorted perspective
Rinaccurately
Rmay not display obstacles at all
The rear view camera does not relieve you of
the responsibility to be cautious. Take care
and pay careful attention. The rear view
camera may not show objects which are
Rvery close to the rear bumper
Runder the rear bumper
Rabove the trunk handle
You are responsible for safety at all times and
must continue to pay attention to the
immediate surroundings when parking and
maneuvering. This includes the area behind,
in front of, and beside the vehicle. Otherwise
you could endanger yourself and/or others.
GWarning!
The rear view camera either will not function
or will not function to its full capability if
Rthe trunk lid is open
Rit is raining very hard, snowing or foggy
Rit is night or you are parking/maneuvering
your vehicle in an area where it is very dark
Rthe camera is exposed to a very bright white
light
Rthe immediate surroundings are
illuminated with fluorescent light (the
COMAND system display can flicker)
Rthere is a sudden change in temperature,
e.g. if you drive into a heated garage from
the cold (lens condensation)
Rthe camera lens is dirty or covered
Rthe rear of your vehicle is damaged
In this case, have the position and setting
of the camera checked by a qualified
specialist workshop. Mercedes-Benz
recommends that you contact a Mercedes-
Benz Center for this purpose.
Do not use the rear view camera in these
situations. Otherwise you could injure
yourself or others and/or damage property
including your vehicle while parking/
maneuvering.
Camera lens : must be free of dirt, ice,
snow, and slush to function properly. Clean
the camera lens regularly. Being careful not
to scratch or damage the camera lens, see
188Driving systemsControls in detail
204_AKB; 5; 23, en-USd2ureepe,Version: 2.11.8.12009-07-16T17:54:06+02:00 - Seite 188
Page 194 of 364
Activating
Moist air can fog up the windows. You can
dehumidify the interior air with the air
conditioning.
XPress button ¿.
The indicator lamp in the button comes on.
i The evaporator will be vented when the
air conditioning has been in use.
Approximately 1 hour after locking the
vehicle, the blower switches on
automatically. The blower will run for
30 minutes at its lowest level. The blower
noise is normal and not an indication of a
malfunction. When you unlock the vehicle
in the meantime, venting will be
interrupted. If the vehicle battery is low,
automatic evaporator venting will not occur
in order to preserve the battery.
Automatic mode
When operating the climate control system in
automatic mode, the interior air temperature,
air volume and air distribution are adjusted
automatically.
In automatic mode, cooling with
dehumidification is switched on. This function
can be switched off if necessary.
GWarning!
If you deactivate the air conditioning, the
vehicle will not be cooled when weather
conditions are warm. The windows can fog up
more quickly. Window fogging may impair
visibility and endanger you and others.
XSet the desired temperature
( Y page 192).XActivating: Press button Ã.
The indicator lamp in the button comes on.
The air volume and air distribution are
adjusted automatically.XDeactivating: Press button I, K or
_ .
The indicator lamp in button à goes out.
The automatic operation of air volume and
air distribution switches off. The symbols of
air distribution or air volume appear in
display G (Y page 189).XAdjust air distribution ( Y page 194).XAdjust air volume ( Y page 194).
Setting temperature
You can adjust the air temperature on each
side of the passenger compartment. You
should raise or lower the temperature setting
in small increments, preferably starting at
72‡ (22†).
You can adjust the air temperature on each
side of the passenger compartment. You
should raise or lower the temperature setting
in small increments, preferably starting at
72‡ (22†).
XIncreasing/decreasing: Turn
temperature controls : and B
( Y page 189) slightly clockwise or
counterclockwise.
Adjusting air vents
GWarning!
When operating the climate control, the air
that enters the passenger compartment
through the air vents can be very hot or very
cold (depending on the set temperature). This
may cause burns or frostbite to unprotected
skin in the immediate area of the air vents.
Always keep sufficient distance between
unprotected parts of the body and the air
vents. If necessary, use the air distribution
adjustment to direct the air to air vents in the
vehicle interior that are not in the immediate
area of unprotected skin.
192Climate control systemControls in detail
204_AKB; 5; 23, en-USd2ureepe,Version: 2.11.8.12009-07-16T17:54:06+02:00 - Seite 192
Page 296 of 364
Display messagesPossible causes/consequences and M SolutionsbCheck
Left
License
Plate Lamp
or
Check
Right
License
Plate LampThe left or right license plate lamp is malfunctioning.XContact an authorized Mercedes-Benz Center as soon as
possible.bAuto Lamp
Function
Inoperativ
eThe light sensor is malfunctioning. The headlamps come on
automatically.XContact an authorized Mercedes-Benz Center as soon as
possible.
To switch off the headlamps (U.S. vehicles only):
XSwitch off the daytime running lamp mode in the control
system ( Y page 133).XSwitch off the headlamps using the exterior lamp switch
( Y page 90).bCheck
Left Low
Beam
or
Check
Right Low
BeamThe left or right low-beam lamp is malfunctioning.XHalogen headlamp: Replace the bulb as soon as possible
( Y page 313).XBi-Xenon headlamp: Contact an authorized Mercedes-
Benz Center as soon as possible.bCheck
Rear Left
Fog LampThe rear fog lamp is malfunctioning.XReplace the bulb as soon as possible ( Y page 313).bSwitch
Off LightsYou have removed the SmartKey from the starter switch,
opened the driver’s door and left the headlamps on or
removed the SmartKey with KEYLESS-GO from the vehicle
and left the headlamps on.XTurn the exterior lamp switch to $ or c
( Y page 90).
or
XWith the rear fog lamp switched on: Push in the exterior
lamp switch to its stop.294Vehicle status messages in the multifunction displayPractical hints
204_AKB; 5; 23, en-USd2ureepe,Version: 2.11.8.12009-07-16T17:54:06+02:00 - Seite 294
Page 297 of 364

Display messagesPossible causes/consequences and M SolutionsbCheck
Left Tail
Lamp
or
Check
Right
Tail LampThe left or right tail lamp is malfunctioning.XReplace the bulb as soon as possible ( Y page 313).bCheck
Left Tail
and Brake
Lamps
or
Check
Right
Tail and
Brake
LampsThe left or right tail lamp/brake lamp is malfunctioning.XReplace the bulb as soon as possible ( Y page 313).bCheck
Left
Cornering
Light
or
Check
Right
Cornering
LightThe left or right corner-illuminating front fog lamp is
malfunctioning.XContact an authorized Mercedes-Benz Center as soon as
possible.bCheck
Rear Left
Turn
Signal
or
Check
Rear
Right
Turn
SignalThe left or right rear turn signal lamp is malfunctioning.XReplace the bulb as soon as possible ( Y page 313).Vehicle status messages in the multifunction display295Practical hints204_AKB; 5; 23, en-USd2ureepe,Version: 2.11.8.12009-07-16T17:54:06+02:00 - Seite 295Z
Page 315 of 364

Replacing bulbs
Safety notes
Safe vehicle operation depends on proper
exterior lighting and signaling to a large
degree.
Correct headlamp adjustment is extremely
important. Have headlamps checked and
readjusted at regular intervals and when a
bulb has been replaced. Contact an
authorized Mercedes-Benz Center for
headlamp adjustment.
GWarning!
Bulbs and bulb sockets can be very hot. Allow
the lamp to cool down before changing a bulb.
Keep bulbs out of reach of children.
Halogen lamps contain pressurized gas. A
bulb can explode if you
R touch or move it when hot
R drop the bulb
R scratch the bulb
Wear eye and hand protection.
Because of high voltage in Xenon lamps, it is
dangerous to replace the bulb or repair the
lamp and its components. We recommend
that you have such work done by a qualified
technician.
i Since replacing bulbs is a technically
highly demanding process, we recommend
to have them replaced at an authorized
Mercedes-Benz Center.
i If the headlamps or front fog lamps are
fogged up on the inside as a result of high
humidity, driving the vehicle a distance with
the lights on should clear up the fogging.Replacing bulbs313Practical hints204_AKB; 5; 23, en-USd2ureepe,Version: 2.11.8.12009-07-16T17:54:06+02:00 - Seite 313Z
Page 318 of 364
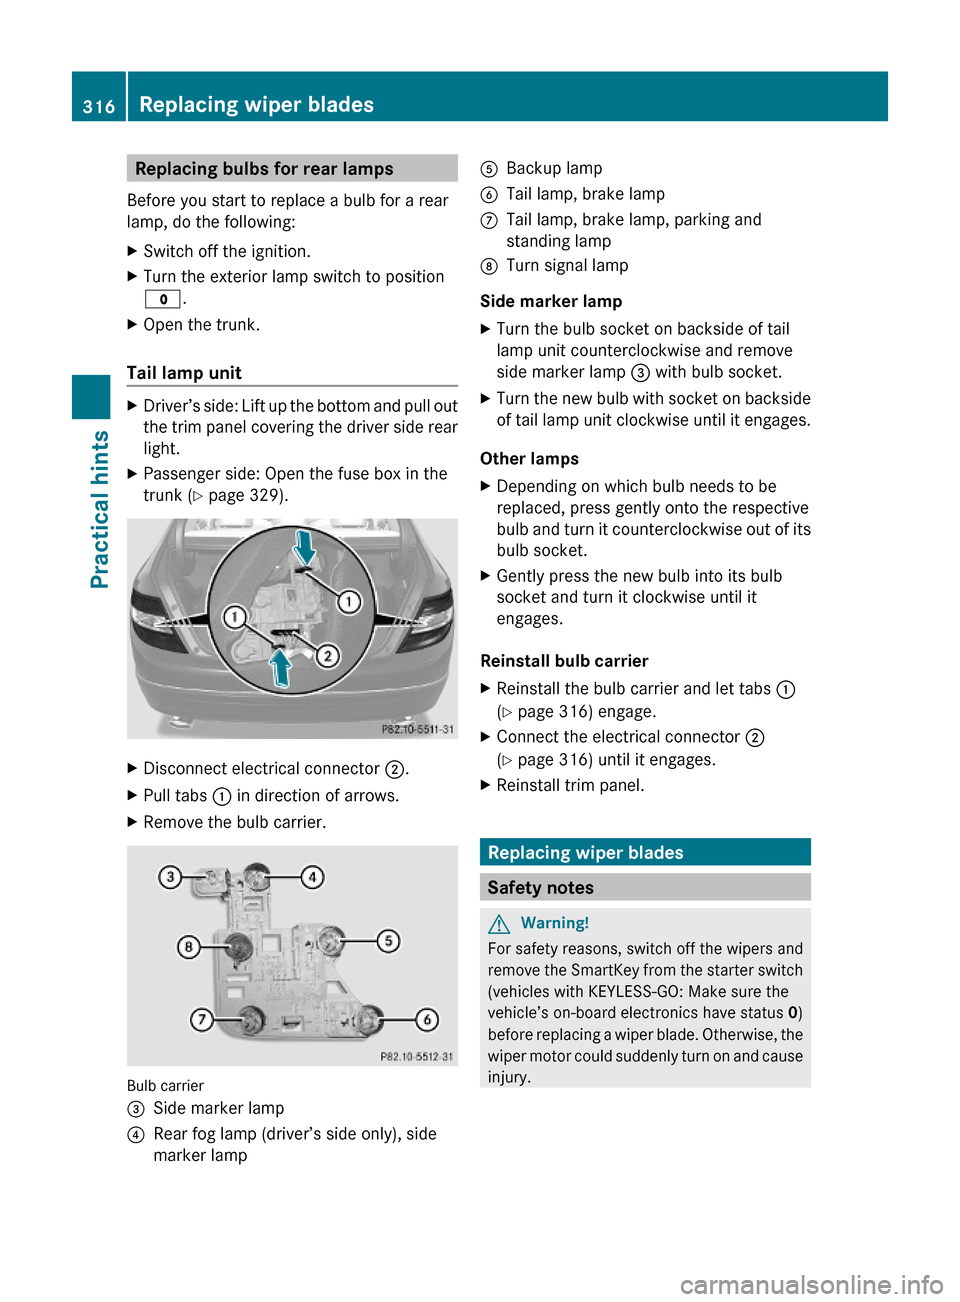
Replacing bulbs for rear lamps
Before you start to replace a bulb for a rear
lamp, do the following:
XSwitch off the ignition.XTurn the exterior lamp switch to position
$.
XOpen the trunk.
Tail lamp unit
XDriver’s side: Lift up the bottom and pull out
the trim panel covering the driver side rear
light.
XPassenger side: Open the fuse box in the
trunk (Y page 329).
XDisconnect electrical connector ;.XPull tabs : in direction of arrows.XRemove the bulb carrier.
Bulb carrier
=Side marker lamp?Rear fog lamp (driver’s side only), side
marker lamp
ABackup lampBTail lamp, brake lampCTail lamp, brake lamp, parking and
standing lamp
DTurn signal lamp
Side marker lamp
XTurn the bulb socket on backside of tail
lamp unit counterclockwise and remove
side marker lamp = with bulb socket.
XTurn the new bulb with socket on backside
of tail lamp unit clockwise until it engages.
Other lamps
XDepending on which bulb needs to be
replaced, press gently onto the respective
bulb and turn it counterclockwise out of its
bulb socket.
XGently press the new bulb into its bulb
socket and turn it clockwise until it
engages.
Reinstall bulb carrier
XReinstall the bulb carrier and let tabs :
(Y page 316) engage.
XConnect the electrical connector ;
(Y page 316) until it engages.
XReinstall trim panel.
Replacing wiper blades
Safety notes
GWarning!
For safety reasons, switch off the wipers and
remove the SmartKey from the starter switch
(vehicles with KEYLESS-GO: Make sure the
vehicle’s on-board electronics have status 0)
before replacing a wiper blade. Otherwise, the
wiper motor could suddenly turn on and cause
injury.
316Replacing wiper bladesPractical hints
204_AKB; 5; 23, en-USd2ureepe,Version: 2.11.8.12009-07-16T17:54:06+02:00 - Seite 316