2010 MERCEDES-BENZ C300 4MATIC display
[x] Cancel search: displayPage 128 of 364
Lap analysis
This function is only available if you have
saved at least two laps and have stopped the
RACETIMER.
XPress button = or ; to select the
AMG menu.
XPress button 9 repeatedly until the lap
analysis appears in the multifunction
display.
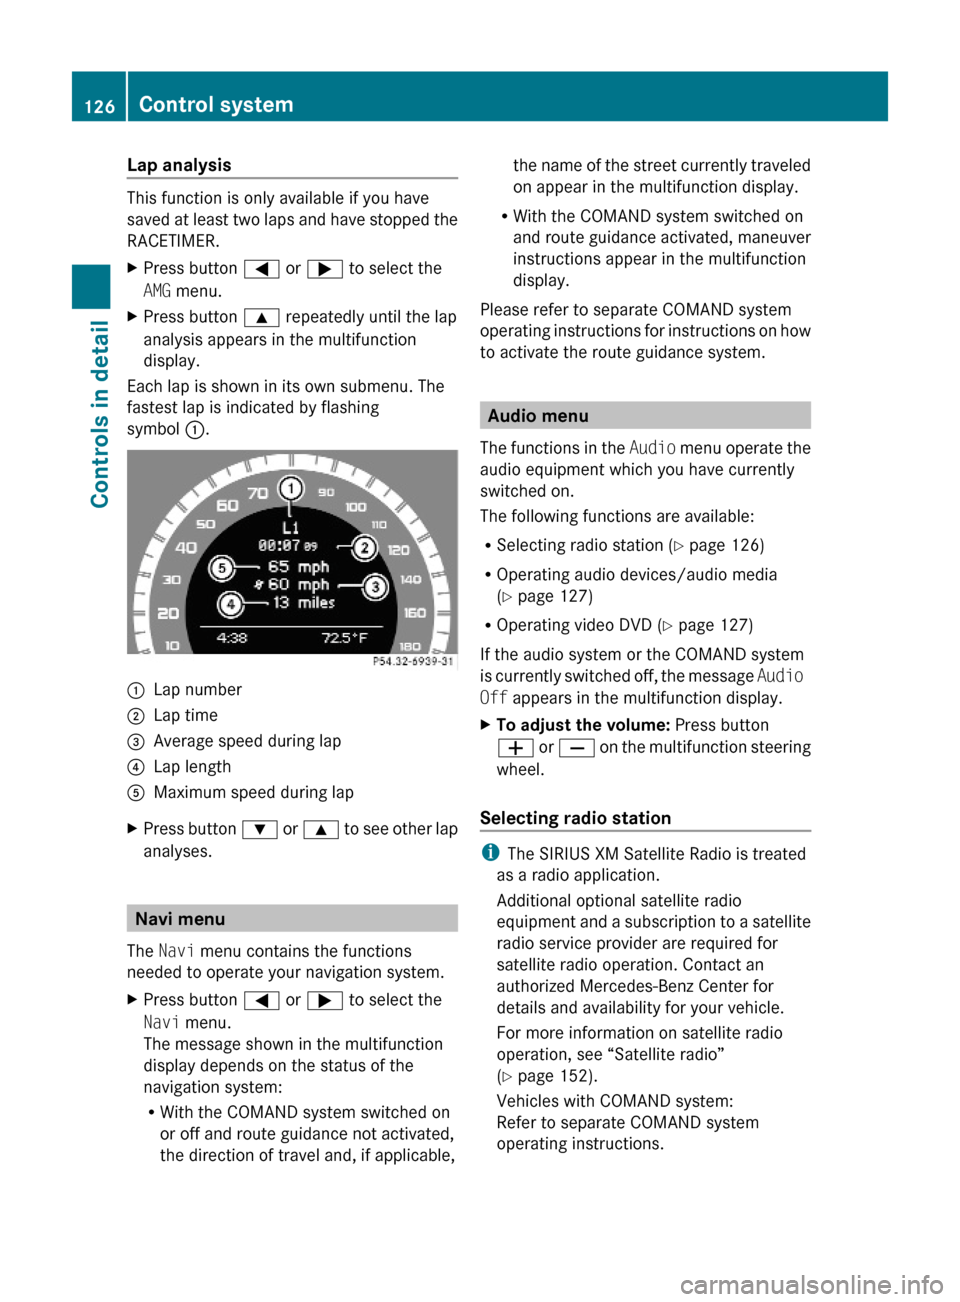
Each lap is shown in its own submenu. The
fastest lap is indicated by flashing
symbol :.
:Lap number;Lap time=Average speed during lap?Lap lengthAMaximum speed during lapXPress button : or 9 to see other lap
analyses.
Navi menu
The Navi menu contains the functions
needed to operate your navigation system.
XPress button = or ; to select the
Navi menu.
The message shown in the multifunction
display depends on the status of the
navigation system:
RWith the COMAND system switched on
or off and route guidance not activated,
the direction of travel and, if applicable,
the name of the street currently traveled
on appear in the multifunction display.
RWith the COMAND system switched on
and route guidance activated, maneuver
instructions appear in the multifunction
display.
Please refer to separate COMAND system
operating instructions for instructions on how
to activate the route guidance system.
Audio menu
The functions in the Audio menu operate the
audio equipment which you have currently
switched on.
The following functions are available:
RSelecting radio station (Y page 126)
ROperating audio devices/audio media
(Y page 127)
ROperating video DVD (Y page 127)
If the audio system or the COMAND system
is currently switched off, the message Audio
Off appears in the multifunction display.
XTo adjust the volume: Press button
W or X on the multifunction steering
wheel.
Selecting radio station
iThe SIRIUS XM Satellite Radio is treated
as a radio application.
Additional optional satellite radio
equipment and a subscription to a satellite
radio service provider are required for
satellite radio operation. Contact an
authorized Mercedes-Benz Center for
details and availability for your vehicle.
For more information on satellite radio
operation, see “Satellite radio”
(Y page 152).
Vehicles with COMAND system:
Refer to separate COMAND system
operating instructions.
126Control systemControls in detail
204_AKB; 5; 23, en-USd2ureepe,Version: 2.11.8.12009-07-16T17:54:06+02:00 - Seite 126
Page 129 of 364
XSwitch on the audio system (Y page 144)
and select radio mode.
Vehicles with COMAND system:
Refer to separate COMAND system
operating instructions.
XPress button = or ; to select the
Audio menu.
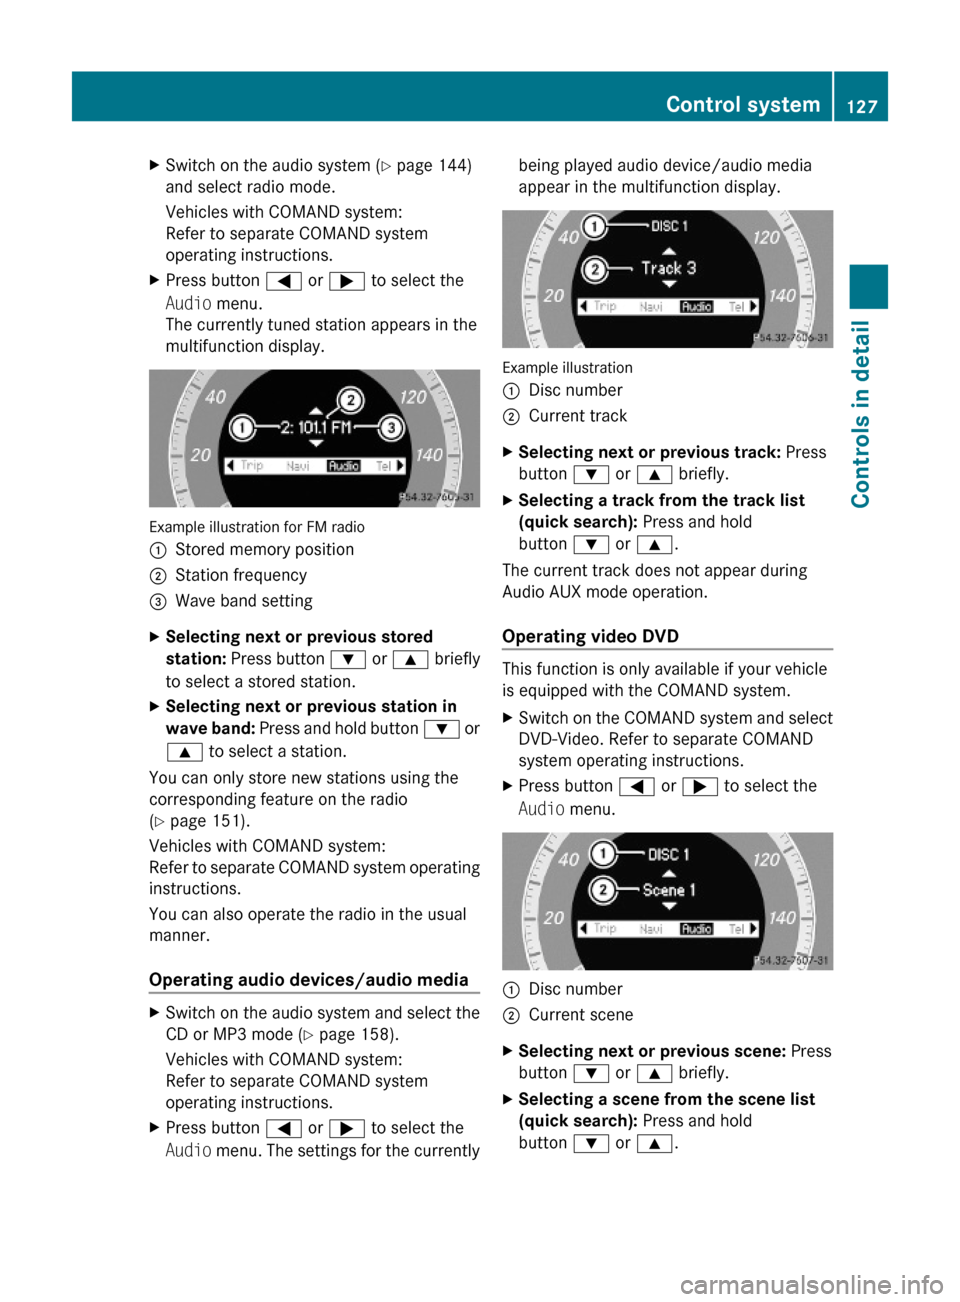
The currently tuned station appears in the
multifunction display.
Example illustration for FM radio
:Stored memory position;Station frequency=Wave band settingXSelecting next or previous stored
station: Press button : or 9 briefly
to select a stored station.
XSelecting next or previous station in
wave band: Press and hold button : or
9 to select a station.
You can only store new stations using the
corresponding feature on the radio
(Y page 151).
Vehicles with COMAND system:
Refer to separate COMAND system operating
instructions.
You can also operate the radio in the usual
manner.
Operating audio devices/audio media
XSwitch on the audio system and select the
CD or MP3 mode (Y page 158).
Vehicles with COMAND system:
Refer to separate COMAND system
operating instructions.
XPress button = or ; to select the
Audio menu. The settings for the currently
being played audio device/audio media
appear in the multifunction display.
Example illustration
:Disc number;Current trackXSelecting next or previous track: Press
button : or 9 briefly.
XSelecting a track from the track list
(quick search): Press and hold
button : or 9.
The current track does not appear during
Audio AUX mode operation.
Operating video DVD
This function is only available if your vehicle
is equipped with the COMAND system.
XSwitch on the COMAND system and select
DVD-Video. Refer to separate COMAND
system operating instructions.
XPress button = or ; to select the
Audio menu.
:Disc number;Current sceneXSelecting next or previous scene: Press
button : or 9 briefly.
XSelecting a scene from the scene list
(quick search): Press and hold
button : or 9.
Control system127Controls in detail204_AKB; 5; 23, en-USd2ureepe,Version: 2.11.8.12009-07-16T17:54:06+02:00 - Seite 127Z
Page 130 of 364
Tel menuGWarning!
A driver’s attention to the road must always
be his/her primary focus when driving. For
your safety and the safety of others, we
recommend that you pull over to a safe
location and stop before placing or taking a
telephone call. If you choose to use the
telephone while driving, please use the hands-
free device and only use the telephone when
weather, road and traffic conditions permit.
Some jurisdictions prohibit the driver from
using a mobile phone while driving a vehicle.
Bear in mind that at a speed of just 30 mph
(approximately 50 km/h), your vehicle is
covering a distance of 44 feet (approximately
14 m) every second.
You can connect your telephone to the audio
system (Y page 167) or to the COMAND
system via Bluetooth®, see separate
COMAND system operating instructions.
XSwitch on the audio system (Y page 144)
or the COMAND system, see separate
COMAND system operating instructions.
XPress button = or ; to select the
Tel menu.
One of the following messages will appear
in the multifunction display:
RNo Service: No network is available.
RReady for Bluetooth Telephony...:
The telephone has not been connected
to the audio system or COMAND system
via Bluetooth® yet.
XConnect the telephone to the audio
system or COMAND system via
Bluetooth®.
RPhone READY or name of the network
provider (if available): The telephone has
found a network and is ready for use. You
can operate it using the control system.
Answering a call
When your telephone is ready to receive calls,
you can answer a call at any time. In the
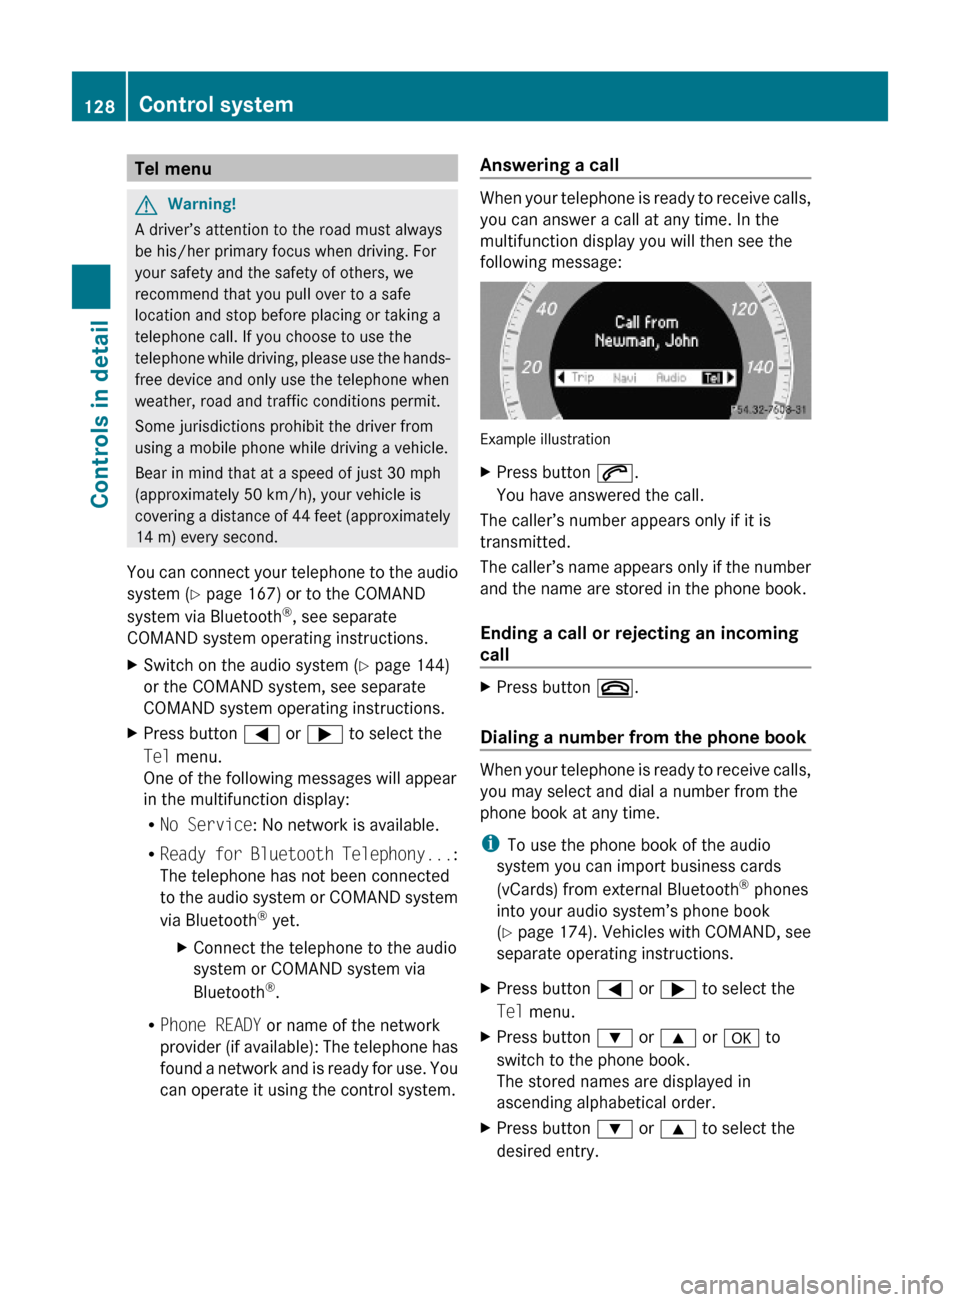
multifunction display you will then see the
following message:
Example illustration
XPress button 6.
You have answered the call.
The caller’s number appears only if it is
transmitted.
The caller’s name appears only if the number
and the name are stored in the phone book.
Ending a call or rejecting an incoming
call
XPress button ~.
Dialing a number from the phone book
When your telephone is ready to receive calls,
you may select and dial a number from the
phone book at any time.
iTo use the phone book of the audio
system you can import business cards
(vCards) from external Bluetooth® phones
into your audio system’s phone book
(Y page 174). Vehicles with COMAND, see
separate operating instructions.
XPress button = or ; to select the
Tel menu.
XPress button : or 9 or a to
switch to the phone book.
The stored names are displayed in
ascending alphabetical order.
XPress button : or 9 to select the
desired entry.
128Control systemControls in detail
204_AKB; 5; 23, en-USd2ureepe,Version: 2.11.8.12009-07-16T17:54:06+02:00 - Seite 128
Page 131 of 364

If you press and hold button : or
9 the system scrolls rapidly through the
list of names (quick search). After holding
button : or 9 for a short while the
scrolling speed increases. Release the
button to stop the quick search. The search
stops automatically at the end of the list.
Example illustration
:Selected name from the phone bookXIf the Symbol G appears on the right-hand
side of the name several entries are
present for the same name: Press button
6 or a and select the desired entry.
XPress button 6 or a.
The control system dials the selected
phone number.
If the connection is successful and this
feature is supported by your network
provider, the name of the party (if stored in
your phone book) you are calling will
appear in the multifunction display.
The control system stores the dialed
number in the redial memory.
or
XPress button ~ or % if you do not
want to make the call.
Redialing
The control system stores the most recently
dialed phone numbers. This eliminates the
need to search through your entire phone
book.
XPress button = or ; to select the
Tel menu.
XPress button 6.XPress button : or 9 to select the
desired number or name.
XPress button 6 or a.
The control system dials the selected
phone number.
Service menu
In the Service menu the following functions
are available:
RVehicle status message memory
(Y page 129)
RRestarting the tire pressure loss warning
system (Canada only) (Y page 234)
RChecking tire inflation pressure
electronically with the Advanced TPMS
(USA only) (Y page 234)
RCalling up the maintenance service
indicator display (Y page 259)
Vehicle status message memory
Use the vehicle status message memory
function to scan malfunction and warning
messages that may be stored in the system.
Such messages appear in the multifunction
display and are based on conditions or
system status the vehicle’s system has
recorded.
GWarning!
Malfunction and warning messages are only
indicated for certain systems and are
intentionally not very detailed. The
malfunction and warning messages are
simply a reminder with respect to the
Control system129Controls in detail204_AKB; 5; 23, en-USd2ureepe,Version: 2.11.8.12009-07-16T17:54:06+02:00 - Seite 129Z
Page 132 of 364
operation of certain systems. They do not
replace the owner’s and/or driver’s
responsibility to maintain the vehicle’s
operating safety. Have all required
maintenance and safety checks performed on
the vehicle. Bring the vehicle to an authorized
Mercedes-Benz Center to address the
malfunction and warning messages.
XPress button = or ; to select the
Service menu.
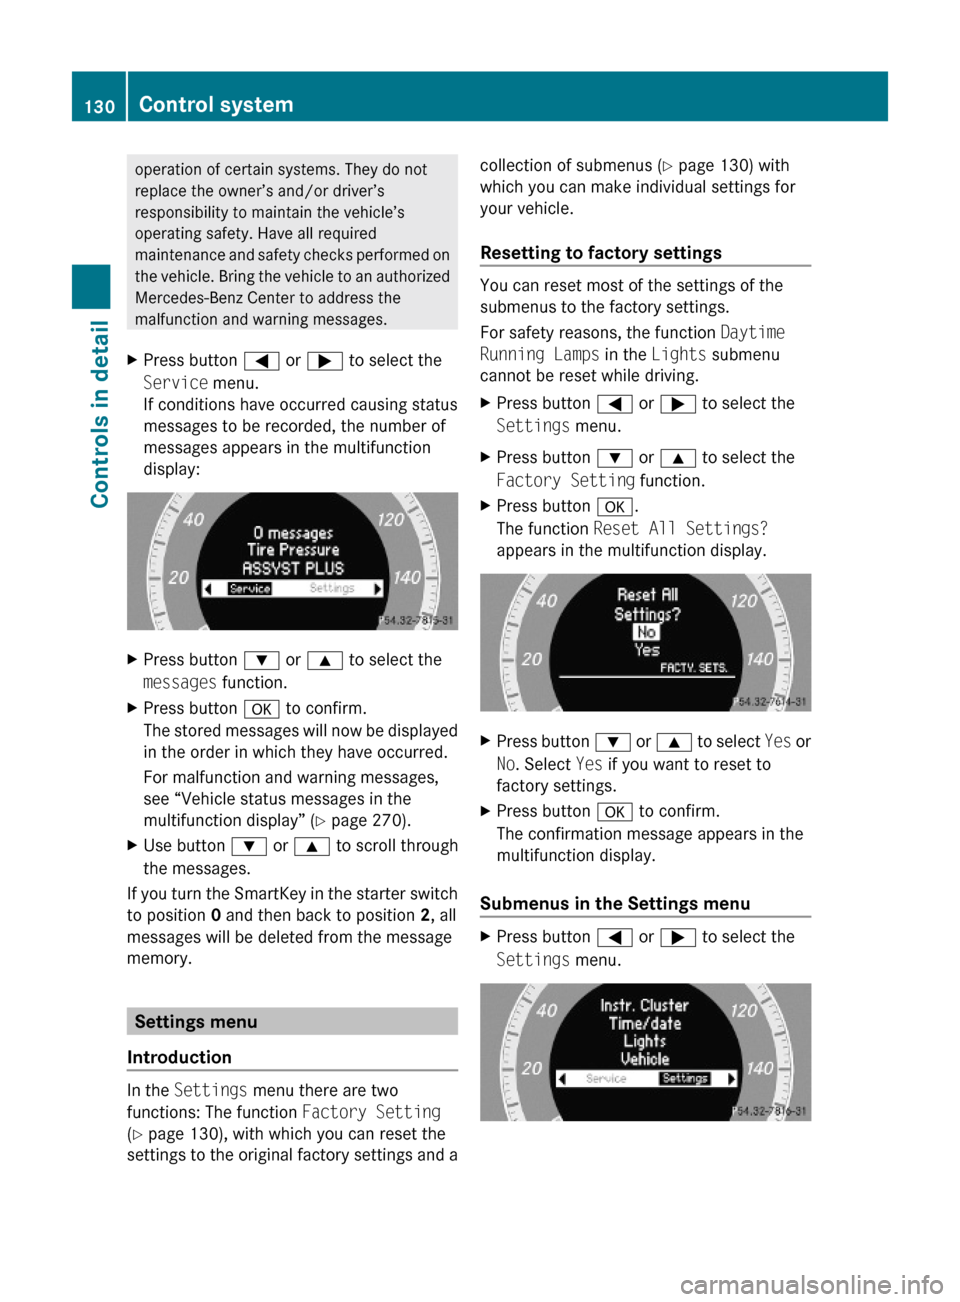
If conditions have occurred causing status
messages to be recorded, the number of
messages appears in the multifunction
display:
XPress button : or 9 to select the
messages function.
XPress button a to confirm.
The stored messages will now be displayed
in the order in which they have occurred.
For malfunction and warning messages,
see “Vehicle status messages in the
multifunction display” (Y page 270).
XUse button : or 9 to scroll through
the messages.
If you turn the SmartKey in the starter switch
to position 0 and then back to position 2, all
messages will be deleted from the message
memory.
Settings menu
Introduction
In the Settings menu there are two
functions: The function Factory Setting
(Y page 130), with which you can reset the
settings to the original factory settings and a
collection of submenus (Y page 130) with
which you can make individual settings for
your vehicle.
Resetting to factory settings
You can reset most of the settings of the
submenus to the factory settings.
For safety reasons, the function Daytime
Running Lamps in the Lights submenu
cannot be reset while driving.
XPress button = or ; to select the
Settings menu.
XPress button : or 9 to select the
Factory Setting function.
XPress button a.
The function Reset All Settings?
appears in the multifunction display.
XPress button : or 9 to select Yes or
No. Select Yes if you want to reset to
factory settings.
XPress button a to confirm.
The confirmation message appears in the
multifunction display.
Submenus in the Settings menu
XPress button = or ; to select the
Settings menu.
130Control systemControls in detail
204_AKB; 5; 23, en-USd2ureepe,Version: 2.11.8.12009-07-16T17:54:06+02:00 - Seite 130
Page 133 of 364
XPress button : or 9 to select a
submenu.
Scroll down with button :, scroll up with
button 9.
With the selection marker on the desired
submenu, use the button a to access the
individual functions within that submenu.
Once within the submenu, you can use button
9 to move to the next function or
button : to move to the previous function
within that submenu.
The following lists show what settings can be
changed within the various menus. Detailed
instructions on making individual settings can
be found on the following pages.
Instrument cluster submenu
RSelecting speedometer display mode
(Y page 131)
RShowing or hiding additional
speedometer13 (Y page 132)
RPermanent display14 (speed display or
outside temperature) (Y page 132)
Time/Date submenu
RSetting the time (Y page 132)
RSetting the date (Y page 133)
Lights submenu
RSwitching daytime running lamp mode on
or off (USA only) (Y page 133)
RSwitching locator lighting on or off
(Y page 134)
RSwitching interior lighting delayed shut-off
on or off (Y page 135)
Vehicle submenu
RSwitching automatic central locking on or
off (Y page 135)
Convenience submenu
RActivating easy-entry/exit feature
(Y page 136)
RSwitching fold-in function for exterior rear
view mirrors on or off (Canada only)
(Y page 136)
Instrument cluster submenu
Access the Instr. Cluster submenu via
the Settings menu. Use the Instr.
Cluster submenu to change the instrument
cluster display settings.
The following functions are available:
RSelecting speedometer display mode
(Y page 131)
RShowing or hiding additional
speedometer15 (Y page 132)
RPermanent display16 (speed display or
outside temperature) (Y page 132)
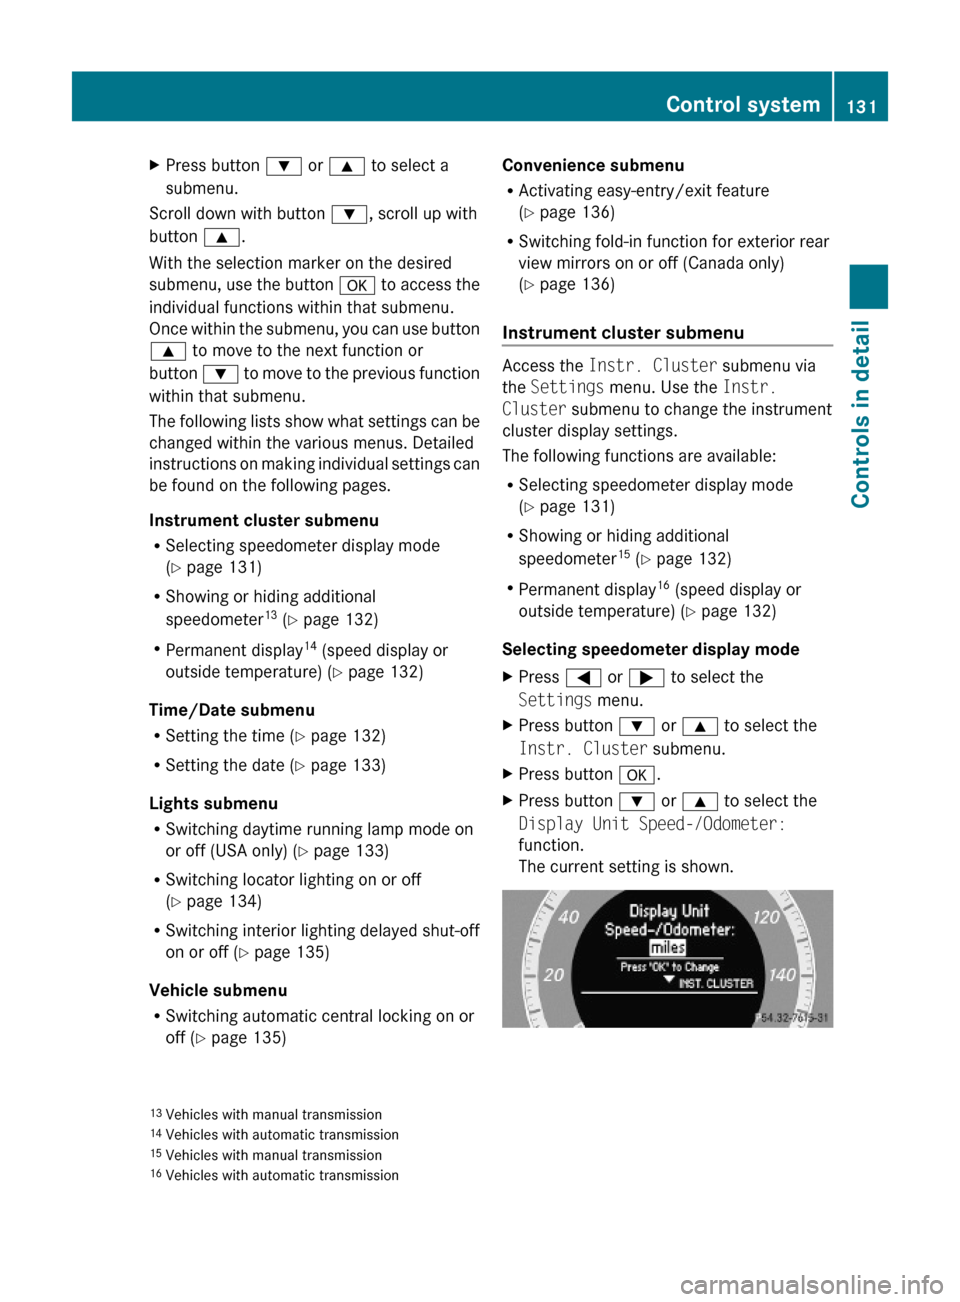
Selecting speedometer display mode
XPress = or ; to select the
Settings menu.
XPress button : or 9 to select the
Instr. Cluster submenu.
XPress button a.XPress button : or 9 to select the
Display Unit Speed-/Odometer:
function.
The current setting is shown.
13Vehicles with manual transmission14Vehicles with automatic transmission15Vehicles with manual transmission16Vehicles with automatic transmission
Control system131Controls in detail204_AKB; 5; 23, en-USd2ureepe,Version: 2.11.8.12009-07-16T17:54:06+02:00 - Seite 131Z
Page 134 of 364

XPress button a to change the setting.
Depending on the previous setting the
Display Unit Speed-/Odometer: will be
set to miles or km.
The selected display unit is valid for:
ROdometer and trip odometer
RTrip computer
RDigital speedometer in the trip menu
RCruise control
RNavigation displays
Showing or hiding additional
speedometer (vehicles with manual
transmission)
You can have an additional digital
speedometer shown on the multifunction
display. The speed is shown in the unit of
kilometers/hour (USA) or miles/hour
(Canada).
XPress button = or ; to select the
Settings menu.
XPress button : or 9 to select the
Instr. Cluster submenu.
XPress button a.XPress button : or 9 to select the
Additional Speedometer function.
The current setting is shown.
XPress button a to change the current
status.
Depending on the previous status, the
additional speedometer will be switched
On or Off.
Permanent display (vehicles with
automatic transmission)
You can use the Permanent Display:
function to choose to display either the
outside temperature or the speed in
kilometers (USA) or miles (Canada)
permanently.
XPress button = or ; to select the
Settings menu.
XPress button : or 9 to select the
Instr. Cluster submenu.
XPress button a.XPress button : or 9 to select the
Permanent Display: function.
The current setting is shown.
XPress button a to change the current
status.
Depending on the previous status, the
Permanent Display: will be switched
between Outside temperature or
Speedometer (km/h) (USA)/
Speedometer (miles) (Canada).
Time/Date submenu
Access the Time/Date submenu via the
Settings menu. Use the Time/Date
submenu to change the time and date display
settings.
The following functions are available:
RSetting the time (Y page 132)
RSetting the date (Y page 133)
Setting the time
This function is not available if your vehicle is
equipped with the COMAND system and
navigation module.
132Control systemControls in detail
204_AKB; 5; 23, en-USd2ureepe,Version: 2.11.8.12009-07-16T17:54:06+02:00 - Seite 132
Page 135 of 364

Vehicles with COMAND system:
For information on setting the time in the
COMAND system, refer to the separate
COMAND system operating instructions.
XPress button = or ; to select the
Settings menu.
XPress button : or 9 to select the
Time/date submenu.
XPress button a.XPress button : or 9 to select the
Time function.
XPress button a.
The current time appears in the
multifunction display.
XTo set a new time press button a again.XPress button = or ; to select the
setting you wish to change: hours or
minutes.
XPress button : or 9 to change the
setting which is highlighted.
XPress button a to store the entry.
Setting the date
This function is not available if your vehicle is
equipped with the COMAND system and
navigation module.
Vehicles with COMAND system:
For information on setting the date in the
COMAND system, refer to the separate
COMAND system operating instructions.
XPress button = or ; to select the
Settings menu.
XPress button : or 9 to select the
Time/date submenu.
XPress button a.XPress button : or 9 to select the
Date function.
XPress button a.
The current date appears in the
multifunction display.
XTo set a new date press button a again.XPress button = or ; to select the
setting you wish to change: month, day or
year.
XPress button : or 9 to change the
setting which is highlighted.
XPress button a to store the entry.
Lights submenu
Access the Lights submenu via the
Settings menu. Use the Lights submenu to
change the lamp and lighting settings on your
vehicle.
The following functions are available:
RSwitching daytime running lamp mode on
or off (USA only) (Y page 133)
RSwitching locator lighting function on or off
(Y page 134)
RSwitching interior lighting delayed shut-off
on or off (Y page 135)
Switching daytime running lamp mode on
or off (USA only)
XPress button = or ; to select the
Settings menu.
XPress button : or 9 to select the
Lights submenu.
Control system133Controls in detail204_AKB; 5; 23, en-USd2ureepe,Version: 2.11.8.12009-07-16T17:54:06+02:00 - Seite 133Z