Page 280 of 500

Black plate (280,1)
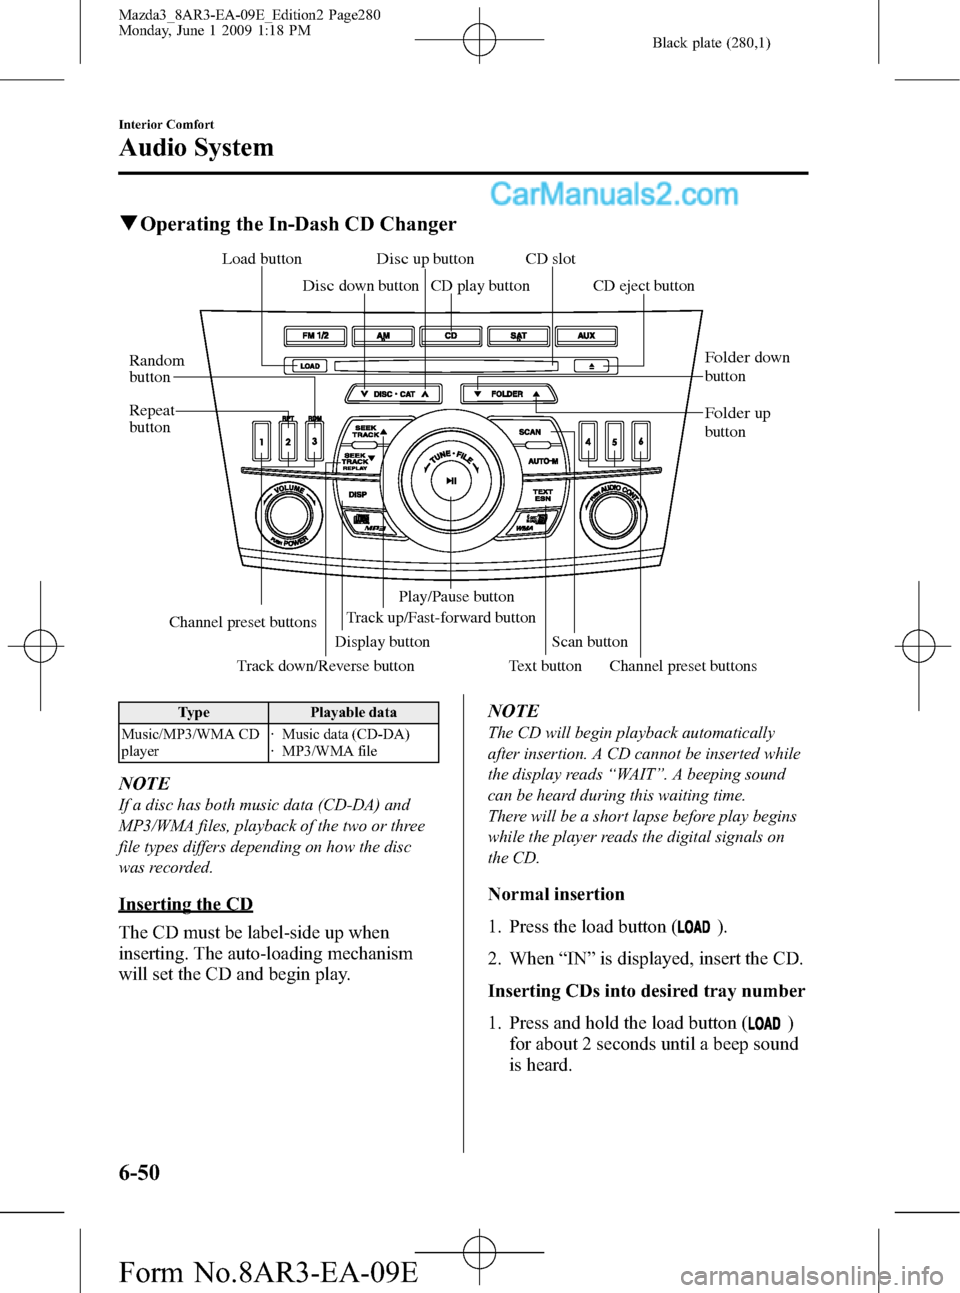
qOperating the In-Dash CD Changer
Track up/Fast-forward buttonCD eject button
Display button
Load button
Channel preset buttons Channel preset buttons
Track down/Reverse button
Text button
Disc down button
Folder down
button
Folder up
button
Disc up button
Random
button
Repeat
button
CD slot
CD play button
Scan button
Play/Pause button
Type Playable data
Music/MP3/WMA CD
player· Music data (CD-DA)
· MP3/WMA file
NOTE
If a disc has both music data (CD-DA) and
MP3/WMA files, playback of the two or three
file types differs depending on how the disc
was recorded.
Inserting the CD
The CD must be label-side up when
inserting. The auto-loading mechanism
will set the CD and begin play.NOTE
The CD will begin playback automatically
after insertion. A CD cannot be inserted while
the display reads“WAIT”. A beeping sound
can be heard during this waiting time.
There will be a short lapse before play begins
while the player reads the digital signals on
the CD.
Normal insertion
1. Press the load button (
).
2. When“IN”is displayed, insert the CD.
Inserting CDs into desired tray number
1. Press and hold the load button (
)
for about 2 seconds until a beep sound
is heard.
6-50
Interior Comfort
Audio System
Mazda3_8AR3-EA-09E_Edition2 Page280
Monday, June 1 2009 1:18 PM
Form No.8AR3-EA-09E
Page 295 of 500

Black plate (295,1)
NOTElAlways perform Bluetooth audio device
programming while the vehicle is stopped.
lIf a Bluetooth device has already been
programmed to the vehicle as a hands-free
mobile phone, it does not need to be
programmed again when using the device
as a Bluetooth audio device. Conversely, it
does not need to be programmed again as a
hands-free mobile phone if it has already
been programmed as a Bluetooth audio
device.
lLook around to be sure other likely
Bluetooth audio devices are not in range
when you start to program. If in doubt,
move your car to another location. The
transmission range of a Bluetooth audio
device is about 10 m (32 ft). Therefore, if
there is another Bluetooth audio device
within a 10 m (32 ft) radius of the vehicle,
the device may be identified and
programmed instead.
lDevice registration can also be done using
voice recognition (page 6-75).
Concerning the operation of a Bluetooth
audio device itself, refer to its instruction
manual.
Some Bluetooth audio devices have PIN
codes (four digits). Refer to the audio
device's instruction manual because the
programming procedure differs depending
on whether it has a PIN code or not.
Programming a Bluetooth audio device
which has a PIN code (4 digits)
1. Using the audio control dial, select the
pairing program mode
“PAIR DEVICE”in the“BT SETUP”
mode. (Refer to
“Bluetooth audio device set-up”for
details.)2. Press the audio control dial to
determine the mode.
After“ENTER PIN”is displayed on
the information display for three
seconds,“PIN 0000”is displayed and
the PIN code can be input.
3. Input the PIN code of your Bluetooth
audio device by pressing channel
preset buttons 1 to 4 while“PIN 0000”
is displayed.
Press channel preset button 1 to input
the first digit, 2 for the second, 3 for
the third, and 4 for the forth. For
example, if the PIN code were“4213”,
press channel preset button 1 four
times (1, 2, 3, 4), button 2 twice (1, 2),
button 3 once (1), and button 4 three
times (1, 2, 3). If the“PIN 0000”
display disappears before finishing the
PIN code input, repeat the procedure
from Step 1.
NOTE
Some devices accept only a particular pairing
code (Usually,“0000”or“1234”).
If pairing cannot be completed, refer to the
owner's manual of your mobile device, and try
those numbers if necessary.
4. Press the audio control dial while the
input PIN code is displayed.
“PAIRING”flashes on the display.
5. Operate the Bluetooth audio device and
set it to the program mode while
“PAIRING”is flashing.
6. When the programming is completed,
“
”and“PAIR SUCCESS”are
displayed after about 10-30 seconds,
after which“PAIR SUCCESS”
continues to be displayed for three
seconds, and then the unit returns to the
normal display.
Interior Comfort
Bluetooth Audio
6-65
Mazda3_8AR3-EA-09E_Edition2 Page295
Monday, June 1 2009 1:18 PM
Form No.8AR3-EA-09E
Page 325 of 500
Black plate (325,1)
Information Display
ClockAudio display
Audio display
Ambient temperature display Climate control display
Climate control displayHands-free display Without multi
information
display
With multi
information
display
Clock adjustment
buttons
qInformation Display Functions
The information display has the following functions:lClockí
lAmbient Temperature Display (Outside Temperature Display)í
lClimate Control DisplaylAudio DisplaylBluetooth Hands-Free DisplayíRefer to Bluetooth Hands-Free on page 6-71.
Interior Comfort
Interior Equipment
6-95íSome models. Mazda3_8AR3-EA-09E_Edition2 Page325
Monday, June 1 2009 1:18 PM
Form No.8AR3-EA-09E
Page 326 of 500

Black plate (326,1)
qClockí
The time is displayed when the ignition is
switched to ACC or ON.
Time setting
1. Turn the ignition switch to the ACC or
ON position.
2. Adjust the time using the time setting
buttons (
,).
The hours advance while the time
setting button (
) is pressed.
The minutes advance while the time
setting button (
) is pressed.
Time resetting
1. Turn the ignition switch to the ACC or
ON position.
2. Press the :00 button.
3. When the button is pressed, the time
will be reset as follows:
(Example)
12:01―12:29→12:00
12:30―12:59→1:00
NOTE
When the :00 button is pressed, the seconds
will start at“00”.
qOutside Temperature Display
(Fully Automatic Type)
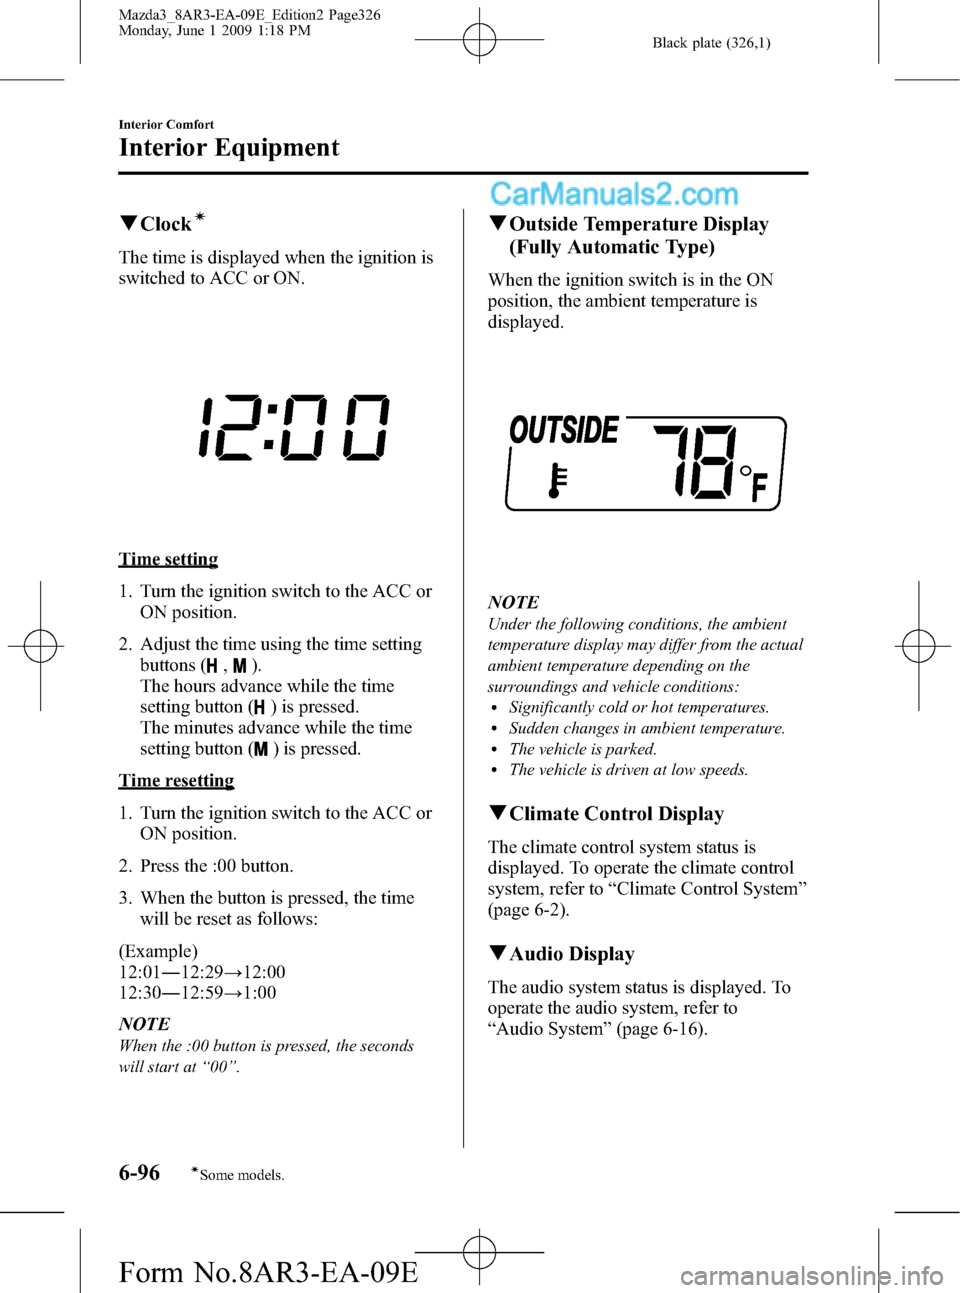
When the ignition switch is in the ON
position, the ambient temperature is
displayed.
NOTE
Under the following conditions, the ambient
temperature display may differ from the actual
ambient temperature depending on the
surroundings and vehicle conditions:
lSignificantly cold or hot temperatures.lSudden changes in ambient temperature.lThe vehicle is parked.lThe vehicle is driven at low speeds.
qClimate Control Display
The climate control system status is
displayed. To operate the climate control
system, refer to“Climate Control System”
(page 6-2).
qAudio Display
The audio system status is displayed. To
operate the audio system, refer to
“Audio System”(page 6-16).
6-96
Interior Comfort
íSome models.
Interior Equipment
Mazda3_8AR3-EA-09E_Edition2 Page326
Monday, June 1 2009 1:18 PM
Form No.8AR3-EA-09E
Page 327 of 500
Black plate (327,1)
Multi Information Displayí
Steering switch
Without navigation system With navigation system
Clock adjustment
buttons
Steering Switch
Left switch
Right switch
Navi switch
BACK switchINFO switch Enter (up/down) switch
Interior Comfort
Interior Equipment
6-97íSome models. Mazda3_8AR3-EA-09E_Edition2 Page327
Monday, June 1 2009 1:18 PM
Form No.8AR3-EA-09E
Page:
< prev 1-8 9-16 17-24