Page 18 of 285
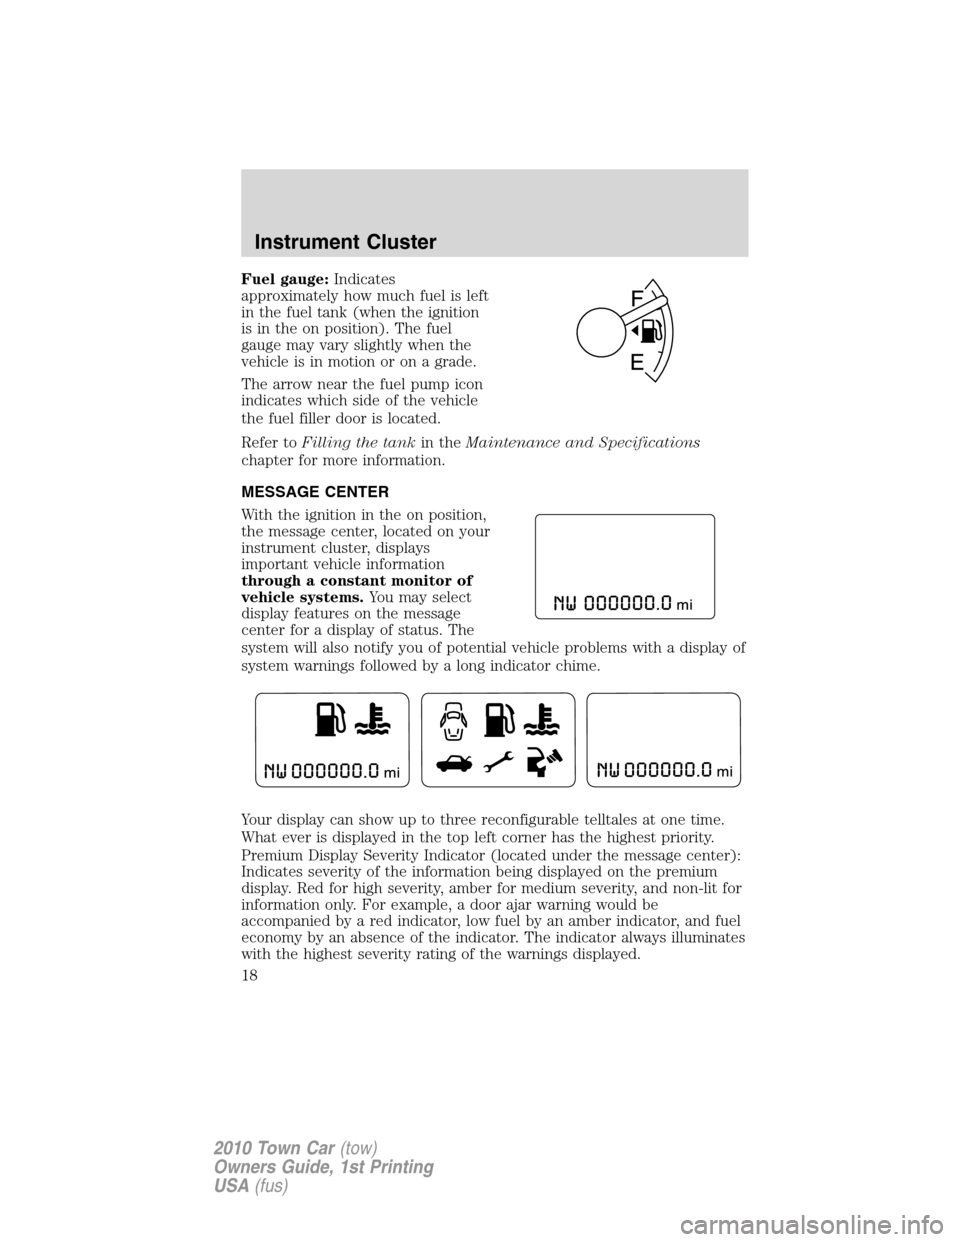
Fuel gauge:Indicates
approximately how much fuel is left
in the fuel tank (when the ignition
is in the on position). The fuel
gauge may vary slightly when the
vehicle is in motion or on a grade.
The arrow near the fuel pump icon
indicates which side of the vehicle
the fuel filler door is located.
Refer toFilling the tankin theMaintenance and Specifications
chapter for more information.
MESSAGE CENTER
With the ignition in the on position,
the message center, located on your
instrument cluster, displays
important vehicle information
through a constant monitor of
vehicle systems.You may select
display features on the message
center for a display of status. The
system will also notify you of potential vehicle problems with a display of
system warnings followed by a long indicator chime.
Your display can show up to three reconfigurable telltales at one time.
What ever is displayed in the top left corner has the highest priority.
Premium Display Severity Indicator (located under the message center):
Indicates severity of the information being displayed on the premium
display. Red for high severity, amber for medium severity, and non-lit for
information only. For example, a door ajar warning would be
accompanied by a red indicator, low fuel by an amber indicator, and fuel
economy by an absence of the indicator. The indicator always illuminates
with the highest severity rating of the warnings displayed.
Instrument Cluster
18
2010 Town Car(tow)
Owners Guide, 1st Printing
USA(fus)
Page 43 of 285
6. Wait the desired amount of time for delay, then turn the headlamp
switch to off.
•At this point, the exterior lamps turn off and the time delay is set.
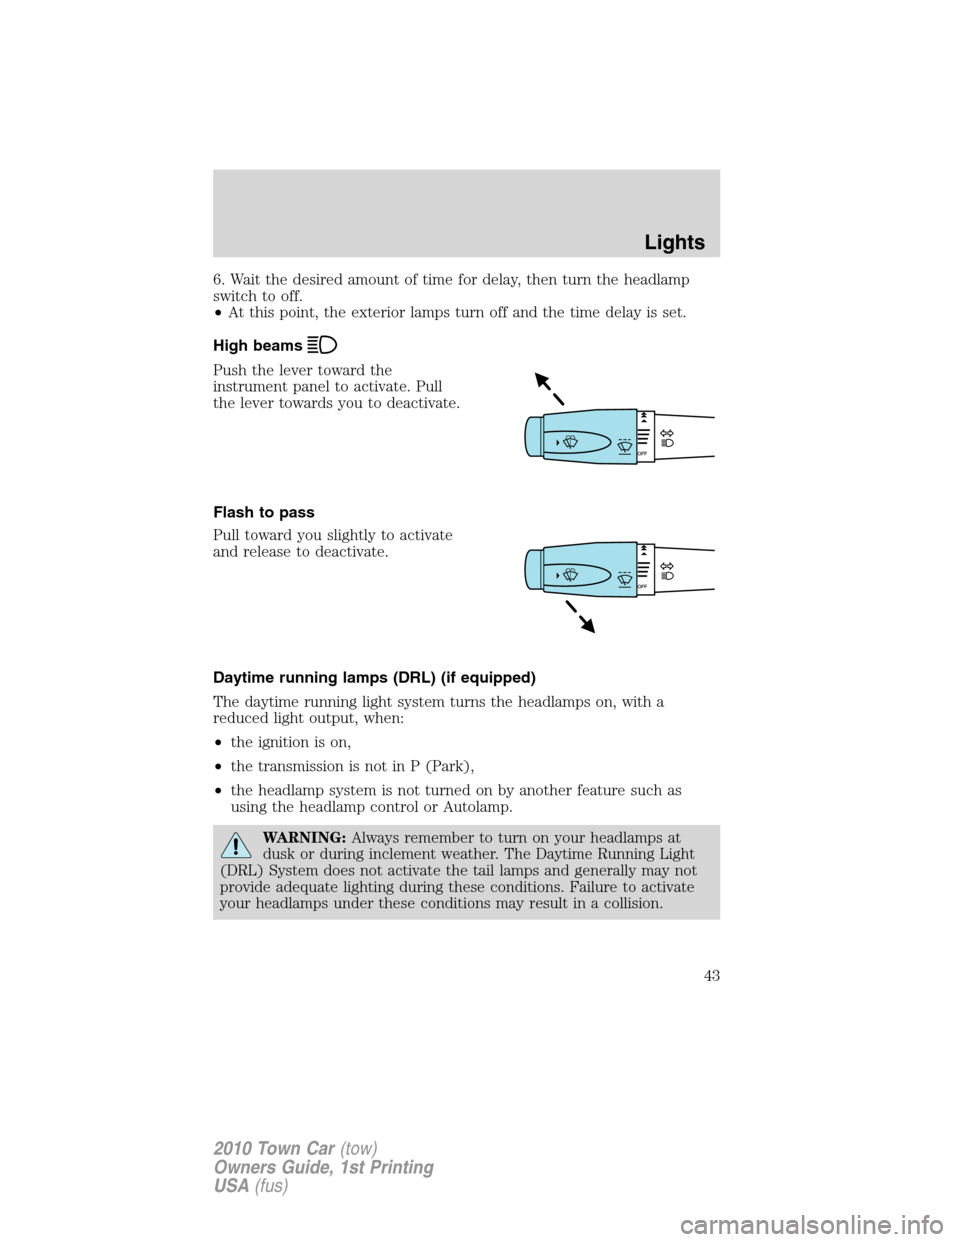
High beams
Push the lever toward the
instrument panel to activate. Pull
the lever towards you to deactivate.
Flash to pass
Pull toward you slightly to activate
and release to deactivate.
Daytime running lamps (DRL) (if equipped)
The daytime running light system turns the headlamps on, with a
reduced light output, when:
•the ignition is on,
•the transmission is not in P (Park),
•the headlamp system is not turned on by another feature such as
using the headlamp control or Autolamp.
WARNING:Always remember to turn on your headlamps at
dusk or during inclement weather. The Daytime Running Light
(DRL) System does not activate the tail lamps and generally may not
provide adequate lighting during these conditions. Failure to activate
your headlamps under these conditions may result in a collision.
Lights
43
2010 Town Car(tow)
Owners Guide, 1st Printing
USA(fus)
Page 49 of 285
Replacing headlamp bulbs
To remove the headlamp bulb:
1. Make sure the headlamp switch is in the off position, then open the
hood.
2. Remove the three retainers on top of the radiator cover and the two
retainers in front of the radiator cover.
3. Remove the three bolts for each headlamp.
4. Press the retainer next to the vertical aim adjuster, then pull the
headlamp assembly forward and disconnect the electrical connector.
5. Remove the five screws and the protective bulb cover from the
headlamp assembly.
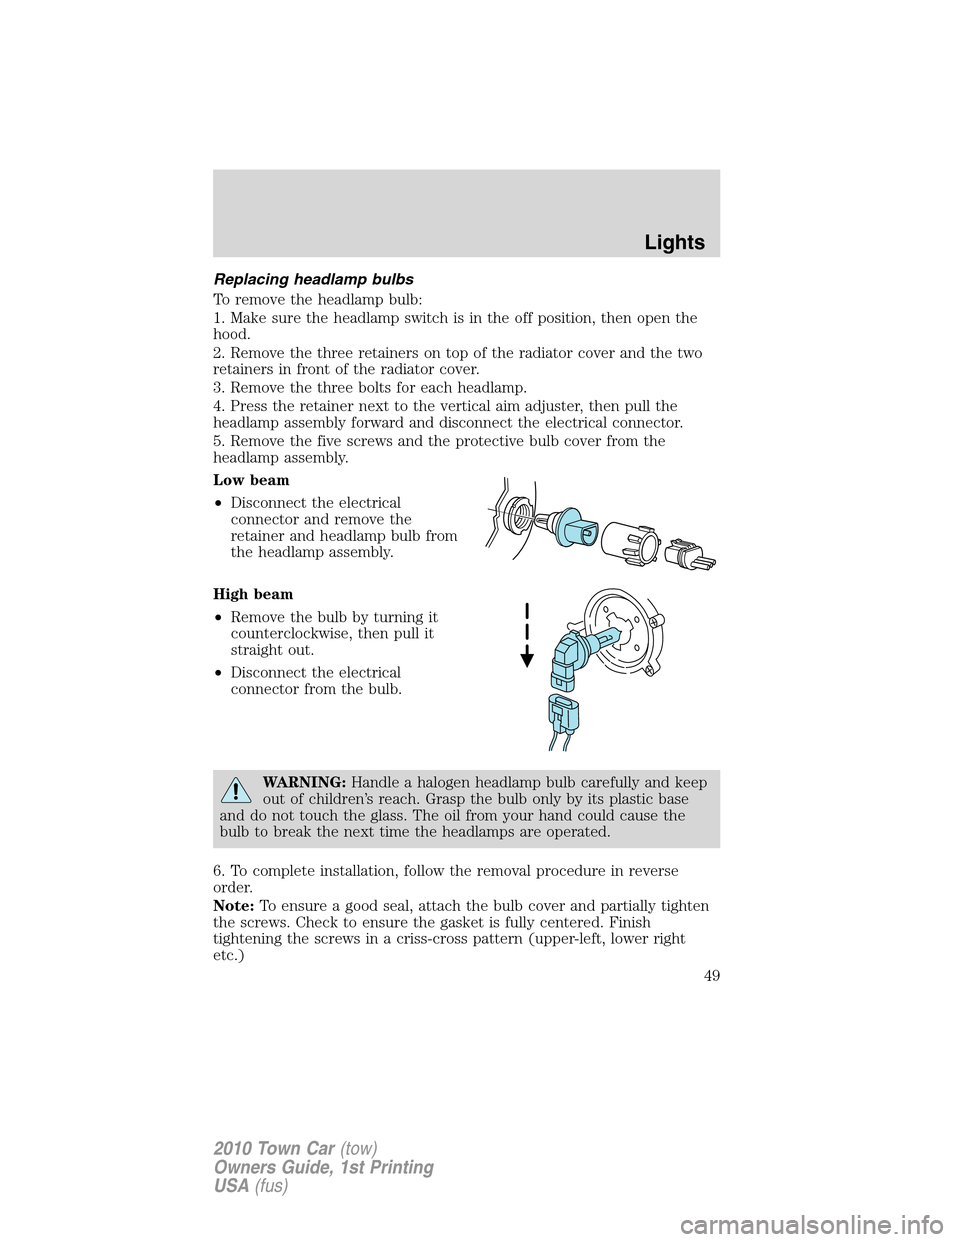
Low beam
•Disconnect the electrical
connector and remove the
retainer and headlamp bulb from
the headlamp assembly.
High beam
•Remove the bulb by turning it
counterclockwise, then pull it
straight out.
•Disconnect the electrical
connector from the bulb.
WARNING:Handle a halogen headlamp bulb carefully and keep
out of children’s reach. Grasp the bulb only by its plastic base
and do not touch the glass. The oil from your hand could cause the
bulb to break the next time the headlamps are operated.
6. To complete installation, follow the removal procedure in reverse
order.
Note:To ensure a good seal, attach the bulb cover and partially tighten
the screws. Check to ensure the gasket is fully centered. Finish
tightening the screws in a criss-cross pattern (upper-left, lower right
etc.)
Lights
49
2010 Town Car(tow)
Owners Guide, 1st Printing
USA(fus)
Page 54 of 285
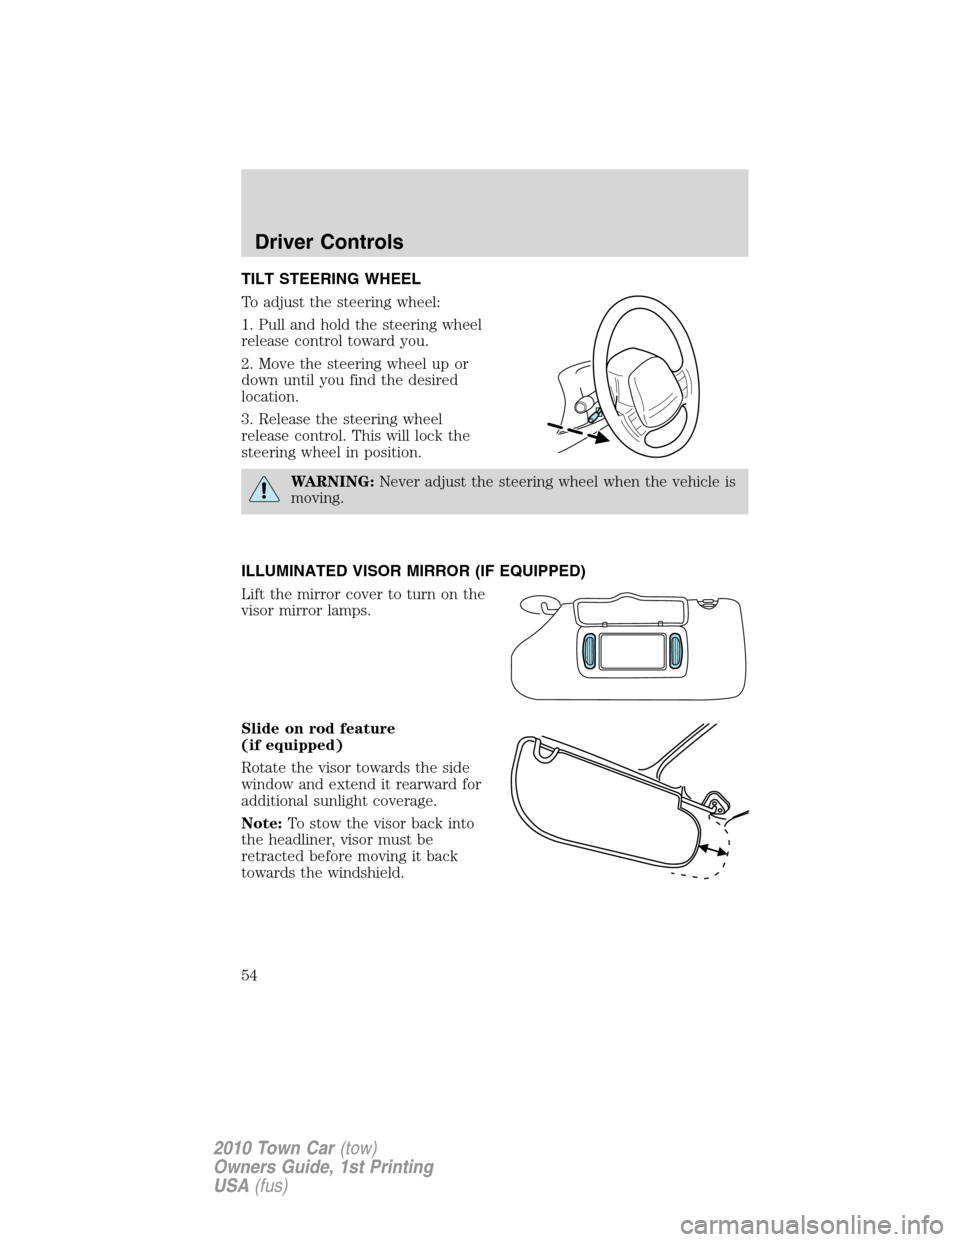
TILT STEERING WHEEL
To adjust the steering wheel:
1. Pull and hold the steering wheel
release control toward you.
2. Move the steering wheel up or
down until you find the desired
location.
3. Release the steering wheel
release control. This will lock the
steering wheel in position.
WARNING:Never adjust the steering wheel when the vehicle is
moving.
ILLUMINATED VISOR MIRROR (IF EQUIPPED)
Lift the mirror cover to turn on the
visor mirror lamps.
Slide on rod feature
(if equipped)
Rotate the visor towards the side
window and extend it rearward for
additional sunlight coverage.
Note:To stow the visor back into
the headliner, visor must be
retracted before moving it back
towards the windshield.
Driver Controls
54
2010 Town Car(tow)
Owners Guide, 1st Printing
USA(fus)
Page 58 of 285
Accessory delay
With accessory delay, the power window switches and radio may be used
for up to 10 minutes after the ignition switch is turned off or until any
door is opened.
INTERIOR MIRROR
The interior rear view mirror has two pivot points on the support arm
which lets you adjust the mirror up or down and from side to side.
WARNING:Do not adjust the mirror while the vehicle is in
motion.
Automatic dimming interior rear view mirror (if equipped)
Your vehicle may be equipped with an interior rear view mirror and a
driver’s side exterior mirror that have an auto-dimming function. The
electronic day/night mirrors will change from the normal (high reflective)
state to the non-glare (darkened) state when bright lights (glare) reach
the interior mirror. When the interior mirror detects bright light from
behind the vehicle, the interior rear view mirror and the driver’s side
exterior mirror (if equipped) will automatically adjust (darken) to
minimize glare.
The mirrors will automatically return to the normal state whenever the
vehicle is placed in R (Reverse) to ensure a bright clear view when
backing up.
Do not block the sensors on the front and back of the interior
rear view mirror since this may impair proper mirror
performance.
Do not clean the housing or glass of any mirror with harsh
abrasives, fuel or other petroleum-based cleaning products.
EXTERIOR MIRRORS
Power side view mirrors
WARNING:Do not adjust the mirror while the vehicle is in
motion.
Driver Controls
58
2010 Town Car(tow)
Owners Guide, 1st Printing
USA(fus)
Page 65 of 285
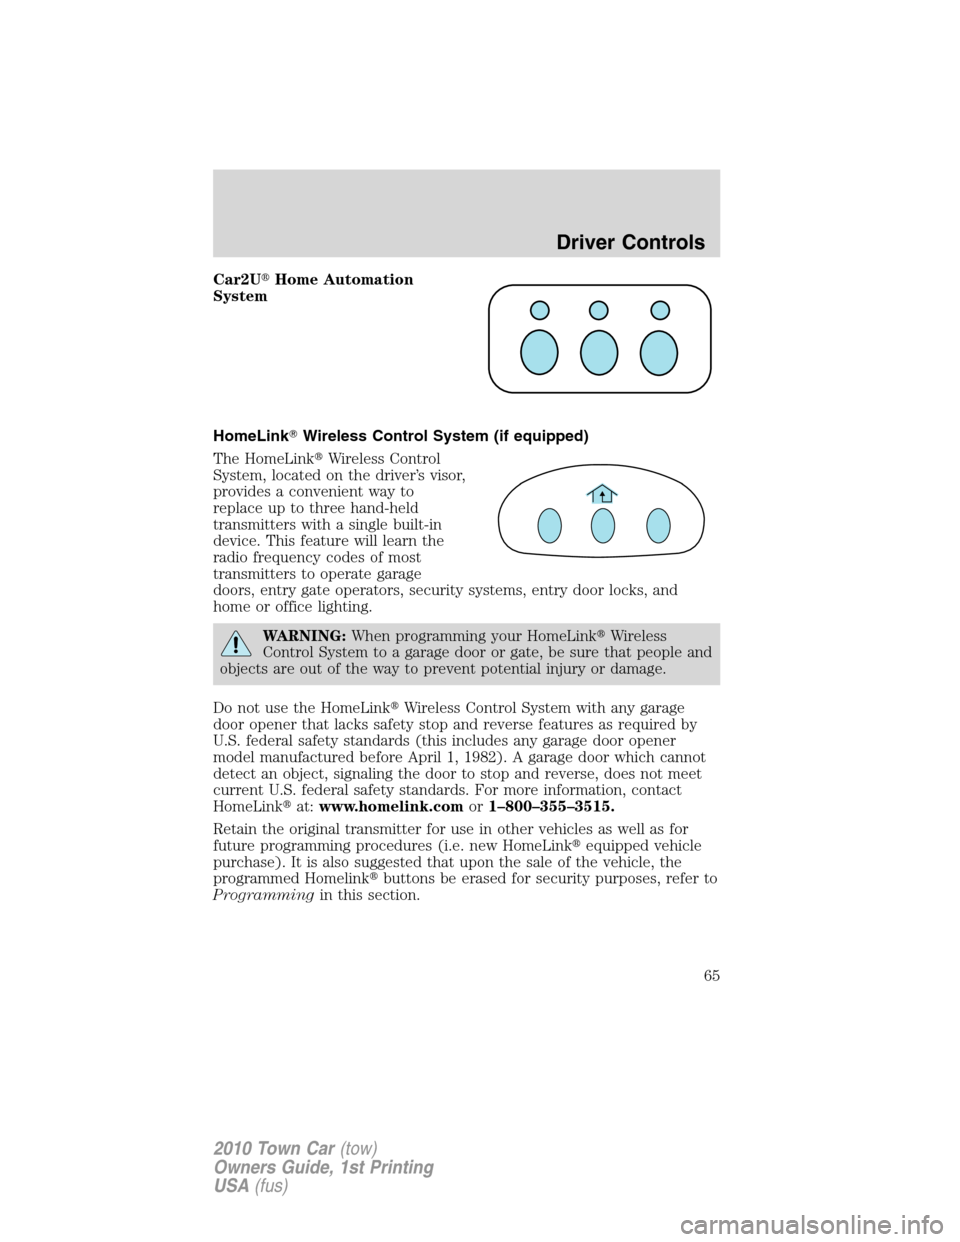
Car2U�Home Automation
System
HomeLink�Wireless Control System (if equipped)
The HomeLink�Wireless Control
System, located on the driver’s visor,
provides a convenient way to
replace up to three hand-held
transmitters with a single built-in
device. This feature will learn the
radio frequency codes of most
transmitters to operate garage
doors, entry gate operators, security systems, entry door locks, and
home or office lighting.
WARNING:When programming your HomeLink�Wireless
Control System to a garage door or gate, be sure that people and
objects are out of the way to prevent potential injury or damage.
Do not use the HomeLink�Wireless Control System with any garage
door opener that lacks safety stop and reverse features as required by
U.S. federal safety standards (this includes any garage door opener
model manufactured before April 1, 1982). A garage door which cannot
detect an object, signaling the door to stop and reverse, does not meet
current U.S. federal safety standards. For more information, contact
HomeLink�at:www.homelink.comor1–800–355–3515.
Retain the original transmitter for use in other vehicles as well as for
future programming procedures (i.e. new HomeLink�equipped vehicle
purchase). It is also suggested that upon the sale of the vehicle, the
programmed Homelink�buttons be erased for security purposes, refer to
Programmingin this section.
Driver Controls
65
2010 Town Car(tow)
Owners Guide, 1st Printing
USA(fus)
Page 74 of 285

To erase programming on the Car2U�system (individual buttons cannot
be erased), use the following procedure:
1. Firmly press the two outside
Car2U�system buttons
simultaneously for approximately
20 seconds until the indicator lights
begin to blink rapidly. The indicator
lights are located directly above the
buttons.
2. Once the indicator lights begin to
blink, release your fingers from the
buttons. The codes for all buttons
are erased.
If you sell your vehicle equipped with the Car2U�system, it is
recommended that you erase the programming for security reasons.
FCC and RSS-210 Industry Canada Compliance
The Car2U�system complies with Part 15 of the FCC rules and with
RSS-210 of Industry Canada. Operation is subject to the following two
conditions: (1) This device may not cause harmful interference, and (2)
This device must accept any interference received including interference
that may cause undesired operation.
Changes and modifications to the Car2U�system transmitter by other
than an authorized service facility could void authorization to use the
equipment.
POWER TRUNK (IF EQUIPPED)
Your vehicle may be equipped with a power trunk controlled by the
interior trunk control, the key fob or the keypad on the door.
If anything obstructs the power trunk while it is closing, the trunk will
automatically reverse to the open position, provided it meets sufficient
resistance. Resistance must be as strong as the force of the closing
trunk, or stronger. The force of the closing trunk increases as the trunk
approaches the latched position. The trunk will close with the next press
of the interior trunk control or key fob button.
WARNING:Make sure all persons are clear of the luggage
compartment area before using the power trunk control.
Driver Controls
74
2010 Town Car(tow)
Owners Guide, 1st Printing
USA(fus)
Page 80 of 285

INTERIOR LUGGAGE COMPARTMENT RELEASE
Your vehicle is equipped with a mechanical interior luggage compartment
release handle that provides a means of escape for children and adults in
the event they become locked inside the luggage compartment.
Adults are advised to familiarize themselves with the operation and
location of the release handle.
To open the luggage compartment
door (lid) from within the luggage
compartment, pull the illuminated
“T” shaped handle and push up on
the trunk lid. The handle is
composed of a material that will
glow for hours in darkness following
brief exposure to ambient light.
The “T” shaped handle will be
located either on the luggage
compartment door (lid) or inside
the luggage compartment near the
tail lamps.
WARNING:Keep vehicle
doors and luggage
compartment locked and keep
keys and remote transmitters out
of a child’s reach. Unsupervised
children could lock themselves in
the trunk and risk injury. Children
should be taught not to play in
vehicles.
Locks and Security
80
2010 Town Car(tow)
Owners Guide, 1st Printing
USA(fus)