2010 LINCOLN NAVIGATOR brake
[x] Cancel search: brakePage 28 of 385

CHECK AIR SUSPENSION (if equipped)— Displayed when the air
suspension system is not operating properly. If this message is displayed
while driving, pull off the road as soon as safely possible. For more
information, refer toAir suspension systemin theDrivingchapter.
CHECK BRAKE SYSTEM— Displayed when the braking system is not
operating properly. If the warning stays on or continues to come on,
contact your authorized dealer as soon as possible.
XXX MILES TO E FUEL LEVEL LOW— Displayed as an early
reminder of a low fuel condition.
PARK BRAKE ENGAGED— Displayed when the parking brake is set,
the engine is running and the vehicle is driven more than 3 mph
(5 km/h). If the warning stays on after the parking brake is released,
contact your authorized dealer as soon as possible.
TRAILER SWAY REDUCE SPEED (if equipped)— Displayed when
the trailer sway control has detected trailer sway. For more information,
refer to theDrivingchapter for more information.
4X4 SHIFT IN PROGRESS—4X4 SHIFT IN PROGRESS—
Displayed when the 4X4 system is making a shift. For more information,
refer toControl trac four-wheel drive (4X4) operationin theDriving
chapter.
FOR 4X4 LOW SLOW TO 3 MPH (if equipped)— Displayed when
4X4 LOW is selected while the vehicle is moving. For more information,
refer toControl trac four-wheel drive (4X4) operationin theDriving
chapter.
FOR 4X4 LOW SHIFT TO N (if equipped)— Displayed when 4X4
LOW is selected and the vehicle is stopped. For more information, refer
toControl trac four-wheel drive (4X4) operationin theDriving
chapter.
TO EXIT 4X4 LOW SLOW TO 3 MPH (if equipped)— Displayed
when 2WD is selected while the vehicle is operating in 4X4 LOW. For
more information, refer toControl trac four-wheel drive (4X4)
operationin theDrivingchapter.
TO EXIT 4X4 LOW SHIFT TO N (if equipped)— Displayed when
2WD is selected while the vehicle has been stopped in 4X4 LOW. For
more information, refer toControl trac four-wheel drive (4X4)
operationin theDrivingchapter.
MY KEY ACTIVE DRIVE SAFELY— Displayed at startup when
MyKey™ is in use. Refer toMyKey™in theLocks and Securitychapter
for more information.
Instrument Cluster
28
2010 Navigator(nav)
Owners Guide(own2002), 1st Printing
USA(fus)
Page 93 of 385

Function Number of bulbs Trade number
2nd row reading lamp 1 1600XB
Rear cargo lamp 1 211–2XB
Rear turn/tail/brake
lamps4 4057K
Backup lamps 2 921
Supplemental tail
lamps4 906
Approach lamps 2 906
Mirror turn signal
lamps2 906 (amber)
License lamp 2 168
High-mount brake
lamp5 W5W
Visor vanity lamp -
Slide on rail system
(SOR)2 A6224PF
All replacement bulbs are clear in color except where noted.
To replace all instrument panel lights - see your authorized dealer
* For vehicles with HID (high intensity discharge) lamps, see your
authorized dealer for service.
Replacing interior bulbs
Check the operation of all bulbs frequently.
Replacing HID headlamp bulbs
The low/high beam headlamps on your vehicle use a “high intensity
discharge” source. These lamps operate at a high voltage. The bulb is
NOT customer replaceable. When the bulb is burned out, the bulb must
be replaced by your authorized dealer.
Replacing front parking lamp/turn signal/sidemarker bulbs
The front parking lamp/turn signal/sidemarker bulbs are located in the
headlamp assembly. Follow the same steps to replace either bulb.
1. Make sure the headlamp control is in the off position.
2. Open the hood.
Lights
93
2010 Navigator(nav)
Owners Guide(own2002), 1st Printing
USA(fus)
Page 96 of 385

Replacing the high-mount brakelamp
To change the high-mount
brakelamp bulbs:
1. Remove the two screws holding
the lamp assembly in place.
2. Pull the lamp assembly straight
out.
3. Disconnect the wire harness.
4. Press the four tabs that hold the
light assembly on, one at a time, and
pull the black bulb carrier away
from the lamp.
5. Pull the old bulb out and replace
with the new bulb.
6. Snap the black bulb carrier into
the lamp assembly.
7. Connect the wire harness.
8. Install the lamp assembly with
two screws.
Replacing license plate lamp bulb
The license plate bulbs are located in the license plate housing assembly
on the liftgate. To change the license plate bulbs:
1. Make sure the headlamp switch is
in the off position.
2. Remove the license lamp screw
from the assembly.
3. Pull the lamp down and twist the
bulb socket counterclockwise.
Remove the bulb socket from the
lamp.
4. Pull out the old bulb and push in
the new bulb.
5. Install the bulb socket in the lamp assembly by turning it clockwise.
6. Install the lamp assembly and secure it with the retaining screw.
Replacing approach lamp/mirror turn signal bulbs
For bulb replacement, see your authorized dealer.
Lights
96
2010 Navigator(nav)
Owners Guide(own2002), 1st Printing
USA(fus)
Page 108 of 385

Note:10 or more switch activations within one minute, or repeated
folding/unfolding of the mirrors while holding the switch rearward during
full travel, may cause the system to disable the fold/unfold function to
protect motors from overheating. Should this occur, wait approximately
three minutes with the vehicle running and up to 10 minutes with the
vehicle off, for the system to reset and for function to return to normal.
Heated outside mirrors
Both mirrors are heated automatically to remove ice, mist and fog when
the rear window defrost is activated.
Do not remove ice from the mirrors with a scraper or attempt to
readjust the mirror glass if it is frozen in place. These actions
could cause damage to the glass and mirrors.
Do not clean the housing or glass of any mirror with harsh
abrasives, fuel or other petroleum-based cleaning products.
Signal indicator mirrors
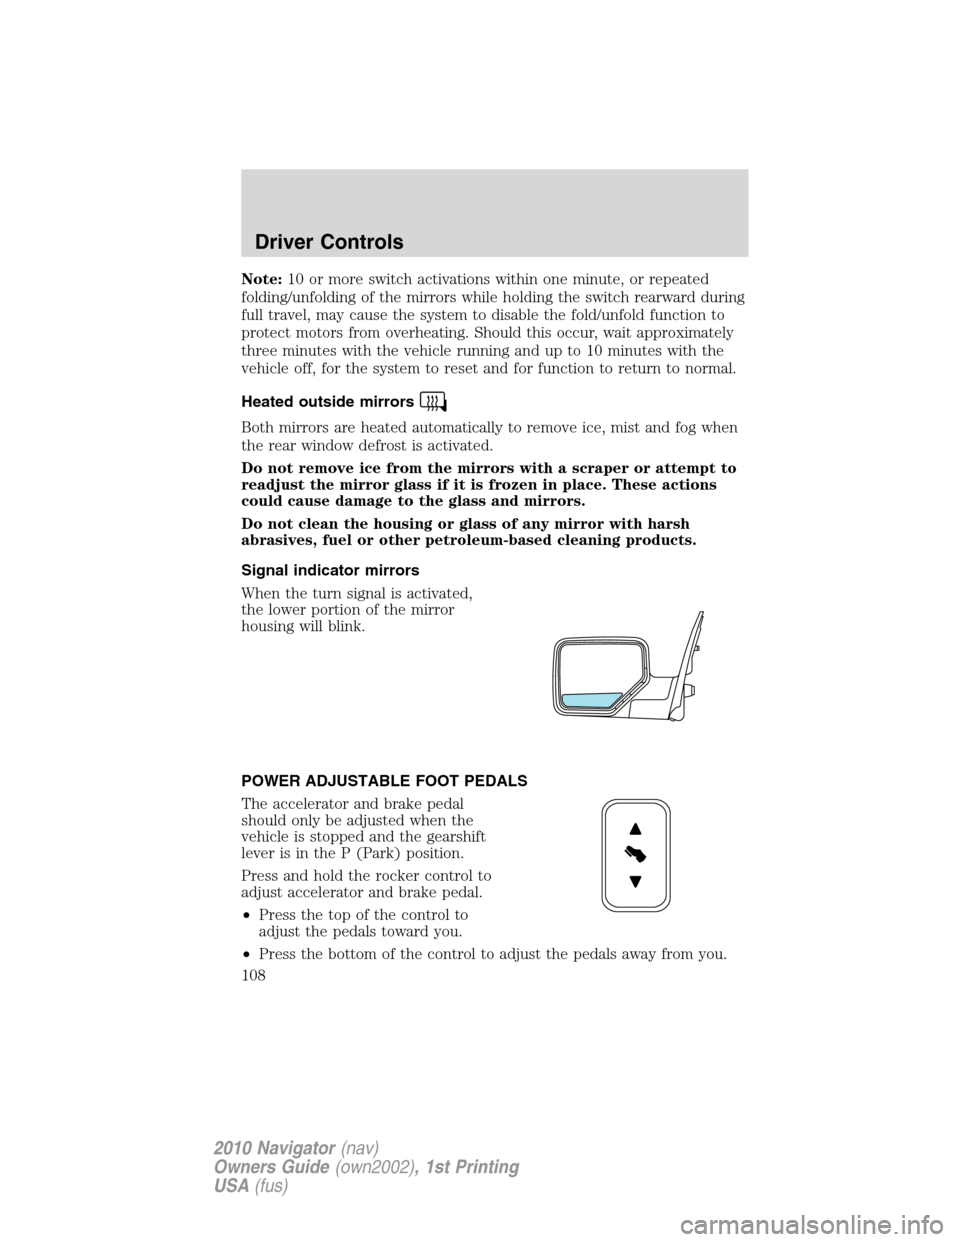
When the turn signal is activated,
the lower portion of the mirror
housing will blink.
POWER ADJUSTABLE FOOT PEDALS
The accelerator and brake pedal
should only be adjusted when the
vehicle is stopped and the gearshift
lever is in the P (Park) position.
Press and hold the rocker control to
adjust accelerator and brake pedal.
•Press the top of the control to
adjust the pedals toward you.
•Press the bottom of the control to adjust the pedals away from you.
Driver Controls
108
2010 Navigator(nav)
Owners Guide(own2002), 1st Printing
USA(fus)
Page 109 of 385

WARNING:Never adjust the accelerator and brake pedal with
feet on the pedals while the vehicle is moving.
POWER DEPLOYABLE RUNNING BOARDS (IF EQUIPPED)
Deployable running boards (DRB) automatically move when the doors
are opened to assist entering and exiting the vehicle.
Automatic power deploy:
•The running boards will extend
down and out when the doors are
opened.
Automatic power stow:
•The running boards will return to
the stowed position when the
doors are closed. There will be a
two second delay before the
running boards move in to the
stowed position.
Manual power deploy:
To manually operate the running boards, refer toMessage centerin the
Instrument Clusterchapter.
•This feature can manually set the running boards in the deployed
(OUT) position for access to the roof.
•When running boards are manually set in the deployed position, the
boards will return to the stowed position and enter automatic mode
when the vehicle speed exceeds 5 mph (8 km/h).
Enable/disable:
To enable/disable the power running board feature, refer toMessage
centerin theInstrument Clusterchapter.
•When this feature is disabled (OFF), the running boards will move to
the stowed position regardless of the position of the doors.
•When this feature is enabled (AUTO), the running boards will move
back to the correct positions based off of the door positions.
Bounce-back:
•If an object is in the way of the moving running board, the running
board will automatically bounce back in the reverse direction and
move to the end of travel.
Driver Controls
109
2010 Navigator(nav)
Owners Guide(own2002), 1st Printing
USA(fus)
Page 111 of 385

Using speed control
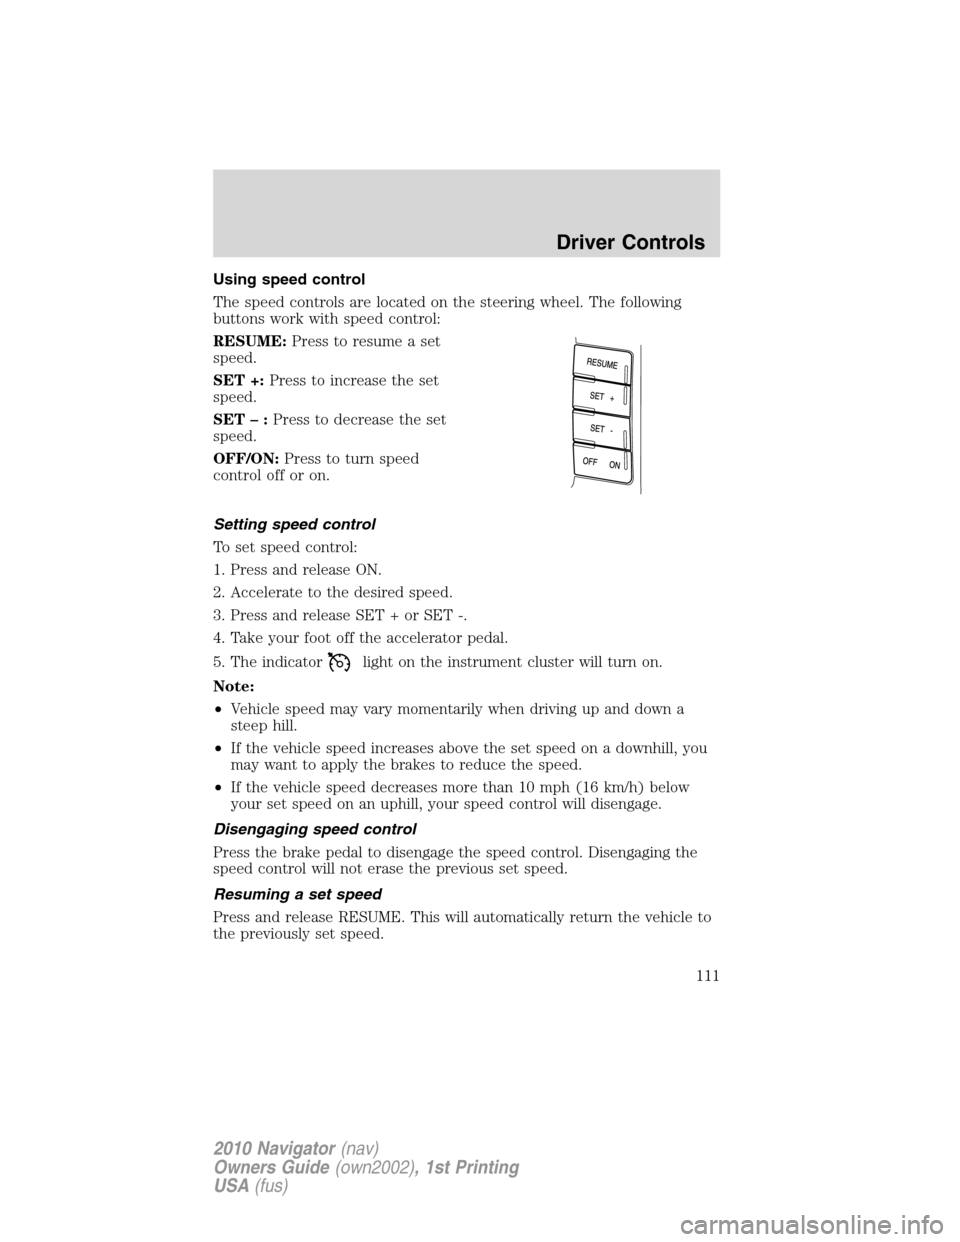
The speed controls are located on the steering wheel. The following
buttons work with speed control:
RESUME:Press to resume a set
speed.
SET +:Press to increase the set
speed.
SET–:Press to decrease the set
speed.
OFF/ON:Press to turn speed
control off or on.
Setting speed control
To set speed control:
1. Press and release ON.
2. Accelerate to the desired speed.
3. Press and release SET + or SET -.
4. Take your foot off the accelerator pedal.
5. The indicator
light on the instrument cluster will turn on.
Note:
•Vehicle speed may vary momentarily when driving up and down a
steep hill.
•If the vehicle speed increases above the set speed on a downhill, you
may want to apply the brakes to reduce the speed.
•If the vehicle speed decreases more than 10 mph (16 km/h) below
your set speed on an uphill, your speed control will disengage.
Disengaging speed control
Press the brake pedal to disengage the speed control. Disengaging the
speed control will not erase the previous set speed.
Resuming a set speed
Press and release RESUME. This will automatically return the vehicle to
the previously set speed.
Driver Controls
111
2010 Navigator(nav)
Owners Guide(own2002), 1st Printing
USA(fus)
Page 112 of 385

Increasing speed while using speed control
To set a higher speed:
•Press and hold SET + until you get to the desired speed, then release.
You can also use SET + to operate the tap-up function. Press and
release SET + to increase the vehicle set speed in 1 mph (1.6 km/h)
increments.
•Use the accelerator pedal to get to the desired speed then press and
release SET +.
Reducing speed while using speed control
To reduce a set speed:
•Press and hold SET – until you get to the desired speed, then release.
You can also use SET – to operate the tap-down function. Press and
release SET – to decrease the vehicle set speed in 1 mph (1.6 km/h)
increments.
•Press the brake pedal until the desired vehicle speed is reached then
press SET –.
Turning off speed control
To turn off the speed control, Press OFF or turn off the ignition.
Note:When you turn off the speed control or the ignition, your speed
control set speed memory is erased.
STEERING WHEEL CONTROLS
Radio control features
– VOL + (Volume):Press to
decrease or increase the volume.
(Seek):Press to select
the previous/next radio station
preset, CD track or satellite radio
station preset depending on which
media mode you are in.
MEDIA:Press repeatedly to select:
•AM, FM1, FM2 or CD
•SAT1, SAT2 or SAT3 (Satellite radio mode)
•LINE IN (Auxiliary input jack)
Driver Controls
112
2010 Navigator(nav)
Owners Guide(own2002), 1st Printing
USA(fus)
Page 177 of 385

Combination lap and shoulder belts
1. Insert the belt tongue into the proper buckle (the buckle closest to
the direction the tongue is coming from) until you hear a snap and feel it
latch. Make sure the tongue is securely fastened in the buckle.
•Front and rear seats
2. To unfasten, push the release button and remove the tongue from the
buckle.
•Front and rear seats
The front outboard and rear safety restraints in the vehicle are
combination lap and shoulder belts. The front outboard passenger and
rear seat safety belts have three types of locking modes described as
follows:
Vehicle sensitive mode
This is the normal retractor mode, which allows free shoulder belt length
adjustment to your movements and locking in response to vehicle
movement. For example, if the driver brakes suddenly or turns a corner
sharply, or the vehicle receives an impact of approximately 5 mph
(8 km/h) or more, the combination safety belts will lock to help reduce
forward movement of the driver and passengers.
Seating and Safety Restraints
177
2010 Navigator(nav)
Owners Guide(own2002), 1st Printing
USA(fus)