Page 296 of 648
296
3-3. Using the audio system
GS_G_U (OM30C80U)
June 29, 2011 10:30 am
Using the video CD menu
Touch “Return” on the “Settings” screen.
Refer to the manual that comes with the video CD for specific menu items.
Changing the sound-multiplex mode
Touch “Main/Sub” on the “Settings” screen. The mode cycles through
each time the switch is touched.
“Main/Sub” “Main” “Sub”
Changing the page
Disc menu displaying
Touch “Prev. Page” or “Next Page” to change the previous/next page.
While playing the video
Touch “Prev. Page” or “Next Page” to change the previous/next track.
Selecting a desired screen
P. 2 8 4
■Error messages
P. 2 9 7
Page 330 of 648

330
3-3. Using the audio system
GS_G_U (OM30C80U)
June 29, 2011 10:30 am
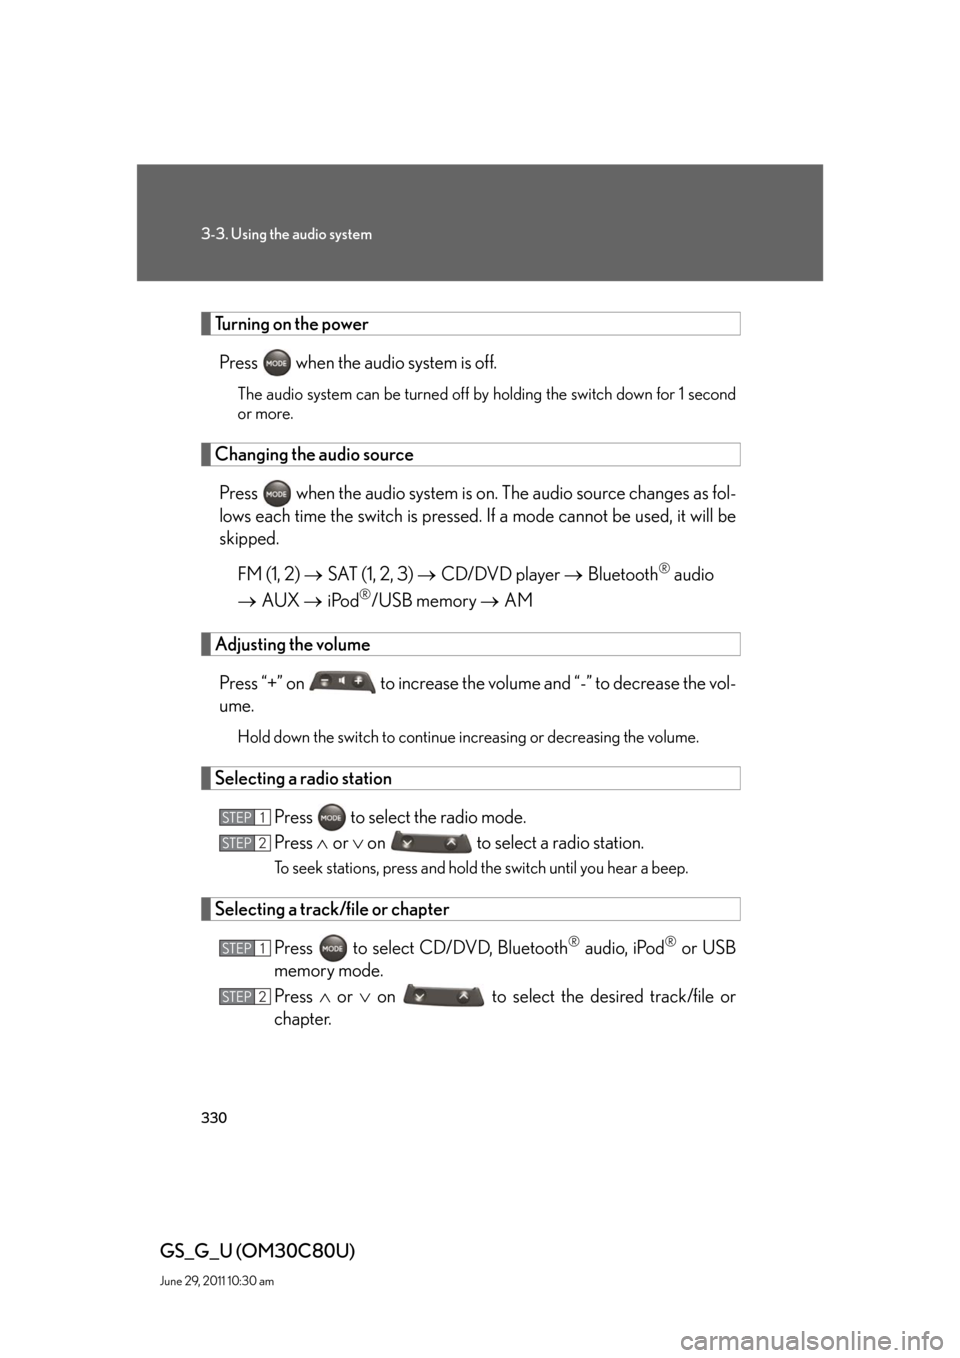
Turning on the power
Press when the audio system is off.
The audio system can be turned off by holding the switch down for 1 second
or more.
Changing the audio source
Press when the audio system is on. The audio source changes as fol-
lows each time the switch is pressed. If a mode cannot be used, it will be
skipped.
FM (1, 2) SAT (1, 2, 3) CD/DVD player Bluetooth
® audio
AUX iPod
®/USB memory AM
Adjusting the volume
Press “+” on to increase the volume and “-” to decrease the vol-
ume.
Hold down the switch to continue increasing or decreasing the volume.
Selecting a radio station
Press to select the radio mode.
Press or on to select a radio station.
To seek stations, press and hold the switch until you hear a beep.
Selecting a track/file or chapter
Press to select CD/DVD, Bluetooth
® audio, iPod® or USB
memory mode.
Press or on to select the desired track/file or
chapter.
STEP1
STEP2
STEP1
STEP2
Page 359 of 648

359
3-4. Using the hands-free system (for cellular phone)
3
Interior features
GS_G_U (OM30C80U)
June 29, 2011 10:30 am
■When another Bluetooth® device is connected while registering or selecting a
phone
When another Bluetooth
® device is connected, a confirmation message will be dis-
played. If you want to disconnect it, touch “Yes”.
■When Bluetooth® audio is connected while registering a phone
When you register your phone, Bluetooth
® audio will disconnect. It will reconnect
automatically when you finish registration. It will not be reconnected depending on
the phone you are using.
■Connecting the phone while Bluetooth® audio is playing
Bluetooth
® audio will disconnect. It will reconnect automatically when you finish
registration. It will not be reconnected depending on the phone you are using.
■Setting the “Handsfree Power”
The state changes between “On” and “Off” every time you select “Handsfree
Power” on the “Connect Phone” screen. When “Handsfree Power” is “On”, the
Bluetooth
® phone is automatically connected when you turn the “ENGINE START
STOP” switch is in ACCESSORY or IGNITION ON mode.
■Editing the “Device Name”
If you change a device name, the name registered in your cellular phone is not
changed.
■About “Device Address”
This address is specific to the system and cannot be changed. If you have registered
two Bluetooth
® phones with the same device name and you cannot distinguish one
from the other, refer to this address.
■When you delete a Bluetooth® phone
The phonebook data will be deleted at the same time.
■Connecting the phone by voice recognition
“Connect Phone” includes “Select Phone”, “Add New Phone” and “Handsfree
Power Off (On)” can be operated by voice recognition. (P. 3 4 7 )
Page 379 of 648
379
3-4. Using the hands-free system (for cellular phone)
3
Interior features
GS_G_U (OM30C80U)
June 29, 2011 10:30 am
■Editing the passcode
Display the “Bluetooth
* Information” screen. (P. 3 7 7 )
Touch “Edit” of “Passcode” on the “Bluetooth
* Information”
screen.
Input a passcode, and touch “OK”.
Touch “Save” on the “Bluetooth
* Information” screen.
*: Bluetooth is a registered trademark of Bluetooth SIG. Inc.
STEP1
STEP2
STEP3
■While driving
You cannot change the state of “Handsfree Power” from “On” to “Off” while driving.
■About “Device Name”
The device names are common Bluetooth
audio and Bluetoothphone.
If you change the device name of the phone, the device name of the audio
will change at same time. However, passcodes can be set separately.
■To return to the default detailed phone settings
Touch “Default”, and then “Yes”.
If the state of “Handsfree Power” is changed from “Off” to “On”, Bluetooth
con-
nection will begin.
STEP4
Page 383 of 648
383
3-5. Using the interior lights
3
Interior features
GS_G_U (OM30C80U)
June 29, 2011 10:30 am
Interior lights
“ON”
“OFF”
“DOOR”
The interior lights are turned on/off
by the illuminated entry system.
■To prevent 12 volt battery discharge
If the interior lights, personal lights and steering spot light remain ON when the
door is not fully closed or the interior light switch in “DOOR” position, the lights will
go off automatically after 20 minutes.
■Customization that can be configured at Lexus dealer
Setting (e.g. The time elapsed before lights turn off) can be changed.
(Customizable features
P. 6 2 2 )
Page 404 of 648

404
3-7. Other interior features
GS_G_U (OM30C80U)
June 29, 2011 10:30 am
■The rear sunshade can be used when
The “ENGINE START STOP” switch is in IGNITION ON mode.
■Reverse operation feature
This function will become operational when the rear sunshade is in the raised posi-
tion and the vehicle has been driven at 9 mph (15 km/h) or more or with the shift
lever in P.
To ensure adequate rear visibility, the sunshade automatically lowers when the shift
lever is shifted to “R” and the function is in an operational condition.
However, the rear sunshade is raised again if any of the following occurs:
●Shift the shift lever into “P”.
●The shift lever is shifted out of “R”, and the vehicle reaches a speed of 9 mph
(15 km/h).
●The switch is pressed again.*
*
: Occasionally, the reverse function may not be carried out after the switch has
been pressed. Repeat the above operation to operate the function.
If the engine is turned off when the rear sunshade has been lowered due to the
reverse operation feature, it will not be raised even when the engine is turned on
again and the vehicle reaches a speed of 9 mph (15 km/h). To raise the sunshade
again, press the switch.
■After the “ENGINE START STOP” switch is turned to OFF
The rear sunshade can be raised and lowered for approximately 1 minute.
■Customization that can be configured at Lexus dealer
Time elapsed before the reverse operation feature activates can be changed.
(Customizable features P. 6 2 2 )
Page 562 of 648
562
5-2. Steps to take in an emergency
GS_G_U (OM30C80U)
June 29, 2011 10:30 am
Firmly tighten each nut two or
three times in the order shown in
the illustration.
Tightening torque:
76 ft•lbf (103 N•m, 10.5 kgf•m)
Stow the flat tire, tire jack and all tools.
STEP4
■If you have a flat rear tire on a road covered with snow or ice
Install the compact spare tire on the front of the vehicle. Perform the following steps
and fit tire chains to the rear tires.
Replace a front tire with the compact spare tire.
Replace the flat rear tire with the tire removed from the front of the vehi-
cle.
Fit tire chains to the rear tires.
■After completing the tire change
The tire pressure warning system must be reset. (P. 464)
STEP5
STEP1
STEP2
STEP3
Page 572 of 648

572
5-2. Steps to take in an emergency
GS_G_U (OM30C80U)
June 29, 2011 10:30 am
Tr u n k
Turn the mechanical key clock-
wise to open.
Changing “ENGINE START STOP” switch modes and starting the
engine
Put the shift lever in “P” and apply the brakes.
Touch the Lexus emblem side of
the electronic key to the
“ENGINE START STOP” switch.
An alarm will sound to indicate that
the start function cannot detect the
electronic key that is touched to
the “ENGINE START STOP”
switch if any of the doors is opened
and closed while the key is touched
to the switch.
To change the “ENGINE START STOP” switch modes: Within 10
seconds of the buzzer sounding, release the brake pedal and
press the “ENGINE START STOP” switch. Modes can be
changed each time the switch is pressed. (
P. 1 3 6 )
To start the engine: Press the “ENGINE START STOP” switch
within 10 seconds after the buzzer sounds, keeping the brake
pedal depressed.
If the “ENGINE START STOP” switch still cannot be operated, contact
your Lexus dealer.
STEP1
STEP2
STEP3