Page 322 of 379

731
Maintenance
WASHER FLUID
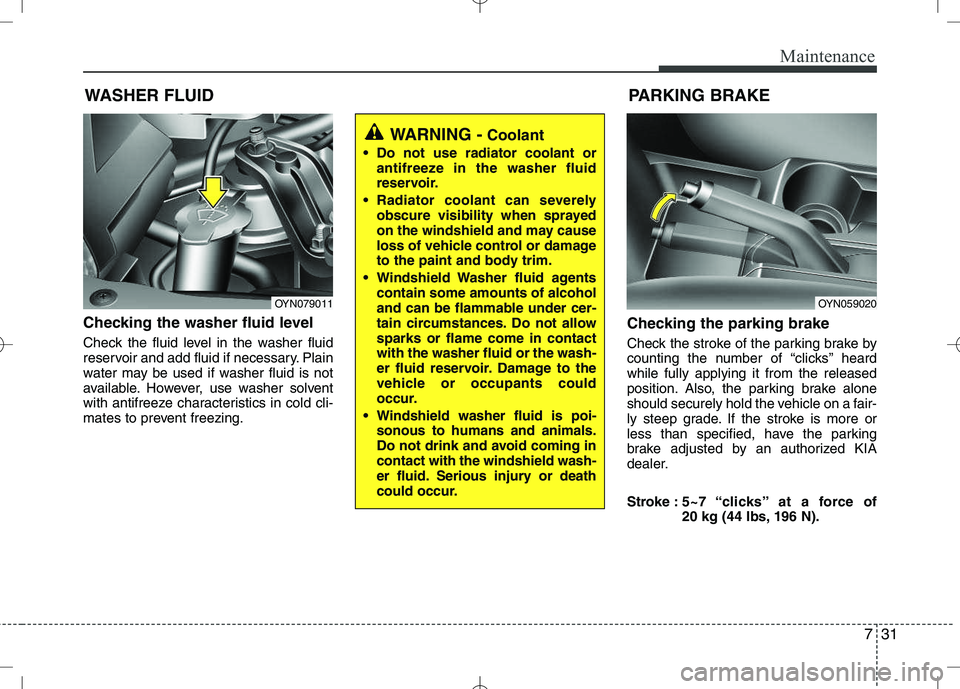
Checking the washer fluid level
Check the fluid level in the washer fluid
reservoir and add fluid if necessary. Plain
water may be used if washer fluid is not
available. However, use washer solvent
with antifreeze characteristics in cold cli-
mates to prevent freezing. Checking the parking brake
Check the stroke of the parking brake by
counting the number of “clicks’’ heardwhile fully applying it from the released
position. Also, the parking brake alone
should securely hold the vehicle on a fair-
ly steep grade. If the stroke is more or
less than specified, have the parking
brake adjusted by an authorized KIA
dealer.
Stroke :
5~7 “clicks’’ at a force of
20 kg (44 lbs, 196 N).
PARKING BRAKE
WARNING -
Coolant
Do not use radiator coolant or antifreeze in the washer fluid
reservoir.
Radiator coolant can severely obscure visibility when sprayed
on the windshield and may cause
loss of vehicle control or damage
to the paint and body trim.
Windshield Washer fluid agents contain some amounts of alcohol
and can be flammable under cer-
tain circumstances. Do not allowsparks or flame come in contactwith the washer fluid or the wash-
er fluid reservoir. Damage to the
vehicle or occupants could
occur.
Windshield washer fluid is poi- sonous to humans and animals.
Do not drink and avoid coming incontact with the windshield wash-
er fluid. Serious injury or death
could occur.
OYN059020OYN079011
Page 328 of 379

737
Maintenance
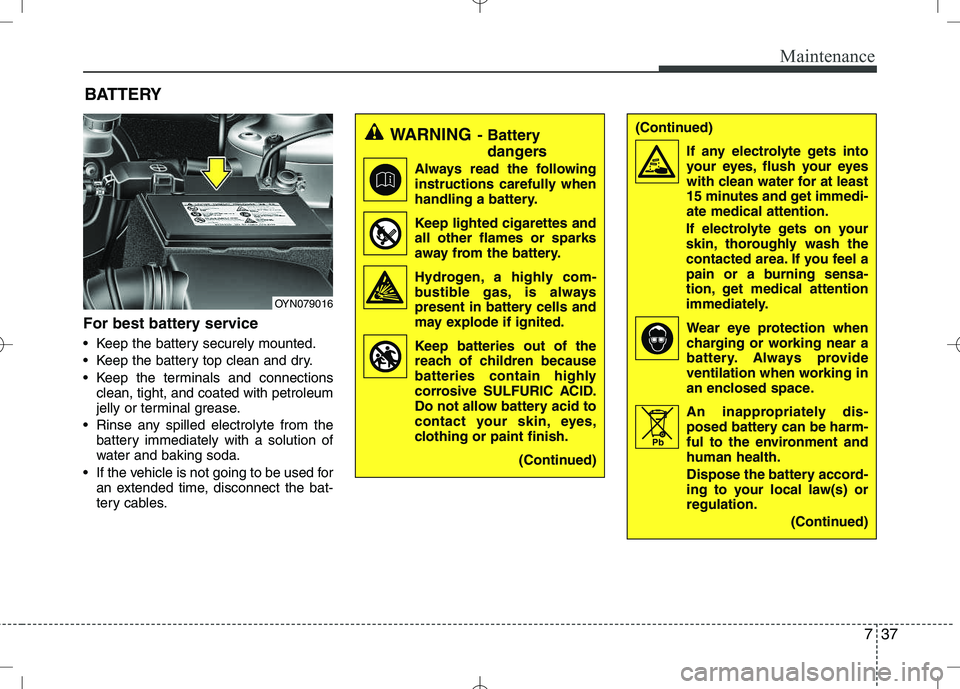
For best battery service
Keep the battery securely mounted.
Keep the battery top clean and dry.
Keep the terminals and connectionsclean, tight, and coated with petroleum
jelly or terminal grease.
Rinse any spilled electrolyte from the battery immediately with a solution of
water and baking soda.
If the vehicle is not going to be used for an extended time, disconnect the bat-
tery cables.
WARNING - Battery
dangers
Always read the following
instructions carefully when
handling a battery.
Keep lighted cigarettes and all other flames or sparks
away from the battery.
Hydrogen, a highly com- bustible gas, is always
present in battery cells and
may explode if ignited.
Keep batteries out of the reach of children because
batteries contain highly
corrosive SULFURIC ACID.
Do not allow battery acid to
contact your skin, eyes,
clothing or paint finish.
(Continued)(Continued)If any electrolyte gets intoyour eyes, flush your eyes
with clean water for at least
15 minutes and get immedi-ate medical attention.
If electrolyte gets on your
skin, thoroughly wash the
contacted area. If you feel a
pain or a burning sensa-
tion, get medical attention
immediately.
Wear eye protection whencharging or working near a
battery. Always provide
ventilation when working in
an enclosed space.
An inappropriately dis- posed battery can be harm-
ful to the environment andhuman health.
Dispose the battery accord-
ing to your local law(s) orregulation.
(Continued)
BATTERY
OYN079016
Pb
Page 344 of 379
753
Maintenance
3. Check the removed fuse; replace it if itis blown. To remove or insert the fuse, use the fuse puller in the engine com-
partment fuse panel.
4. Push in a new fuse of the same rating, and make sure it fits tightly in the clips.
If it fits loosely, consult an authorized
KIA dealer.
Main fuse
If the main fuse is blown, it must be
removed as follows:
1. Disconnect the negative battery cable.
2. Remove the nuts shown in the pictureabove.
3. Replace the fuse with a new one of the same rating.
4. Reinstall in the reverse order of removal.
✽✽ NOTICE
If the main fuse is blown, consult an
Authorized KIA dealer.
CAUTION
After checking the fuse panel in the engine compartment, securely
install the fuse panel cover. If not,electrical failures may occur fromwater leaking in.OYN079019
Page 346 of 379
755
Maintenance
Inner fuse panelDescription Fuse rating Protected component
START 10A Start Motor
ACC 10A Audio, Trip Computer, Outside Mirror Actuator
P/OUTLET FRT 15A Front Power Outlet & Cigar Lighter
P/OUTLET RR 25A Rear Power Outlet, Console Power Outlet CLUSTER 10A Cluster, BCM, Trip Computer, PDM, Smart Key Unit T/SIG 10A Multi Function Switch Light
ECU 5 10A ECU, Air Flow Sensor, Fuel Water Sensor TCU 10A Speed In Sensor, Speed Out Sensor, Speed Sensor
B/UP LP 10A Back Up Switch, Inhibit Switch, RPAS
ABS 3 10A Yaw Rate Sensor, ABS(ESP), ESP Switch
A/BAG 10A ACU
A/BAG IND 10A Cluster(Air Bag Indicator)
IGN COIL 15A Ignition Coil, Condensor IG1 10A MDPS, Center Facia Switch Module, TPMS, RPAS, Start Motor(ISG)
IG2 10A HLLD Switch, HLLD Actuator, BCM, FATC, Sunroof
WIPER FRT 25A Front Wiper S/HEATER 15A Seat Warmer
WIPER RR 25A Rear Wiper PDM 2 10A PDM
HTD MIRR 10A Outside Mirror Defroster
FOG LP FRT10AFront Fog Light
FOG LP RR10ARear Fog Light
Page 348 of 379

757
Maintenance
Engine compartment fuse panelDescription Fuse rating Protected component
B+1 50A I/P Junction Box(FOG LP FRT 10A,FOG LP RR 10A, AUDIO 20A, ROOM LP 10A, STOP LP 15A,
PDM 1 25A, DEICER 15A, DR LOCK 20A, FOLD’G MIRR 10A, SUNROOF 20A, Relay-Tail Lamp,
Fuse- TAIL LP LH 10A, TAIL LP RH 10A)
B+2 50A I/P Junction Box(HAZARD 15A, Relay-Power Window, Fuse-P/WDW LH 25A, P/WDW RH 25A,
SAFETY P/WDW 15A)
C/FAN 40A Cooling Fan Relay(High), Cooling Fan Relay (Low) ALT 125A/150A Alternator(Gasoline/Diesel)
ABS 2 40A ABS, ESP
ABS 1 40A ABS, ESP
RR HTD 40A I/P Junction Box(Rear Heater Relay)
BLOWER 40A Blower Motor
MDPS 80A MDPS(Motor Driving Power Steering)IG2 40A Ignition Switch(IG2, Start)
ECU 1 20A ECU
F/PUMP 20A Fuel Pump Relay(Gasoline) IG1 40A Ignition Switch(IG1, Accessory)
H/LP 20A Head Lamp Low Beam
H/LP LO LH 10A Left Head Lamp Low Beam
H/LP LO RH 10A Right Head Lamp Low Beam H/LP HI 20A Head Lamp High Beam
HORN 10A Horn, Burglar Alarm Horn, Battery Sensor
ECU 4 10A ECU(Gasoline)
Page 349 of 379
Maintenance
58
7
Engine compartment fuse panel (Diesel engine only) Description Fuse rating
Protected component
FUEL HTR30AFuel Filter Heater(Diesel)
A/CON 110AAir Conditioning System Relay
A/CON 210AAir Conditioning System
ECU 3 10A Immobilizer, Stop Switch, IMV, MPROP
ECU 2 30A ECU 4 10A, Main Relay, Fuse-ECU 1 20A, ECU 3 10A, SENSOR 10A, INJECTOR 15A
DRL 10A Daytime Running Light
SENSOR 10A Gasoline - Air Conditioning System Relay, Cooling Fan Relay(High, Low), Camshaft Position, Sensor,
Immobilizer, Canister Purge Solenoid Valve, Oxygen Sensor Up/Down
Diesel - Air Conditioning System Relay, Cooling Fan Relay(High, Low), Lambda Sensor
INJECTOR 15A Gasoline - Injector #1~#4, Fuel Pump Relay, Oil Control Valve
Diesel - Electrical EGR Actuator, Immobilizer, VGT Actuator, Crank Position Sensor, Glow Plug Relay,
PTC HTR 1 Relay
Description Fuse rating Protected component
GLOW 80A Glow Plug
PTC HTR 1 50A PTC Heater 1
PTC HTR 2 50A PTC Heater 2
PTC HTR 3 50A PTC Heater 3
Page 357 of 379
Maintenance
66
7
High mounted stop light replacement (if equipped)
1. Open the tailgate.
2. Loosen the light assembly retaining
nuts. 3. Remove the light assembly and dis-
connect the bulb electrical connector.
4. Remove the socket from the assembly.
5. Remove the bulb from the socket by pulling it.
6. Install a new bulb in the socket.
7. Reinstall the light assembly in the reverse order of removal. License plate light bulb replace- ment
1. Open the tailgate.
2. Remove the tailgate trim by removing
the screws.
3. Remove the lens by pushing the cover.
4. Remove the bulb by pulling it straight out.
5. Install a new bulb.
6. Reinstall the lens securely.
OYN079056OYN079058OYN079057