Page 4 of 314
1
How to use this manual / 1-2
Fuel requirements / 1-3
Vehicle handling instructions / 1-5
Vehicle break-in process / 1-5
Indicator symbols on the instrument cluster / 1-6
Introduction
Page 9 of 314
Introduction61INDICATOR SYMBOLS ON THE INSTRUMENT CLUSTER
Seat Belt Warning LightHigh Beam IndicatorTurn Signal IndicatorABS Warning Light*
Parking Brake & Brake Fluid
Warning LightMalfunction Indicator*Immobilizer Indicator
Low Fuel Level Warning Light
* : if equipped Tailgate Open Warning Light
❈ For more detailed explanations, refer to “Instrument cluster” in section 4.
Charging System Warning Light
Door Ajar Warning Light
A050000AAM-EC
Front Fog Light Indicator*
Engine Oil Pressure Warning Light
O/D OFF Indicator*
O/D
OFF
Air Bag Warning Light*
TPMS (Tire Pressure Monitoring
System) Malfunction Indicator* Low Tire Pressure Telltale*
Cruise Indicator*Cruise SET Indicator*Shift Pattern Indicator
ESC Indicator*ESC OFF Indicator*
TPMS
Tail Light Indicator*Low Windshield Washer Fluid
Level Warning Light*
Low Beam Indicator*
Page 12 of 314

23
Your vehicle at a glance
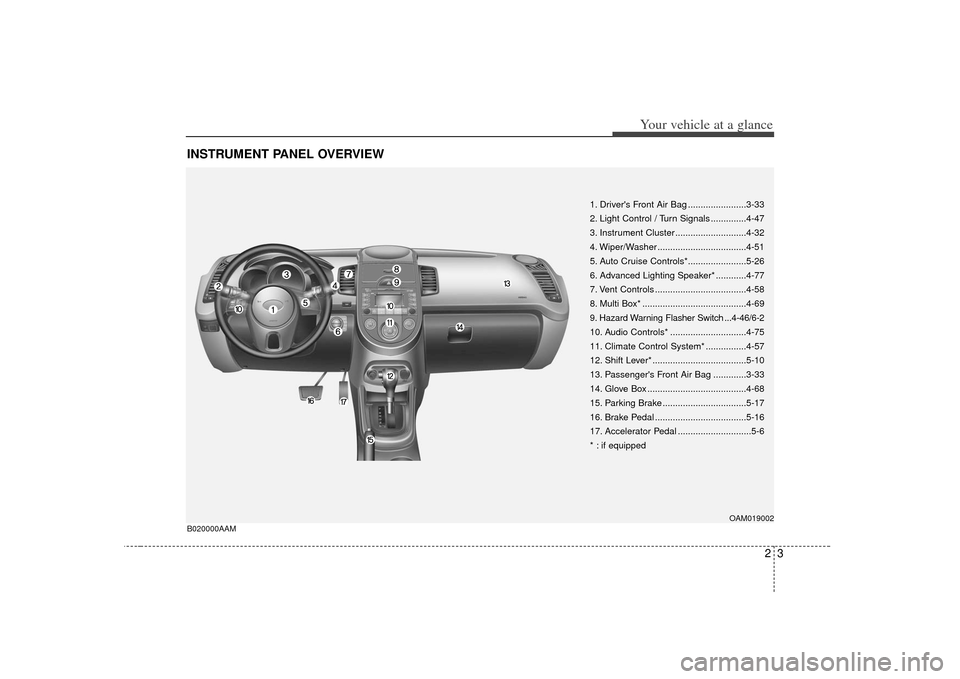
INSTRUMENT PANEL OVERVIEW
1. Driver's Front Air Bag .......................3-33
2. Light Control / Turn Signals ..............4-47
3. Instrument Cluster ............................4-32
4. Wiper/Washer ...................................4-51
5. Auto Cruise Controls*.......................5-26
6. Advanced Lighting Speaker* ............4-77
7. Vent Controls ....................................4-58
8. Multi Box* .........................................4-69
9. Hazard Warning Flasher Switch ...4-46/6-2
10. Audio Controls* ..............................4-75
11. Climate Control System* ................4-57
12. Shift Lever* .....................................5-10
13. Passenger's Front Air Bag .............3-33
14. Glove Box .......................................4-68
15. Parking Brake .................................5-17
16. Brake Pedal ....................................5-16
17. Accelerator Pedal .............................5-6
* : if equipped
OAM019002
B020000AAM
Page 51 of 314

Safety features of your vehicle38
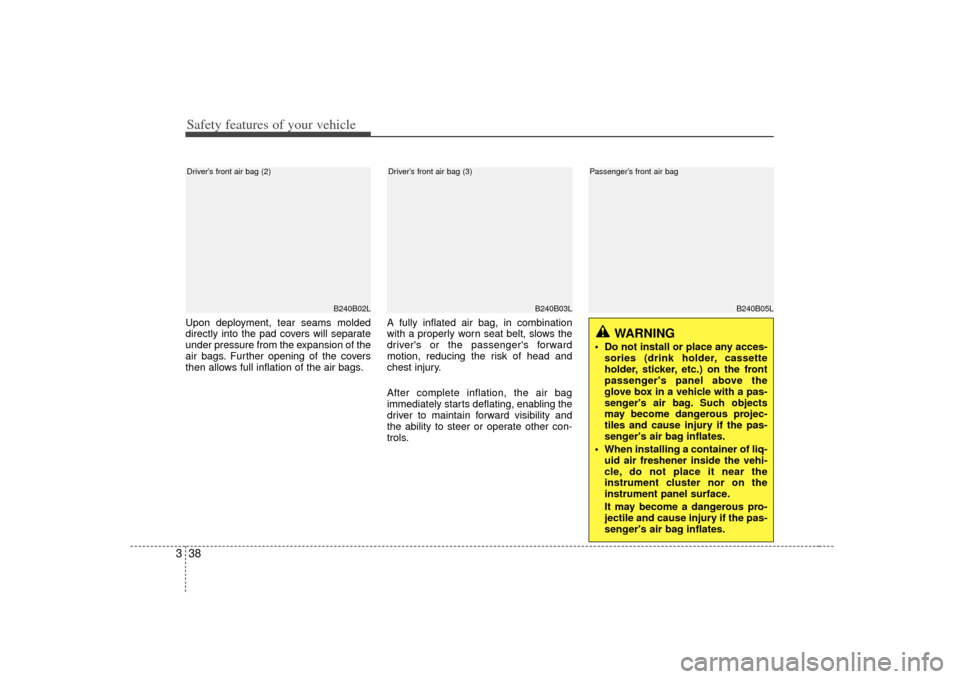
3Upon deployment, tear seams molded
directly into the pad covers will separate
under pressure from the expansion of the
air bags. Further opening of the covers
then allows full inflation of the air bags. A fully inflated air bag, in combination
with a properly worn seat belt, slows the
driver's or the passenger's forward
motion, reducing the risk of head and
chest injury.
After complete inflation, the air bag
immediately starts deflating, enabling the
driver to maintain forward visibility and
the ability to steer or operate other con-
trols.
B240B02L
B240B03L
Driver’s front air bag (2)
Driver’s front air bag (3)
WARNING
Do not install or place any acces-
sories (drink holder, cassette
holder, sticker, etc.) on the front
passenger's panel above the
glove box in a vehicle with a pas-
senger's air bag. Such objects
may become dangerous projec-
tiles and cause injury if the pas-
senger's air bag inflates.
When installing a container of liq- uid air freshener inside the vehi-
cle, do not place it near the
instrument cluster nor on the
instrument panel surface.
It may become a dangerous pro-
jectile and cause injury if the pas-
senger's air bag inflates.
B240B05L
Passenger’s front air bag
Page 73 of 314
4
Keys / 4-2
Remote keyless entry / 4-6
Door locks / 4-8
Tailgate / 4-12
Windows / 4-14
Hood / 4-17
Fuel filler lid / 4-19
Sunroof / 4-22
Steering wheel / 4-26
Mirrors / 4-28
Instrument cluster / 4-32
Rearview camera / 4-46
Hazard warning flasher / 4-46
Lighting / 4-47
Wipers and washers / 4-51
Interior light / 4-54
Defroster / 4-56
Manual climate control system / 4-57
Windshield defrosting and defogging / 4-66
Storage compartment / 4-68
Interior features / 4-70
Exterior feature / 4-74
Audio system / 4-75
Features of your vehicle
Page 104 of 314
Features of your vehicle32
4INSTRUMENT CLUSTER
1. Tachometer
2. Turn signal indicators
3. Speedometer
4. Engine temperature gauge
5. Warning and indicator lights
6. Shift position indicator*
(Automatic transaxle only)
7. Odometer/Tripmeter*
8. Fuel gauge
* : if equipped
OAM049030C
D150000AAM
1
4
5
8
6
7
2
2
3
5
* The actual cluster in the vehicle may differ from the illustration. For more details refer to the "Gauges" in the next pages.
Page 117 of 314

445
Features of your vehicle
D150325AAMCruise indicators (if equipped)CRUISE indicator
The indicator illuminates when the cruise
control system is enabled.
The cruise indicator in the instrument
cluster is illuminated when the cruise
control ON-OFF switch on the steering
wheel is pushed.
The indicator goes off when the cruise
control ON-OFF switch is pushed again.
For more information about the use of
cruise control, refer to “Cruise control
system” in section 5.Cruise SET indicator
The indicator illuminates when the cruise
function switch (SET - or RES +) is ON.
The cruise SET indicator in the instru-
ment cluster is illuminated when the
cruise control switch (SET - or RES +) is
pushed.
The cruise SET indicator does not illumi-
nate when the cruise control switch
(CANCEL) is pushed or the system is
disengaged.
D150327AUNKey reminder warning chime
(if equipped)If the driver’s door is opened while the
ignition key is left in the ignition switch
(ACC or LOCK position), the key
reminder warning chime will sound. This
is to prevent you from locking your keys
in the vehicle. The chime sounds until the
key is removed from the ignition switch or
the driver’s door is closed.
CRUISE
SET
Page 186 of 314

511
Driving your vehicle
For smooth operation, depress the brakepedal when shifting from N (Neutral) to aforward or reverse gear.
E060101AAMTransaxle rangesThe indicator in the instrument cluster
displays the shift lever position when the
ignition switch is in the ON position.
P (Park)
Always come to a complete stop before
shifting into P (Park). This position locks
the transaxle and prevents the drive
wheels from rotating.
WARNING
- Automatic transaxle
Always check the surrounding
areas near your vehicle for peo-
ple, especially children, before
shifting the shift lever into D
(Drive) or R (Reverse).
Before leaving the driver’s seat, always make sure the shift lever
is in the P (Park) position; then
set the parking brake fully and
shut the engine off. Unexpected
and sudden vehicle movement
can occur if these precautions
are not followed in the order iden-
tified.
CAUTION
To avoid damage to your transaxle, do not accelerate theengine in R (Reverse) or any for-ward gear position with thebrakes on.
When stopped on an incline, do not hold the vehicle with theengine power. Use the servicebrake or the parking brake.
Do not shift from N (Neutral) or P (Park) into D (Drive), or R(Reverse) when the engine is above idle speed.
WARNING
Shifting into P (Park) while the vehicle is in motion will cause the
drive wheels to lock which will
cause you to lose control of the
vehicle.
Do not use the P (Park) position in place of the parking brake.
Always make sure the shift lever
is latched in the P (Park) position
and set the parking brake fully.
Never leave a child unattended in a vehicle.