2010 KIA Soul light
[x] Cancel search: lightPage 61 of 314
Safety features of your vehicle48
3
OEP036096NOVQ036018N1VQA2091
Rear impactSide impactRollover
(Continued)
No objects should be placed over
or near the air bag modules on
the steering wheel, instrument
panel, and the front passenger's
panel above the glove box,
because any such object could
cause harm if the vehicle is in a
crash severe enough to cause
the air bags to deploy.
Never place covers, blankets or aftermarket seat warmers on the
passenger seat as these may
interfere with the occupant detec-
tion system.
Do not tamper with or disconnect SRS wiring or other components
of the SRS system. Doing so
could result in injury, due to acci-
dental deployment of the air bags
or by rendering the SRS inopera-
tive.
(Continued)
(Continued)
If the SRS air bag warning lightremains illuminated while the
vehicle is being driven, have an
authorized KIA dealer inspect the
air bag system as soon as possi-
ble.
Air bags can only be used once – have an authorized KIA dealer
replace the air bag immediately
after deployment.
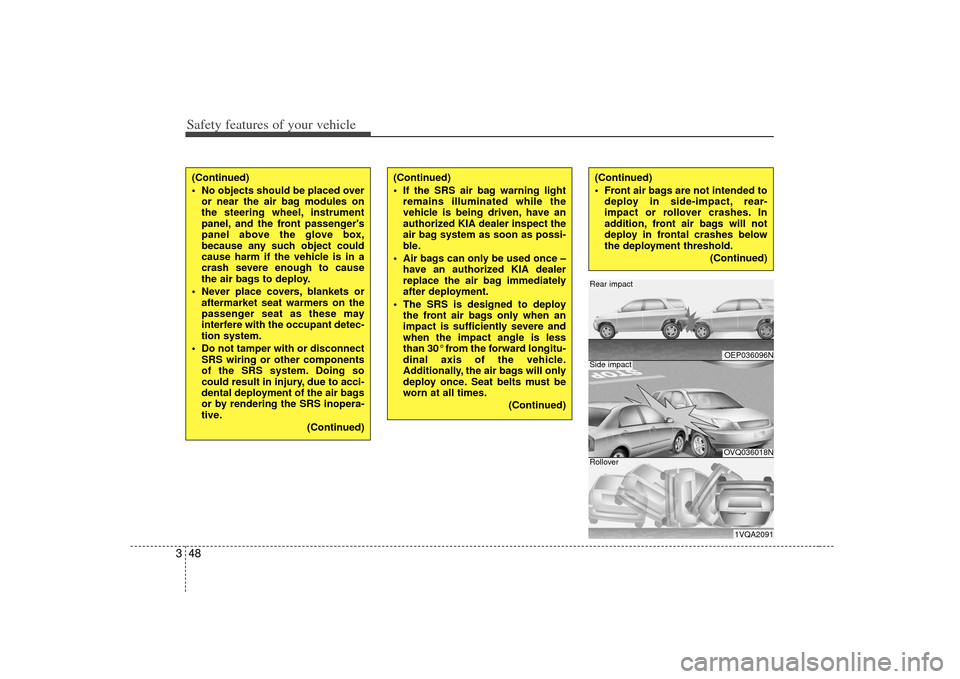
The SRS is designed to deploy the front air bags only when an
impact is sufficiently severe and
when the impact angle is less
than 30° from the forward longitu-
dinal axis of the vehicle.
Additionally, the air bags will only
deploy once. Seat belts must be
worn at all times.
(Continued)
(Continued)
Front air bags are not intended todeploy in side-impact, rear-
impact or rollover crashes. In
addition, front air bags will not
deploy in frontal crashes below
the deployment threshold.
(Continued)
Page 70 of 314
357
Safety features of your vehicle
C041100AUNSRS CareThe SRS is virtually maintenance-free
and so there are no parts you can safely
service by yourself. If the SRS air bag
warning light does not illuminate, or con-
tinuously remains on, have your vehicle
immediately inspected by an authorized
KIA dealer.
Any work on the SRS system, such as
removing, installing, repairing, or any
work on the steering wheel must be per-
formed by an authorized KIA dealer.
Improper handling of the SRS system
may result in serious personal injury.
WARNING
Modification to SRS componentsor wiring, including the addition
of any kind of badges to the pad
covers or modifications to the
body structure, can adversely
affect SRS performance and lead
to possible injury.
For cleaning the air bag pad cov- ers, use only a soft, dry cloth or
one which has been moistened
with plain water. Solvents or
cleaners could adversely affect
the air bag covers and proper
deployment of the system.
No objects should be placed over
or near the air bag modules on the
steering wheel, instrument panel,
and the front passenger's panel
above the glove box, because any
such object could cause harm if the
vehicle is in a crash severe enough
to cause the air bags to inflate.
(Continued)
(Continued)
If the air bags inflate, they must be replaced by an authorized KIA
dealer.
Do not tamper with or disconnect SRS wiring, or other components
of the SRS system. Doing so
could result in injury, due to acci-
dental inflation of the air bags or
by rendering the SRS inopera-
tive.
If components of the air bag sys- tem must be discarded, or if the
vehicle must be scrapped, certain
safety precautions must be
observed. An authorized KIA
dealer knows these precautions
and can give you the necessary
information. Failure to follow
these precautions and proce-
dures could increase the risk of
personal injury.
If your car was flooded and has soaked carpeting or water on
flooring, you shouldn't try to start
the engine; have the car towed to
an authorized KIA dealer.
Page 73 of 314

4
Keys / 4-2
Remote keyless entry / 4-6
Door locks / 4-8
Tailgate / 4-12
Windows / 4-14
Hood / 4-17
Fuel filler lid / 4-19
Sunroof / 4-22
Steering wheel / 4-26
Mirrors / 4-28
Instrument cluster / 4-32
Rearview camera / 4-46
Hazard warning flasher / 4-46
Lighting / 4-47
Wipers and washers / 4-51
Interior light / 4-54
Defroster / 4-56
Manual climate control system / 4-57
Windshield defrosting and defogging / 4-66
Storage compartment / 4-68
Interior features / 4-70
Exterior feature / 4-74
Audio system / 4-75
Features of your vehicle
Page 78 of 314
Features of your vehicle64Remote keyless entry system
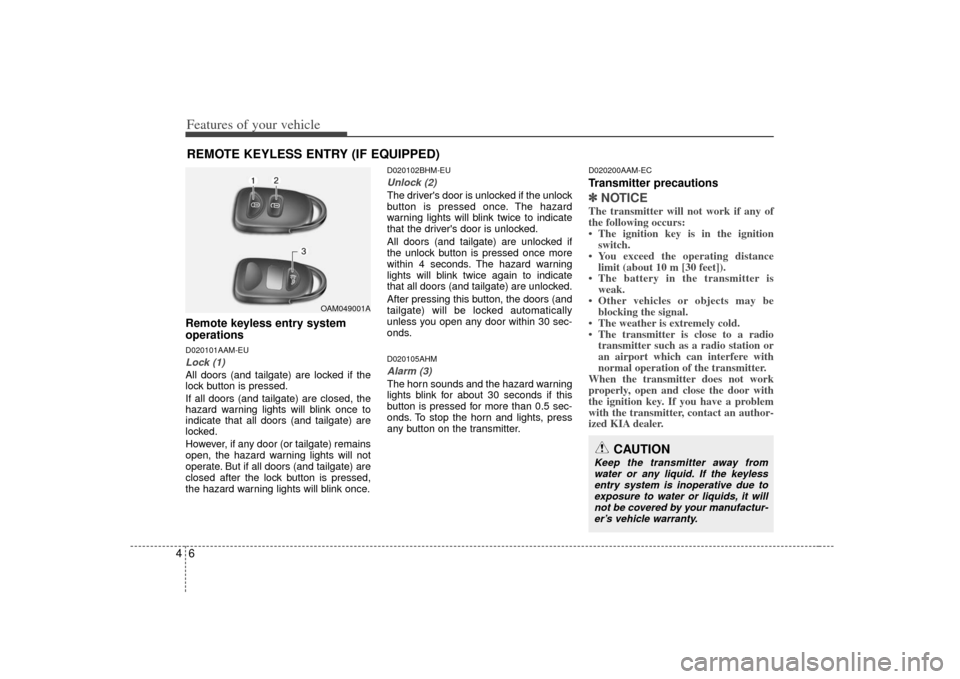
operationsD020101AAM-EULock (1)All doors (and tailgate) are locked if the
lock button is pressed.
If all doors (and tailgate) are closed, the
hazard warning lights will blink once to
indicate that all doors (and tailgate) are
locked.
However, if any door (or tailgate) remains
open, the hazard warning lights will not
operate. But if all doors (and tailgate) are
closed after the lock button is pressed,
the hazard warning lights will blink once.
D020102BHM-EUUnlock (2)The driver's door is unlocked if the unlock
button is pressed once. The hazard
warning lights will blink twice to indicate
that the driver's door is unlocked.
All doors (and tailgate) are unlocked if
the unlock button is pressed once more
within 4 seconds. The hazard warning
lights will blink twice again to indicate
that all doors (and tailgate) are unlocked.
After pressing this button, the doors (and
tailgate) will be locked automatically
unless you open any door within 30 sec-
onds.D020105AHMAlarm (3)The horn sounds and the hazard warning
lights blink for about 30 seconds if this
button is pressed for more than 0.5 sec-
onds. To stop the horn and lights, press
any button on the transmitter.
D020200AAM-ECTransmitter precautions✽ ✽NOTICEThe transmitter will not work if any of
the following occurs:
• The ignition key is in the ignition
switch.
• You exceed the operating distance limit (about 10 m [30 feet]).
• The battery in the transmitter is weak.
• Other vehicles or objects may be blocking the signal.
• The weather is extremely cold.
• The transmitter is close to a radio transmitter such as a radio station or
an airport which can interfere with
normal operation of the transmitter.
When the transmitter does not work
properly, open and close the door with
the ignition key. If you have a problem
with the transmitter, contact an author-
ized KIA dealer.
REMOTE KEYLESS ENTRY (IF EQUIPPED)
OAM049001A
CAUTION
Keep the transmitter away from
water or any liquid. If the keyless entry system is inoperative due toexposure to water or liquids, it will not be covered by your manufactur-er’s vehicle warranty.
Page 79 of 314

47
Features of your vehicle
This device complies with Industry
Canada Standard RSS-210.
Operation is subject to the following two
conditions:
1. This device may not cause harmfulinterference, and
2. This device must accept any interfer- ence received, including interference
that may cause undesired operation.
D020300AHMBattery replacementA transmitter uses a 3 volt lithium battery
which will normally last for several years.
When replacement is necessary, use the
following procedure.
1. Insert a slim tool into the slot and gen-tly pry open the transmitter center
cover.
2. Replace the battery with a new battery (CR2032). When replacing the battery,
make sure the battery positive “+” sym-
bol faces up as indicated in the illus-
tration. 3. Install the battery in the reverse order
of removal.
For transmitter replacement, see an
authorized KIA dealer to reprogram the
transmitter.
CAUTION
Changes or modifications not expressly approved by the partyresponsible for compliance couldvoid the user’s authority to operate the equipment. If the keyless entrysystem is inoperative due tochanges or modifications not expressly approved by the partyresponsible for compliance, it willnot be covered by your manufactur-er’s vehicle warranty.
OAM049002
CAUTION
The keyless entry system trans- mitter is designed to give youyears of trouble-free use, howev-er it can malfunction if exposed tomoisture or static electricity. If you are unsure how to use yourtransmitter or replace the battery, contact an authorized KIA dealer.
Using the wrong battery can cause the transmitter to malfunc-tion. Be sure to use the correctbattery.
To avoid damaging the transmit- ter, don't drop it, get it wet, orexpose it to heat or sunlight.
Page 87 of 314
415
Features of your vehicle
D080100AAMPower windowsThe ignition switch must be in the ON
position for power windows to operate.
Each door has a power window switch
that controls the door's window. The driv-
er has a power window lock button which
can block the operation of passenger
windows. The power windows can be
operated for approximately 30 seconds
after the ignition key is removed or turned
to the ACC or LOCK position. However, if
the front doors are opened, the power
windows cannot be operated even within
the 30 second period.✽ ✽NOTICEWhile driving with the rear windows
down or with the sunroof (if equipped)
in an open (or partially open) position,
your vehicle may demonstrate a wind
buffeting or pulsation noise. This noise
is a normal occurrence and can be
reduced or eliminated by taking the fol-
lowing actions. If the noise occurs with
one or both of the rear windows down,
partially lower both front windows
approximately one inch. If you experi-
ence the noise with the sunroof open,
slightly reduce the size of the sunroof
opening.
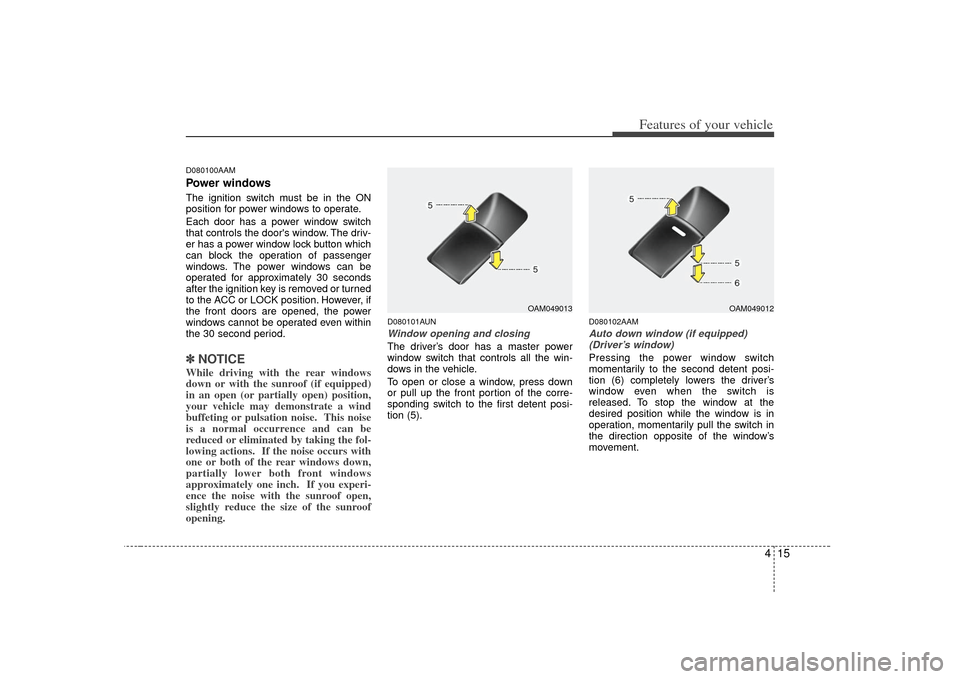
D080101AUNWindow opening and closingThe driver’s door has a master power
window switch that controls all the win-
dows in the vehicle.
To open or close a window, press down
or pull up the front portion of the corre-
sponding switch to the first detent posi-
tion (5).
D080102AAMAuto down window (if equipped)
(Driver’s window)Pressing the power window switch
momentarily to the second detent posi-
tion (6) completely lowers the driver’s
window even when the switch is
released. To stop the window at the
desired position while the window is in
operation, momentarily pull the switch in
the direction opposite of the window’s
movement.
OAM049013
OAM049012
Page 89 of 314

417
Features of your vehicle
D090100AUN-U1Opening the hood 1. Pull the release lever to unlatch thehood. The hood should pop open
slightly. 2. Go to the front of the vehicle, raise the
hood slightly, pull the secondary latch
inside of the hood center and lift the
hood. 3. Pull out the support rod from the hood.
4. Hold the hood open with the support
rod.HOOD
OAM049015
OAM049016
OAM049017
WARNING
- Hot parts
Grasp the support rod in the area
wrapped in rubber. The rubber will
help prevent you from being burned
by hot metal when the engine is
hot.
Page 91 of 314
419
Features of your vehicle
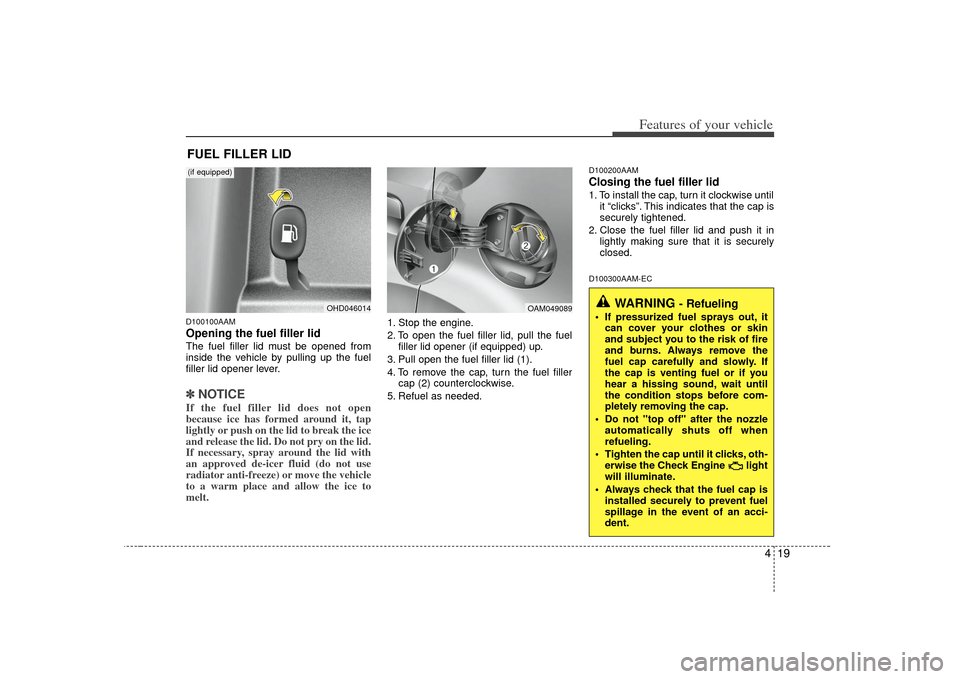
D100100AAMOpening the fuel filler lidThe fuel filler lid must be opened from
inside the vehicle by pulling up the fuel
filler lid opener lever.✽ ✽NOTICEIf the fuel filler lid does not open
because ice has formed around it, tap
lightly or push on the lid to break the ice
and release the lid. Do not pry on the lid.
If necessary, spray around the lid with
an approved de-icer fluid (do not use
radiator anti-freeze) or move the vehicle
to a warm place and allow the ice to
melt.
1. Stop the engine.
2. To open the fuel filler lid, pull the fuel
filler lid opener (if equipped) up.
3. Pull open the fuel filler lid (1).
4. To remove the cap, turn the fuel filler cap (2) counterclockwise.
5. Refuel as needed.
D100200AAMClosing the fuel filler lid1. To install the cap, turn it clockwise until it “clicks”. This indicates that the cap is
securely tightened.
2. Close the fuel filler lid and push it in lightly making sure that it is securely
closed.D100300AAM-EC
FUEL FILLER LID
WARNING
- Refueling
If pressurized fuel sprays out, itcan cover your clothes or skin
and subject you to the risk of fire
and burns. Always remove the
fuel cap carefully and slowly. If
the cap is venting fuel or if you
hear a hissing sound, wait until
the condition stops before com-
pletely removing the cap.
Do not "top off" after the nozzle automatically shuts off when
refueling.
Tighten the cap until it clicks, oth- erwise the Check Engine light
will illuminate.
Always check that the fuel cap is installed securely to prevent fuel
spillage in the event of an acci-
dent.
OHD046014
OAM049089
(if equipped)