2010 KIA SORENTO check engine light
[x] Cancel search: check engine lightPage 248 of 399
Driving your vehicle
36
5
ESP operation
ESP ON condition
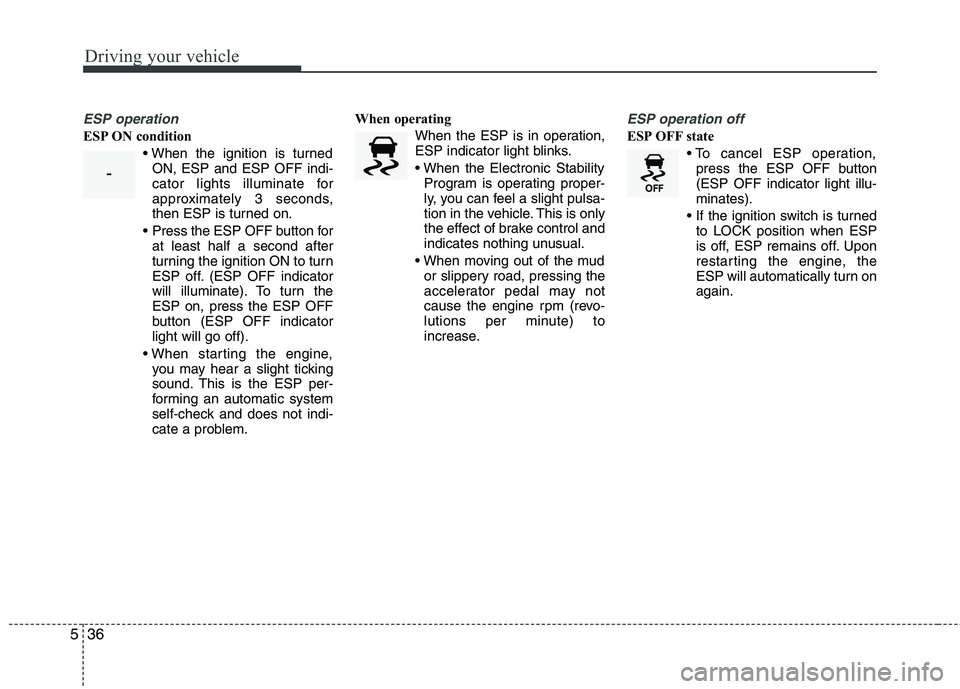
ON, ESP and ESP OFF indi-
cator lights illuminate for
approximately 3 seconds,
then ESP is turned on.
Press the ESP OFF button for at least half a second after
turning the ignition ON to turn
ESP off. (ESP OFF indicator
will illuminate). To turn theESP on, press the ESP OFF
button (ESP OFF indicatorlight will go off).
you may hear a slight ticking
sound. This is the ESP per-
forming an automatic system
self-check and does not indi-
cate a problem. When operating
When the ESP is in operation,
ESP indicator light blinks.
Program is operating proper-
ly, you can feel a slight pulsa-
tion in the vehicle. This is only
the effect of brake control and
indicates nothing unusual.
or slippery road, pressing the
accelerator pedal may not
cause the engine rpm (revo-
lutions per minute) to
increase.
ESP operation off
ESP OFF state
press the ESP OFF button (ESP OFF indicator light illu-minates).
to LOCK position when ESP
is off, ESP remains off. Upon
restarting the engine, the
ESP will automatically turn onagain.
-
Page 251 of 399
539
Driving your vehicle
✽✽NOTICE
The DBC does not turn ON in the P (Park) position.
The DBC may not activate if the ESP (or BAS) is activated.
Noise or vibration may occur from the brakes when the DBC is activated.
The rear stop light comes on when the DBC is activated.
In a very steep hill even though the brake pedal or accelerator pedal is
depressed the DBC may not deacti-
vate.
Always turn OFF the DBC on normal roads. The DBC might activate from
the standby mode when abrupt corn-
ing or driving through speed bumps.
DBC may activate and cause the engine to stop in vehicles with manual
transaxle if you drive in 3rd gear (or
above) with DBC on. Do not turn on
DBC when driving in 3rd gear (or
above).
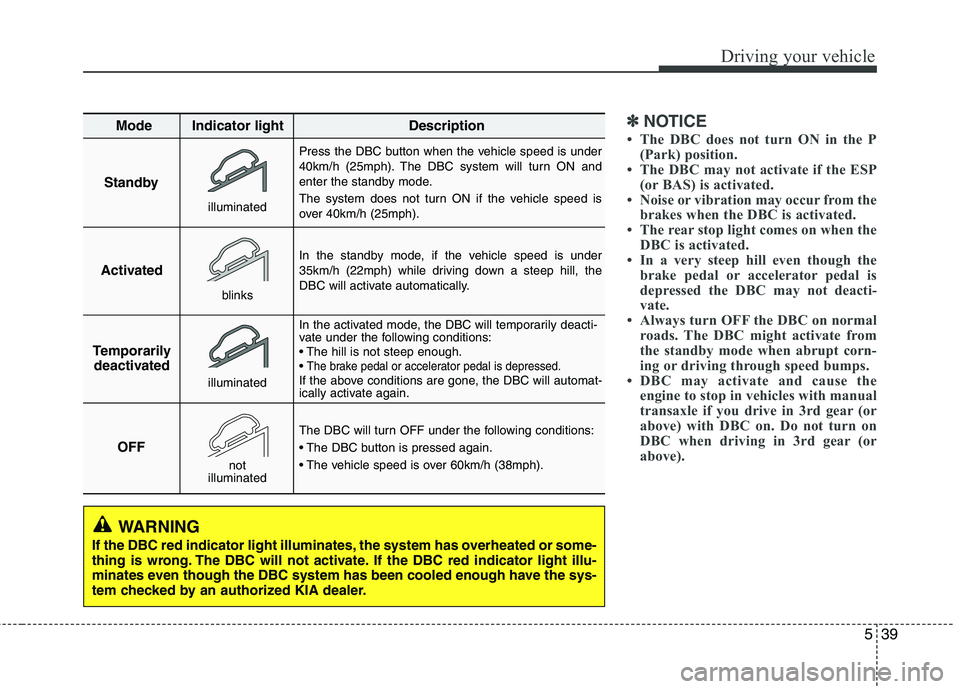
Standby Press the DBC button when the vehicle speed is under
40km/h (25mph). The DBC system will turn ON and
enter the standby mode.
The system does not turn ON if the vehicle speed is
over 40km/h (25mph).
In the standby mode, if the vehicle speed is under
35km/h (22mph) while driving down a steep hill, the
DBC will activate automatically.
In the activated mode, the DBC will temporarily deacti-
vate under the following conditions:
The brake pedal or accelerator pedal is depressed.If the above conditions are gone, the DBC will automat-
ically activate again.
The DBC will turn OFF under the following conditions:
Activated
Temporarily deactivated
OFF
Mode Indicator light Description
blinks
illuminated
not
illuminated
illuminated
WARNING
If the DBC red indicator light illuminates, the system has overheated or some-
thing is wrong. The DBC will not activate. If the DBC red indicator light illu-
minates even though the DBC system has been cooled enough have the sys-
tem checked by an authorized KIA dealer.
Page 252 of 399
Driving your vehicle
40
5
Good braking practices
Check to be sure the parking brake is
not engaged and that the parking
brake indicator light is out before driv-
ing away.
Driving through water may get the brakes wet. They can also get wet
when the vehicle is washed. Wet
brakes can be dangerous! Your vehicle
will not stop as quickly if the brakes are
wet. Wet brakes may cause the vehicle
to pull to one side. To dry the brakes, apply the brakes
lightly until the braking action returns to
normal, taking care to keep the vehicle
under control at all times. If the braking
action does not return to normal, stop
as soon as it is safe to do so and call an
authorized KIA dealer for assistance.
Don't coast down hills with the vehicle out of gear. This is extremely haz-
ardous. Keep the vehicle in gear at all
times, use the brakes to slow down,
then shift to a lower gear so that engine
braking will help you maintain a safespeed.
Don't "ride" the brake pedal. Resting your foot on the brake pedal while driv-ing can be dangerous because the
brakes might overheat and lose their
effectiveness. It also increases the
wear of the brake components.
If a tire goes flat while you are driving, apply the brakes gently and keep the
vehicle pointed straight ahead while
you slow down. When you are moving
slowly enough for it to be safe to do so,
pull off the road and stop in a safe
place.
If your vehicle is equipped with an auto- matic transaxle, don't let your vehicle
creep forward. To avoid creeping for-
ward, keep your foot firmly on the brake
pedal when the vehicle is stopped. Be cautious when parking on a hill.
Firmly engage the parking brake and
place the shift lever in P (automatic
transaxle) or in first or reverse gear
(manual transaxle). If your vehicle is
facing downhill, turn the front wheels
into the curb to help keep the vehicle
from rolling. If your vehicle is facing
uphill, turn the front wheels away from
the curb to help keep the vehicle from
rolling. If there is no curb or if it is
required by other conditions to keep the
vehicle from rolling, block the wheels.
Under some conditions your parking brake can freeze in the engaged posi-
tion. This is most likely to happen when
there is an accumulation of snow or ice
around or near the rear brakes or if the
brakes are wet. If there is a risk that the
parking brake may freeze, apply it only
temporarily while you put the shift lever
in P (automatic transaxle) or in first or
reverse gear (manual transaxle) and
block the rear wheels so the vehicle
cannot roll. Then release the parking
brake.
Do not hold the vehicle on the upgrade with the accelerator pedal. This can
cause the transaxle to overheat.
Always use the brake pedal or parking
brake.
WARNING
Whenever you leave or park your vehicle, always set the parking
brake as far as possible and fully
engage the vehicle's transaxle
into the P (Park) position. If the
parking brake is not fully
engaged, the vehicle may move
inadvertently and injure yourself
and others.
All vehicles should always have the parking brake fully engaged
when parking to avoid inadver-
tent movement of the vehicle
which can injure occupants orpedestrians.
Page 257 of 399

545
Driving your vehicle
Your vehicle's fuel economy depends
mainly on your style of driving, where you
drive and when you drive.
Each of these factors affects how many
kilometers (miles) you can get from a
liter (gallon) of fuel. To operate your vehi-
cle as economically as possible, use the
following driving suggestions to help
save money in both fuel and repairs:
Drive smoothly. Accelerate at a moder-ate rate. Don't make "jack-rabbit" starts or full-throttle shifts and maintain a
steady cruising speed. Don't race
between stoplights. Try to adjust your
speed to the traffic so you don't have to
change speeds unnecessarily. Avoid
heavy traffic whenever possible.
Always maintain a safe distance from
other vehicles so you can avoid unnec-
essary braking. This also reduces
brake wear.
Drive at a moderate speed. The faster you drive, the more fuel your vehicle
uses. Driving at a moderate speed,
especially on the highway, is one of the
most effective ways to reduce fuel con-sumption. Don't "ride" the brake or clutch pedal.
This can increase fuel consumption
and also increase wear on these com-
ponents. In addition, driving with your
foot resting on the brake pedal may
cause the brakes to overheat, which
reduces their effectiveness and may
lead to more serious consequences.
Take care of your tires. Keep them inflated to the recommended pressure.
Incorrect inflation, either too much or
too little, results in unnecessary tire
wear. Check the tire pressures at leastonce a month.
Be sure that the wheels are aligned correctly. Improper alignment can
result from hitting curbs or driving too
fast over irregular surfaces. Poor align-
ment causes faster tire wear and may
also result in other problems as well as
greater fuel consumption. Keep your vehicle in good condition.
For better fuel economy and reduced
maintenance costs, maintain your vehi-cle in accordance with the mainte-
nance schedule in Section 7. If you
drive your vehicle in severe conditions,more frequent maintenance is required
(see Section 7 for details).
Keep your vehicle clean. For maximum service, your vehicle should be kept
clean and free of corrosive materials. It
is especially important that mud, dirt,
ice, etc. not be allowed to accumulate
on the underside of the vehicle. This
extra weight can result in increased
fuel consumption and also contributeto corrosion.
Travel lightly. Don't carry unnecessary weight in your vehicle. Weight reduces
fuel economy.
Don't let the engine idle longer than necessary. If you are waiting (and not
in traffic), turn off your engine and
restart only when you're ready to go.
ECONOMICAL OPERATION
Page 266 of 399

Driving your vehicle
54
5
To keep locks from freezing
To keep the locks from freezing, squirt an
approved de-icer fluid or glycerine into
the key opening. If a lock is covered with
ice, squirt it with an approved de-icing
fluid to remove the ice. If the lock is
frozen internally, you may be able to thaw
it out by using a heated key. Handle the
heated key with care to avoid injury.
Use approved window washer
anti-freeze in system
To keep the water in the window washer
system from freezing, add an approved
window washer anti-freeze solution in
accordance with instructions on the con-
tainer. Window washer anti-freeze is
available from an authorized KIA dealer
and most auto parts outlets. Do not useengine coolant or other types of anti-
freeze as these may damage the paintfinish. Don't let your parking brake
freeze
Under some conditions your parking
brake can freeze in the engaged position.
This is most likely to happen when there
is an accumulation of snow or ice around
or near the rear brakes or if the brakes
are wet. If there is a risk the parking
brake may freeze, apply it only temporar-
ily while you put the shift lever in P (auto-
matic transaxle) or in first or reverse gear
(manual transaxle) and block the rear
wheels so the vehicle cannot roll. Then
release the parking brake.
Don't let ice and snow accumu- late underneath
Under some conditions, snow and ice
can build up under the fenders and inter-
fere with the steering. When driving in
severe winter conditions where this may
happen, you should periodically check
underneath the car to be sure the move-
ment of the front wheels and the steering
components is not obstructed.Carry emergency equipment
Depending on the severity of the weath-
er, you should carry appropriate emer-
gency equipment. Some of the items you
may want to carry include tire chains, tow
straps or chains, flashlight, emergency
flares, sand, shovel, jumper cables, win-
dow scraper, gloves, ground cloth, cover-
alls, blanket, etc.
Page 270 of 399
Driving your vehicle
58
5
Following distance
Stay at least twice as far behind the vehi-
cle ahead as you would when driving
your vehicle without a trailer. This can
help you avoid situations that require
heavy braking and sudden turns.
Passing
You’ll need more passing distance up
ahead when you’re towing a trailer. And,
because of the increased vehicle length,
you’ll need to go much farther beyond the
passed vehicle before you can return to
your lane.
Backing up
Hold the bottom of the steering wheel
with one hand. Then, to move the trailer
to the left, just move your hand to the left.
To move the trailer to the right, move your
hand to the right. Always back up slowly
and, if possible, have someone guide
you.
Making turns
When you’re turning with a trailer, make
wider turns than normal. Do this so your
trailer won’t strike soft shoulders, curbs,
road signs, trees, or other objects. Avoid
jerky or sudden maneuvers. Signal well
in advance.
Turn signals when towing a trailer
When you tow a trailer, your vehicle has
to have a different turn signal flasher and
extra wiring. The green arrows on your
instrument panel will flash whenever you
signal a turn or lane change. Properly
connected, the trailer lights will also flash
to alert other drivers you’re about to turn,
change lanes, or stop.
When towing a trailer, the green arrows
on your instrument panel will flash for
turns even if the bulbs on the trailer are
burned out. Thus, you may think drivers
behind you are seeing your signals
when, in fact, they are not. It’s important
to check occasionally to be sure the trail-
er bulbs are still working. You must also
check the lights every time you discon-
nect and then reconnect the wires.
Do not connect a trailer lighting system
directly to your vehicle’s lighting system.
Use only an approved trailer wiring har-
ness.
An authorized KIA dealer can assist you
in installing the wiring harness.
Driving on grades
Reduce speed and shift to a lower gear
before you start down a long or steep
downgrade. If you don’t shift down, you
might have to use your brakes so much
that they would get hot and no longer
operate efficiently.
On a long uphill grade, shift down and
reduce your speed to around 70 km/h (45mph) to reduce the possibility of engine
and transaxle overheating.
If your trailer weighs more than the max-
imum trailer weight without trailer brakes
and you have an automatic transaxle,
you should drive in D (Drive) when tow-
ing a trailer.
Operating your vehicle in D (Drive) when
towing a trailer will minimize heat build up
and extend the life of your transaxle.
WARNING
Failure to use an approved trailer wiring harness could result in dam-
age to the vehicle electrical system
and/or personal injury.
Page 278 of 399
63
What to do in an emergency
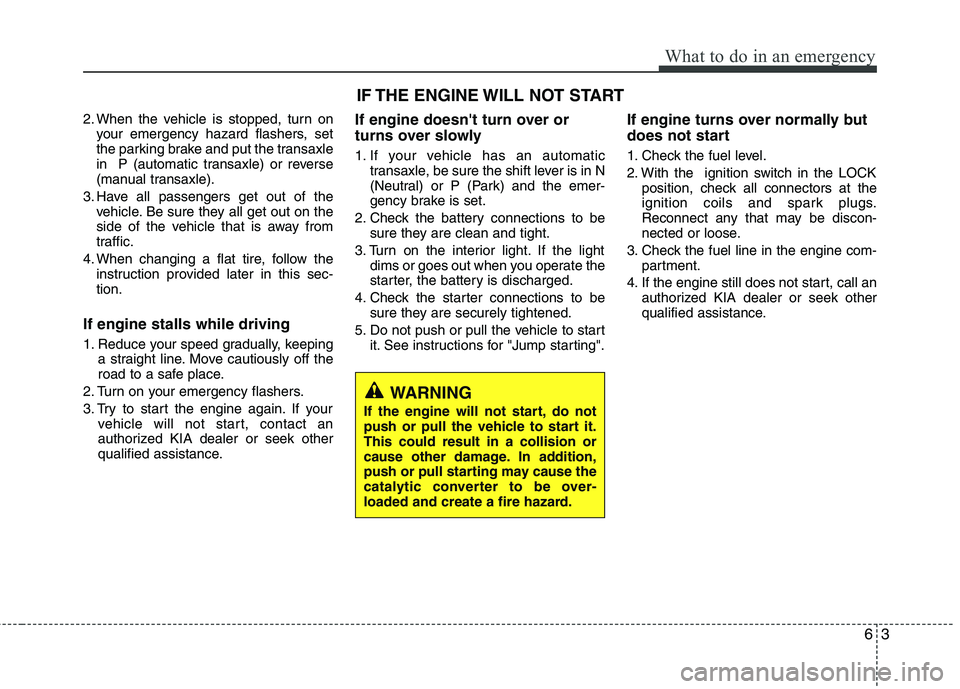
2. When the vehicle is stopped, turn onyour emergency hazard flashers, set
the parking brake and put the transaxle
in P (automatic transaxle) or reverse
(manual transaxle).
3. Have all passengers get out of the vehicle. Be sure they all get out on the
side of the vehicle that is away from
traffic.
4. When changing a flat tire, follow the instruction provided later in this sec-tion.
If engine stalls while driving
1. Reduce your speed gradually, keeping a straight line. Move cautiously off the
road to a safe place.
2. Turn on your emergency flashers.
3. Try to start the engine again. If your vehicle will not start, contact an
authorized KIA dealer or seek other
qualified assistance. If engine doesn't turn over or
turns over slowly
1. If your vehicle has an automatic
transaxle, be sure the shift lever is in N
(Neutral) or P (Park) and the emer-
gency brake is set.
2. Check the battery connections to be sure they are clean and tight.
3. Turn on the interior light. If the light dims or goes out when you operate the
starter, the battery is discharged.
4. Check the starter connections to be sure they are securely tightened.
5. Do not push or pull the vehicle to start it. See instructions for "Jump starting". If engine turns over normally but
does not start
1. Check the fuel level.
2. With the ignition switch in the LOCK
position, check all connectors at the
ignition coils and spark plugs.
Reconnect any that may be discon-
nected or loose.
3. Check the fuel line in the engine com- partment.
4. If the engine still does not start, call an authorized KIA dealer or seek other
qualified assistance.
IF THE ENGINE WILL NOT START
WARNING
If the engine will not start, do not
push or pull the vehicle to start it.This could result in a collision or
cause other damage. In addition,
push or pull starting may cause the
catalytic converter to be over-
loaded and create a fire hazard.
Page 297 of 399

What to do in an emergency
22
6
✽✽
NOTICE
If the TPMS, Low Tire Pressure and
Position indicators do not illuminate
for 3 seconds when the ignition
switch is turned to the ON position
or engine is running, or if they
remain illuminated after coming on
for approximately 3 seconds, take
your car to your nearest authorized
KIA dealer and have the system
checked.Low tire pressure tell- tale
Low tire pressure posi- tion telltale
When the tire pressure monitoring
system warning indicators are illumi-
nated, one or more of your tires is
significantly under-inflated. The lowtire pressure position telltale light willindicate which tire is significantly
under-inflated by illuminating the cor-responding position light.
If either telltale illuminates, immedi-
ately reduce your speed, avoid hard
cornering and anticipate increased
stopping distances. You should stop
and check your tires as soon as pos-
sible. Inflate the tires to the proper
pressure as indicated on the vehi-
cle’s placard or tire inflation pressure
label located on the driver’s side cen-
ter pillar outer panel. If you cannot
reach a service station or if the tire
cannot hold the newly added air,
replace the low pressure tire with the
spare tire. Then the TPMS malfunction indicator
may turn on and the Low Tire
Pressure and Position telltales will
remain on after restarting and about
20 minutes of continuous driving
before you have the low pressure tire
repaired and replaced on the vehicle.
CAUTION
In winter or cold weather, the
low tire pressure telltale may beilluminated if the tire pressurewas adjusted to the recom- mended tire inflation pressurein warm weather. It does notmean your TPMS is malfunction- ing because the decreased tem-perature leads to a proportionallowering of tire pressure.
When you drive your vehiclefrom a warm area to a cold area or from a cold area to a warmarea, or the outside temperatureis greatly higher or lower, you should check the tire inflationpressure and adjust the tires tothe recommended tire inflation pressure.