Page 149 of 336

483
Features of your vehicle
D240100ANF
Automatic heating and air condi-
tioning
The automatic climate control system is
controlled by simply setting the desired
temperature.
The Full Automatic Temperature Control
(FATC) system automatically controls the
heating and cooling system as follows;
1. Push the AUTO button. It is indicatedby AUTO on the display. The modes,
fan speeds, air intake and air-condi-
tioning will be controlled automatically
by temperature setting. 2. Push the temperature control button to
set the desired temperature.
If the temperature is set to the lowest
setting (Lo), the air conditioning sys-
tem will operate continuously.
3. To turn the automatic operation off, press any button except temperature
control button. If you press the mode
selection button, air-conditioning but-
ton, defrost button, air intake control
button or fan speed button, the select-
ed function will be controlled manually
while other functions operate automat-
ically.
Regardless of the temperature setting,
when using automatic operation, the air
conditioning system can automatically
turn on to decrease the humidity inside
the vehicle, even if the temperature is set
to warm.
✽ ✽ NOTICE
Never place anything over the sensor
located on the instrument panel to
ensure better control of the heating and
cooling system.
OMG045045OMG049081
Page 150 of 336

Features of your vehicle
84
4
D240200AUN
Manual heating and air condition-
ing
The heating and cooling system can be
controlled manually by pushing buttons
other than the AUTO button. In this case,
the system works sequentially according
to the order of buttons selected.
When pressing any button (or turning
any knob) except AUTO button while
automatic operation, the functions not
selected will be controlled automatically.
1. Start the engine.
2. Set the mode to the desired position.
3. Set the temperature control to the
desired position.
4. Set the air intake control to the outside (fresh) air position.
5. Set the fan speed control to the desired speed.
6. If air conditioning is desired, turn the air conditioning system on.
Press the AUTO button in order to con-
vert to full automatic control of the sys-
tem.
D240201AMG
Mode selection
The mode selection button controls the
direction of the air flow through the venti-
lation system.
Refer to the illustration in the “Manual cli-
mate control system”.
The air flow outlet port is converted as
follows: Face-Level (B, D)
Air flow is directed toward the upper body
and face. Additionally, each outlet can be
controlled to direct the air discharged
from the outlet.
Bi-Level (B, D, C)
Air flow is discharged towards the face and
floor.
Floor-Level (C, A, D)
Most of the air flow is directed to the
floor, with a small amount of the air being
directed to the windshield and side win-
dow defroster.
Floor/Defrost-Level (A, C, D)
Most of the air flow is directed to the floor
and the windshield with a small amount
directed to the side window defrosters.
OMG049082
Page 151 of 336
485
Features of your vehicle
Defrost-level (A, D)
Most of the air flow is directed to the
windshield with a small amount of air
directed to the side window defrosters.Instrument panel vents
The outlet port can be opened or closed
separately using the horizontal thumb-
wheel. To close the vent, rotate it to the
far left position. To open the vent, rotate it
right to the desired position.
Also, you can adjust the direction of air
delivered from these vents using the vent
control lever as shown.D240202AMG
Temperature control
The temperature will increase to the
maximum (HI) by turning the knob all the
way to the right.
The temperature will decrease to the
minimum (Lo) by turning the knob all the
way to the left.
When turning the knob, the temperature
will increase or decrease by increments
of 0.5°C/1°F. When set to the lowest tem-
perature setting, the air conditioning will
operate continuously.
OMG049075LOMG049084OMG040083
Page 153 of 336

487
Features of your vehicle
✽
✽NOTICE
It should be noted that prolonged oper-
ation of the heating in recirculated air
position will cause fogging of the wind-
shield and side windows and the air
within the passenger compartment will
become stale.
In addition, prolonged use of the air
conditioning with the recirculated air
position selected, will result in excessive-
ly dry air in the passenger compart-
ment.
D240205AUN
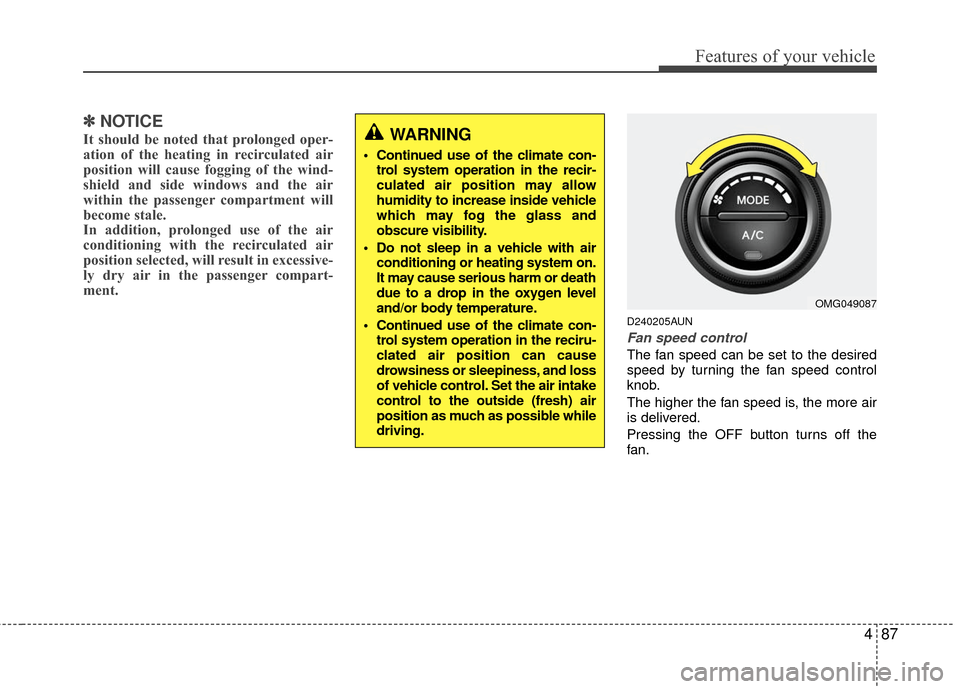
Fan speed control
The fan speed can be set to the desired
speed by turning the fan speed control
knob.
The higher the fan speed is, the more air
is delivered.
Pressing the OFF button turns off the
fan.
WARNING
Continued use of the climate con-
trol system operation in the recir-
culated air position may allow
humidity to increase inside vehicle
which may fog the glass and
obscure visibility.
Do not sleep in a vehicle with air conditioning or heating system on.
It may cause serious harm or death
due to a drop in the oxygen level
and/or body temperature.
Continued use of the climate con- trol system operation in the reciru-
clated air position can cause
drowsiness or sleepiness, and loss
of vehicle control. Set the air intake
control to the outside (fresh) air
position as much as possible while
driving.
OMG049087
Page 154 of 336
Features of your vehicle
88
4
D240206AUN
Air conditioning
Push the A/C button to turn the air condi-
tioning system on (indicator light will illu-
minate).
Push the button again to turn the air con-
ditioning system off.
D240208AUN
OFF mode
Push the OFF button to turn off the air cli-
mate control system. However you can
still operate the mode and air intake but-
tons as long as the ignition switch is in
the position ON.
OMG049088OMG049089
Page 155 of 336

489
Features of your vehicle
WINDSHIELD DEFROSTING AND DEFOGGING
D250000AUN
For maximum defrosting, set the temper-ature control to the extreme right/hot posi-
tion and the fan speed control to the high-
est speed.
If warm air to the floor is desired while defrosting or defogging, set the mode to
the floor-defrost position.
Before driving, clear all snow and ice from the windshield, rear window, outside rear
view mirrors, and all side windows.
Clear all snow and ice from the hood and air inlet in the cowl grill to improve heater
and defroster efficiency and to reduce the
probability of fogging up inside of the
windshield.
Manual climate control system
D250101AFD
To defog inside windshield
1. Select any fan speed except “0” posi- tion.
2. Select desired temperature.
3. Select the or position.
4. The outside (fresh) air and air condi- tioning will be selected automatically.
If the air-conditioning and outside (fresh)
air position are not selected automatical-
ly, press the corresponding button manu-
ally.
D250102AFD
To defrost outside windshield
1. Set the fan speed to the highest (extreme right) position.
2. Set the temperature to the extreme hot position.
3. Select the position.
4. The outside (fresh) air and air condi- tioning will be selected automatically.
OMG049090
WARNING - Windshieldheating
Do not use the or position
during cooling operation in
extremely humid weather. The dif-
ference between the temperature of
the outside air and that of the wind-
shield could cause the outer sur-
face of the windshield to fog up,
causing loss of visibility. In this
case, set the mode selection knob
or button to the position and
fan speed control knob or button to
a lower speed.
OMG049091
Page 156 of 336

Features of your vehicle
90
4
Automatic climate control system
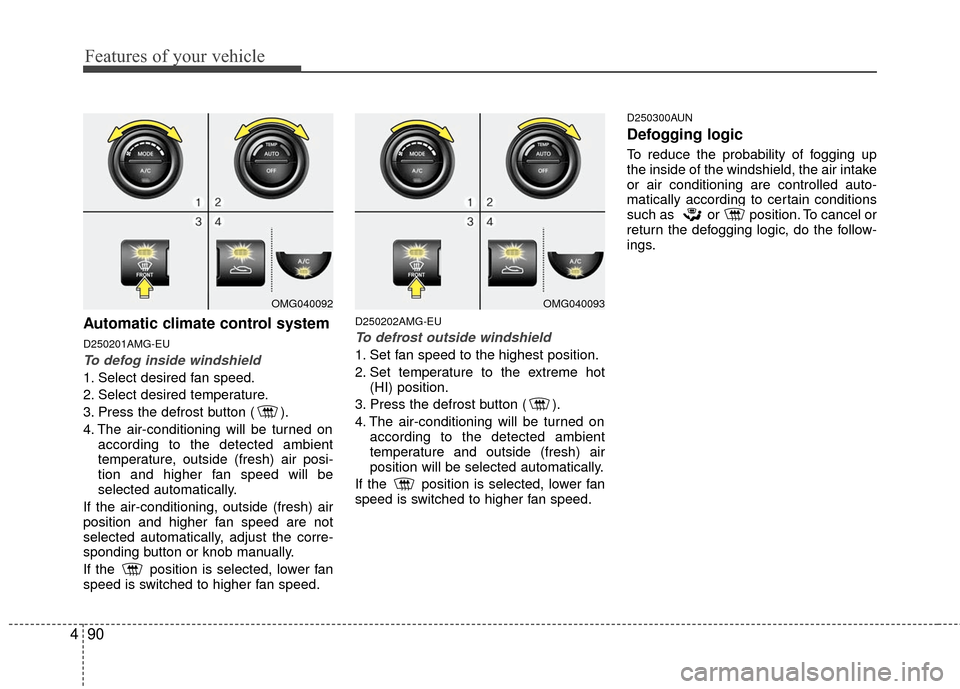
D250201AMG-EU
To defog inside windshield
1. Select desired fan speed.
2. Select desired temperature.
3. Press the defrost button ( ).
4. The air-conditioning will be turned on
according to the detected ambient
temperature, outside (fresh) air posi-
tion and higher fan speed will be
selected automatically.
If the air-conditioning, outside (fresh) air
position and higher fan speed are not
selected automatically, adjust the corre-
sponding button or knob manually.
If the position is selected, lower fan
speed is switched to higher fan speed.
D250202AMG-EU
To defrost outside windshield
1. Set fan speed to the highest position.
2. Set temperature to the extreme hot (HI) position.
3. Press the defrost button ( ).
4. The air-conditioning will be turned on according to the detected ambient
temperature and outside (fresh) air
position will be selected automatically.
If the position is selected, lower fan
speed is switched to higher fan speed.
D250300AUN
Defogging logic
To reduce the probability of fogging up
the inside of the windshield, the air intake
or air conditioning are controlled auto-
matically according to certain conditions
such as or position. To cancel or
return the defogging logic, do the follow-
ings.
OMG040092OMG040093
Page 157 of 336

491
Features of your vehicle
D250301AMG-EU
Manual climate control system
1. Turn the ignition switch to the ON posi-tion.
2. Turn the fan speed control knob to the “OFF” position.
3. Turn the mode selection knob to the defrost position ( ).
4. Push the air intake control button ( ) at least 5 times within 3 sec-
onds.
The indicator light in the air intake control
button will blink 3 times with 0.5 second
of interval. It indicates that the defogging
logic is canceled or returned to the pro-
grammed status.
If the battery has been discharged or discon-
nected, it is reset to the default defog logic
status.
D250302AUN-EU
Automatic climate control system
1. Turn the ignition switch to the ON posi- tion.
2. Select the defrost position pressing defrost button ( ).
3. While holding the air conditioning but- ton (A/C) pressed, press the air intake
control button ( ) at least 5 times
within 3 seconds.
The A/C display blinks 3 times with 0.5
second of interval. It indicates that the
defogging logic is canceled or returned to
the programmed status.
If the battery has been discharged or dis-
connected, it is reset to the
defaultdefog
logic status.
OMG049109NOMG040110N