Page 49 of 496
Automatic Locking Retractors (ALR) Mode — If
Equipped
In this mode, the shoulder belt is automatically pre-
locked. The belt will still retract to remove any slack in
the shoulder belt. The Automatic Locking Mode is avail-
able on all passenger-seating positions with a combina-
tion lap/shoulder belt.
When To Use The Automatic Locking Mode
Use the Automatic Locking Mode anytime a child safety
seat is installed in a seating position that has a belt with
this feature. Children 12 years old and under should
always be properly restrained in the rear seat.
How To Engage The Automatic Locking Mode
1. Buckle the combination lap and shoulder belt.
2. Grasp the shoulder portion and pull downward until
the entire belt is extracted.3. Allow the belt to retract. As the belt retracts, you will
hear a clicking sound. This indicates the safety belt is
now in the Automatic Locking Mode.
How To Disengage The Automatic Locking Mode
Unbuckle the combination lap/shoulder belt and allow it
to retract completely to disengage the Automatic Locking
Mode and activate the vehicle sensitive (emergency)
locking mode.
Energy Management Feature
This vehicle has a safety belt system with an Energy
Management feature in the front seating positions to help
further reduce the risk of injury in the event of a head-on
collision. This safety belt system has a retractor assembly
that is designed to release webbing in a controlled
manner. This feature is designed to help reduce the belt
force acting on the occupant’s chest.
48 THINGS TO KNOW BEFORE STARTING YOUR VEHICLE
Page 50 of 496
WARNING!
•The belt and retractor assembly must be replaced
if the seat belt assembly Automatic Locking Re-
tractor (ALR) feature or any other seat belt func-
tion is not working properly when checked ac-
cording to the procedures in the Service Manual.
•Failure to replace the belt and retractor assembly
could increase the risk of injury in collisions.
Seat Belt Pretensioners — If Equipped
The seat belts for both front seating positions may be
equipped with pretensioning devices that are designed to
remove slack from the seat belt in the event of a collision.
These devices improve the performance of the seat belt
by assuring that the belt is tight about the occupant early
in a collision. Pretensioners work for all size occupants,
including those in child restraints.NOTE:
These devices are not a substitute for proper seat
belt placement by the occupant. The seat belt still must be
worn snugly and positioned properly.
The pretensioners are triggered by the Occupant Re-
straint Controller (ORC). Like the airbags, the pretension-
ers are single use items. A deployed pretensioner or a
deployed airbag must be replaced immediately.
Supplemental Active Head Restraints (AHR)
These head restraints are passive, deployable compo-
nents, and vehicles with this equipment cannot be readily
identified by any markings, only through visual inspec-
tion of the head restraint. The head restraint will be split
in two halves, with the front half being soft foam and
trim, the back half being decorative plastic.
2
THINGS TO KNOW BEFORE STARTING YOUR VEHICLE 49
Page 62 of 496
The system includes side impact sensors adjacent to both
front and rear seat occupants that are calibrated to deploy
the SABIC airbags during impacts that require airbag
occupant protection.
WARNING!
•If your vehicle is equipped with left and right
Supplemental Side Airbag Inflatable Curtain
(SABIC), do not stack luggage or other cargo up
high enough to block the location of the SABIC.
The area where the SABIC is located should re-
main free from any obstructions.
•Do not use accessory seat covers or place objects
between you and the side airbags; the performance
could be adversely affected and/or objects could
be pushed into you, causing serious injury.
Knee Impact Bolsters
The Knee Impact Bolsters help protect the knees of the
driver and the front passenger, and position front occu-
pants for the best interaction with the Advanced Front
Airbags.
Along with seat belts and pretensioners, Advanced Front
Airbags work with the knee bolsters to provide improved
protection for the driver and front passenger. Side airbags
also work with seat belts to improve occupant protection.
Here are some simple steps you can take to minimize the
risk of harm from a deploying airbag:
1.Children 12 years old and under should always ride
buckled up in a rear seat.
2
THINGS TO KNOW BEFORE STARTING YOUR VEHICLE 61
Page 77 of 496
•Carefully follow the instructions that come with the
restraint. If you install the restraint improperly, it may
not work when you need it.
Installing Child Restraints Using the Vehicle Seat
Belt
The seat belts in the passenger seating positions are
equipped with either an Automatic Locking Retractor
(ALR) or a cinching latch plate or both. Both types of
seatbelts are designed to keep the lap portion of the seat
belt tight around the child restraint so that it is not
necessary to use a locking clip. The ALR will make a
ratcheting noise if you extract the entire belt from the
retractor and then allow the belt to retract into the
retractor. For additional information on ALR, refer to
“Automatic Locking Mode”.
•Buckle the child into the seat according to the child
restraint manufacturer ’s directions.
•When your child restraint is not in use, secure it in the
vehicle with the seat belt or remove it from the vehicle.
Do not leave it loose in the vehicle. In a sudden stop or
collision, it could strike the occupants or seatbacks and
cause serious personal injury.
•To install a child restraint, first, pull enough of the seat
belt webbing from the retractor to route it through the
belt path of the child restraint and slide the latch plate
into the buckle. Next, extract all the seat belt webbing
out of the retractor and then allow the belt to retract
into the retractor. Finally, pull on any excess webbing
to tighten the lap portion around the child restraint.
Any seat belt system will loosen with time, so check
the belt occasionally, and pull it tight if necessary.
•In the rear seat, you may have trouble tightening the
lap/shoulder belt on the child restraint because the
buckle or latch plate is too close to the belt path
opening on the restraint. Disconnect the latch plate
76 THINGS TO KNOW BEFORE STARTING YOUR VEHICLE
Page 141 of 496
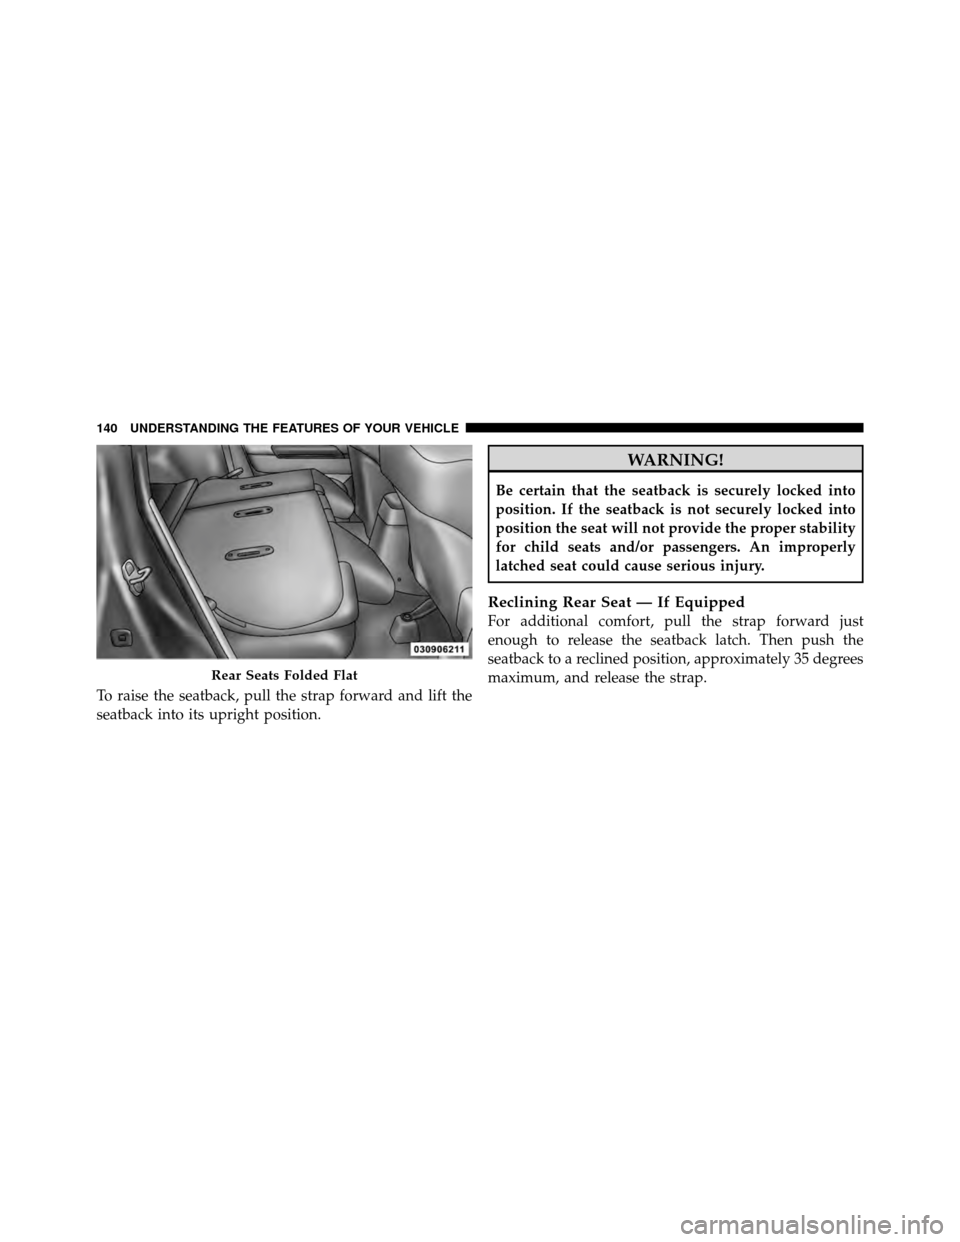
To raise the seatback, pull the strap forward and lift the
seatback into its upright position.
WARNING!
Be certain that the seatback is securely locked into
position. If the seatback is not securely locked into
position the seat will not provide the proper stability
for child seats and/or passengers. An improperly
latched seat could cause serious injury.
Reclining Rear Seat — If Equipped
For additional comfort, pull the strap forward just
enough to release the seatback latch. Then push the
seatback to a reclined position, approximately 35 degrees
maximum, and release the strap.
Rear Seats Folded Flat
140 UNDERSTANDING THE FEATURES OF YOUR VEHICLE
Page 291 of 496
STARTING PROCEDURES
Before starting your vehicle, adjust your seat, adjust both
inside and outside mirrors, and fasten your seat belts.
WARNING!
Never leave children alone in a vehicle. Leaving
unattended children in a vehicle is dangerous for a
number of reasons. A child or others could be seri-
ously or fatally injured. Do not leave the key in the
ignition. A child could operate power windows,
other controls, or move the vehicle.
Manual Transmission – If Equipped
Before starting the engine fully apply the parking brake,
press the clutch pedal to the floor, and place the shift
lever in NEUTRAL.NOTE:
•The engine will not start unless the clutch pedal is
pressed to the floor.
•If the key will not turn and the steering wheel is
locked, rotate the wheel in either direction to relieve
pressure on the locking mechanism and then turn the
key.
Automatic Transmission – If Equipped
The shift lever must be in the PARK or NEUTRAL
position before you can start the engine. Apply the brakes
before shifting to any driving gear.
NOTE:
You must press the brake pedal before shifting
out of PARK.
290 STARTING AND OPERATING
Page 298 of 496
Gear Ranges
DO NOT race the engine when shifting from PARK or
NEUTRAL positions into another gear range.
PARK
This range supplements the parking brake by locking the
transmission. The engine can be started in this range.
Never use PARK while the vehicle is in motion. Apply
the parking brake when leaving the vehicle in this range.
Always apply the parking brake first, and then place the
shift lever in the PARK position.
WARNING!
•Unintended movement of a vehicle could injure
those in and near the vehicle. As with all vehicles,
you should never exit a vehicle while the engine is
running. Before exiting a vehicle, you should
always shift the vehicle into PARK, remove the
key from the ignition, and apply the parking
brake. Once the key is removed from the ignition,
the shift lever is locked in the PARK position,
securing the vehicle against unwanted movement.
Furthermore, you should never leave unattended
children inside a vehicle.(Continued)
5
STARTING AND OPERATING 297
Page 299 of 496
WARNING! (Continued)
•Never leave children alone in a vehicle. Leaving
unattended children in a vehicle is dangerous for a
number of reasons. A child or others could be
seriously or fatally injured. Do not leave the
ignition key in the ignition switch. A child could
operate power windows, other controls, or move
the vehicle.
The following indicators should be used to ensure that
you have engaged the shift lever into the PARK position:
•When shifting into PARK, firmly move the shift lever
all the way forward until it stops.
•Look at the shift indicator window on the shift lever
bezel to ensure it is in the PARK position.
•You must press the brake pedal to move the shift lever
out of the PARK position.
CAUTION!
Before moving the shift lever out of PARK, you must
turn the ignition from LOCK to ON so the steering
wheel and shift lever are released. Otherwise, dam-
age to the steering column or shift lever could result.
You must also press the brake pedal.
REVERSE
This range is for moving the vehicle rearward. Use this
range only after the vehicle has come to a complete stop.
NEUTRAL
This range is used when the vehicle is standing for
prolonged periods with the engine running. The engine
may be started in this range. Set the parking brake if you
must leave the vehicle.
DRIVE
This range is used for most city and highway driving.
298 STARTING AND OPERATING