Page 129 of 407

Press the lens to turn these lights on. Press a second time
to turn the lights off.
The lights also turn on when a front door or rear door is
opened. The lights will also turn on when the UNLOCK
button on the Remote Keyless Entry (RKE) transmitter is
pressed.
Sunglasses Storage
At the rear of the console a compartment is provided for
the storage of a pair of sunglasses.
The storage compartment access is a “push/push” de-
sign. Push the finger depression on the overhead console
to open. Push the finger depression to close.
GARAGE DOOR OPENER — IF EQUIPPED
HomeLink�replaces up to three remote controls (hand-
held transmitters) that operate devices such as garage
door openers, motorized gates, lighting or home security systems. The HomeLink�
unit operates off your vehicle’s
battery.
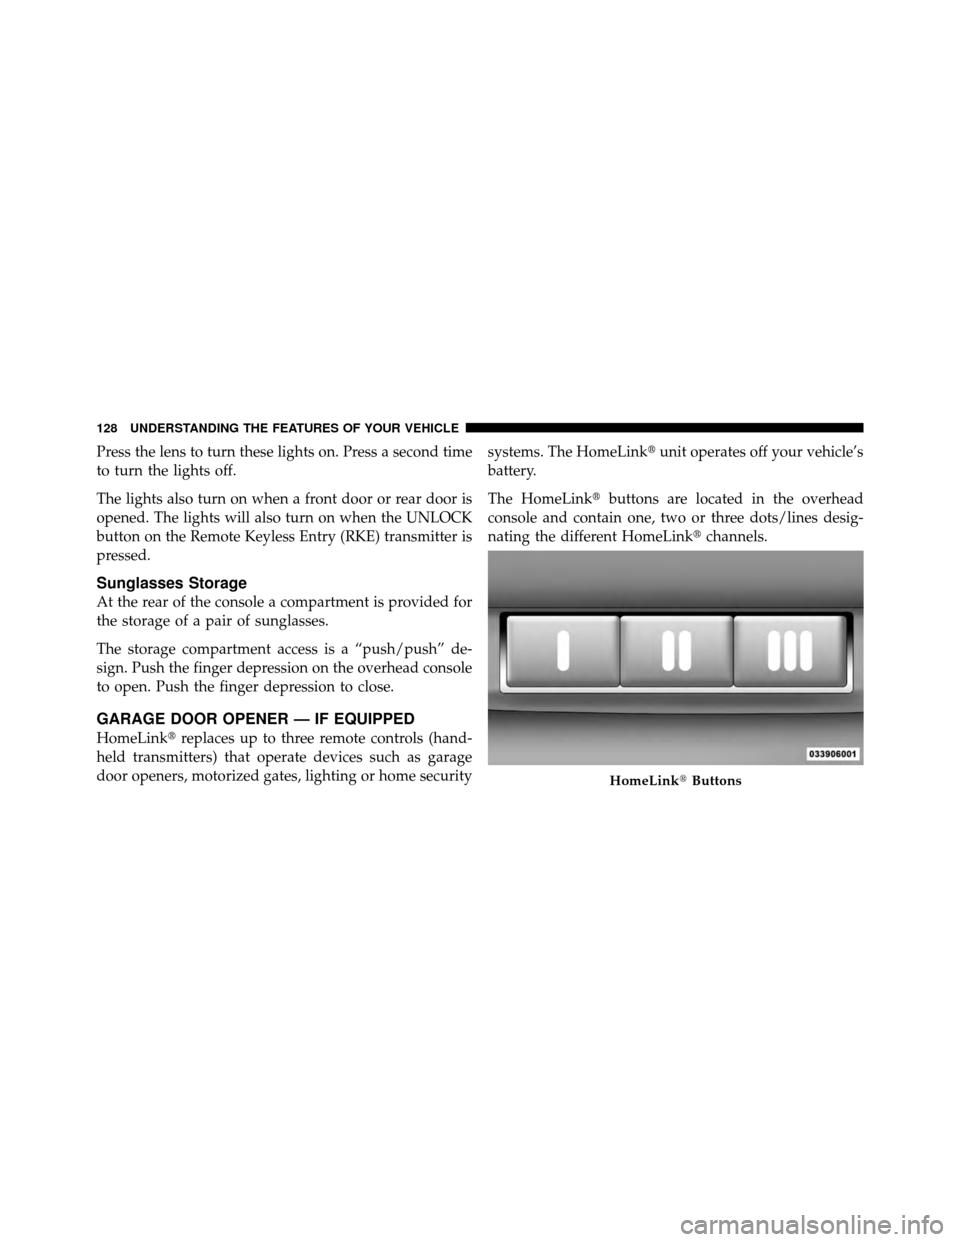
The HomeLink� buttons are located in the overhead
console and contain one, two or three dots/lines desig-
nating the different HomeLink� channels.
HomeLink�Buttons
128 UNDERSTANDING THE FEATURES OF YOUR VEHICLE
Page 141 of 407
CAUTION! (Continued)
•Accessories that draw higher power (i.e., coolers,
vacuum cleaners, lights, etc.) will degrade the
battery even more quickly. Only use these inter-
mittently and with greater caution.
•After the use of high power draw accessories, or
long periods of the vehicle not being started (with
accessories still plugged in), the vehicle must be
driven a sufficient length of time to allow the
generator to recharge the vehicle’s battery.
POWER INVERTER — IF EQUIPPED
There is a 115 Volt, 150 Watt inverter outlet located on the
back of the center console to convert DC current to AC
current. This outlet can power cellular phones, electron-
ics and other low power devices requiring power up to
150 Watts. Certain high-end video games, such as Play-
station3 and XBox360 will exceed this power limit, as will
most power tools.
140 UNDERSTANDING THE FEATURES OF YOUR VEHICLE
Page 145 of 407
the cargo light lens surface will turn off all interior lights.
Push on the lens surface a second time to restore the
interior lights to normal operation.
Rear Storage Compartment
The rear storage compartment is located on the driver’s
side behind the second row seat.
Retractable Cargo Area Cover — If Equipped
NOTE:The purpose of this cover is for privacy, not to
secure loads. It will not prevent cargo from shifting or
protect passengers from loose cargo.
To cover the cargo area:
1. Grasp the cover at the center handle. Pull it over the
cargo area.
2. Insert the pins on the ends of the cover into the slots in
the pillar trim cover.
3. The liftgate may be opened with the cargo cover in
place.
Rear Storage Compartment
144 UNDERSTANDING THE FEATURES OF YOUR VEHICLE
Page 158 of 407

WARNING!
Driving a vehicle with the red brake light on is
dangerous. Part of the brake system may have failed.
It will take longer to stop the vehicle. You could have
an accident. Have the vehicle checked immediately.
Vehicles equipped with the Anti-Lock Brake System
(ABS), are also equipped with Electronic Brake Force
Distribution (EBD). In the event of an EBD failure, the
Brake Warning Light will turn on along with the ABS
Light. Immediate repair to the ABS system is required.
Operation of the Brake Warning Light can be checked by
turning the ignition switch from the OFF position to the
ON position. The light should illuminate for approxi-
mately two seconds. The light should then turn off unless
the parking brake is applied or a brake fault is detected.
If the light does not illuminate, have the light inspected
by an authorized dealer. The light also will turn on when the parking brake is
applied with the ignition switch in the ON position.
NOTE:
This light shows only that the parking brake is
applied. It does not show the degree of brake application.
3. Turn Signal Indicators The arrow will flash with the exterior turn signal
when the turn signal lever is operated.
If the vehicle electronics sense that the vehicle has
traveled about 1 mile (1.6 km) with the turn signals on, a
chime will sound to alert you to turn the signals off. If
either indicator flashes at a rapid rate, check for a
defective outside light bulb.
4. High Beam Indicator Indicates that headlights are on high beam.
4
UNDERSTANDING YOUR INSTRUMENT PANEL 157
Page 166 of 407

make a record of the odometer reading before the repair/
service, so that you can be sure that it is properly reset, or
that the door jamb sticker is accurate if the odometer
must be reset at zero.
19. Shift Lever Indicator
The Shift Lever Indicator is self-contained within the
instrument cluster. It displays the gear position of the
automatic transmission.
NOTE:You must apply the brakes before shifting from
PARK.
20. Fuel Gauge
The pointer shows the level of fuel in the fuel tank when
the ignition switch is in the ON position.
21. Electronic Throttle Control (ETC) Warning Light This light informs you of a problem with the
Electronic Throttle Control (ETC) system. If a
problem is detected the light will come on while the engine is running. Cycle the ignition key when
the vehicle has completely stopped and the shift lever is
placed in the PARK position. The light should turn off. If
the light remains lit with the engine running, your
vehicle will usually be drivable; however, see your
authorized dealer for service as soon as possible. If the
light is flashing when the engine is running, immediate
service is required and you may experience reduced
performance, an elevated/rough idle or engine stall and
your vehicle may require towing. The light will come on
when the ignition is first turned on and remain on briefly
as a bulb check. If the light does not come on during
starting, have the system checked by an authorized
dealer.
22. Front Fog Light Indicator — If Equipped
This indicator will illuminate when the front fog
lights are on.
4
UNDERSTANDING YOUR INSTRUMENT PANEL 165
Page 182 of 407

Flash Lamps with Lock
When YES (Y) is selected, the front and rear turn signals
will flash when the doors are locked or unlocked with the
RKE transmitter. This feature may be selected with or
without the “Sound Horn with Lock” feature. To make
your selection, press and release the FUNCTION SE-
LECT button until YES (Y) or NO (N) appears.
Headlamp Off Delay
When this feature is selected, the driver can choose to
have the headlights remain on for 0, 30, 60, or 90 seconds
when exiting the vehicle. To make your selection, press
and release the FUNCTION SELECT button until “0,”
“30,” “60,” or “90” appears.
Auto High Beams (Available with SmartBeam™
Only)
When this feature is selected, the high beam headlights
will deactivate automatically under certain conditions. To
make your selection, press and release the FUNCTIONSELECT button until YES (Y) or NO (N) appears. Refer to
“Lights/SmartBeam™ — If Equipped” in “Understand-
ing The Features Of Your Vehicle” for further
information.
Headlamps On with Wipers (Available with
Automatic Headlamps Only)
When YES (Y) is selected, and the headlight switch is in
the AUTO position, the headlights will turn on approxi-
mately 10 seconds after the wipers are turned on. The
headlights will also turn off when the wipers are turned
off if they were turned on by this feature. To make your
selection, press and release the FUNCTION SELECT
button until YES (Y) or NO (N) appears.
NOTE:
Turning the headlights on during the daytime
causes the instrument panel lights to dim. To increase the
brightness, refer to “Lights” in “Understanding The
Features Of Your Vehicle”.4
UNDERSTANDING YOUR INSTRUMENT PANEL 181
Page 184 of 407

Key Off Power Delay
When this feature is selected, the power window
switches, radio, Uconnect™ Phone (if equipped), DVD
video system (if equipped), power sunroof (if equipped),
and power outlets will remain active for up to 10 minutes
after the ignition switch is turned off. Opening a vehicle
door will cancel this feature. To make your selection,
press and release the FUNCTION SELECT button until
“Off,” “45 sec.,” “5 min.,” or “10 min.” appears.
Illuminated Approach
When this feature is selected, the headlights will activate
and remain on for up to 90 seconds when the doors are
unlocked with the RKE transmitter. To make your selec-
tion, press and release the FUNCTION SELECT button
until “OFF,” “30 sec.,” “60 sec.,” or “90 sec.” appears.
Display Units of Measure In:
The EVIC, odometer, and Uconnect™ gps (if equipped)
can be changed between English and Metric units of
measure. To make your selection, press and release the
FUNCTION SELECT button until “ENGLISH” or “MET-
RIC” appears.
System Status
Press and release the MENU button until one of the
following System Status messages displays in the EVIC:
•System OK
•System Warnings Displayed (will display all currently
active System Warnings)
4
UNDERSTANDING YOUR INSTRUMENT PANEL 183
Page 350 of 407

REPLACEMENT BULBS
Interior LightsBulb Type
Glove Box Lamp ......................... 194
Grab Handle Lamp ................ L002825W5W
Overhead Console Reading Lamps .........VT4976
Rear Cargo Lamp ....................... 214–2
Visor Vanity Lamp ..................... V26377
Underpanel Courtesy Lamps ................ 906
Instrument Cluster (General Illumination) ....... 103
Telltale/Hazard Lamp ...................... 74
Exterior Lights Bulb Type
Backup Lamps ......................... 3157K
Front Park/Turn Lamp ................... 3757A
Front Fog Lamps ........................ 9145
Front Side Marker ...................... W5W
Headlamps (Low Beam) – High Intensity Discharge
(HID) .......... D1S (Serviced at Authorized Dealer) Headlamps (Low Beam)
................... 9006
Headlamps (High Beam) ..................9005
Rear Turn/Stop/Tail Lamps ...............3157K
NOTE: Numbers refer to commercial bulb types that
can be purchased from your authorized dealer.
If a bulb needs to be replaced, visit your authorized
dealer or refer to the applicable Service Manual.
BULB REPLACEMENT
High Intensity Discharge Headlamps (HID) — If
Equipped
The headlamps are a type of high voltage discharge tube.
High voltage can remain in the circuit even with the
headlamp switch off and the key removed. Because of
this, you should not attempt to service a headlamp bulb
yourself. If a headlamp bulb fails, take your vehicle to
an authorized dealer for service.7
MAINTAINING YOUR VEHICLE 349