2010 HYUNDAI VERACRUZ battery
[x] Cancel search: batteryPage 103 of 425
421
Features of your vehicle
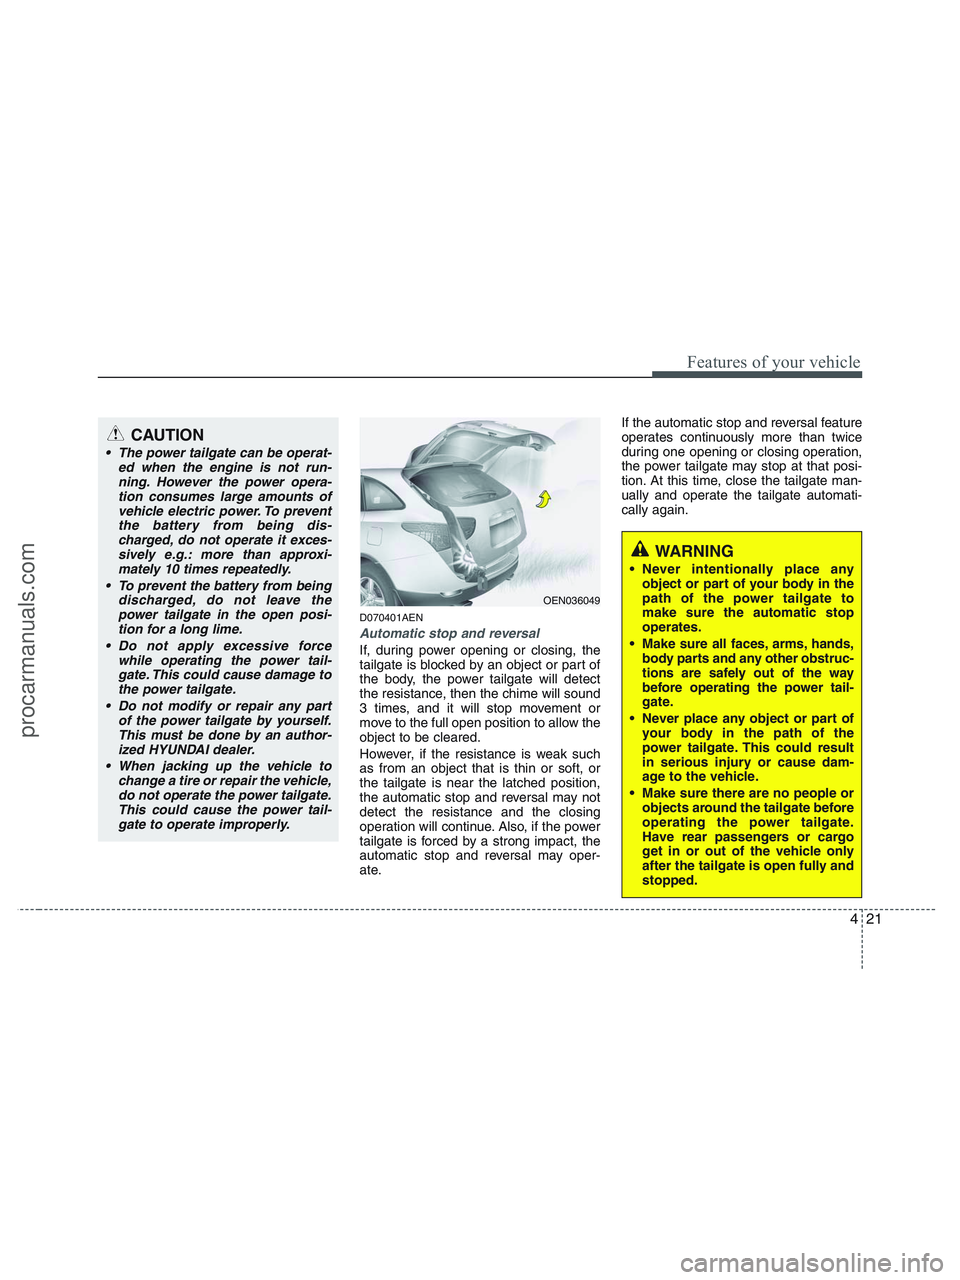
D070401AEN
Automatic stop and reversal
If, during power opening or closing, the
tailgate is blocked by an object or part of
the body, the power tailgate will detect
the resistance, then the chime will sound
3 times, and it will stop movement or
move to the full open position to allow the
object to be cleared.
However, if the resistance is weak such
as from an object that is thin or soft, or
the tailgate is near the latched position,
the automatic stop and reversal may not
detect the resistance and the closing
operation will continue. Also, if the power
tailgate is forced by a strong impact, the
automatic stop and reversal may oper-
ate.If the automatic stop and reversal feature
operates continuously more than twice
during one opening or closing operation,
the power tailgate may stop at that posi-
tion. At this time, close the tailgate man-
ually and operate the tailgate automati-
cally again.
OEN036049
WARNING
Never intentionally place any
object or part of your body in the
path of the power tailgate to
make sure the automatic stop
operates.
Make sure all faces, arms, hands,
body parts and any other obstruc-
tions are safely out of the way
before operating the power tail-
gate.
Never place any object or part of
your body in the path of the
power tailgate. This could result
in serious injury or cause dam-
age to the vehicle.
Make sure there are no people or
objects around the tailgate before
operating the power tailgate.
Have rear passengers or cargo
get in or out of the vehicle only
after the tailgate is open fully and
stopped.
CAUTION
The power tailgate can be operat-
ed when the engine is not run-
ning. However the power opera-
tion consumes large amounts of
vehicle electric power. To prevent
the battery from being dis-
charged, do not operate it exces-
sively e.g.: more than approxi-
mately 10 times repeatedly.
To prevent the battery from being
discharged, do not leave the
power tailgate in the open posi-
tion for a long lime.
Do not apply excessive force
while operating the power tail-
gate. This could cause damage to
the power tailgate.
Do not modify or repair any part
of the power tailgate by yourself.
This must be done by an author-
ized HYUNDAI dealer.
When jacking up the vehicle to
change a tire or repair the vehicle,
do not operate the power tailgate.
This could cause the power tail-
gate to operate improperly.
procarmanuals.com
Page 104 of 425
Features of your vehicle
22 4
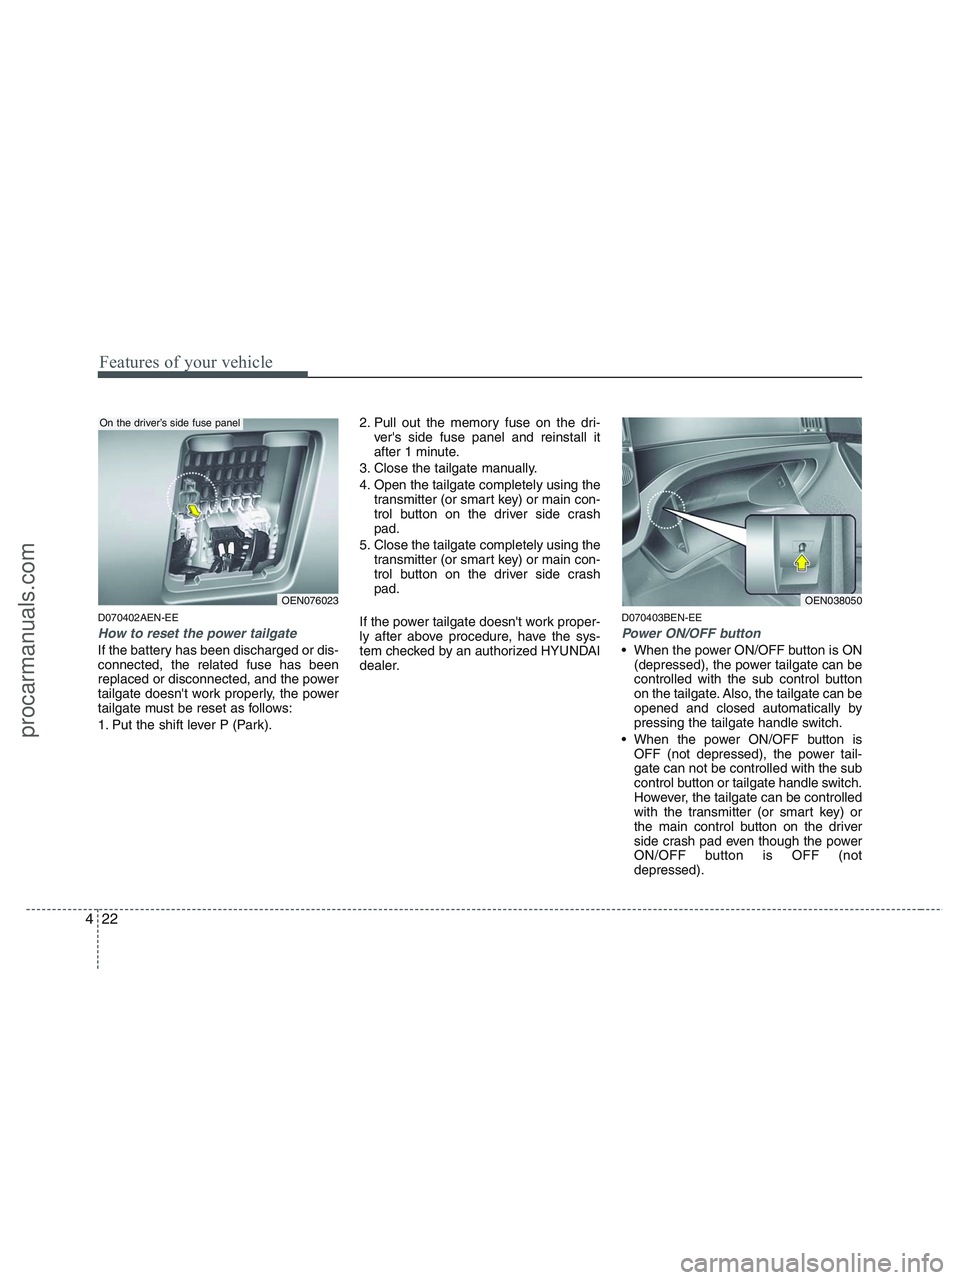
D070402AEN-EE
How to reset the power tailgate
If the battery has been discharged or dis-
connected, the related fuse has been
replaced or disconnected, and the power
tailgate doesn't work properly, the power
tailgate must be reset as follows:
1. Put the shift lever P (Park).2. Pull out the memory fuse on the dri-
ver's side fuse panel and reinstall it
after 1 minute.
3. Close the tailgate manually.
4. Open the tailgate completely using the
transmitter (or smart key) or main con-
trol button on the driver side crash
pad.
5. Close the tailgate completely using the
transmitter (or smart key) or main con-
trol button on the driver side crash
pad.
If the power tailgate doesn't work proper-
ly after above procedure, have the sys-
tem checked by an authorized HYUNDAI
dealer.
D070403BEN-EE
Power ON/OFF button
When the power ON/OFF button is ON
(depressed), the power tailgate can be
controlled with the sub control button
on the tailgate. Also, the tailgate can be
opened and closed automatically by
pressing the tailgate handle switch.
When the power ON/OFF button is
OFF (not depressed), the power tail-
gate can not be controlled with the sub
control button or tailgate handle switch.
However, the tailgate can be controlled
with the transmitter (or smart key) or
the main control button on the driver
side crash pad even though the power
ON/OFF button is OFF (not
depressed).
OEN038050OEN076023
On the driver’s side fuse panel
procarmanuals.com
Page 117 of 425
435
Features of your vehicle
Resetting the sunroof
Whenever the vehicle battery is discon-
nected or discharged, or related fuse is
blown, you must reset your sunroof sys-
tem as follows:
1. Turn the ignition switch to the ON
position and close the sunroof com-
pletely.
2. Type A: Release the control lever.
Type B: Press and hold the control
lever upward until the sunroof
tilts completely upward. Then,
release the lever.
3. Type A: Pull and hold the control lever
downward until the sunroof
tilts and slightly moves up
and down. Then, release the
lever.
Type B: Press and hold the control
lever upward until the sunroof
slightly moves up and down.
Then, release the lever.4. Pull and hold the control lever down-
ward (Type B: Press and hold the con-
trol lever upward) until the sunroof is
operated as follows;
TILT DOWN →SLIDE OPEN →
SLIDE CLOSE
Then, release the control lever.
When this is complete, the sunroof sys-
tem is reset.
❈For more detailed information, contact
an authorized HYUNDAI dealer.
CAUTION
If the sunroof is not reset when the
vehicle battery is disconnected or
discharged, or related fuse is
blown, the sunroof may operate
improperly.
procarmanuals.com
Page 127 of 425
445
Features of your vehicle
1. Press and hold the button for more
than 6 seconds. When the compass
memory is cleared a "C" will appear in
the display.
2. To calibrate the compass, drive the
vehicle in 2 complete circles at less
than 5 mph (8 km/h).
Integrated HomeLink
®Wireless Control
System
The HomeLink® Wireless Control
System provides a convenient way to
replace up to three hand-held radio-fre-
quency (RF) transmitters with a single
built-in device. This innovative feature will
learn the radio frequency codes of most
current transmitters to operate devices
such as gate operators, garage door
openers, entry door locks, security sys-
tems, even home lighting. Both standard
and rolling code-equipped transmitters
can be programmed by following the out-
lined procedures. Additional HomeLink
®
information can be found at: www.home-
link.com or by calling 1-800-355-3515.Retain the original transmitter of the RF
device you are programming for use in
other vehicles as well as for future
HomeLink
®programming. It is also sug-
gested that upon the sale of the vehicle,
the programmed HomeLink
®buttons be
erased for security purposes.Programming HomeLink
®
✽ ✽
NOTICE
• When programming a garage door
opener, it is advised to park the vehi-
cle outside of the garage.
• It is recommended that a new battery
be placed in the hand-held transmit-
ter of the device being programmed to
HomeLink
®for quicker training and
accurate transmission of the radio-
frequency signal.
• Some vehicles may require the igni-
tion switch to be turned to the second
(or "accessories") position for pro-
gramming and/or operation of
HomeLink.
• In the event that there are still pro-
gramming difficulties or questions
after following the programming steps
listed below, contact HomeLink
®at:
www.homelink.com or 1-800-355-
3515.
CAUTION
Before programming HomeLink®to
a garage door opener or gate oper-
ator, make sure that people and
objects are out of the way of the
device to prevent potential harm or
damage. Do not use HomeLink
®
with any garage door opener that
lacks the safety stop and reverse
features required by U.S. federal
safety standards (this includes any
garage door opener model manu-
factured before April 1, 1982). A
garage door that cannot detect an
object - signaling the door to stop
and reverse - does not meet current
U.S. federal safety standards. Using
a garage door opener without these
features increases the risk of seri-
ous injury or death.
procarmanuals.com
Page 140 of 425
Features of your vehicle
58 4
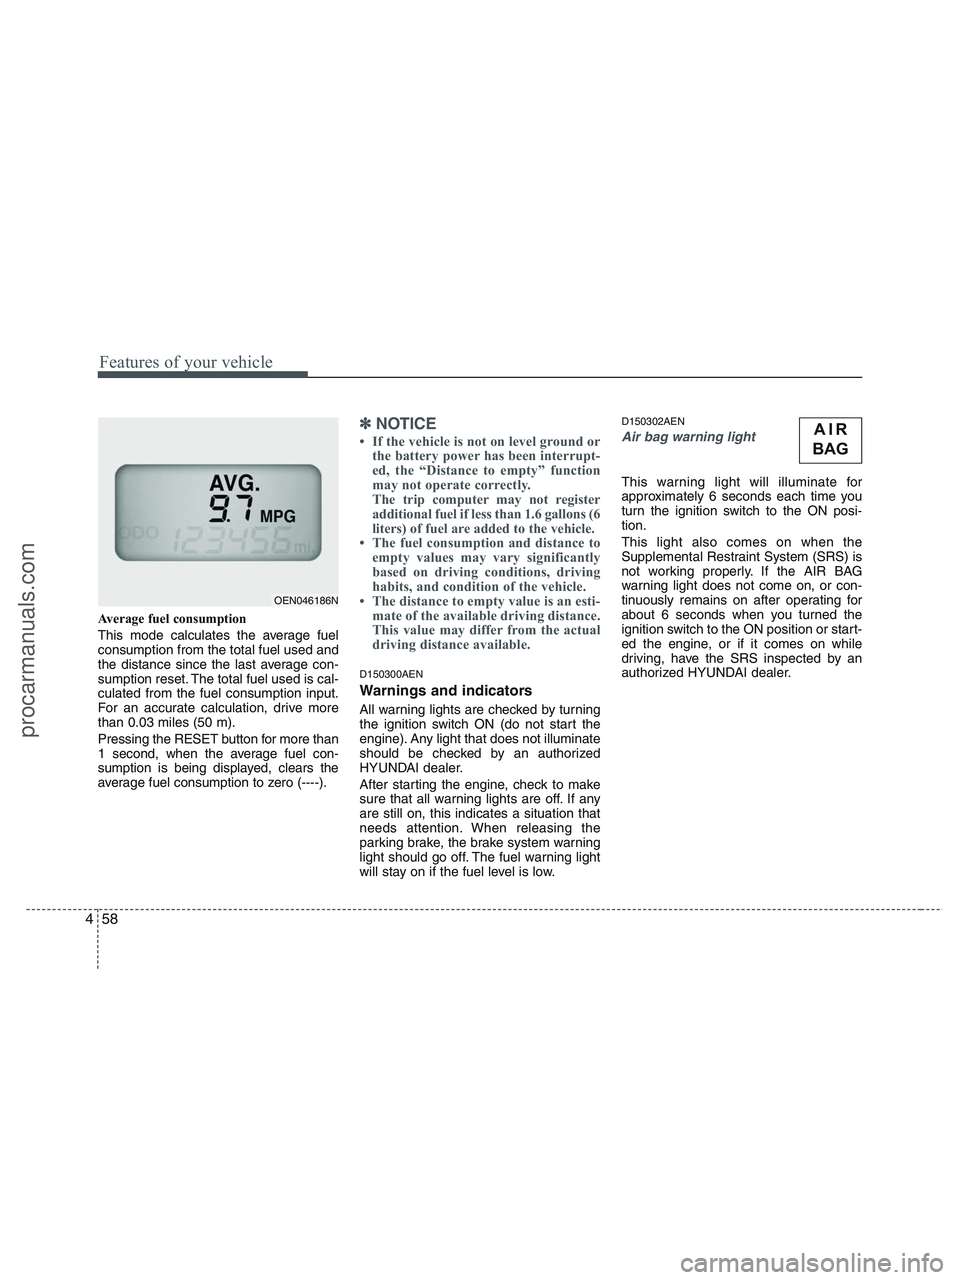
Average fuel consumption
This mode calculates the average fuel
consumption from the total fuel used and
the distance since the last average con-
sumption reset. The total fuel used is cal-
culated from the fuel consumption input.
For an accurate calculation, drive more
than 0.03 miles (50 m).
Pressing the RESET button for more than
1 second, when the average fuel con-
sumption is being displayed, clears the
average fuel consumption to zero (----).
✽ ✽
NOTICE
• If the vehicle is not on level ground or
the battery power has been interrupt-
ed, the “Distance to empty” function
may not operate correctly.
The trip computer may not register
additional fuel if less than 1.6 gallons (6
liters) of fuel are added to the vehicle.
• The fuel consumption and distance to
empty values may vary significantly
based on driving conditions, driving
habits, and condition of the vehicle.
• The distance to empty value is an esti-
mate of the available driving distance.
This value may differ from the actual
driving distance available.
D150300AEN
Warnings and indicators
All warning lights are checked by turning
the ignition switch ON (do not start the
engine). Any light that does not illuminate
should be checked by an authorized
HYUNDAI dealer.
After starting the engine, check to make
sure that all warning lights are off. If any
are still on, this indicates a situation that
needs attention. When releasing the
parking brake, the brake system warning
light should go off. The fuel warning light
will stay on if the fuel level is low.
D150302AEN
Air bag warning light
This warning light will illuminate for
approximately 6 seconds each time you
turn the ignition switch to the ON posi-
tion.
This light also comes on when the
Supplemental Restraint System (SRS) is
not working properly. If the AIR BAG
warning light does not come on, or con-
tinuously remains on after operating for
about 6 seconds when you turned the
ignition switch to the ON position or start-
ed the engine, or if it comes on while
driving, have the SRS inspected by an
authorized HYUNDAI dealer.
OEN046186N
AIR
BAG
procarmanuals.com
Page 145 of 425
463
Features of your vehicle
D150316AEN
Door and tailgate ajar
warning light
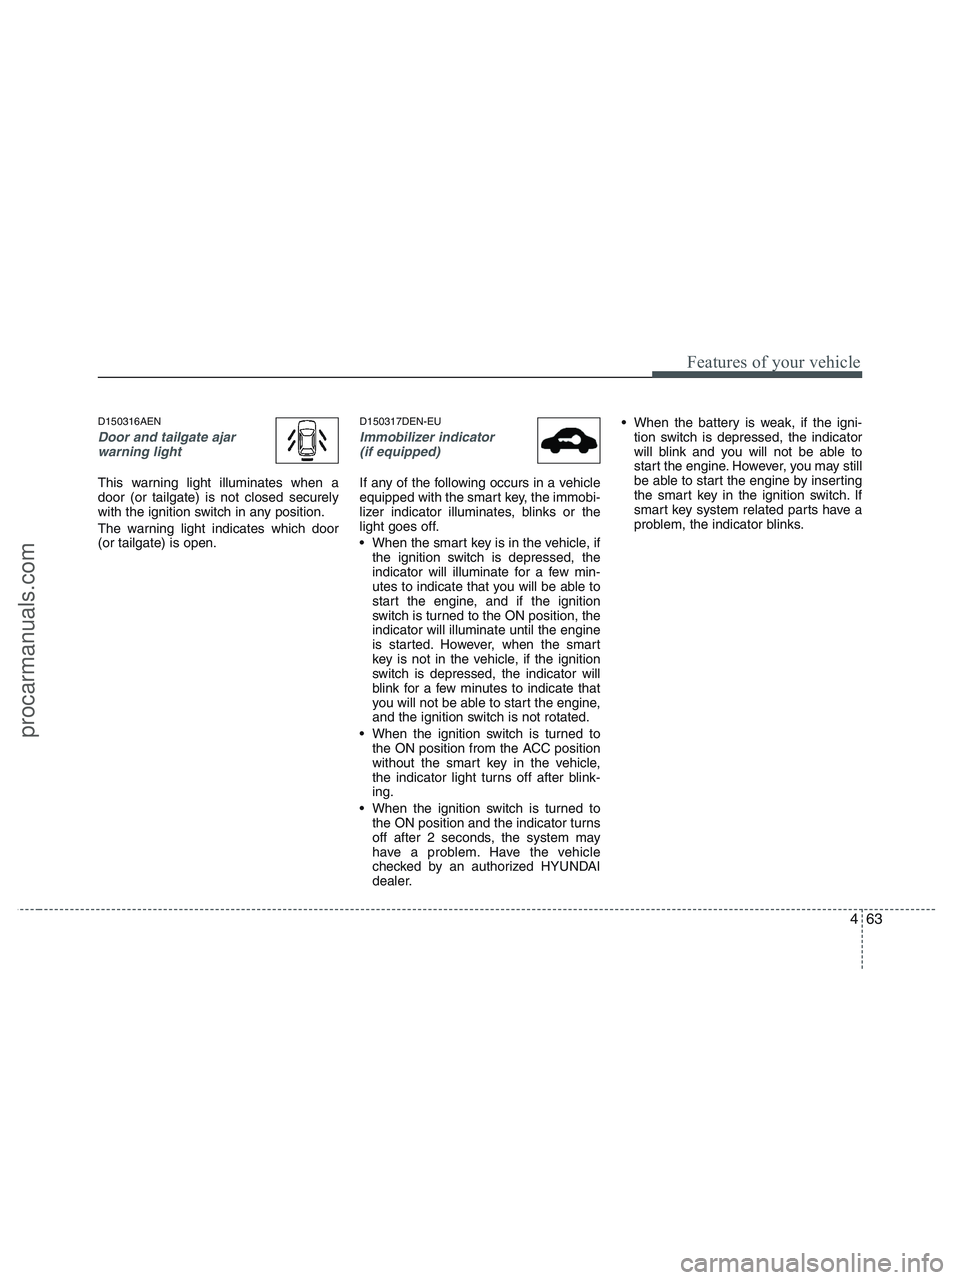
This warning light illuminates when a
door (or tailgate) is not closed securely
with the ignition switch in any position.
The warning light indicates which door
(or tailgate) is open.
D150317DEN-EU
Immobilizer indicator
(if equipped)
If any of the following occurs in a vehicle
equipped with the smart key, the immobi-
lizer indicator illuminates, blinks or the
light goes off.
When the smart key is in the vehicle, if
the ignition switch is depressed, the
indicator will illuminate for a few min-
utes to indicate that you will be able to
start the engine, and if the ignition
switch is turned to the ON position, the
indicator will illuminate until the engine
is started. However, when the smart
key is not in the vehicle, if the ignition
switch is depressed, the indicator will
blink for a few minutes to indicate that
you will not be able to start the engine,
and the ignition switch is not rotated.
When the ignition switch is turned to
the ON position from the ACC position
without the smart key in the vehicle,
the indicator light turns off after blink-
ing.
When the ignition switch is turned to
the ON position and the indicator turns
off after 2 seconds, the system may
have a problem. Have the vehicle
checked by an authorized HYUNDAI
dealer. When the battery is weak, if the igni-
tion switch is depressed, the indicator
will blink and you will not be able to
start the engine. However, you may still
be able to start the engine by inserting
the smart key in the ignition switch. If
smart key system related parts have a
problem, the indicator blinks.
procarmanuals.com
Page 152 of 425
Features of your vehicle
70 4
D190100AUN
Battery saver function
The purpose of this feature is to pre-
vent the battery from being dis-
charged. The system automatically
turns off the exterior lights when the
driver removes the ignition key and
opens the driver-side door.
With this feature, the parking lights will
be turned off automatically if the driver
parks on the side of road at night.
If necessary, to keep the lights on
when the ignition key is removed, per-
form the following:
1) Open the driver-side door.
2) Turn the parking lights OFF and ON
again using the light switch on the
steering column.
D190200AEN
Headlight escort function
(if equipped)
The headlights (and/or taillights) remain
on for approximately 20 minutes after the
ignition key is removed or turned to the
ACC or LOCK position. However, if the
driver’s door is opened and closed, the
headlights are turned off after 30 sec-
onds.The headlights can be turned off by
pressing the lock button on the transmit-
ter (or smart key) twice or turning off the
light switch from the headlight or Auto
light position.
D190300AEN
Rescue mode function
(if equipped)
If your vehicle has any problem on the
vehicle network system, the headlights
(low beam) turn on automatically with the
ignition switch in the ON position even
though the headlight switch is not turned
on. At this time, the emergency lighting is
not turned off when the headlight switch
is turned off.
D190400AUN
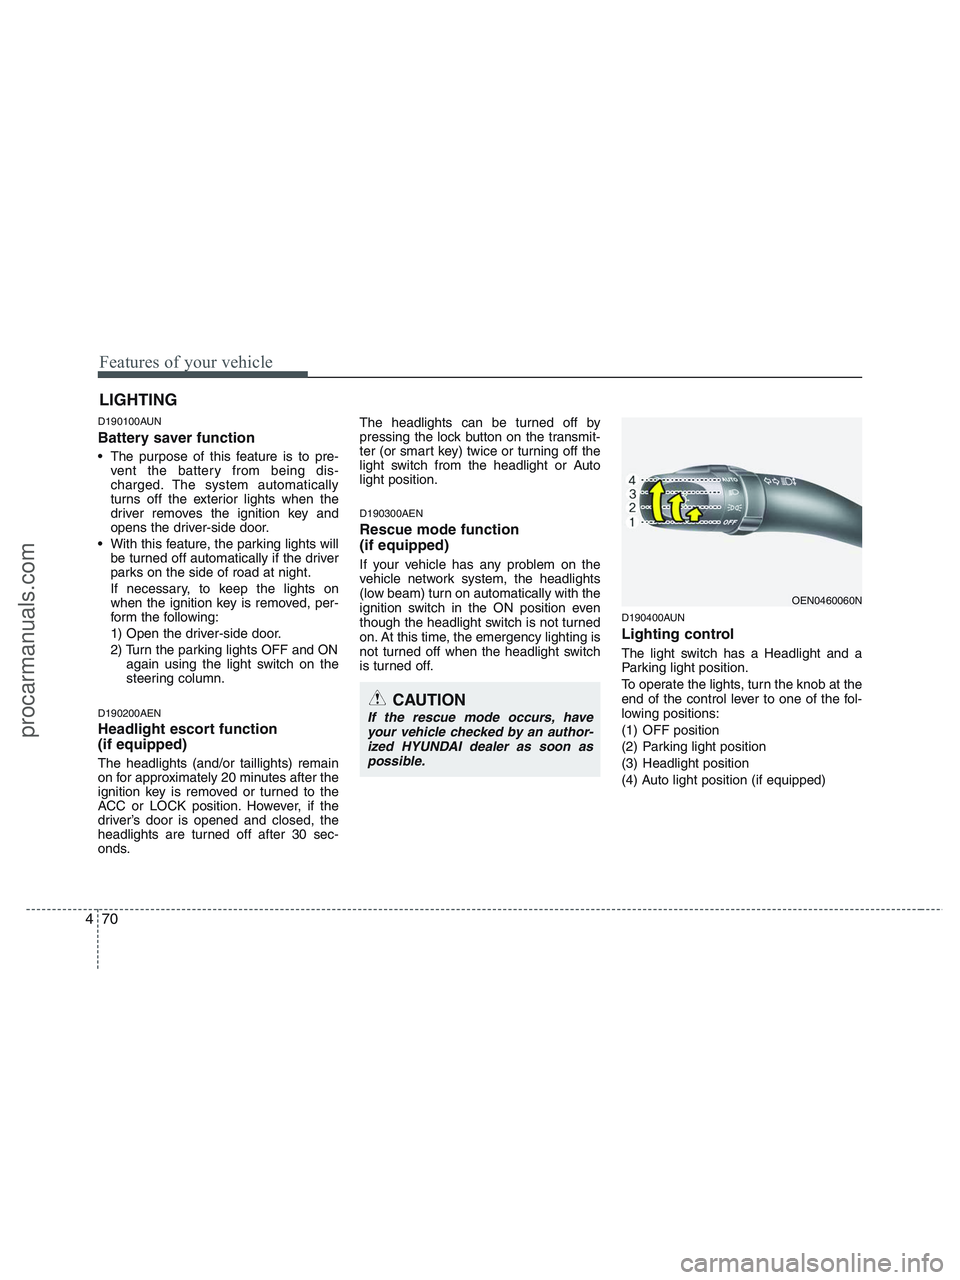
Lighting control
The light switch has a Headlight and a
Parking light position.
To operate the lights, turn the knob at the
end of the control lever to one of the fol-
lowing positions:
(1) OFF position
(2) Parking light position
(3) Headlight position
(4) Auto light position (if equipped)
LIGHTING
CAUTION
If the rescue mode occurs, have
your vehicle checked by an author-
ized HYUNDAI dealer as soon as
possible.
OEN0460060N
procarmanuals.com
Page 154 of 425

Features of your vehicle
72 4
D190500AUN
High beam operation
To turn on the high beam headlights,
push the lever away from you. Pull it back
for low beams.
The high beam indicator will light when
the headlight high beams are switched
on.
To prevent the battery from being dis-
charged, do not leave the lights on for a
prolonged time while the engine is not
running.To flash the headlights, pull the lever
towards you. It will return to the normal
(low beam) position when released. The
headlight switch does not need to be on
to use this flashing feature.
CAUTION
Never place anything over sensor
(1) located on the instrument
panel. This will ensure better
auto-light system control.
Don’t clean the sensor using a
window cleaner. The cleaner may
leave a light film which could
interfere with sensor operation.
If your vehicle has window tint or
other types of coating on the
front windshield, the Auto light
system may not work properly.
OEN040065OEN040064
procarmanuals.com