2010 HYUNDAI VERACRUZ ESP
[x] Cancel search: ESPPage 130 of 425
Features of your vehicle
48 4
FCC ID: NZLZTVHL3
IC: 4112A-ZTVHL3
This device complies with Part 15 of
the FCC Rules.
Operation is subject to the following two
conditions:
1. this device may not cause harmful
interference, and
2. This device must accept any interfer-
ence received, including interference
that may cause undesired operation.
NVS
®is a registered trademark and Z-
Nav™ is a trademark of the Gentex
Corporation, Zeeland, Michigan.
HomeLink
®is a registered trademark
owned by Johnson Controls,
Incorporated, Milwaukee, Wisconsin.
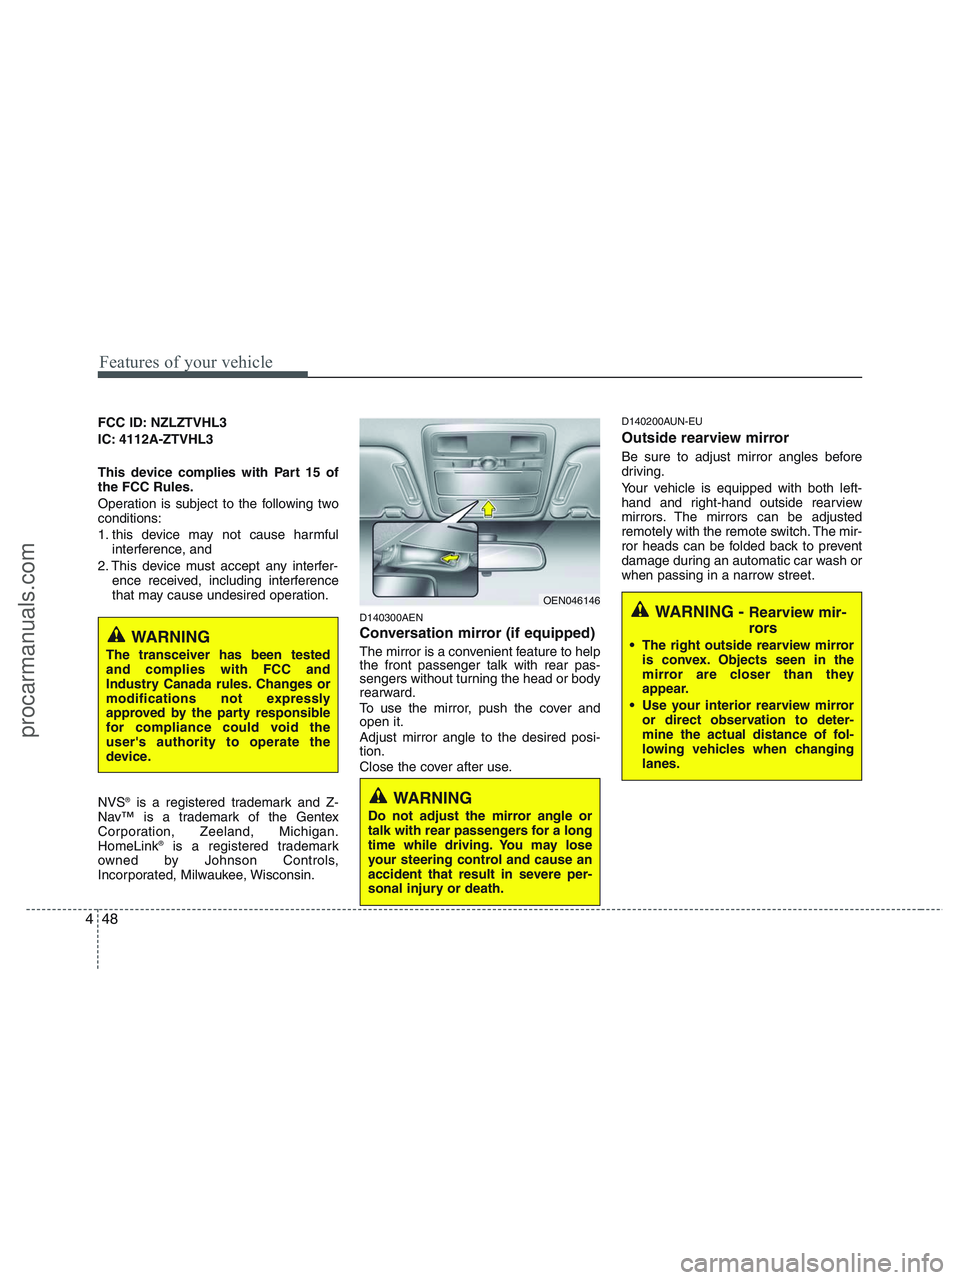
D140300AEN
Conversation mirror (if equipped)
The mirror is a convenient feature to help
the front passenger talk with rear pas-
sengers without turning the head or body
rearward.
To use the mirror, push the cover and
open it.
Adjust mirror angle to the desired posi-
tion.
Close the cover after use.
D140200AUN-EU
Outside rearview mirror
Be sure to adjust mirror angles before
driving.
Your vehicle is equipped with both left-
hand and right-hand outside rearview
mirrors. The mirrors can be adjusted
remotely with the remote switch. The mir-
ror heads can be folded back to prevent
damage during an automatic car wash or
when passing in a narrow street.
WARNING
Do not adjust the mirror angle or
talk with rear passengers for a long
time while driving. You may lose
your steering control and cause an
accident that result in severe per-
sonal injury or death.
WARNING
The transceiver has been tested
and complies with FCC and
Industry Canada rules. Changes or
modifications not expressly
approved by the party responsible
for compliance could void the
user's authority to operate the
device.
OEN046146WARNING - Rearview mir-
rors
The right outside rearview mirror
is convex. Objects seen in the
mirror are closer than they
appear.
Use your interior rearview mirror
or direct observation to deter-
mine the actual distance of fol-
lowing vehicles when changing
lanes.
procarmanuals.com
Page 131 of 425
449
Features of your vehicle
CAUTION
The mirrors stop moving when
they reach the maximum adjust-
ing angles, but the motor contin-
ues to operate while the switch is
depressed. Do not depress the
switch longer than necessary, the
motor may be damaged.
Do not attempt to adjust the out-
side rearview mirror by hand.
Doing so may damage the parts.
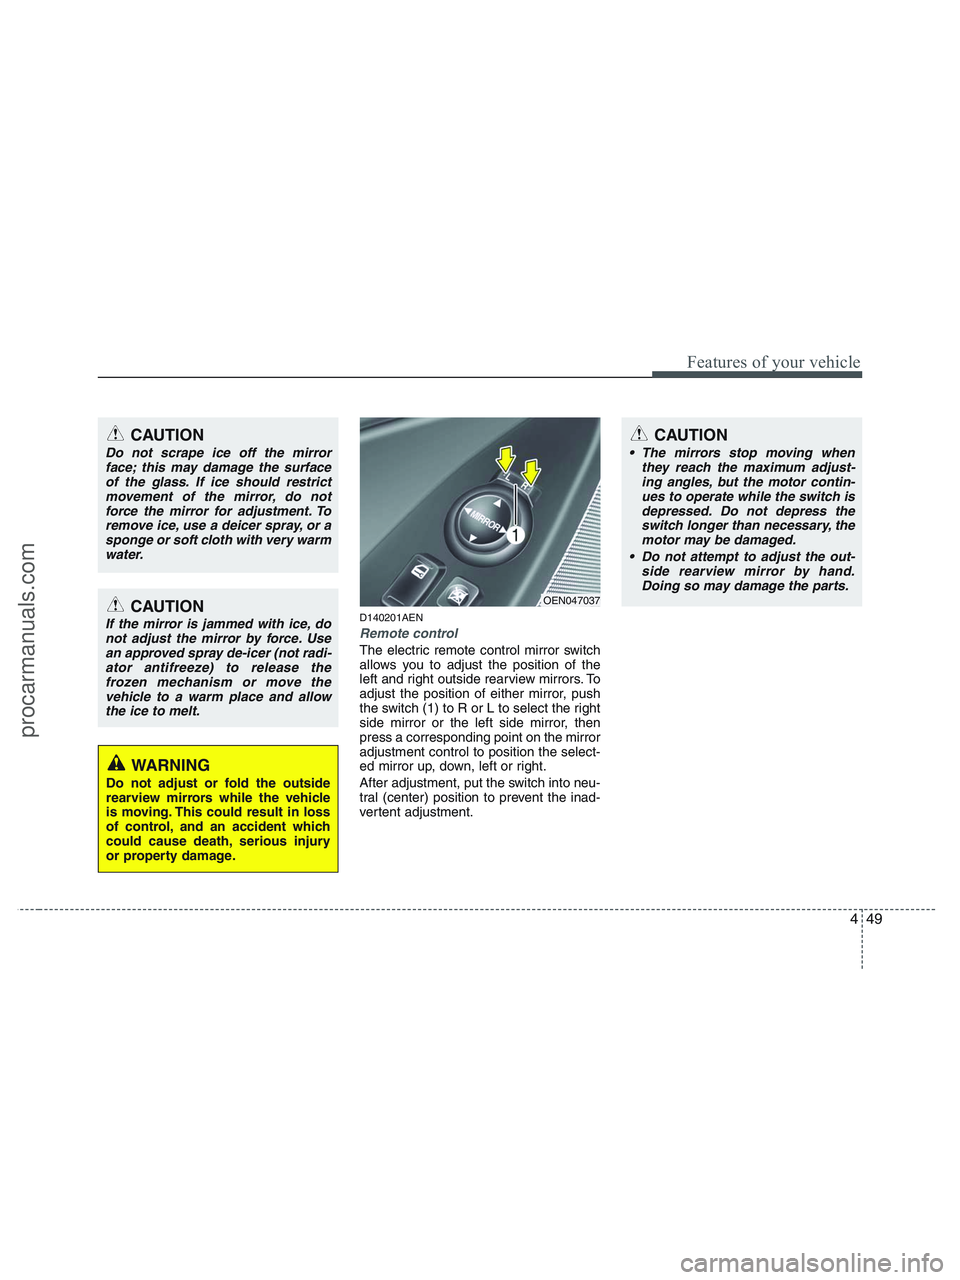
D140201AEN
Remote control
The electric remote control mirror switch
allows you to adjust the position of the
left and right outside rearview mirrors. To
adjust the position of either mirror, push
the switch (1) to R or L to select the right
side mirror or the left side mirror, then
press a corresponding point on the mirror
adjustment control to position the select-
ed mirror up, down, left or right.
After adjustment, put the switch into neu-
tral (center) position to prevent the inad-
vertent adjustment.
CAUTION
Do not scrape ice off the mirror
face; this may damage the surface
of the glass. If ice should restrict
movement of the mirror, do not
force the mirror for adjustment. To
remove ice, use a deicer spray, or a
sponge or soft cloth with very warm
water.
CAUTION
If the mirror is jammed with ice, do
not adjust the mirror by force. Use
an approved spray de-icer (not radi-
ator antifreeze) to release the
frozen mechanism or move the
vehicle to a warm place and allow
the ice to melt.
WARNING
Do not adjust or fold the outside
rearview mirrors while the vehicle
is moving. This could result in loss
of control, and an accident which
could cause death, serious injury
or property damage.
OEN047037
procarmanuals.com
Page 149 of 425

467
Features of your vehicle
D170000AEN
The rear parking assist system assists
the driver during backward movement of
the vehicle by chiming if any object is
sensed within a distance of 47 in. (120
cm) behind the vehicle. This system is a
supplemental system and it is not intend-
ed to nor does it replace the need for
extreme care and attention of the driver.
The sensing range and objects
detectable by the back sensors are limit-
ed. Whenever backing-up, pay as much
attention to what is behind you as you
would in a vehicle without a rear parking
assist system.
Operation of the rear parking
assist system
D170101AEN
Operating condition
This system will activate when backing
up with the ignition switch ON.
If the vehicle is moving at a speed over
3 mph (5 km/h), the system may not be
activated correctly.
The sensing distance while the rear
parking assist system is in operation is
approximately 47 in. (120 cm).
When more than two objects are
sensed at the same time, the closest
one will be recognized first.
D170102AUN
Types of warning sound
When an object is 47 in. to 32 in. (120
cm to 81 cm) from the rear bumper:
Buzzer beeps intermittently.
When an object is 31 in. to 16 in. (80
cm to 41 cm) from the rear bumper:
Buzzer beeps more frequently.
When an object is within 15 in. (40 cm)
of the rear bumper:
Buzzer sounds continuously.
REAR PARKING ASSIST SYSTEM (IF EQUIPPED)
OEN046058
WARNING
The rear parking assist system is a
supplementary function only. The
operation of the rear parking assist
system can be affected by several
factors (including environmental
conditions). It is the responsibility
of the driver to always check the
area behind the vehicle before and
while backing up.
Sensors
procarmanuals.com
Page 151 of 425

469
Features of your vehicle
✽ ✽
NOTICE
This system can only sense objects with-
in the range and location of the sensors;
It can not detect objects in other areas
where sensors are not installed. Also,
small or slim objects, such as poles or
objects located between sensors may not
be detected by the sensors.
Always visually check behind the vehi-
cle when backing up.
Be sure to inform any drivers of the
vehicle that may be unfamiliar with the
system regarding the systems capabili-
ties and limitations.
D170400AEN
Self-diagnosis
If you don’t hear an audible warning
sound or if the buzzer sounds intermit-
tently when shifting the gear to the R
(Reverse) position, this may indicate a
malfunction in the rear parking assist sys-
tem. If this occurs, have your vehicle
checked by an authorized HYUNDAI
dealer as soon as possible.
D180000AUN
The hazard warning flasher should be
used whenever you find it necessary to
stop the car in a hazardous location.
When you must make such an emer-
gency stop, always pull off the road as far
as possible.
The hazard warning lights are turned on
by pushing in the hazard switch. This
causes all turn signal lights to blink. The
hazard warning lights will operate even
though the key is not in the ignition
switch.
To turn the hazard warning lights off,
push the switch a second time.
WARNING
Pay close attention when the vehi-
cle is driven close to objects on the
road, particularly pedestrians, and
especially children. Be aware that
some objects may not be detected
by the sensors, due to the object’s
distance, size or material, all of
which can limit the effectiveness of
the sensor. Always perform a visu-
al inspection to make sure the vehi-
cle is clear of all obstructions
before moving the vehicle in any
direction.
WARNING
Your new vehicle warranty does not
cover any accidents or damage to
the vehicle or injuries to its occu-
pants due to a rear parking assist
system malfunction. Always drive
safely and cautiously.
HAZARD WARNING FLASHER
OEN046059
procarmanuals.com
Page 202 of 425
Features of your vehicle
120 4
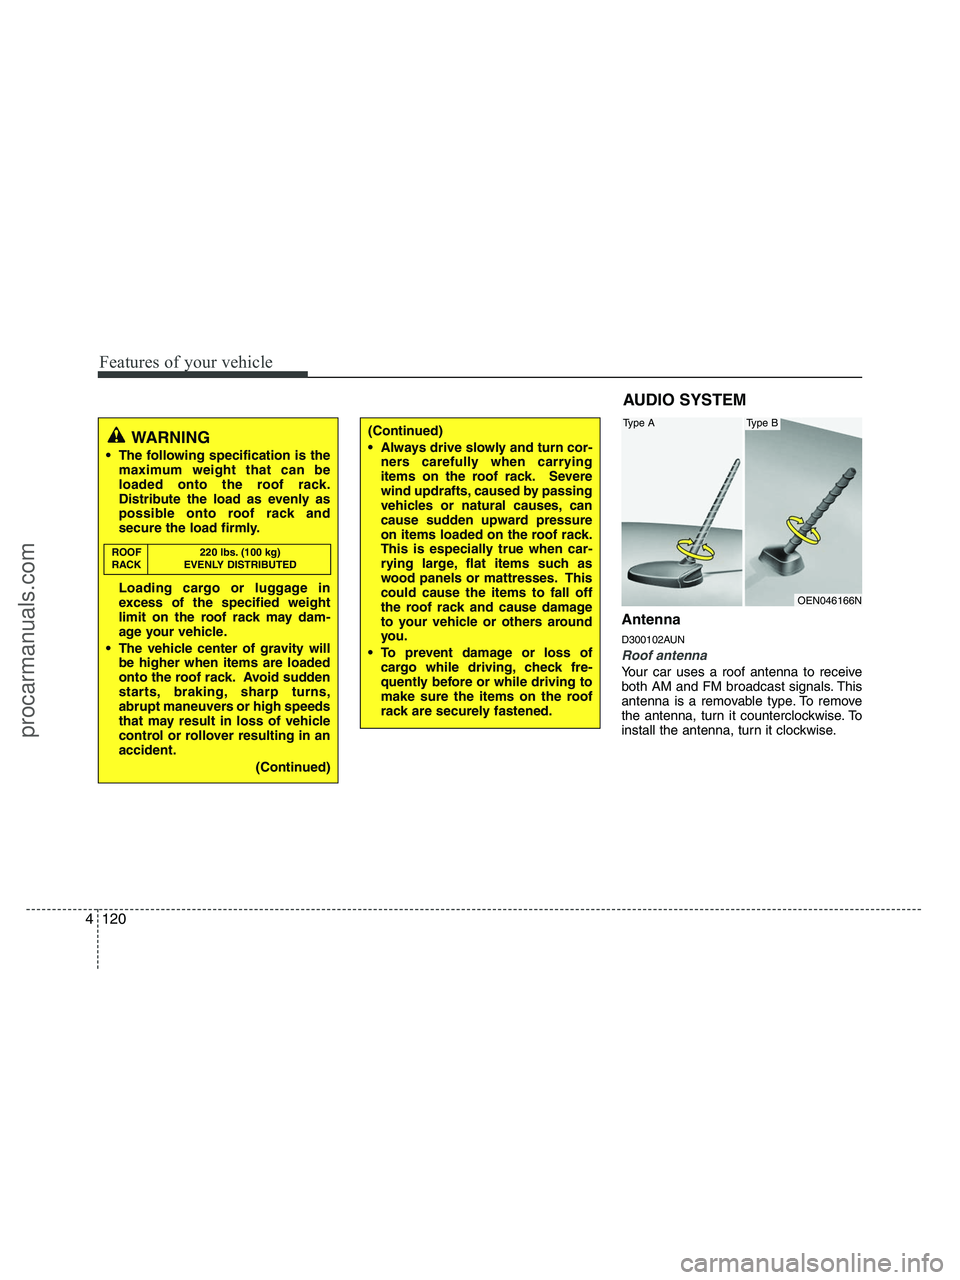
Antenna
D300102AUN
Roof antenna
Your car uses a roof antenna to receive
both AM and FM broadcast signals. This
antenna is a removable type. To remove
the antenna, turn it counterclockwise. To
install the antenna, turn it clockwise.
WARNING
The following specification is the
maximum weight that can be
loaded onto the roof rack.
Distribute the load as evenly as
possible onto roof rack and
secure the load firmly.
Loading cargo or luggage in
excess of the specified weight
limit on the roof rack may dam-
age your vehicle.
The vehicle center of gravity will
be higher when items are loaded
onto the roof rack. Avoid sudden
starts, braking, sharp turns,
abrupt maneuvers or high speeds
that may result in loss of vehicle
control or rollover resulting in an
accident.
(Continued)
ROOF 220 lbs. (100 kg)
RACK EVENLY DISTRIBUTED
(Continued)
Always drive slowly and turn cor-
ners carefully when carrying
items on the roof rack. Severe
wind updrafts, caused by passing
vehicles or natural causes, can
cause sudden upward pressure
on items loaded on the roof rack.
This is especially true when car-
rying large, flat items such as
wood panels or mattresses. This
could cause the items to fall off
the roof rack and cause damage
to your vehicle or others around
you.
To prevent damage or loss of
cargo while driving, check fre-
quently before or while driving to
make sure the items on the roof
rack are securely fastened.
AUDIO SYSTEM
OEN046166N
Type AType B
procarmanuals.com
Page 211 of 425
4129
Features of your vehicle
1. Power ON/OFF Button &
Volume Control Knob
Turns the set on/off when the ignition
switch is on ACC or ON. If the button is
turned to the right, it increases the vol-
ume and left, it decreases the volume.
2. FM/AM Selection Button
Turns to FM or AM mode, and toggles in
the order of FM1
➟ FM2 ➟ AM ➟ FM1...
when the button is pressed each time.
3. Automatic Channel Selection
Button
] button is pressed,
it increases the band frequency to auto-
matically select a channel.
Stops at the previous frequency if no
channel is found.
] button is press-
ed, it reduces the band frequency to
automatically select a channel.
Stops at the previous frequency if no
channel is found.
4. Preset Button
Push [1]~[6] buttons less than 0.8 sec-
ond to play the channel saved in each
button. Push Preset button for 0.8 sec-
ond or longer to save current channel to
the respective button with a beep.
5. Manual Channel Selection
Knob & SETUP Button
Manual Channel Selection knob
Turn this control while listening to a radio
channel to manually adjust frequency.
Turn clockwise to increase frequency and
counterclockwise to reduce frequency.
SETUP Button
Press this button to turn to the XM
option, SCROLL and adjustment mode. If
no action is taken for 5 seconds after
pressing the button, it will return to the
play mode.(After entering SETUP mode,
move between items using the left, right
and PUSH functions of the [TUNE] but-
ton.)
The setup item changes from SCROLL
➟ XM...
Press this button to turn to the XM option,
SCROLL, SURROUND and adjustment
mode. If no action is taken for 5 seconds
after pressing the button, it will return to
the play mode.(After entering SETUP
mode, move between items using the left,
right and PUSH functions of the [TUNE]
button.)
The setup item changes from SCROLL
➟SURROUND ➟ XM...
Sound Quality Control Knob
Pressing the button changes the TONE
and POSITION mode. The mode select-
ed is shown on the display. After select-
ing each mode, rotate the Audio control
knob clockwise or counterclockwise.
BASS Control
To increase the BASS, rotate the knob
clockwise, while to decrease the BASS,
rotate the knob counterclockwise.
MIDDLE Control
To increase the MIDDLE, rotate the knob
clockwise, while to decrease the MID-
DLE, rotate the knob counterclockwise.
procarmanuals.com
Page 212 of 425
Features of your vehicle
130 4
TREBLE Control
To increase the TREBLE, rotate the knob
clockwise, while to decrease the TRE-
BLE, rotate the knob counterclockwise.
FADER Control
Turn the control knob clockwise to empha-
size rear speaker sound(front speaker
sound will be attenuated). When the con-
trol knob is turned counterclockwise, front
speaker sound will be emphasized(rear
speaker sound will be attenuated).
BALANCE Control
Rotate the knob clockwise to emphasize
right speaker sound(left speaker sound
will be attenuated). When the control
knob is turned counterclockwise, left
speaker sound will be emphasized(right
speaker sound will be attenuated).6. SCAN Button
If this button is pressed, the frequencies
will become increased and receive the
corresponding broadcasts. This function
will play the frequencies for 5 seconds
(XM MODE:10 seconds) each and find
other broadcasts as the frequency
increases. Press the button again when
desiring to continue listening to the cur-
rently playing broadcast.
7. MUTE Button
Press [MUTE] button to stop sound and
“Audio Mute” is displayed on the LCD.
procarmanuals.com
Page 216 of 425
Features of your vehicle
134 4
1. CD Loading Slot
Please face printed side upward and gen-
tly push in. When the ignition switch is on
ACC or ON and power is off, power is
automatically turned on if the CD is
loaded. This CDP supports only 12cm CD.
If a VCD, Data CD are loaded, "Reading
Error" message will appear and CD will be
ejected.
2. CD Eject Button
Push button for less than 0.8 second
to eject the CD during CD playback.
This button is enabled when ignition
switch is off.
ALL EJECT(CDC Only)
Press this button for more than 0.8 sec-
ond to eject all discs inside the deck in
respective order.
3. CD or CD/AUX or CD/AUX/RSE
Selection Button
CD Selection Button
If the CD is loaded, turns to CD mode. If
no CD, it displays "No Disc" for 3 sec-
onds and returns to th previous mode. CD/AUX Selection Button
If the auxiliary device is connected, it
switches to the AUX mode from the other
mode to play the sound from the auxiliary
player.
If the CD is loaded, turns to CD mode,
and if a device is connected to AUX then
it toggles. CD
➟ AUX ➟ CD... when the
button is pressed each time.(It will not
turn to AUX if the auxiliary device is not
connected)
If no CD and auxiliary device is connect-
ed, it displays "No Media" for 3 seconds
and returns to the previous mode.
CD/AUX/RSE Selection Button
If the auxiliary device is connected, it
switches to the AUX mode from the other
mode to play the sound from the auxiliary
player.
If the CD is loaded, turns to CD mode,
and if a device is connected to AUX and
there is a CD in the RSE then it toggles.
CD
➟ AUX ➟ RSE ➟ CD... when the but-
ton is pressed each time.(It will not turn
to AUX and RSE if the auxiliary device is
not connected and there is no CD in the
RSE)
If no CD and auxiliary device is connect-
ed, it displays "No Media" for 3 seconds
and returns to the previous mode.
4. Automatic Track Selection
Button
] button for less than
0.8 second to play from the beginning
of current song.
] button for less than
0.8 second and press again within 1
seconds to play the previous song.
] button for less than 0.8
second to play the next song.
5. Fast Search Button
longer to initiate high speed sound
search of current song.
longer to initiate reverse direction high
speed sound search of current song.
6. RANDOM Play Button
Press this button for less than 0.8 second
to activate ‘RDM’ mode and more than
0.8 second to activate ‘ALL RDM’ mode.
RDM : Only files/tracks in a folder/disc
are played back in a random sequence.
ALL RDM(MP3/WMA Only) : All files in
a disc are played back in the random
sequence.
procarmanuals.com