2010 Hyundai Sonata headlight bulb
[x] Cancel search: headlight bulbPage 76 of 285

1
FEATURES OF YOUR HYUNDAI
63
MULTI-FUNCTION LIGHT
SWITCHB340A01A-AATCOMBINATION TURN SIGNAL,
HEADLIGHT AND HIGH-BEAM
SWITCH
Turn Signal OperationPulling down on the lever causes the turn
signals on the left side of the car to blink.
Pushing upwards on the lever causes the
turn signals on the right side of the car to
blink. As the turn is completed, the lever
will automatically return to the center
position and turn off the turn signals at the
same time. If either turn signal indicator
light blinks more rapidly than usual, goes
on but does not blink, or does not go on at
all, there is a malfunction in the system.
Check for a burned-out fuse or bulb or see
your Hyundai dealer.
4. Drive Timeo This mode indicates the total time from
the starting of the engine to the ignition
key "OFF" after resetting. When the
RESET switch is pushed, it will be
initialized to '0:00'. If the ignition switch
is turned to OFF for more than 2 hours,
it will be reset automatically.
o The drive time will be initialized to '0:00'
after being displayed to '99:59'.
ONF048055N
3. Average Fuel Consumption (MPG)o This mode calculates the average fuel
consumption from the total fuel used
and the distance since the last average
consumption reset.
o The total fuel used is calculated from the
fuel consumption input.
o Average fuel consumption is reset to
zero if the battery is disconnected.
o To reset the average fuel consumption
to zero (--), press the RESET switch for
more than 1 second. If the fuel is refilled
more than 1.36 gallons (6 liters), it will
be reset automatically.
o When you drive 0.5 mile and less after
resetting, the average fuel consumption
will be displayed to '--'.
ONF048122N
Page 215 of 285

6
Engine Compartment .................................................... 6-2
General Checks ............................................................ 6-4
Checking the Engine Oil ............................................... 6-4
Changing the Engine Oil and Filter ................................ 6-6
Checking and Changing the Engine Coolant ................ 6-8
Changing the Air Cleaner Filter ...................................6-11
Checking the Transaxle Oil (Manual) ......................... 6-14
Checking the Transaxle Fluid (Automatic) ..................6-15
Checking the Brakes..................................................6-17
Air Conditioning Care..................................................6-18
Changing the Climate Control Air Filter.......................6-19
Checking Drive Belts..................................................6-22
Checking and Replacing Fuses ..................................6-22
Checking the Battery..................................................6-24
Power Steering Fluid Level .........................................6-26
Headlight Aiming Adjustment......................................6-27
Replacement of Light Bulbs ........................................6-28
Bulb Wattages.............................................................6-36
Fuse Panel Description...............................................6-37
DO-IT-YOURSELF MAINTENANCE
6
Page 242 of 285

6
DO-IT-YOURSELF MAINTENANCE
28
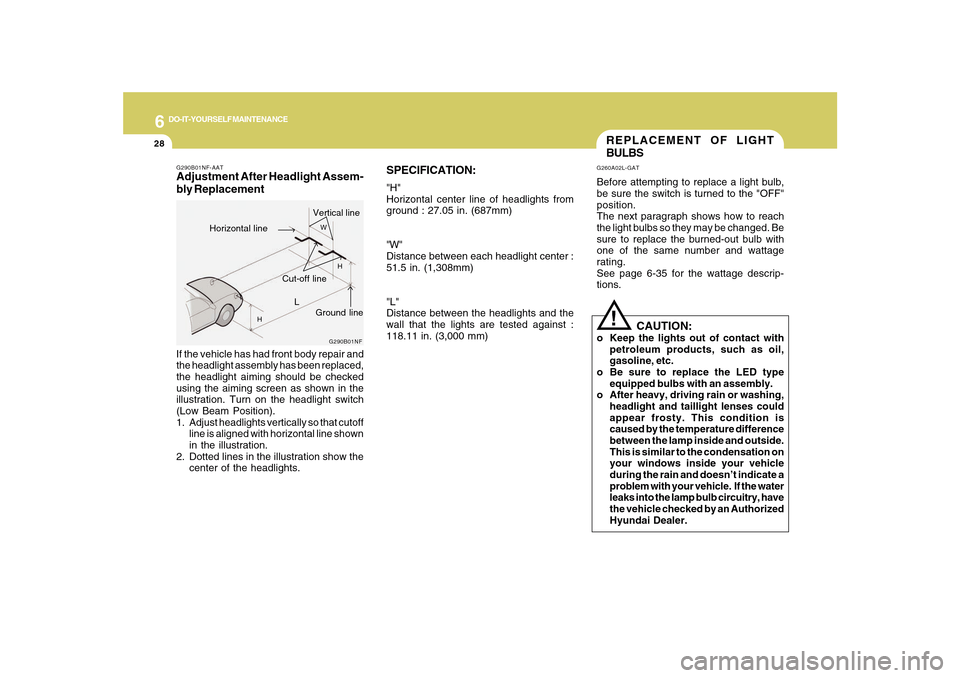
SPECIFICATION:"H"
Horizontal center line of headlights from
ground : 27.05 in. (687mm)
"W"
Distance between each headlight center :
51.5 in. (1,308mm)
"L"
Distance between the headlights and the
wall that the lights are tested against :
118.11 in. (3,000 mm)
REPLACEMENT OF LIGHT
BULBSG260A02L-GATBefore attempting to replace a light bulb,
be sure the switch is turned to the "OFF"
position.
The next paragraph shows how to reach
the light bulbs so they may be changed. Be
sure to replace the burned-out bulb with
one of the same number and wattage
rating.
See page 6-35 for the wattage descrip-
tions.
!
CAUTION:
o Keep the lights out of contact with
petroleum products, such as oil,
gasoline, etc.
o Be sure to replace the LED type
equipped bulbs with an assembly.
o After heavy, driving rain or washing,
headlight and taillight lenses could
appear frosty. This condition is
caused by the temperature difference
between the lamp inside and outside.
This is similar to the condensation on
your windows inside your vehicle
during the rain and doesn’t indicate a
problem with your vehicle. If the water
leaks into the lamp bulb circuitry, have
the vehicle checked by an Authorized
Hyundai Dealer.
G290B01NF-AATAdjustment After Headlight Assem-
bly Replacement
G290B01NF
L
W
H
H
Cut-off line
Ground line
Horizontal lineVertical line
If the vehicle has had front body repair and
the headlight assembly has been replaced,
the headlight aiming should be checked
using the aiming screen as shown in the
illustration. Turn on the headlight switch
(Low Beam Position).
1. Adjust headlights vertically so that cutoff
line is aligned with horizontal line shown
in the illustration.
2. Dotted lines in the illustration show the
center of the headlights.
Page 243 of 285

6
DO-IT-YOURSELF MAINTENANCE
29
Replacement instructions:
1. Allow the bulb to cool. Wear eye
protection.
2. Open the engine hood.
3. Always grasp the bulb by its base, avoid
touching the glass.G270A01NF-AATHEADLIGHT, FRONT TURN SIGNAL
LIGHT AND FRONT FOG LIGHT
Headlight and Front Turn Signal
Light
ONF078024
Headlight (Low beam)
Turn signal light
Front position light
Front Fog LightHeadlight
(High beam)
ONF078023N
4. Using a socket wrench of the correct
size, remove the headlight assembly
mounting bolts and bumper mounting
bolt.
HNF5024
5. Disconnect the power cord from the
back of the headlight.
Page 244 of 285

6
DO-IT-YOURSELF MAINTENANCE
30
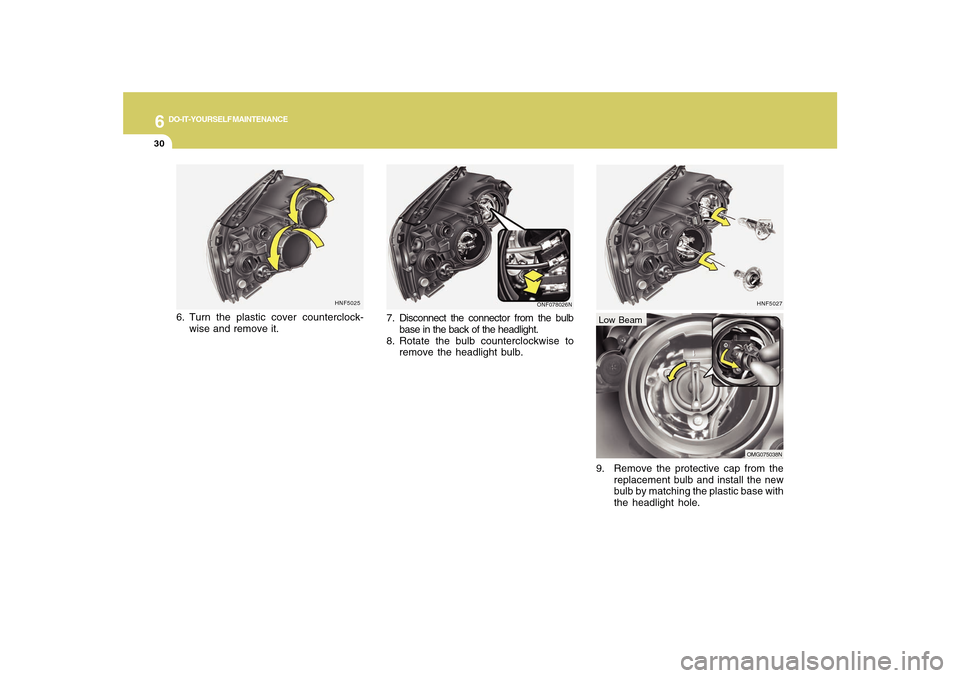
HNF5027
9. Remove the protective cap from the
replacement bulb and install the new
bulb by matching the plastic base with
the headlight hole.Low Beam
OMG075038N
HNF5025
6. Turn the plastic cover counterclock-
wise and remove it.
ONF078026N
7. Disconnect the connector from the bulb
base in the back of the headlight.
8. Rotate the bulb counterclockwise to
remove the headlight bulb.
Page 245 of 285

6
DO-IT-YOURSELF MAINTENANCE
31
12. To replace the front turn signal light
bulb remove it from the bulb holder
and install the new bulb.
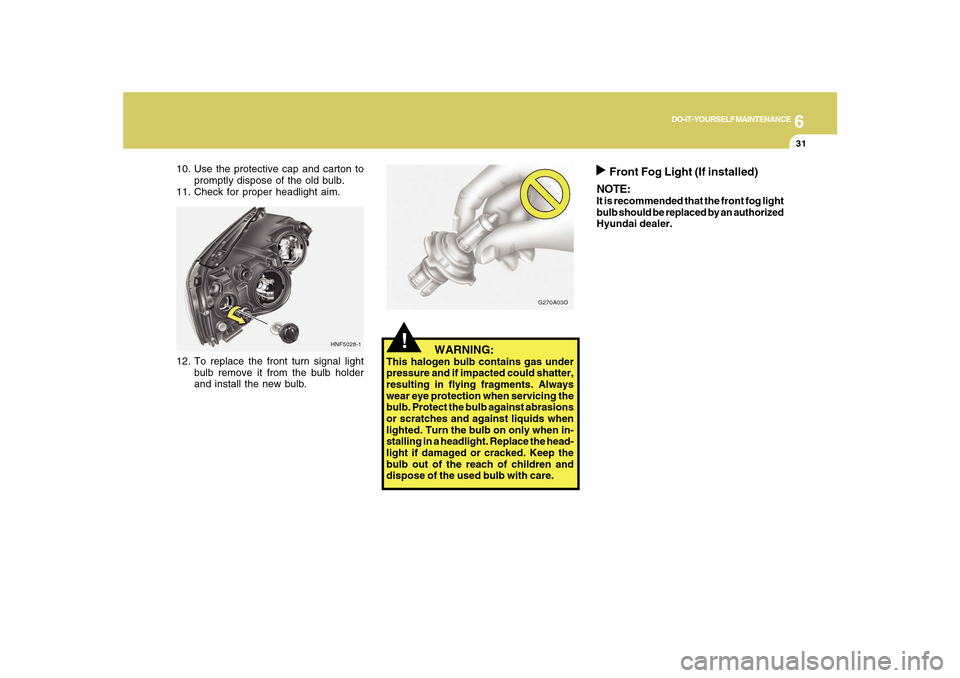
!
WARNING:
This halogen bulb contains gas under
pressure and if impacted could shatter,
resulting in flying fragments. Always
wear eye protection when servicing the
bulb. Protect the bulb against abrasions
or scratches and against liquids when
lighted. Turn the bulb on only when in-
stalling in a headlight. Replace the head-
light if damaged or cracked. Keep the
bulb out of the reach of children and
dispose of the used bulb with care.
HNF5028-1G270A03O
10. Use the protective cap and carton to
promptly dispose of the old bulb.
11. Check for proper headlight aim.
Front Fog Light (If installed)
NOTE:
It is recommended that the front fog light
bulb should be replaced by an authorized
Hyundai dealer.
Page 250 of 285

6
DO-IT-YOURSELF MAINTENANCE
36
Socket Type
BAY 15d
w2.1 x 9.5d
BAY 15d
sv6-7, 6
BAY 15d
BAY 15s
w2.1 x 9.5d
w2.1 x 9.5d No.
1
2
3
4
5
6
7Socket Type
P x 26d
P14,5s
BAY15d
w2.1 x 9.5d
sv6-7,6
PGJ13
w2.1 x 9.2d
w2.1 x 4.6d
BULB WATTAGESG280A01NF-AAT
G280A01NF-D
Part Name
Stop / Tail Light
High Mounted Rear Stop Light
Tail Light
Luggage Compartment Light
Rear Side Marker Light
Rear Turn Signal Light
Back-up Light
License Plate Light Part Name
Headlight
Front Turn Signal Light
Map Light
Interior Light
Front Fog Light
Front Position Side Marker Light
Front Door Edge Warning LightNo.
8
9
10
11
12
13
14
15 Wattage
55
55
28
10
10
27
5
8
Low beam
High beamWattage
28/8
16
28/8
5
5
27
16
5
Page 283 of 285

10
INDEX
4
Fuel
Capacity............................................................................ 9-2
Gauge..............................................................................1-58
Recommendations............................................................ 1-2
Fuel Filler Lid
Remote release ..............................................................1-87
Fuse Panel Description .....................................................6-37
Fuses..................................................................................6-22
G
General Checks ................................................................... 6-4
Glove Box ...........................................................................1-76
H
Hazard Warning System ....................................................1-68
Headlight
Aiming adjustment ..........................................................6-27
Replacement...................................................................6-28
Switch..............................................................................1-64
Heating and Ventilation
Air flow control ................................................... 1-97, 1-108
Air intake control switch ..................................... 1-99, 1-107
Bi-level heating .............................................................1-100
Defrosting/Defogging....................................................1-103
Fan speed control (Blower Control) .................. 1-97, 1-107
Temperature control .......................................................1-96
High-Mounted Rear Stop Light .........................................1-87
Hood Release ....................................................................1-89
Horn....................................................................................1-91I
Ignition Switch ...................................................................... 2-3
Instrument Cluster and Indicator Lights ............................1-50
Instrument Panel Light Control (Rheostat) .......................1-69
Interior Light .......................................................................1-74
Intermittent Wiper ...............................................................1-67
J
Jump Starting ....................................................................... 3-3
K
Key ........................................................................................ 1-3
If you lose your keys ......................................................3-17
Positions............................................................................ 2-3
L
Light Bulb Watages ............................................................6-36
Light Bulbs Replacement ..................................................6-28
Lubrication Chart .................................................................. 9-4
M
Maintenance Intervals
Explanation of scheduled maintenance items ................ 5-7
Maintenance under severe usage conditions ................. 5-6
Scheduled maintenance.................................................. 5-4
Service requirements ........................................................ 5-2
Manual Heating and Cooling Control System ..................1-96