Page 175 of 285
2
DRIVING YOUR HYUNDAI
22
C190F01Y-GATTrailer or Vehicle Towing Tips1. Before towing, check hitch and safety
chain connections as well as proper
operation of the trailer running lights,
brake lights, and turn signals.
2. Always drive your vehicle at a moderate
speed. (Less than 60 mph)
3. Trailer towing requires more fuel than
normal conditions.
4. To maintain engine braking efficiency
and electrical charging performance,
do not tow a trailer with the transaxle in
fifth gear (manual transaxle).
5. Always secure items in the trailer to
prevent load shift while driving.
6. Check the condition and air pressure of
all tires on the trailer and your car. Low
tire pressure can seriously affect the
handling. Also check the spare tire.
7. The vehicle/trailer combination is more
affected by crosswind and buffeting.
When being passed by a large vehicle,
keep a constant speed and steer straight
ahead. If there is too much wind
buffeting, slow down to get out of the
other vehicle's air turbulence.
!
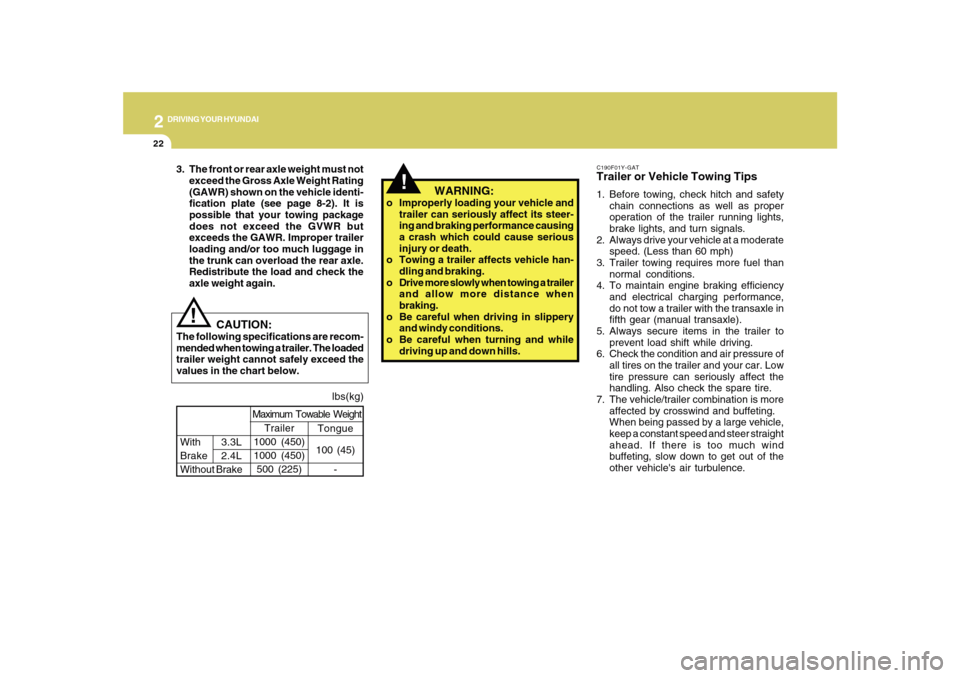
lbs(kg)
!
Tongue
100 (45)
- With3.3L
Brake 2.4L
Without BrakeMaximum Towable Weight
Trailer
1000 (450)
1000 (450)
500 (225)
CAUTION:
The following specifications are recom-
mended when towing a trailer. The loaded
trailer weight cannot safely exceed the
values in the chart below.
WARNING:
o Improperly loading your vehicle and
trailer can seriously affect its steer-
ing and braking performance causing
a crash which could cause serious
injury or death.
o Towing a trailer affects vehicle han-
dling and braking.
o Drive more slowly when towing a trailer
and allow more distance when
braking.
o Be careful when driving in slippery
and windy conditions.
o Be careful when turning and while
driving up and down hills. 3. The front or rear axle weight must not
exceed the Gross Axle Weight Rating
(GAWR) shown on the vehicle identi-
fication plate (see page 8-2). It is
possible that your towing package
does not exceed the GVWR but
exceeds the GAWR. Improper trailer
loading and/or too much luggage in
the trunk can overload the rear axle.
Redistribute the load and check the
axle weight again.
Page 217 of 285
6
DO-IT-YOURSELF MAINTENANCE
3
8G010A01NF
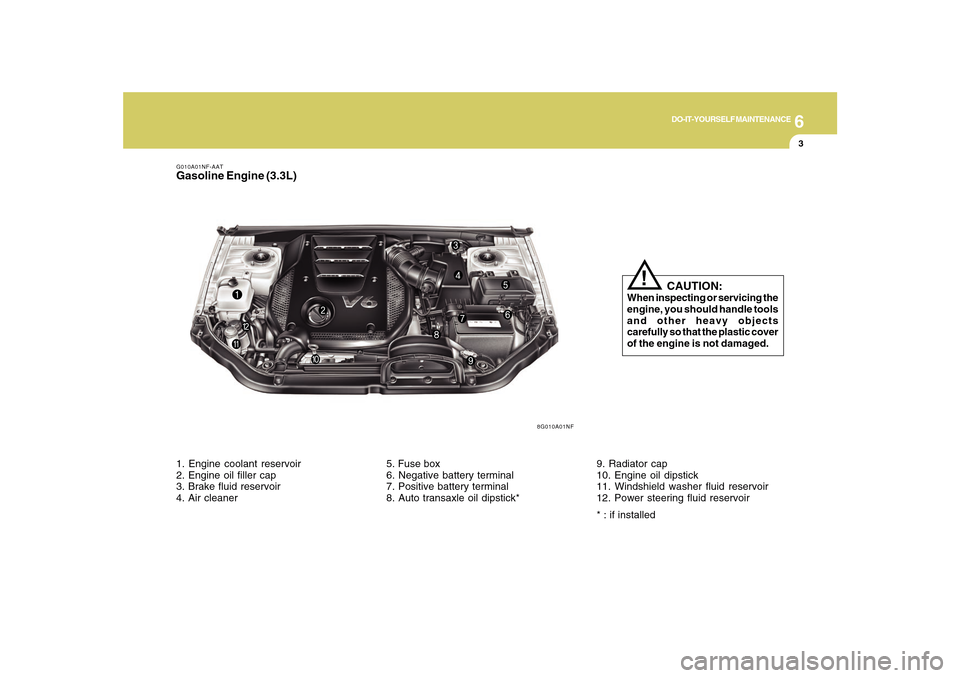
G010A01NF-AATGasoline Engine (3.3L)
CAUTION:
When inspecting or servicing the
engine, you should handle tools
and other heavy objects
carefully so that the plastic cover
of the engine is not damaged.
!
1. Engine coolant reservoir
2. Engine oil filler cap
3. Brake fluid reservoir
4. Air cleaner5. Fuse box
6. Negative battery terminal
7. Positive battery terminal
8. Auto transaxle oil dipstick*9. Radiator cap
10. Engine oil dipstick
11. Windshield washer fluid reservoir
12. Power steering fluid reservoir
* : if installed
Page 219 of 285
6
DO-IT-YOURSELF MAINTENANCE
5
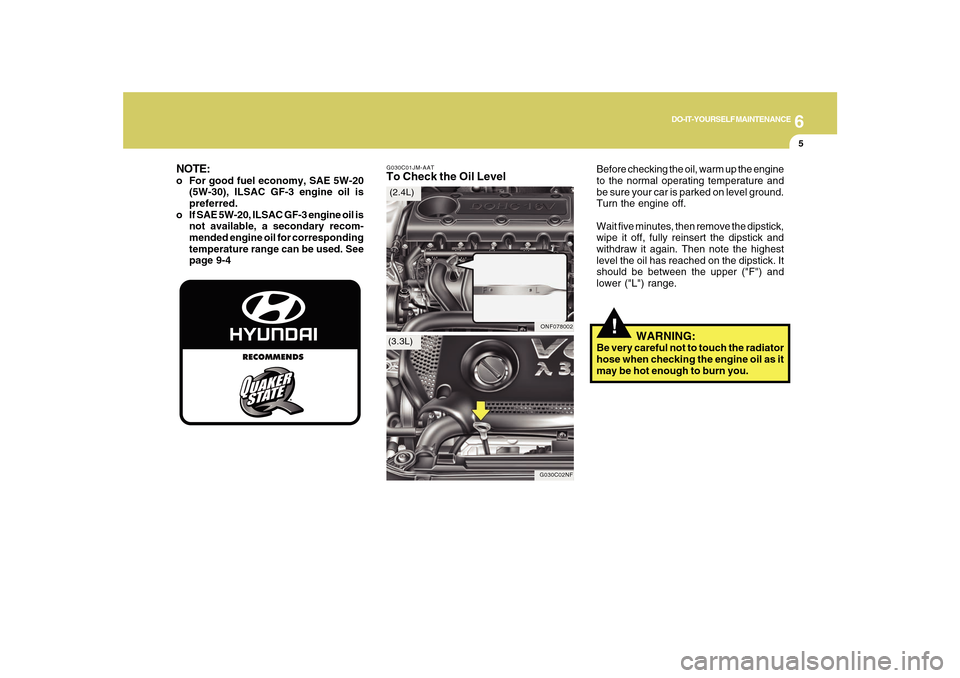
G030C01JM-AATTo Check the Oil Level
Before checking the oil, warm up the engine
to the normal operating temperature and
be sure your car is parked on level ground.
Turn the engine off.
Wait five minutes, then remove the dipstick,
wipe it off, fully reinsert the dipstick and
withdraw it again. Then note the highest
level the oil has reached on the dipstick. It
should be between the upper ("F") and
lower ("L") range.
!
WARNING:
Be very careful not to touch the radiator
hose when checking the engine oil as it
may be hot enough to burn you.
ONF078002
G030C02NF
(2.4L)
(3.3L)
NOTE:o For good fuel economy, SAE 5W-20
(5W-30), ILSAC GF-3 engine oil is
preferred.
o If SAE 5W-20, ILSAC GF-3 engine oil is
not available, a secondary recom-
mended engine oil for corresponding
temperature range can be used. See
page 9-4
Page 220 of 285
6
DO-IT-YOURSELF MAINTENANCE
6
!!
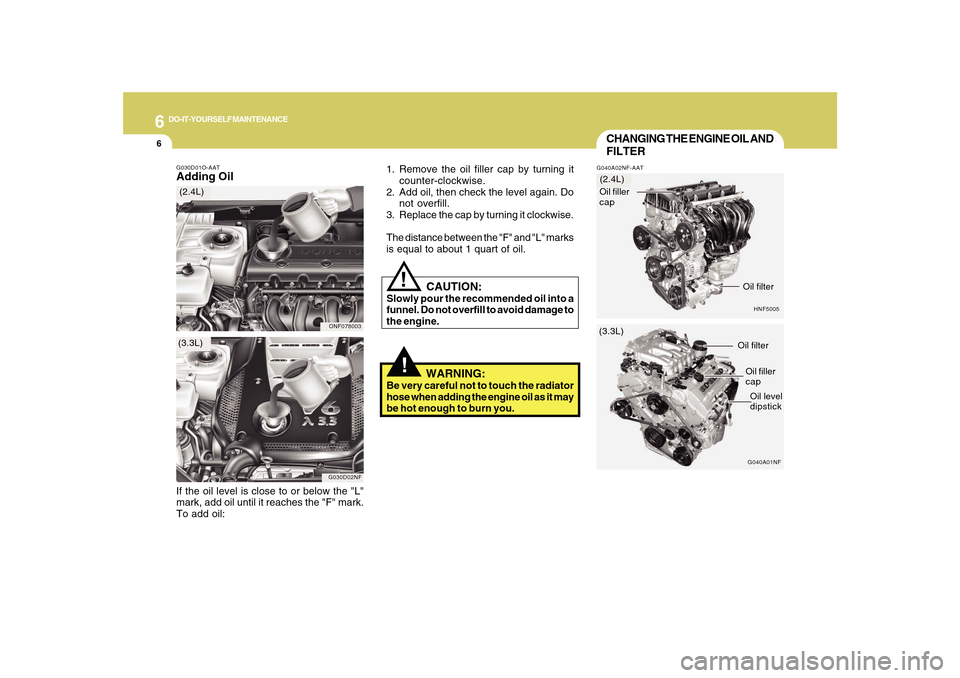
G030D01O-AATAdding Oil
1. Remove the oil filler cap by turning it
counter-clockwise.
2. Add oil, then check the level again. Do
not overfill.
3. Replace the cap by turning it clockwise.
The distance between the "F" and "L" marks
is equal to about 1 quart of oil.
CAUTION:
Slowly pour the recommended oil into a
funnel. Do not overfill to avoid damage to
the engine.
WARNING:
Be very careful not to touch the radiator
hose when adding the engine oil as it may
be hot enough to burn you.
If the oil level is close to or below the "L"
mark, add oil until it reaches the "F" mark.
To add oil:
ONF078003
G030D02NF
(3.3L)(2.4L)
CHANGING THE ENGINE OIL AND
FILTERG040A02NF-AAT
HNF5005(3.3L)(2.4L)
G040A01NFOil filter
Oil filler
cap
Oil level
dipstick Oil filler
cap
Oil filter
Page 221 of 285

6
DO-IT-YOURSELF MAINTENANCE
7
!
3. Slide underneath the car and loosen
the drain plug by turning it counter-
clockwise with a wrench of the proper
size. Be sure that a drain pan is in
position to catch the oil as it drains out,
then remove the drain plug.
4. When the oil has stopped draining,
replace the drain plug using a new
gasket and retighten by turning it clock-
wise.
Oil pan drain plug tightening torque:
25.3 ~ 32.5 lb.ft (3.5 ~ 4.5 kgf.m)
HNF5006-1
(2.4L)
(3.3L)
The engine oil and filter should be changed
at those intervals specified in the
maintenance schedule in Section 5. If the
car is being driven in severe conditions,
more frequent oil and filter changes are
required.
The procedure for changing the oil and
filter is as follows:
1. Park the car on level ground and set the
parking brake. Start the engine and let
it warm up until the needle on the coolant
temperature gauge moves above the
lowest mark. Turn the engine off and
place the gear selector lever in "P" (au-
tomatic) or reverse gear (manual
transaxle).
2. Open the hood and remove the engine
oil filler cap.NOTE:Loosen the oil filter cap by turning it
counterclockwise to drain well the oil in
the oil filter (3.3L only).
WARNING:
Be very careful when draining the engine
oil as it may be hot enough to burn you!
HNF5005-1
G040B01NF
Page 227 of 285
6
DO-IT-YOURSELF MAINTENANCE
13
HHR5051
HHR5050
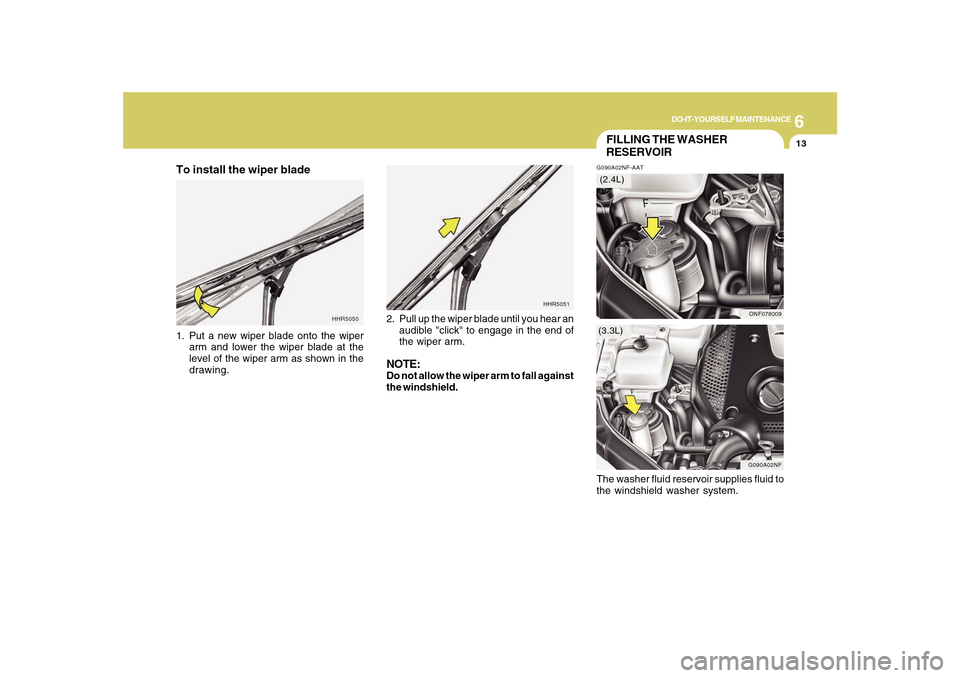
FILLING THE WASHER
RESERVOIRG090A02NF-AAT
G090A02NF
ONF078009
(3.3L)(2.4L)
To install the wiper blade1. Put a new wiper blade onto the wiper
arm and lower the wiper blade at the
level of the wiper arm as shown in the
drawing.2. Pull up the wiper blade until you hear an
audible "click" to engage in the end of
the wiper arm.
NOTE:Do not allow the wiper arm to fall against
the windshield.
The washer fluid reservoir supplies fluid to
the windshield washer system.
Page 229 of 285
6
DO-IT-YOURSELF MAINTENANCE
15
CHECKING THE TRANSAXLE
FLUID (AUTOMATIC)G110A01E-AATTransaxle fluid in the automatic transaxle
should be checked at those intervals
specified in the vehicle maintenance
schedule in Section 5.NOTE:Automatic transaxle fluid is basically
red in color. As driving distance in-
creases, the fluid color turns darkish red
gradually. It is a normal condition and
you should not judge the need to replace
based upon the changing color.
You must replace the automatic
transaxle fluid in accordance with
intervals specified in the vehicle
maintenance schedule in section 5.
!
G110B05A-AATRecommended Fluid
Your Hyundai automatic transaxle is
specially designed to operate with
HYUNDAI GENUINE ATF SP III, DIAMOND
ATF SP III, SK ATF SP III or other brands
meeting the SP III specification approved
by Hyundai Motor Co.. Damage caused
by a nonspecified fluid is not covered by
your new vehicle limited warranty.
CAUTION:
Use of aftermarket ATF additives may
cause damage to the automatic
transaxle.
Only use HYUNDAI GENUINE ATF SP III,
DIAMOND ATF SP III, SK ATF SP III or
other brands meeting the SP III specifi-
cation approved by Hyundai Motor Co..
If you are having your vehicle serviced
at a facility other than a Hyundai dealer,
verify that the correct ATF is used for
your vehicle.
!
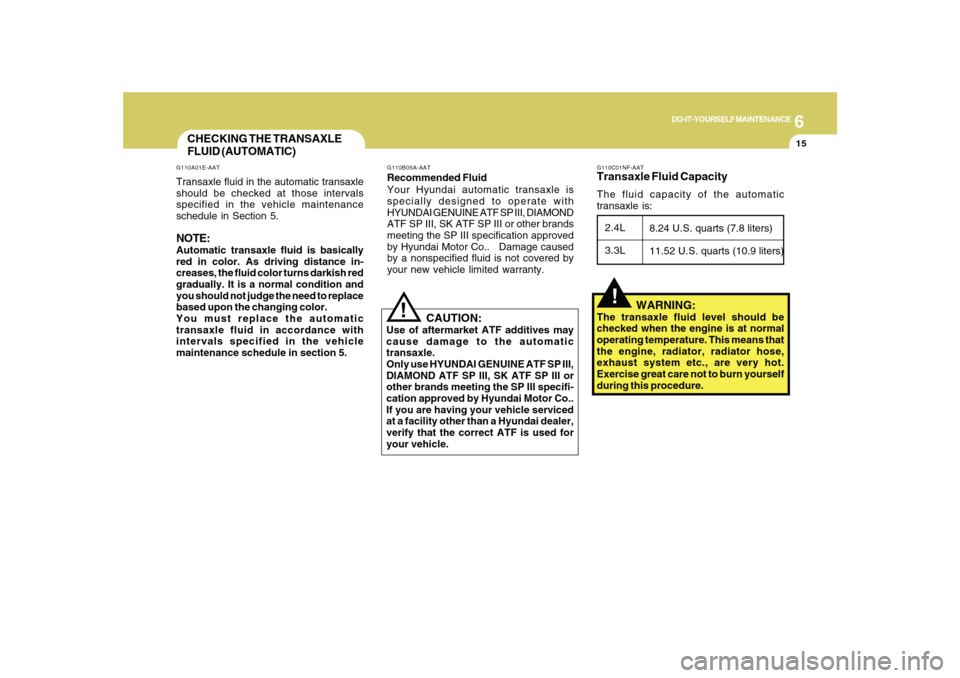
G110C01NF-AATTransaxle Fluid CapacityThe fluid capacity of the automatic
transaxle is:
WARNING:
The transaxle fluid level should be
checked when the engine is at normal
operating temperature. This means that
the engine, radiator, radiator hose,
exhaust system etc., are very hot.
Exercise great care not to burn yourself
during this procedure.2.4L
3.3L
8.24 U.S. quarts (7.8 liters)
11.52 U.S. quarts (10.9 liters)
Page 236 of 285
6
DO-IT-YOURSELF MAINTENANCE
22
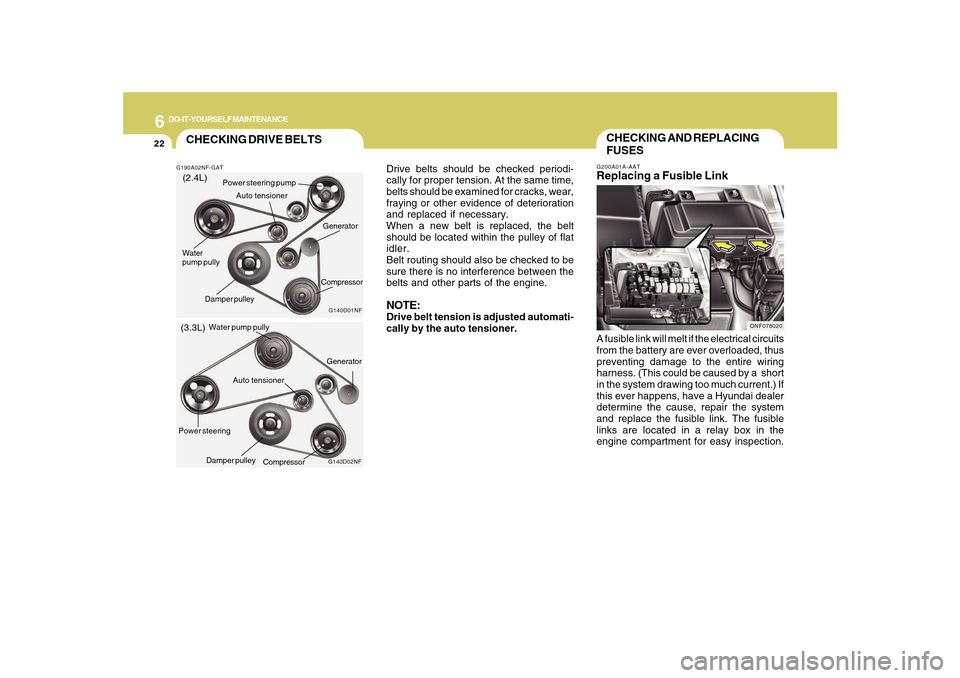
Drive belts should be checked periodi-
cally for proper tension. At the same time,
belts should be examined for cracks, wear,
fraying or other evidence of deterioration
and replaced if necessary.
When a new belt is replaced, the belt
should be located within the pulley of flat
idler.
Belt routing should also be checked to be
sure there is no interference between the
belts and other parts of the engine.NOTE:Drive belt tension is adjusted automati-
cally by the auto tensioner.
CHECKING AND REPLACING
FUSESG200A01A-AATReplacing a Fusible LinkA fusible link will melt if the electrical circuits
from the battery are ever overloaded, thus
preventing damage to the entire wiring
harness. (This could be caused by a short
in the system drawing too much current.) If
this ever happens, have a Hyundai dealer
determine the cause, repair the system
and replace the fusible link. The fusible
links are located in a relay box in the
engine compartment for easy inspection.
ONF078020
G190A02NF-GATCHECKING DRIVE BELTS
G140D01NF
(2.4L)
(3.3L)
G140D02NF
Power steering pump
Compressor Water
pump pullyGenerator
Power steering
Compressor Water pump pully
Generator
Damper pulleyDamper pulley
Auto tensionerAuto tensioner