2010 Hyundai Sonata warning light
[x] Cancel search: warning lightPage 175 of 285
2
DRIVING YOUR HYUNDAI
22
C190F01Y-GATTrailer or Vehicle Towing Tips1. Before towing, check hitch and safety
chain connections as well as proper
operation of the trailer running lights,
brake lights, and turn signals.
2. Always drive your vehicle at a moderate
speed. (Less than 60 mph)
3. Trailer towing requires more fuel than
normal conditions.
4. To maintain engine braking efficiency
and electrical charging performance,
do not tow a trailer with the transaxle in
fifth gear (manual transaxle).
5. Always secure items in the trailer to
prevent load shift while driving.
6. Check the condition and air pressure of
all tires on the trailer and your car. Low
tire pressure can seriously affect the
handling. Also check the spare tire.
7. The vehicle/trailer combination is more
affected by crosswind and buffeting.
When being passed by a large vehicle,
keep a constant speed and steer straight
ahead. If there is too much wind
buffeting, slow down to get out of the
other vehicle's air turbulence.
!
lbs(kg)
!
Tongue
100 (45)
- With3.3L
Brake 2.4L
Without BrakeMaximum Towable Weight
Trailer
1000 (450)
1000 (450)
500 (225)
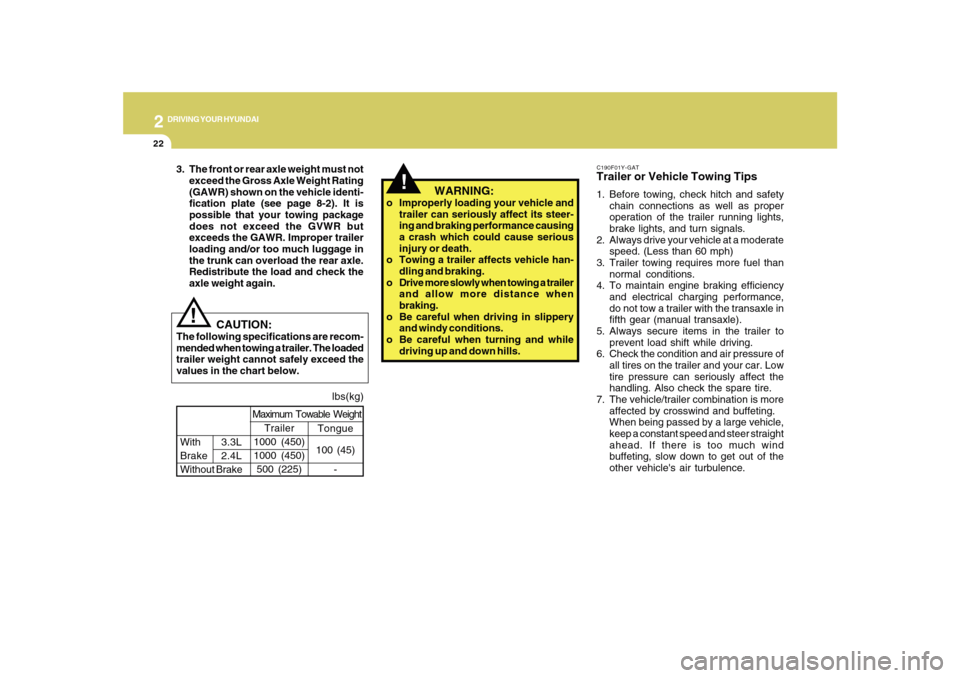
CAUTION:
The following specifications are recom-
mended when towing a trailer. The loaded
trailer weight cannot safely exceed the
values in the chart below.
WARNING:
o Improperly loading your vehicle and
trailer can seriously affect its steer-
ing and braking performance causing
a crash which could cause serious
injury or death.
o Towing a trailer affects vehicle han-
dling and braking.
o Drive more slowly when towing a trailer
and allow more distance when
braking.
o Be careful when driving in slippery
and windy conditions.
o Be careful when turning and while
driving up and down hills. 3. The front or rear axle weight must not
exceed the Gross Axle Weight Rating
(GAWR) shown on the vehicle identi-
fication plate (see page 8-2). It is
possible that your towing package
does not exceed the GVWR but
exceeds the GAWR. Improper trailer
loading and/or too much luggage in
the trunk can overload the rear axle.
Redistribute the load and check the
axle weight again.
Page 183 of 285
32WHAT TO DO IN AN EMERGENCY
IF THE ENGINE WILL NOT START!
D010A01A-AAT
D010B02A-AATIf Engine Doesn't Turn Over or Turns
Over Slowly
D010C02Y-AATIf Engine Turns Over Normally but
Does Not Start1. Check fuel level.
2. With the key in the "OFF" position, check
all connectors at ignition, coil and spark
plugs. Reconnect any that may be dis-
connected or loose.
3. Check the fuel line in the engine com-
partment.
4. If the engine still does not start, call a
Hyundai dealer or seek other qualified
assistance.
D010D01NF-AATIf Engine Stalls While Driving1. Reduce your speed gradually, keeping
a straight line.
2. Turn on your emergency flashers.
3. Move cautiously off the road to a safe
place.
4. Try to start the engine again. If your
vehicle will not start, contact a Hyundai
dealer or seek other qualified assis-
tance.If the engine stalls at a crossroad and
crossing1. Turn on your emergency flashers.
2. Set the shift lever in the N (Neutral)
position. Try to start the engine.
3. If your vehicle does not start, push the
vehicle to a safe place (if it is safe to do
so) with the shift lever in the N (Neutral)
position.
4. Try to start the engine again. If your
vehicle does not start, contact a
HYUNDAI dealer or seek other quali-
fied assistance.
WARNING:
If the engine will not start, do not push or
pull the car to start it. This could result in
a collision or cause other damage. In
addition, push or pull starting may cause
the catalytic converter to be overloaded
and create a fire hazard.
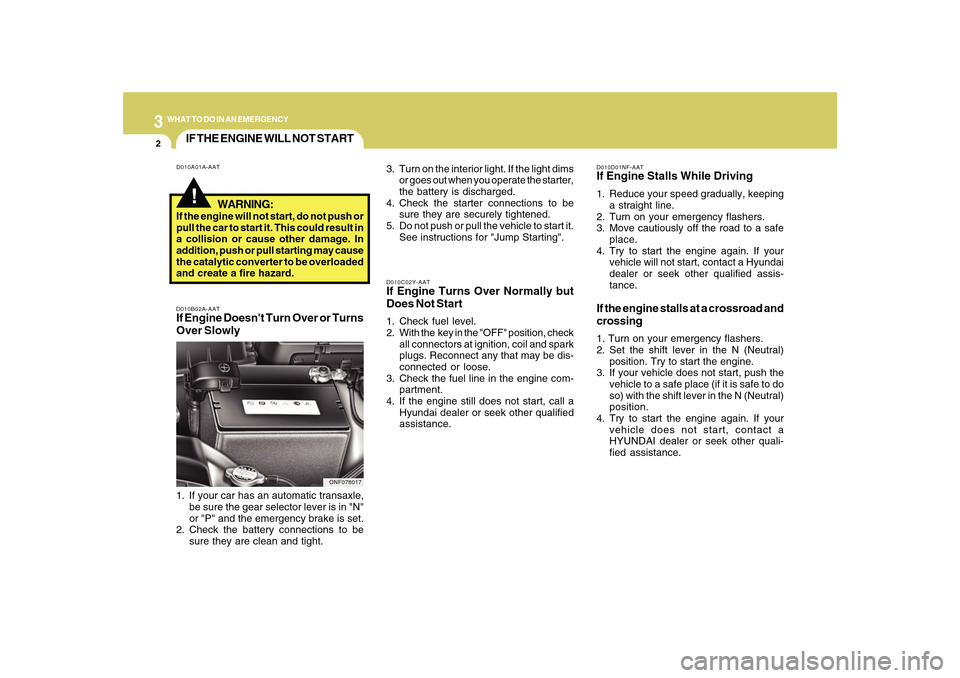
1. If your car has an automatic transaxle,
be sure the gear selector lever is in "N"
or "P" and the emergency brake is set.
2. Check the battery connections to be
sure they are clean and tight.
ONF078017
3. Turn on the interior light. If the light dims
or goes out when you operate the starter,
the battery is discharged.
4. Check the starter connections to be
sure they are securely tightened.
5. Do not push or pull the vehicle to start it.
See instructions for "Jump Starting".
Page 184 of 285
3
WHAT TO DO IN AN EMERGENCY
3
JUMP STARTING!
o If you should accidentally get acid on
your skin or in your eyes, immediately
remove any contaminated clothing and
flush the area with clean water for at
least 15 minutes. Then promptly obtain
medical attention. If you must be trans-
ported to an emergency facility, continue
to apply water to the affected area with
a sponge or cloth.
o The gas produced by the battery during
the jump-start operation is highly
explosive. Do not smoke or allow a
spark or an open flame in the vicinity.
o The battery being used to provide the
jump start must be 12-volt. If you cannot
determine that it is a 12-volt battery, do
not attempt to use it for the jump start.
o To jump start a car with a discharged
battery, follow this procedure exactly:
1. If the booster battery is installed in
another vehicle, be sure the two vehicles
are not touching.
2. Turn off all unnecessary lights and
acces-sories in both vehicles.
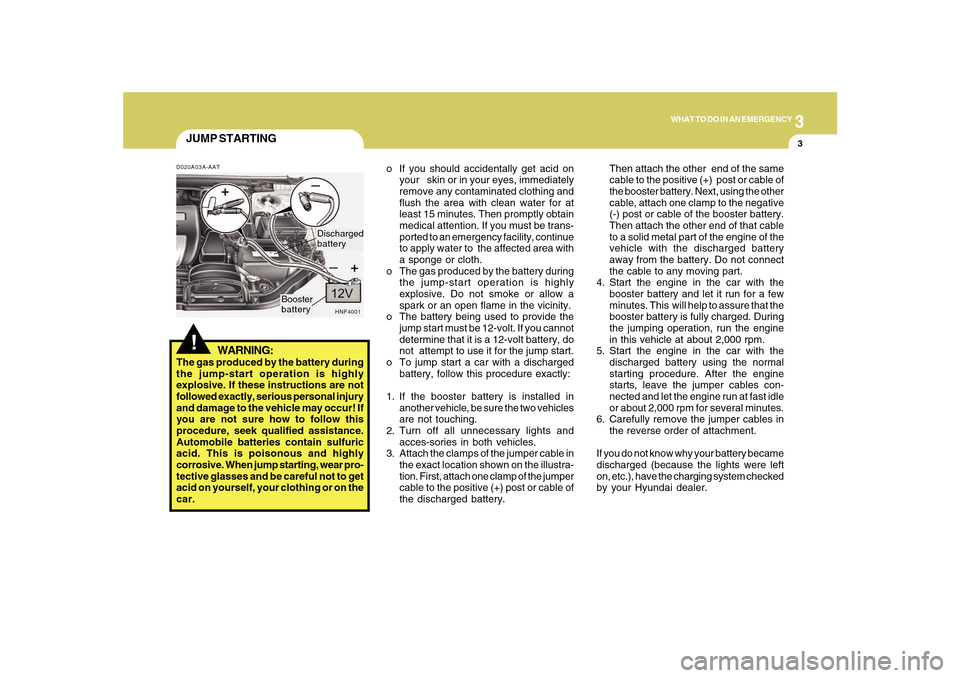
3. Attach the clamps of the jumper cable in
the exact location shown on the illustra-
tion. First, attach one clamp of the jumper
cable to the positive (+) post or cable of
the discharged battery.Then attach the other end of the same
cable to the positive (+) post or cable of
the booster battery. Next, using the other
cable, attach one clamp to the negative
(-) post or cable of the booster battery.
Then attach the other end of that cable
to a solid metal part of the engine of the
vehicle with the discharged battery
away from the battery. Do not connect
the cable to any moving part.
4. Start the engine in the car with the
booster battery and let it run for a few
minutes. This will help to assure that the
booster battery is fully charged. During
the jumping operation, run the engine
in this vehicle at about 2,000 rpm.
5. Start the engine in the car with the
discharged battery using the normal
starting procedure. After the engine
starts, leave the jumper cables con-
nected and let the engine run at fast idle
or about 2,000 rpm for several minutes.
6. Carefully remove the jumper cables in
the reverse order of attachment.
If you do not know why your battery became
discharged (because the lights were left
on, etc.), have the charging system checked
by your Hyundai dealer.
D020A03A-AAT
WARNING:
The gas produced by the battery during
the jump-start operation is highly
explosive. If these instructions are not
followed exactly, serious personal injury
and damage to the vehicle may occur! If
you are not sure how to follow this
procedure, seek qualified assistance.
Automobile batteries contain sulfuric
acid. This is poisonous and highly
corrosive. When jump starting, wear pro-
tective glasses and be careful not to get
acid on yourself, your clothing or on the
car.
HNF4001
Booster
batteryDischarged
battery
Page 194 of 285
3
WHAT TO DO IN AN EMERGENCY
13
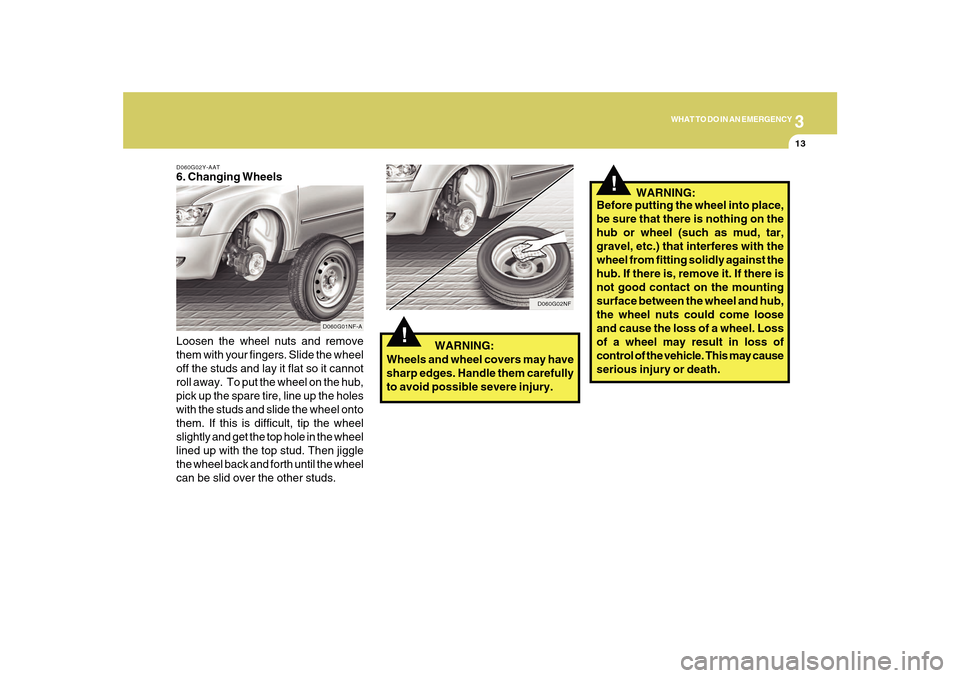
D060G02Y-AAT6. Changing Wheels
Loosen the wheel nuts and remove
them with your fingers. Slide the wheel
off the studs and lay it flat so it cannot
roll away. To put the wheel on the hub,
pick up the spare tire, line up the holes
with the studs and slide the wheel onto
them. If this is difficult, tip the wheel
slightly and get the top hole in the wheel
lined up with the top stud. Then jiggle
the wheel back and forth until the wheel
can be slid over the other studs.
D060G01NF-A
!
WARNING:
Wheels and wheel covers may have
sharp edges. Handle them carefully
to avoid possible severe injury.
D060G02NF
!
Before putting the wheel into place,
be sure that there is nothing on the
hub or wheel (such as mud, tar,
gravel, etc.) that interferes with the
wheel from fitting solidly against the
hub. If there is, remove it. If there is
not good contact on the mounting
surface between the wheel and hub,
the wheel nuts could come loose
and cause the loss of a wheel. Loss
of a wheel may result in loss of
control of the vehicle. This may cause
serious injury or death. WARNING:
Page 239 of 285
6
DO-IT-YOURSELF MAINTENANCE
25
!
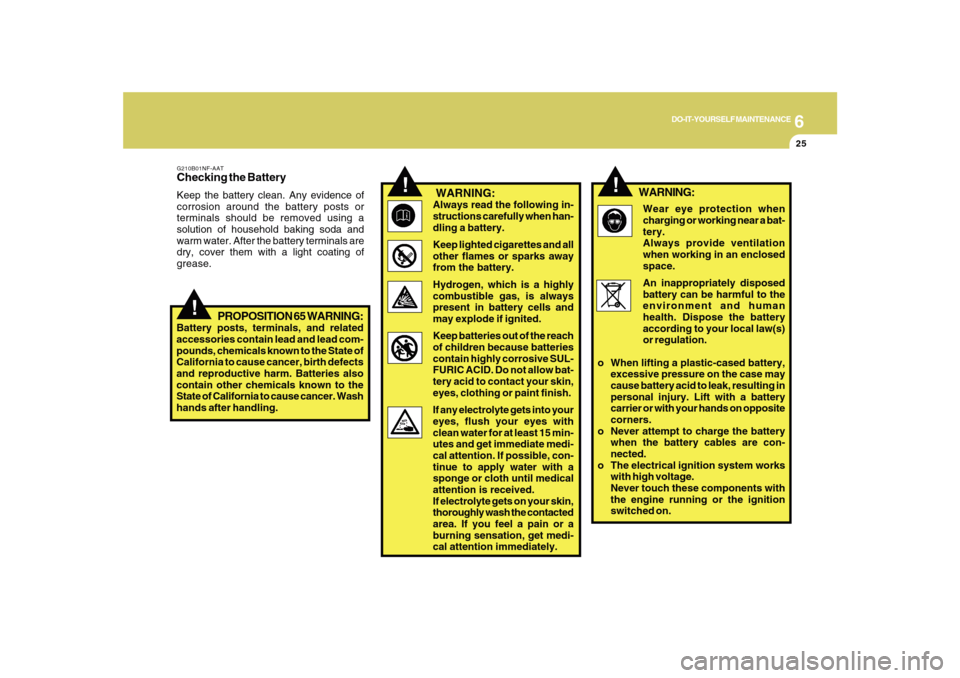
G210B01NF-AATChecking the BatteryKeep the battery clean. Any evidence of
corrosion around the battery posts or
terminals should be removed using a
solution of household baking soda and
warm water. After the battery terminals are
dry, cover them with a light coating of
grease.
PROPOSITION 65 WARNING:
Battery posts, terminals, and related
accessories contain lead and lead com-
pounds, chemicals known to the State of
California to cause cancer, birth defects
and reproductive harm. Batteries also
contain other chemicals known to the
State of California to cause cancer. Wash
hands after handling.
!
!
WARNING:Always read the following in-
structions carefully when han-
dling a battery.
Keep lighted cigarettes and all
other flames or sparks away
from the battery.
Hydrogen, which is a highly
combustible gas, is always
present in battery cells and
may explode if ignited.
Keep batteries out of the reach
of children because batteries
contain highly corrosive SUL-
FURIC ACID. Do not allow bat-
tery acid to contact your skin,
eyes, clothing or paint finish.
If any electrolyte gets into your
eyes, flush your eyes with
clean water for at least 15 min-
utes and get immediate medi-
cal attention. If possible, con-
tinue to apply water with a
sponge or cloth until medical
attention is received.
If electrolyte gets on your skin,
thoroughly wash the contacted
area. If you feel a pain or a
burning sensation, get medi-
cal attention immediately.Wear eye protection when
charging or working near a bat-
tery.
Always provide ventilation
when working in an enclosed
space.
An inappropriately disposed
battery can be harmful to the
environment and human
health. Dispose the battery
according to your local law(s)
or regulation.
o When lifting a plastic-cased battery,
excessive pressure on the case may
cause battery acid to leak, resulting in
personal injury. Lift with a battery
carrier or with your hands on opposite
corners.
o Never attempt to charge the battery
when the battery cables are con-
nected.
o The electrical ignition system works
with high voltage.
Never touch these components with
the engine running or the ignition
switched on.
WARNING:
Page 241 of 285
6
DO-IT-YOURSELF MAINTENANCE
27
FOR MORE INFORMATION
ABOUT YOUR HYUNDAIG250A01A-AATIf you desire additional information about
maintaining and servicing your Hyundai,
you may purchase a factory Shop Manual
at your Hyundai dealer's parts department.
This is the same manual used by
dealership technicians and while it is highly
technical it can be useful in obtaining a
better understanding of your car and how
it works.
HEADLIGHT AIMING ADJUST-
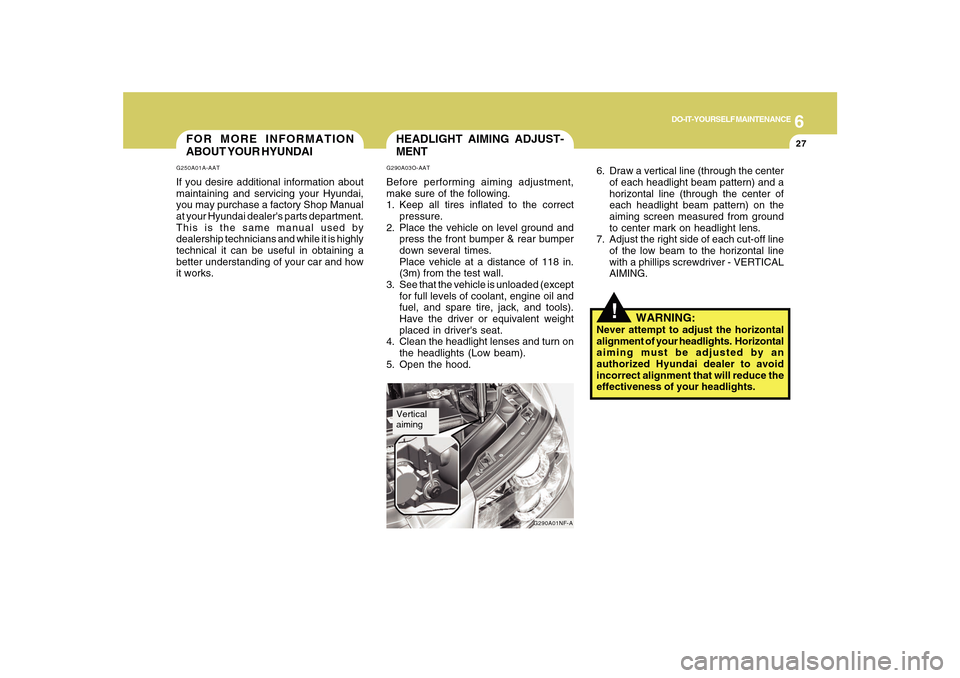
MENTG290A03O-AATBefore performing aiming adjustment,
make sure of the following.
1. Keep all tires inflated to the correct
pressure.
2. Place the vehicle on level ground and
press the front bumper & rear bumper
down several times.
Place vehicle at a distance of 118 in.
(3m) from the test wall.
3. See that the vehicle is unloaded (except
for full levels of coolant, engine oil and
fuel, and spare tire, jack, and tools).
Have the driver or equivalent weight
placed in driver's seat.
4. Clean the headlight lenses and turn on
the headlights (Low beam).
5. Open the hood.
G290A01NF-A
Vertical
aiming
!
6. Draw a vertical line (through the center
of each headlight beam pattern) and a
horizontal line (through the center of
each headlight beam pattern) on the
aiming screen measured from ground
to center mark on headlight lens.
7. Adjust the right side of each cut-off line
of the low beam to the horizontal line
with a phillips screwdriver - VERTICAL
AIMING.
WARNING:
Never attempt to adjust the horizontal
alignment of your headlights. Horizontal
aiming must be adjusted by an
authorized Hyundai dealer to avoid
incorrect alignment that will reduce the
effectiveness of your headlights.
Page 245 of 285
6
DO-IT-YOURSELF MAINTENANCE
31
12. To replace the front turn signal light
bulb remove it from the bulb holder
and install the new bulb.
!
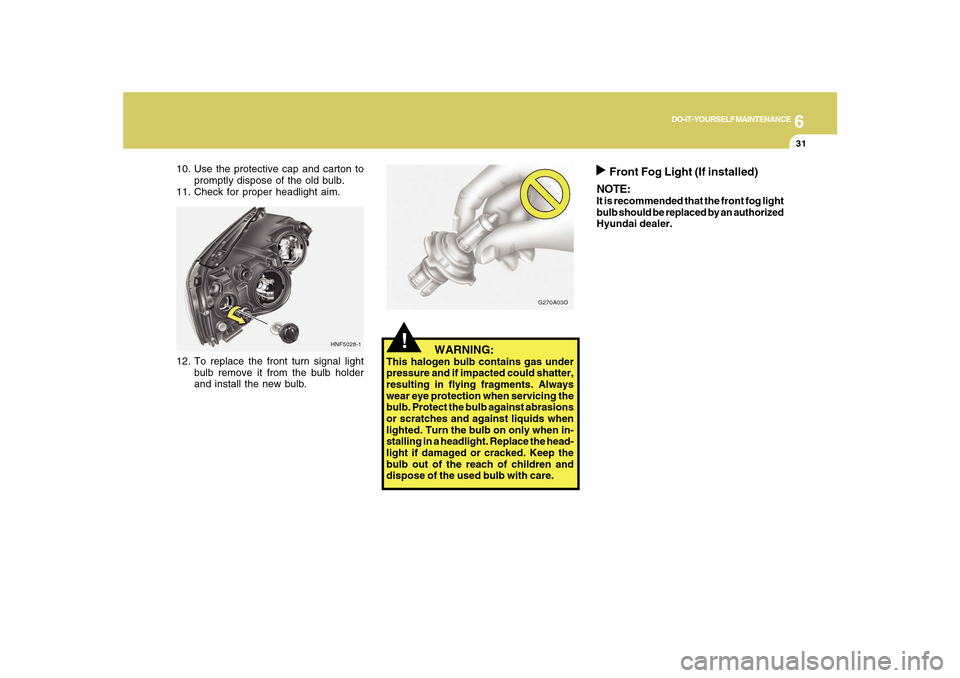
WARNING:
This halogen bulb contains gas under
pressure and if impacted could shatter,
resulting in flying fragments. Always
wear eye protection when servicing the
bulb. Protect the bulb against abrasions
or scratches and against liquids when
lighted. Turn the bulb on only when in-
stalling in a headlight. Replace the head-
light if damaged or cracked. Keep the
bulb out of the reach of children and
dispose of the used bulb with care.
HNF5028-1G270A03O
10. Use the protective cap and carton to
promptly dispose of the old bulb.
11. Check for proper headlight aim.
Front Fog Light (If installed)
NOTE:
It is recommended that the front fog light
bulb should be replaced by an authorized
Hyundai dealer.
Page 250 of 285

6
DO-IT-YOURSELF MAINTENANCE
36
Socket Type
BAY 15d
w2.1 x 9.5d
BAY 15d
sv6-7, 6
BAY 15d
BAY 15s
w2.1 x 9.5d
w2.1 x 9.5d No.
1
2
3
4
5
6
7Socket Type
P x 26d
P14,5s
BAY15d
w2.1 x 9.5d
sv6-7,6
PGJ13
w2.1 x 9.2d
w2.1 x 4.6d
BULB WATTAGESG280A01NF-AAT
G280A01NF-D
Part Name
Stop / Tail Light
High Mounted Rear Stop Light
Tail Light
Luggage Compartment Light
Rear Side Marker Light
Rear Turn Signal Light
Back-up Light
License Plate Light Part Name
Headlight
Front Turn Signal Light
Map Light
Interior Light
Front Fog Light
Front Position Side Marker Light
Front Door Edge Warning LightNo.
8
9
10
11
12
13
14
15 Wattage
55
55
28
10
10
27
5
8
Low beam
High beamWattage
28/8
16
28/8
5
5
27
16
5