2010 Hyundai Sonata child lock
[x] Cancel search: child lockPage 99 of 285
1FEATURES OF YOUR HYUNDAI86
!
WARNING:
o If a person becomes locked in the
trunk, pull the emergency trunk
release lever of the inside panel in the
trunk to open the trunk lid.
o Keep cars locked and keys out of the
reach of children. HYUNDAI recom-
mends parents teach children about
the emergency trunk release lever in
their vehicle and how to open the trunk
lid if they are accidentally locked in
the trunk.
ONF049132 B540B03E-AAT
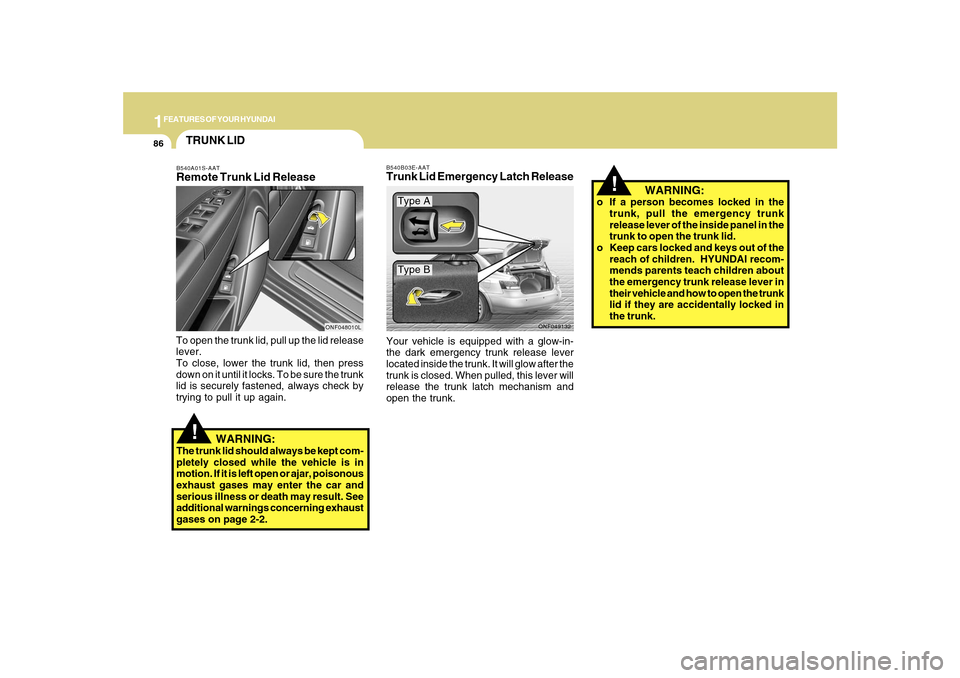
Trunk Lid Emergency Latch ReleaseYour vehicle is equipped with a glow-in-
the dark emergency trunk release lever
located inside the trunk. It will glow after the
trunk is closed. When pulled, this lever will
release the trunk latch mechanism and
open the trunk.
!
WARNING:
The trunk lid should always be kept com-
pletely closed while the vehicle is in
motion. If it is left open or ajar, poisonous
exhaust gases may enter the car and
serious illness or death may result. See
additional warnings concerning exhaust
gases on page 2-2.TRUNK LIDB540A01S-AATRemote Trunk Lid ReleaseTo open the trunk lid, pull up the lid release
lever.
To close, lower the trunk lid, then press
down on it until it locks. To be sure the trunk
lid is securely fastened, always check by
trying to pull it up again.
ONF048010L
Type AType B
Page 135 of 285
1FEATURES OF YOUR HYUNDAI
122
PA710SF01NF-AATIf a USB device is connected to the multiple
terminal inside the console on the right
hand side of the driver’s seat, the ‘USB’
icon will be displayed on the top right
corner of the display screen.1.AUX Selection ButtonIf USB is connected, it switches to the USB
mode from the CD mode to play the song
files stored in the USB.
If there is no CD and USB mode from the
Radio mode, it displays ‘NO MEDIA’.2. Track Moving Buttono Press the [SEEK
] button for less than
0.8 seconds to play from the beginning
of the song currently played.
Press the button for less than 0.8 sec-
onds and press it again within 1 second
to move and play the previous track.
Press the button for 0.8 seconds or
longer to play the song in reverse direc-
tion in fast speed.
o Press the [SEEK ] button for less than
0.8 seconds to move to the next track.
Press the button for 0.8 seconds or
longer to play the song in forward direc-
tion in fast speed.
3. INFO ButtonDisplays the information of the file cur-
rently played in the order of FILE NAME
➟TITLE➟ARTIST➟ALBUM➟FOLDER➟TOTAL
FILE➟normal display➟FILE NAME➟…
(Displays no information if the file has no
song information.)4. Folder moving Buttono Moves [FLDR
] button to the child
folder of the current folder and displays
the first song in the folder. Press ENT/
TUNE button to move to the folder dis-
played. It will play the first song in the
folder.
o Moves [FLDR ] button to the parent
folder and displays the first song in the
folder. Press ENT/TUNE button to move
to the folder displayed. It will play the
first song in the folder.
5. TUNE/ENTER ButtonTurn this button clockwise to display the
songs next to the currently played song.
Turn the button counterclockwise to dis-
play the songs before the currently played
song.
Press the button to skip and play the se-
lected song.Pressing the button changes the BASS,
MIDDLE, TREBLE, FADER and BALANCE
TUNE mode.
The mode selected is shown on the dis-
play.
After selecting each mode, rotate the Au-
dio control knob clockwise or counter-
clockwise.
o BASS Control
To increase the BASS, rotate the knob
clockwise, while to decrease the BASS,
rotate the knob counterclockwise.
o MIDDLE Control
To increase the MIDDLE, rotate the knob
clockwise, while to decrease the MIDDLE,
rotate the knob counterclockwise.
o TREBLE Control
To increase the TREBLE, rotate the knob
clockwise, while to decrease the TREBLE,
rotate the knob counterclockwise.
o FADER Control
Turn the control knob clockwise to empha-
size rear speaker sound (front speaker
sound will be attenuated). When the con-
trol knob is turned counterclockwise, front
speaker sound will be emphasized (rear
speaker sound will be attenuated).
Page 148 of 285
1
FEATURES OF YOUR HYUNDAI
135
PA760SF01NF-AATIf a USB is connected to the multiple termi-
nal inside the console on the right hand
side of the driver’s seat, the ‘USB’ icon will
be displayed on the top right corner of the
display screen.1.AUX Selection ButtonIf a USB device is connected, it switches to
the USB mode from the CD mode to play
the song files stored in the USB device.
If there is no CD and USB mode from the
Radio mode, it displays ‘NO MEDIA’.2. Track Moving Buttono Press the [SEEK
] button for less than
0.8 seconds to play from the beginning
of the song currently played.
Press the button for less than 0.8 sec-
onds and press it again within 1 second
to move and play the previous track.
Press the button for 0.8 seconds or
longer to play the song in reverse direc-
tion in fast speed.
o Press the [SEEK ] button for less than
0.8 seconds to move to the next track.
Press the button for 0.8 seconds or
longer to play the song in forward direc-
tion in fast speed.
3. INFO ButtonDisplays the information of the file cur-
rently played in the order of FILE NAME
➟TITLE➟ARTIST➟ALBUM➟FOLDER➟TOTAL
FILE➟normal display➟FILE NAME➟…
(Displays no information if the file has no
song information.)4. Folder moving Buttono Moves [FLDR
] button child folder of
the current folder and displays the first
song in the folder. Press ENT/TUNE
button to move to the folder displayed.
It will play the first song in the folder.
o Moves [FLDR ] button parent folder
and displays the first song in the folder.
Press ENT/TUNE button to move to the
folder displayed. It will play the first song
in the folder.
5. TUNE/ENTER ButtonTurn this button clockwise to display the
songs next to the currently played song.
Turn the button counterclockwise to dis-
play the songs before the currently played
song.
Press the button to skip and play the se-
lected song.Pressing the button changes the BASS,
MIDDLE, TREBLE, FADER and BALANCE
TUNE mode.
The mode selected is shown on the dis-
play.
After selecting each mode, rotate the Au-
dio control knob clockwise or counter-
clockwise.
o BASS Control
To increase the BASS, rotate the knob
clockwise, while to decrease the BASS,
rotate the knob counterclockwise.
o MIDDLE Control
To increase the MIDDLE, rotate the knob
clockwise, while to decrease the MIDDLE,
rotate the knob counterclockwise.
o TREBLE Control
To increase the TREBLE, rotate the knob
clockwise, while to decrease the TREBLE,
rotate the knob counterclockwise.
o FADER Control
Turn the control knob clockwise to empha-
size rear speaker sound (front speaker
sound will be attenuated). When the con-
trol knob is turned counterclockwise, front
speaker sound will be emphasized (rear
speaker sound will be attenuated).
Page 156 of 285
2
DRIVING YOUR HYUNDAI
3
!
BEFORE STARTING
THE ENGINEC020A01NF-AATBefore you start the engine, you should
always:
1. Look around the vehicle to be sure
there are no flat tires, puddles of oil,
water or other indications of possible
trouble.
2. After entering the car, check to be sure
the parking brake is engaged.
3. Check that all windows and lights are
clean.
4. Check that the interior and exterior
mirrors are clean and in position.
5. Check your seat, seatback and head-
rest to be sure they are in their proper
positions.
6. Lock all the doors.
7. Fasten your seat belt and be sure that all
other occupants have fastened theirs.
8. Turn off all lights and accessories that
are not needed.
9. When you turn the ignition switch to
"ON", check that all appropriate warning
lights are operating and that you have
sufficient fuel.
10. Check the operation of warning lights
and all bulbs when key is in the "ON"
position.
TO START THE ENGINEC030A01E-AATCOMBINATION IGNITION SWITCHo If your Hyundai is equipped with a
manual transaxle, place the shift lever
in neutral and depress the clutch pedal
fully.
o If your Hyundai has an automatic
transaxle, place the shift lever in "P"
(Park).
o To start the engine, insert the ignition
key and turn it to the "START" position.
Release it as soon as the engine starts.
Do not hold the key in the "START"
position for more than 15 seconds.NOTE:o For safety, the engine will not start if
the clutch pedal is not depressed fully
(Manual Transaxle) or the shift lever
is not in "P" or "N" Position (Automatic
Transaxle).
o The ignition key cannot be turned from
"ACC" position to "LOCK" position
unless the shift lever is in the "P"
(Park) position or the negative battery
terminal is disconnected from the bat-
tery. To remove the key, always
confirm that the shift lever is securely
positioned in "P" (Park) (For Automatic
Transaxle).
o For additional information about start-
ing, see page 2-5.
WARNING:
o All passengers must be properly
belted whenever the vehicle is moving.
Refer to pages: 1-22 through 1-34 for
more information on their proper use.
o Always check the surrounding areas
near your vehicle for people,
especially children, before putting a
car into 'drive'.
!
WARNING:
Always wear appropriate shoes when
operating your vehicle.
Unsuitable shoes (high heels, ski boots,
etc.) may interfere with your ability to
use the brake and accelerator pedal,
and the clutch (if installed).
!
WARNING:
When you intend to park or stop the
vehicle with the engine on, be careful not
to depress the accelerator pedal for a
long period of time. It may overheat the
engine or exhaust system and cause
fire.
Page 281 of 285
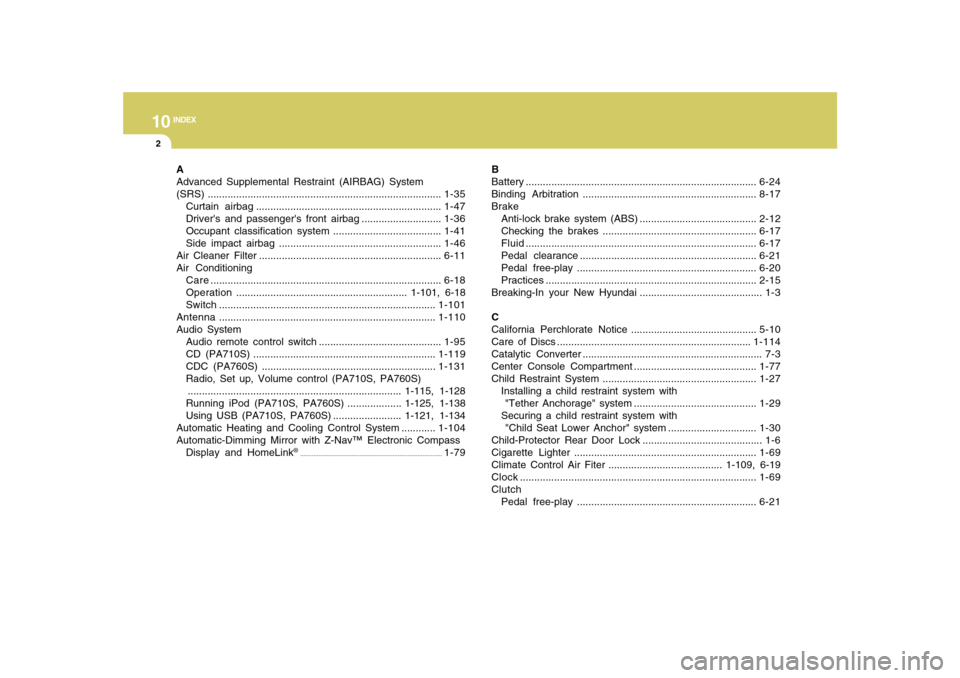
10
INDEX
2
A
Advanced Supplemental Restraint (AIRBAG) System
(SRS)..................................................................................1-35
Curtain airbag .................................................................1-47
Driver's and passenger's front airbag ............................1-36
Occupant classification system ......................................1-41
Side impact airbag .........................................................1-46
Air Cleaner Filter ................................................................6-11
Air Conditioning
Care.................................................................................6-18
Operation............................................................ 1-101, 6-18
Switch............................................................................1-101
Antenna............................................................................1-110
Audio System
Audio remote control switch ...........................................1-95
CD (PA710S) ................................................................1-119
CDC (PA760S) .............................................................1-131
Radio, Set up, Volume control (PA710S, PA760S)
........................................................................... 1-115, 1-128
Running iPod (PA710S, PA760S) ................... 1-125, 1-138
Using USB (PA710S, PA760S) ........................ 1-121, 1-134
Automatic Heating and Cooling Control System ............1-104
Automatic-Dimming Mirror with Z-Nav™ Electronic Compass
Display and HomeLink
®
......................................................................................
1-79B
Battery .................................................................................6-24
Binding Arbitration .............................................................8-17
Brake
Anti-lock brake system (ABS) .........................................2-12
Checking the brakes ......................................................6-17
Fluid.................................................................................6-17
Pedal clearance ..............................................................6-21
Pedal free-play ...............................................................6-20
Practices..........................................................................2-15
Breaking-In your New Hyundai ........................................... 1-3
C
California Perchlorate Notice ............................................5-10
Care of Discs ....................................................................1-114
Catalytic Converter ............................................................... 7-3
Center Console Compartment ...........................................1-77
Child Restraint System ......................................................1-27
Installing a child restraint system with
"Tether Anchorage" system ...........................................1-29
Securing a child restraint system with
"Child Seat Lower Anchor" system ...............................1-30
Child-Protector Rear Door Lock .......................................... 1-6
Cigarette Lighter ................................................................1-69
Climate Control Air Fiter ........................................ 1-109, 6-19
Clock ...................................................................................1-69
Clutch
Pedal free-play ...............................................................6-21