2010 Hyundai Azera radio
[x] Cancel search: radioPage 191 of 334

1FEATURES OF YOUR HYUNDAI
178
RADIO, SET UP, VOLUME CONTROL (PA760) (If Installed)
1. FM Selection Button
2. AM Selection Button
3. CD Selection Button
4. AUX Selection Button
5. Automatic Channel Selection Button
6. Power ON/OFF
7. SCAN Button
8. MUTE Button
9. SET UP Button
10. TUNE/ENTER Button
11. Pre-set Button
OTGAUDIO-21
Page 199 of 334

1FEATURES OF YOUR HYUNDAI
186
In case USB is connected to the multiple
terminal inside the console on the right
hand side of the driver’s seat. When USB
is connected, the ‘USB’ icon will be dis-
played on the top right corner of the display
screen.1.AUX Selection ButtonIf USB is not connected, it switches to the
USB mode from the Radio and CD mode
to play the song files stored in the USB.
If AUX is not connected, it is invalid key.2. Track Moving Buttono Press the [SEEK
] button for less than
0.8 second to play from the beginning of
the song currently played.
Press the button for less than 0.8 sec-
ond and press it again within 1 second
to move and play the previous track.
Press the button for 0.8 second or longer
to play the song in reverse direction in
fast speed.
o Press the [SEEK ] button for less than
0.8 second to move to the next track.
Press the button for 0.8 second or longer
to play the song in forward direction in
fast speed.
3. INFO ButtonDisplays the information of the file cur-
rently played in the order of FILE NAME
➟TITLE➟ARTIST➟ALBUM➟FOLDER➟
TOTAL FILE➟NORMAL DISPLAY➟FILE
NAME➟… (Displays no information if the
file has no song information.)4. Folder moving Buttono Moves [FLDR
] button child folder of
the current folder and displays the first
song in the folder. Press TUNE/ENTER
button to move to the folder displayed.
It will play the first song in the folder.
o Moves [FLDR ] button parent folder
and displays the first song in the folder.
Press TUNE/ENTER button to move to
the folder displayed. It will play the first
song in the folder.
5. TUNE/ENTER ButtonTurn this button clockwise to display the
songs next to the currently played song.
Turn the button counterclockwise to dis-
play the songs before the currently played
song.
Press the button to skip and play the se-
lected song.Pressing the button changes the BASS,
MIDDLE, TREBLE, FADER and BALANCE
TUNE mode. The mode selected is shown
on the display. After selecting each mode,
rotate the Audio control knob clockwise or
counterclockwise.
o BASS Control
To increase the BASS, rotate the knob
clockwise, while to decrease the BASS,
rotate the knob counterclockwise.
o MIDDLE Control
To increase the MIDDLE, rotate the knob
clockwise, while to decrease the MIDDLE,
rotate the knob counterclockwise.
o TREBLE Control
To increase the TREBLE, rotate the knob
clockwise, while to decrease the TREBLE,
rotate the knob counterclockwise.
o FADER Control
Turn the control knob clockwise to empha-
size rear speaker sound (front speaker
sound will be attenuated). When the con-
trol knob is turned counterclockwise, front
speaker sound will be emphasized (rear
speaker sound will be attenuated).
Page 202 of 334

1
FEATURES OF YOUR HYUNDAI
189
In case the i-Pod exclusive cable is con-
nected to the multiple terminal inside the
console on the right hand side of the driver’s
seat. When the i-Pod is connected, the ‘i-
Pod’ icon will be displayed on the top right
corner of the display screen.1. i-Pod Selection ButtonIf i-Pod is connected, it switches to the i-
Pod mode from the Radio and CD mode to
play the song files stored in the i-Pod.
If there are no CD and AUX mode from the
Radio mode, it displays ‘NO MEDIA’.2. Track Moving Buttono Press the [SEEK
] button for less than
0.8 second to play from the beginning of
the song currently played.
Press the button for less than 0.8 sec-
ond and press it again within 1 second
to move and play the previous track.
Press the button for 0.8 second or longer
to play the song in reverse direction in
fast speed.
o Press the [SEEK ] button for less than
0.8 second to move to the next track.
Press the button for 0.8 second or longer
to play the song in forward direction in
fast speed.
3. INFO ButtonDisplays the information of the file cur-
rently played in the order of TITLE➟
ARTIST➟ALBUM➟NORMAL DISPLAY
➟TITLE➟… (Displays no information if the
file has no song information.)4. Category Selection ButtonMoves to the upper category from currently
played category of the i-Pod.
To move to (play) the category (song)
displayed, press MENU(Preset 6).
You will be able to search through the
lower category of the selected category.
The order of i-Pod’s category is SONG,
ALBUMES, ARTISTS, GENRES, and i-
Pod.5. TUNE/ENTER ButtonWhen you turn the button clockwise, it will
display the songs (category) next to the
song currently played (category in the same
level).
Also, when you turn the button counter-
clockwise, it will display the songs (cat-
egory) before the song currently played
(category in the same level).
If you want to listen to the song displayed
in the song category, press the button, then
it will skip to the selected song and play.Pressing the button changes the BASS,
MIDDLE, TREBLE, FADER and BALANCE
TUNE mode. The mode selected is shown
on the display. After selecting each mode,
rotate the Audio control knob clockwise or
counterclockwise.
o BASS Control
To increase the BASS, rotate the knob
clockwise, while to decrease the BASS,
rotate the knob counterclockwise.
o MIDDLE Control
To increase the MIDDLE, rotate the knob
clockwise, while to decrease the MIDDLE,
rotate the knob counterclockwise.
o TREBLE Control
To increase the TREBLE, rotate the knob
clockwise, while to decrease the TREBLE,
rotate the knob counterclockwise.
o FADER Control
Turn the control knob clockwise to empha-
size rear speaker sound (front speaker
sound will be attenuated). When the con-
trol knob is turned counterclockwise, front
speaker sound will be emphasized (rear
speaker sound will be attenuated).
Page 207 of 334

2
DRIVING YOUR HYUNDAI
4
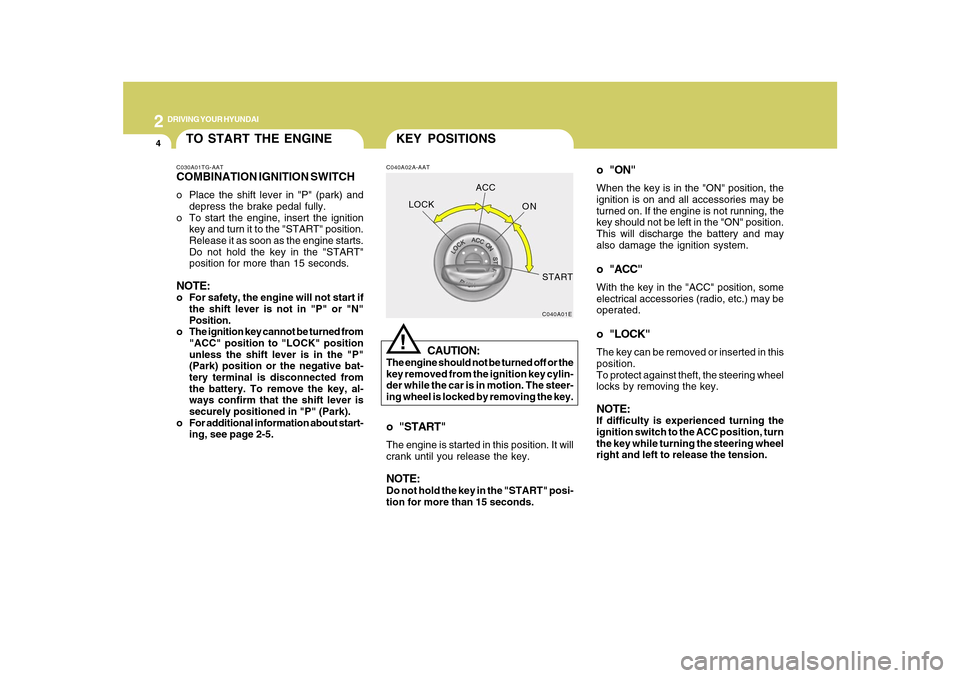
o "ON"When the key is in the "ON" position, the
ignition is on and all accessories may be
turned on. If the engine is not running, the
key should not be left in the "ON" position.
This will discharge the battery and may
also damage the ignition system.o "ACC"With the key in the "ACC" position, some
electrical accessories (radio, etc.) may be
operated.o "LOCK"The key can be removed or inserted in this
position.
To protect against theft, the steering wheel
locks by removing the key.NOTE:If difficulty is experienced turning the
ignition switch to the ACC position, turn
the key while turning the steering wheel
right and left to release the tension.
KEY POSITIONSC040A02A-AAT
CAUTION:
The engine should not be turned off or the
key removed from the ignition key cylin-
der while the car is in motion. The steer-
ing wheel is locked by removing the key.
!
o "START"The engine is started in this position. It will
crank until you release the key.NOTE:Do not hold the key in the "START" posi-
tion for more than 15 seconds.
C040A01E
LOCKACC
ON
START
TO START THE ENGINEC030A01TG-AATCOMBINATION IGNITION SWITCHo Place the shift lever in "P" (park) and
depress the brake pedal fully.
o To start the engine, insert the ignition
key and turn it to the "START" position.
Release it as soon as the engine starts.
Do not hold the key in the "START"
position for more than 15 seconds.NOTE:o For safety, the engine will not start if
the shift lever is not in "P" or "N"
Position.
o The ignition key cannot be turned from
"ACC" position to "LOCK" position
unless the shift lever is in the "P"
(Park) position or the negative bat-
tery terminal is disconnected from
the battery. To remove the key, al-
ways confirm that the shift lever is
securely positioned in "P" (Park).
o For additional information about start-
ing, see page 2-5.
Page 238 of 334

3
WHAT TO DO IN AN EMERGENCY
7
Have the system checked by an autho-
rized Hyundai dealer as soon as pos-
sible to determine the cause of the
problem.
NOTE:
o The TPMS malfunction indicator
may be illuminated if the vehicle
is moving around electric power
supply cables or radio transmit-
ters such as police stations, gov-
ernment and public offices, broad-
casting stations, military installa-
tions, airports, or transmitting tow-
ers, etc. which can interfere with
normal operation of the Tire Pres-
sure Monitoring System (TPMS).
o The TPMS malfunction indicator
may be illuminated if snow chains
or some electronic devices, such
as notebook computers, are used
in the vehicle. This can interfere
with normal operation of the Tire
Pressure Monitoring System
(TPMS).Changing a tire with TPMS
If you have a flat tire, the Low Tire
Pressure telltale will turn on. Have the
flat tire repaired by an authorized Hyundai
dealer as soon as possible or replace
the flat tire with the temporary spare
tire.
NOTE:
NEVER use a puncture-repairing
agent to repair and/or inflate a low
pressure tire. If used, you will have
to replace the tire pressure sensor.
Each wheel is equipped with a tire
pressure sensor mounted inside the tire
behind the valve stem. You must use
TPMS specific wheels. It is recom-
mended that you always have your tires
serviced by an authorized Hyundai dealer
as soon as possible.
After you replace the low pressure tire
with the temporary spare tire, the TPMS
malfunction indicator may illuminate
and the low tire pressure telltale still
illuminate after restarting and about 20
minutes of continuous driving.Once the low pressure tire is re-inflated
to the recommended pressure and in-
stalled on the vehicle, the TPMS mal-
function indicator and the low tire pres-
sure telltale will be extinguished. If the
low pressure and TPMS malfunction
indicators are not extinguished after
about 20 minutes of continuous driving,
please visit an authorized Hyundai
dealer.
You may not be able to identify a low tire
by simply looking at it. Always use a
good quality tire pressure gauge to
measure the tire's inflation pressure.
Please note that a tire that is hot (from
being driven) will have a higher pres-
sure measurement than a tire that is
cold (from sitting stationary for at least
3 hours and driven less than 1 mile
during that 3 hour period). Allow the tire
to cool before measuring the inflation
pressure.
Always be sure the tire is cold before
inflating to the recommended pressure.
A cold tire means the vehicle has been
sitting for 3 hours and driven for less
than 1 mile in that 3 hour period.
Page 285 of 334

6
DO-IT-YOURSELF MAINTENANCE
19
G200B01NF-AATReplacing Accessory Fuse
G200B01TG-A
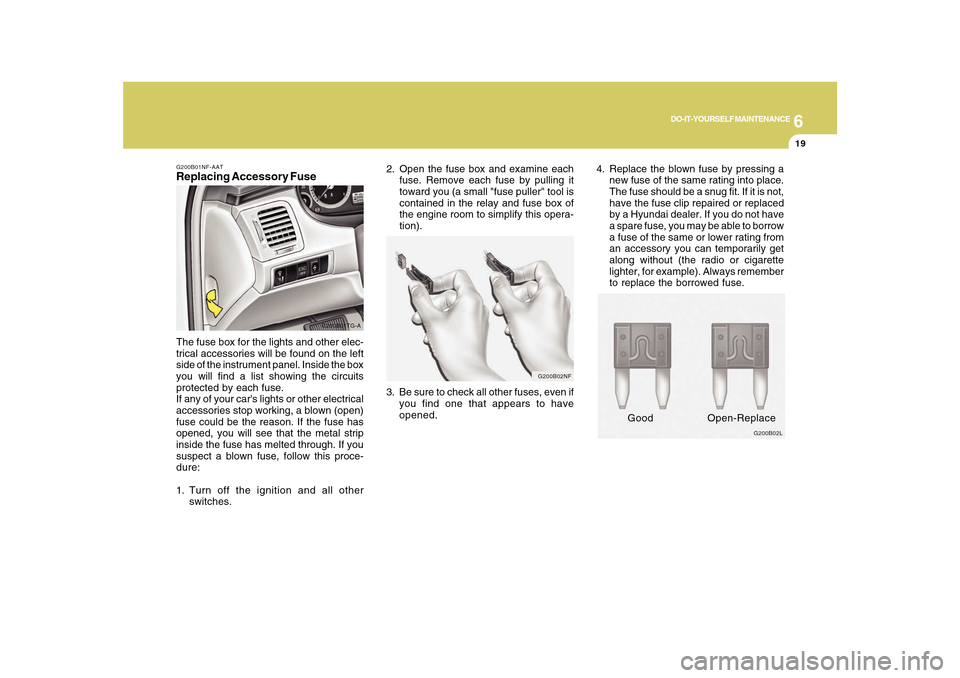
The fuse box for the lights and other elec-
trical accessories will be found on the left
side of the instrument panel. Inside the box
you will find a list showing the circuits
protected by each fuse.
If any of your car's lights or other electrical
accessories stop working, a blown (open)
fuse could be the reason. If the fuse has
opened, you will see that the metal strip
inside the fuse has melted through. If you
suspect a blown fuse, follow this proce-
dure:
1. Turn off the ignition and all other
switches.
G200B02L
Good Open-Replace
3. Be sure to check all other fuses, even if
you find one that appears to have
opened.
G200B02NF
2. Open the fuse box and examine each
fuse. Remove each fuse by pulling it
toward you (a small "fuse puller" tool is
contained in the relay and fuse box of
the engine room to simplify this opera-
tion).4. Replace the blown fuse by pressing a
new fuse of the same rating into place.
The fuse should be a snug fit. If it is not,
have the fuse clip repaired or replaced
by a Hyundai dealer. If you do not have
a spare fuse, you may be able to borrow
a fuse of the same or lower rating from
an accessory you can temporarily get
along without (the radio or cigarette
lighter, for example). Always remember
to replace the borrowed fuse.