Page 227 of 284

Engine Compartment .................................................... 6-2
General Checks ........................................................... 6-5
Maintenance Precautions ............................................. 6-6
Checking the Engine Oil ............................................... 6-6
Checking and Changing the Engine Coolant ...............6-10
Changing the Air Cleaner Filte r ....................................6-12
Checking the Transaxle Oil (Manual ) ..........................6-14
Checking the Transaxle Fluid (Automatic)..................6-15
Checking the B rakes ................................................... 6-17
Checking the Clutch Fluid ............................................ 6-18
Air Conditioning Care ................................................... 6-18
Changing the Climate Control Air Filter........................ 6-19
Checking and Replacing Fuses .................................. 6-20
Checking the Battery ................................................... 6-22
Power Steering Fluid Level .......................................... 6-24
Removal of Water from the Fuel Filter .........................6-25
Headlight Aiming Adjustment ....................................... 6-26
Replacement of Light Bulbs ......................................... 6-27
Bulb Wattage ............................................................... 6-34
Fuse Panel Description ............................................... 6-35
DO-IT-YOURSELF MAINTENANCE
6
6
Page 253 of 284

6
DO-IT-YOURSELF MAINTENANCE
27REPLACEMENT OF LIGHT BULBS
SPECIFICATIONS: "H" Horizontal center line of headlights from ground.: 665 mm (26.18 in.) "W" Distance between each headlight center. : 1,170 mm (46.06 in.) "L" Distance between the headlightsand the wall that the lights are tested against. : 3,000 mm (118.11 in.). G260A01MC-AAT Before attempting to replace a light bulb, be sure the switch is turned to the "OFF" position.The next paragraph shows how to reach the light bulbs so they may be changed. Be sure to replace the burned-out bulbwith one of the same number and watt- age rating. See page 6-34 for the wattage descrip-tions.
CAUTION:
o Keep the lamps out of contact with petroleum products, such as oil,gasoline, etc.
o If you don't have necessary tools,
the correct bulbs and the exper-tise, consult your authorized Hyundai dealer.
! G270A03MC-GAT Headlight, Front Turn Signal Light and Front Fog LightOMC055021
Turn signal light
Headlight Fog light
OMC050021
Headlight Turn signal light
Fog light
Type A
Type B
Page 254 of 284

6 DO-IT-YOURSELF MAINTENANCE
28
5. Remove the socket cover.
6. Push the bulb spring to remove theheadlight bulb.
7. Remove the protective cap from the replacement bulb and install the new bulb by matching the plastic basewith the headlight hole. Reattach the bulb spring and install the socket cover. Reconnect the power cord.
8. Use the protective cap and carton to dispose of the old bulb.
9.Check for proper headlight aim.
Headlight (Type A)
1. Allow the bulb to cool. Wear eye protection.
2. Open the engine hood and discon- nect the negative (-) post of the battery.
3. Always grasp the bulb by its plastic base, avoid touching the glass.
4. Disconnect the power cord from the back of the headlight.
OMC055022
CAUTION:
o The headlight aiming should be checked by an authorized Hyundai dealer after replacing the head- light bulbs.
o After heavy, driving rain or wash- ing, headlight and taillight lensescould appear frosty. This condi- tion is caused by the temperaturedifference between the lamp in- side and outside. This is similar to the condensa-tion on your windows inside your vehicle during the rain and doesn’t indicate a problem with your ve-hicle. If the water leaks into the lamp bulb circuitry, have the ve- hicle checked by an authorizedHyundai dealer.
!
Page 255 of 284
6
DO-IT-YOURSELF MAINTENANCE
29
Headlight (Type B)
1. Allow the bulb to cool. Wear eye protection.
2. Open the engine hood and discon- nect the negative (-) post of the battery.
3. Always grasp the bulb by its plastic base, avoid touching the glass.
4. Disconnect the power cord from the
back of the headlight.
5. Remove the socket cover by press-ing the tab and pulling up. 6. Push the bulb spring to remove the
headlight bulb.
7. Remove the protective cap from the
replacement bulb and install the new bulb by matching the plastic base with the headlight hole. Reattach the bulb spring.8. Reinstall the socket cover by press-ing the upper tab with the lower tab hooked.
9. Reconnect the power cord.
10. Use the protective cap and carton to
dispose of the old bulb.
11.Check for proper headlight aim.
G270A04MC-1
G270A05MC-1G270A02MC-1
G270A03MC-1
Page 256 of 284

6 DO-IT-YOURSELF MAINTENANCE
30
Front Turn Signal light
1. Open the engine hood and discon- nect the negative (-) post of the battery.
2. Disconnect the power cord from the bulb.
3. Take out the bulb from the bulb holder by turning it counterclock- wise.
4. Install the new bulb.
OMC055023
Front Fog Light (If Installed)
NOTE: It is recommended that the front fog light bulb be replaced by an autho- rized Hyundai dealer.
G270D01MC-GAT Rear Combination Light
1. Open the trunk lid (4 Door) or tail gate (3 Door).
OMC055024
2. Remove the cover on the inside of luggage trim.
4 Door
G270A03O
!WARNING:
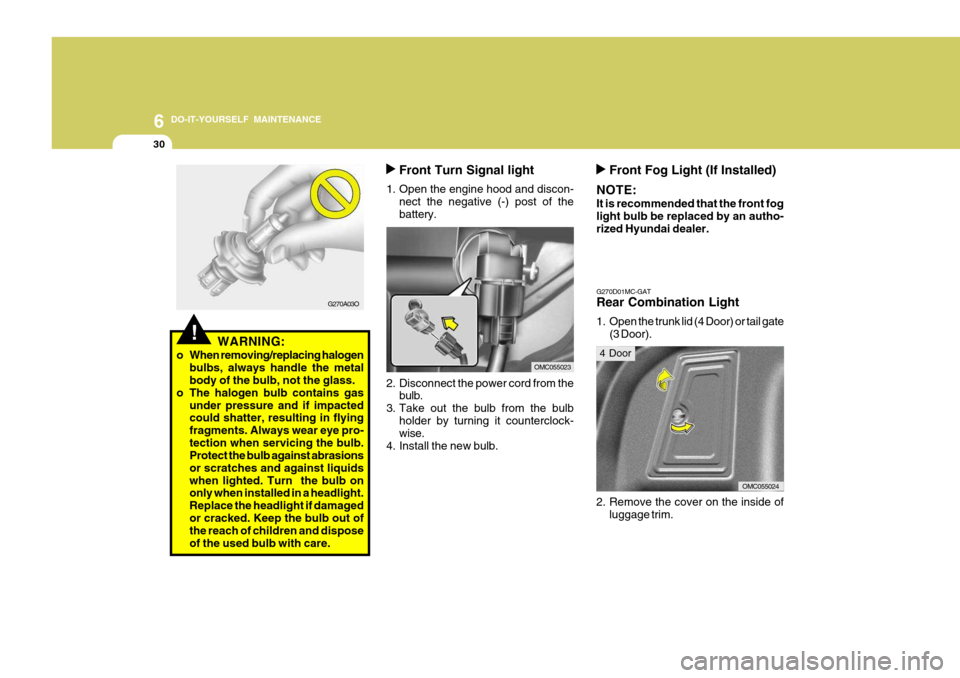
o When removing/replacing halogen bulbs, always handle the metal body of the bulb, not the glass.
o The halogen bulb contains gas under pressure and if impactedcould shatter, resulting in flying fragments. Always wear eye pro-tection when servicing the bulb. Protect the bulb against abrasions or scratches and against liquidswhen lighted. Turn the bulb on only when installed in a headlight. Replace the headlight if damagedor cracked. Keep the bulb out of the reach of children and dispose of the used bulb with care.
Page 260 of 284
6 DO-IT-YOURSELF MAINTENANCE
34BULB WATTAGE
G280A01MC-GAT
OMC059020N
Socket Type P43t-38
BAU15s
W2.1X9.5d W2.1X9.5d
S8.5/8.5PG13
LED Type
W2.1X9.5d Part Name
Stop/Tail Light
High Mounted Rear Stop Light (If Installed) Luggage Compartment Light
Rear Turn Signal Light Rear Fog Light (If Installed) Back-up Light
License Plate Light
Part Name
Headlight (High/Low)Front Turn Signal LightFront Position Light Map Light Interior LightFront Fog Light (If Installed) Side Repeater Light (If Installed) Side Repeater Light (If Installed)
No.
12 3 4 5 67 No.
8 9
10 11 12 1314
Wattage
55/60
215
1010 27
0.4 5
Wattage
21/5
165
21 21 16 5 Socket Type
BAY15d
W2.1X9.5d S8.5/8.5BAU15sBA15s
W2.1X9.5d
S8.5/8.5
4 Door 3 Door