2010 Hyundai Accent brake
[x] Cancel search: brakePage 81 of 284

1
FEATURES OF YOUR HYUNDAI
69
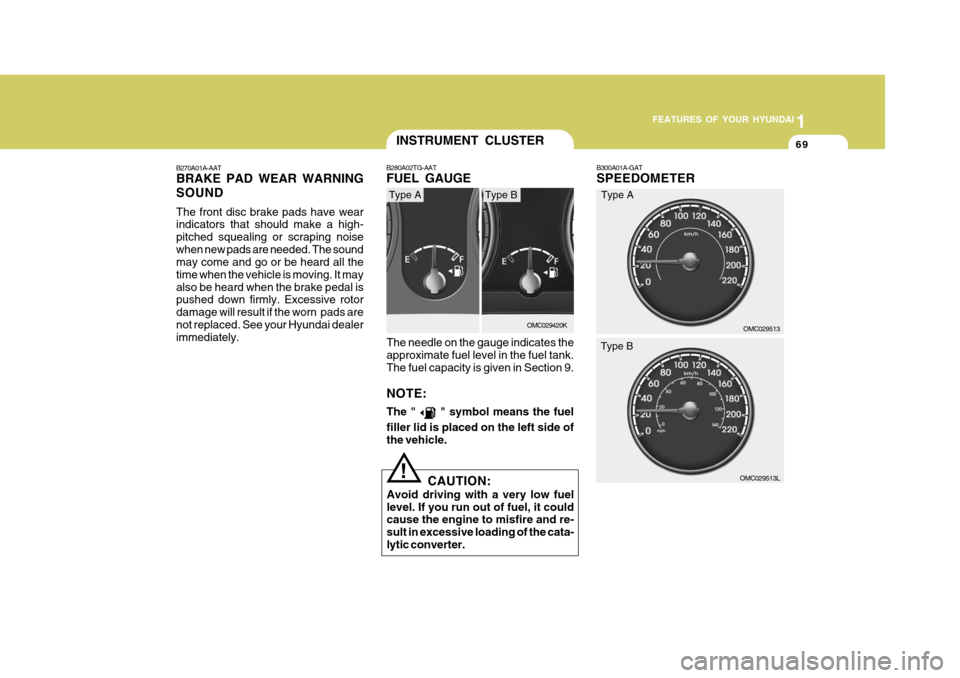
B300A01A-GAT SPEEDOMETER
OMC029513
OMC029513L
Type A
Type B
B270A01A-AAT BRAKE PAD WEAR WARNING SOUND The front disc brake pads have wear indicators that should make a high- pitched squealing or scraping noisewhen new pads are needed. The sound may come and go or be heard all the time when the vehicle is moving. It mayalso be heard when the brake pedal is pushed down firmly. Excessive rotor damage will result if the worn pads arenot replaced. See your Hyundai dealer immediately.
INSTRUMENT CLUSTER
The needle on the gauge indicates the approximate fuel level in the fuel tank. The fuel capacity is given in Section 9. NOTE: The "
" symbol means the fuel
filler lid is placed on the left side of the vehicle.
B280A02TG-AAT FUEL GAUGE
OMC029420K
Type AType B
CAUTION:
Avoid driving with a very low fuel level. If you run out of fuel, it could cause the engine to misfire and re- sult in excessive loading of the cata-lytic converter.
!
Page 106 of 284

1FEATURES OF YOUR HYUNDAI
94PARKING BRAKE
Always engage the parking brake be- fore leaving the car. This also turns on the parking brake indicator light when the key is in the "ON" or "START"position. Before driving away, be sure that the parking brake is fully released and the indicator light is off.
B530A03A-AAT
OMC035017
DAY/NIGHT INSIDE REARVIEW MIRROR
B520A01A-AAT
Your Hyundai is equipped with a day/ night inside rearview mirror. The "night" position is selected by flipping the tab at the bottom of the mirror toward you.In the "night" position, the glare of headlights of cars behind you is re- duced.
OMC025047
!
B510C01A-AAT FOLDING THE OUTSIDE REAR- VIEW MIRRORS
To fold the outside rearview mirrors, push them towards the rear.The outside rearview mirrors can be folded rearward for parking in narrow areas. WARNING:
Do not adjust or fold the outside rearview mirrors while the vehicle is moving. This could result in loss ofcontrol, and an accident which could cause death, serious injury or prop- erty damage.
OMC025051
Page 107 of 284

1
FEATURES OF YOUR HYUNDAI
95
Applying the parking brake To engage the parking brake, first apply the foot brake and then without press-ing the release button in, pull the park-
ing brake lever up as far as possible. In addition it is recommended that whenparking the vehicle on a gradient, the shift lever should be positioned in the appropriate low gear on manual transaxlevehicles or in the P (Park) position on automatic transaxle vehicles.
CAUTION:
Driving with the parking brake ap-plied will cause excessive brake pad (or lining) and brake rotor wear.
!
!WARNING:
Whenever leaving vehicle or parking always set the parking brake as far as possible and fully engage the vehicle's transaxle into the park po-sition. Vehicles not fully engaged in park with the parking brake set are at risk for moving inadvertently andinjuring yourself or others.
Releasing the parking brake To release the parking brake, first apply the foot brake and pull up the parkingbrake lever slightly. Secondly, depress the release button and lower the parking brake lever while holding the button.
HIGH-MOUNTED REAR STOP LIGHT
B550A01S-GAT
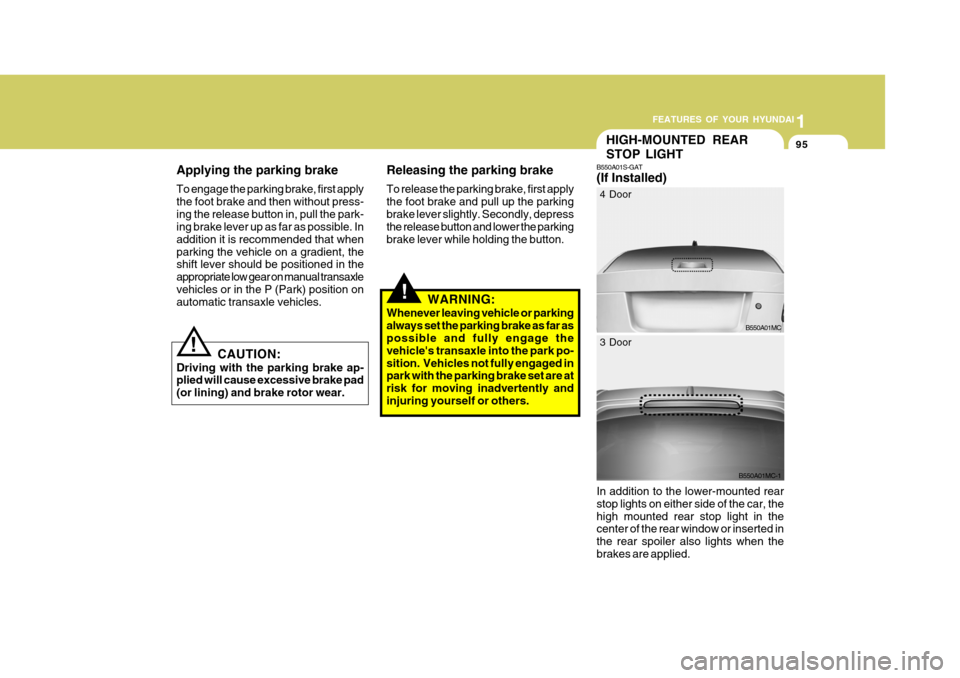
(If Installed) In addition to the lower-mounted rear stop lights on either side of the car, thehigh mounted rear stop light in the center of the rear window or inserted in the rear spoiler also lights when thebrakes are applied.
B550A01MC
4 Door
B550A01MC-1
3 Door
Page 163 of 284

2
Engine Exhaust can be Dangerous! ............................. 2-2
Before Starting the Engine ............................................ 2-3
Key Position ................................................................. 2-4Starting ......................................................................... 2-5
Operating the Manual Transaxle .................................. 2-7
Automatic Transaxle ..................................................... 2-9Anti-lock Brake System (ABS) .................................... 2-13
Electronic Stability Program (ESP) ..............................2-14
Vehicle Stability Management (VSM) ..........................2-15
Rear Parking Assist System ....................................... 2-16
Good Braking Practices .............................................. 2-18
Driving for Economy .................................................... 2-19
Smooth Cornering ........................................................ 2-21
Winter Driving .............................................................. 2-21
Trailer or Vehicle Towing ............................................. 2-24
DRIVING YOUR HYUNDAI
2
Page 165 of 284

2
DRIVING YOUR HYUNDAI
3
2
DRIVING YOUR HYUNDAI
3
!
BEFORE STARTING THE EN- GINE
C020A03O-GAT Before you start the engine, you should always:
1. Look around the vehicle to be sure
there are no flat tires, puddles of oil, water or other indications of pos- sible trouble.
2. After entering the car, check to be sure the parking brake is engaged.
3. Check that all windows, and lights are clean.
4. Check that the interior and exterior
mirrors are clean and in position.
5. Check your seat, seatback and headrest to be sure they are in theirproper positions.
6. Lock all the doors.
7. Fasten your seat belt and be sure
that all other occupants have fas- tened theirs.
8. Turn off all lights and accessories
that are not needed.
9. When you turn the ignition switch to "ON", check that all appropriatewarning lights are operating andthat you have sufficient fuel.
10.Check the operation of warning
lights and all bulbs when key is inthe "ON" position. WARNING:
(Diesel Engine)
To ensure that sufficient vacuum exists within the brake system dur-ing cold weather start-up condi- tions, it is necessary to run the engine at idle for several secondsafter starting the engine.TO START THE ENGINE
C030A01A-GAT COMBINATION IGNITION SWITCH
o If your Hyundai is equipped with a manual transaxle, place the shift lever in neutral and depress the clutch pedal fully.
o If your Hyundai has an automatic
transaxle, place the shift lever in "P"(park).
o To start the engine, insert the igni- tion key and turn it to the "START"position. Release it as soon as the engine starts. Do not hold the key inthe "START" position for more than 15 seconds.
NOTE: For safety, the engine will not start if the shift lever is not in "P" or "N" position (Automatic transaxle).
!WARNING:
o Always wear appropriate shoes when operating your vehicle. Unsuitable shoes (high heels, skiboots, etc.) may interfere with your ability to use the brake and accel- erator pedal, and the clutch (ifinstalled).
o When you intend to park or stop
the vehicle with the engine on, becareful not to depress the accel- erator pedal for a long period of time. It may overheat the engine orexhaust system and cause fire.
Page 170 of 284

2 DRIVING YOUR HYUNDAI
8
C070D02O-AAT Good Driving Practices
o Never take the car out of gear andcoast down a hill. This is extremely hazardous. Always leave the car in gear.
o Don't "ride" the brakes. This can cause them to overheat and mal-function. Instead, when you are driv- ing down a long hill, slow down andshift to a lower gear. When you do this, engine braking will help slow the car.
o Slow down before shifting to a lower gear. This will help avoid over-rev-ving the engine, which can causedamage.
o Slow down when you encounter cross
winds. This gives you much bettercontrol of your car.
o Be sure the car is completely stopped
before you attempt to shift into re-verse. The transaxle can be dam- aged if you do not. To shift into reverse, depress the clutch, movethe shift lever to neutral, wait three seconds, then shift to the reverse position.
o Exercise extreme caution when driv- ing on a slippery surface. Be espe-
C070E03A-GAT RECOMMENDED SHIFT POINTS
Shift
from-to Recommended
The shift points as shown above are recommended for optimum fuel economy and performance. 20 km/h (15 mph) 40 km/h (25 mph)55 km/h (35 mph) 75 km/h (45 mph)
1-2 2-33-4 4-5
C070B01A-AAT Using the Clutch The clutch should be pressed all the way to the floor before shifting, thenreleased slowly. The clutch pedal should always be used after fully re- turning to the original position. Do notrest your foot on the clutch pedal while driving. This can cause unnecessary wear. Do not partially engage the clutchto hold the car on an incline. This causes unnecessary wear. Use the parking brake to hold the car on anincline. Do not operate the clutch pedal rapidly and repeatedly.
!WARNING:
If your vehicle has a manual transaxle not equipped with a ignition lock switch, it may move and cause aserious accident when starting the engine without depressing the clutch pedal while the parking brake is re-leased and the shift lever not in the N(Neutral) position.
Page 171 of 284

2
DRIVING YOUR HYUNDAI
9
2
DRIVING YOUR HYUNDAI
9
!
cially careful when braking, acceler- ating or shifting gears. On a slipperysurface, an abrupt change in ve- hicle speed can cause the drive wheels to lose traction and the ve-hicle to go out of control.
WARNING:
o Avoid high cornering speeds.
o Do not make quick steering wheel movements, such as sharp lanechanges or fast, sharp turns.
o Always wear your seat belts. In a collis ion crash, an unbelted person
is significantly more likely to diethan a person wearing a seatbelt.
o The risk of rollover is greatly in-
creased if you lose control ofyour vehicle at highway speeds.
o Loss of control often occurs if
two or more wheels drop off theroadway and the driver oversteers to reenter the roadway.
o In the event your vehicle leaves the roadway, do not steer sharply.Instead, slow down before pull- ing back into the travel lanes.
o Never exceed posted speed lim- its.
AUTOMATIC TRANSAXLE
OMC035014
C090A01A-GAT The highly efficient Hyundai automatic transaxle has four forward speeds and one reverse speed. It has a conven- tional shift pattern as shown in theillustration.
CAUTION:
Never shift into "R" or "P" positionwhile the vehicle is moving. NOTE:
Depress the brake pedal and push the button when shift- ing. Push the button when shifting. The selector lever can be shifted freely.
For optimum fuel economy, acceler-ate gradually. The transaxle will auto- matically shift to the second, third andoverdrive gears.
!
Page 172 of 284

2 DRIVING YOUR HYUNDAI
10
This means that no shift-up to 3rd gear is performed. However, the shift-up tothird gear is done when the car speed exceeds a certain value to prevent the
engine from over-revving. Manuallymove the selector to "D" returning to normal driving condition.
C090E02A-AAT o D (Drive): Use for normal driving. Bring the car to a complete stop before shifting the selector to "D" position. The transaxlewill automatically shift through a four- gear sequence. Never downshift manu- ally to "2" position or "L" position whenvehicle speed is more than 95 km/h (60 mph).
C090C01A-AAT o R (Reverse): Use for backing up the vehicle. Bring the car to a complete stop before shift-ing the selector lever to "R" position. C090G01A-GAT o L (Low gear): Use for driving up a very steep grade or for engine braking when descendingsteep hills. When downshifting to "L", the transaxle will temporarily remain in second gear until the vehicle hasslowed enough for low gear to engage. Do not exceed 50 km/h (30 mph) in low gear.
C090D02A-AAT o N (Neutral): In the "N" position, the transaxle is in neutral, which means that no gearsare engaged. The engine can be started with the shift lever in "N" position, although this is not recommended ex-cept if the engine stalls while the car is moving.
C090B02A-AAT The Function of Each Position Is As Follows: o P (Park): Use to hold the vehicle in place when parking or while starting the engine. Whenever parking the car, apply the parking brake and shift the selectorlever to the "P" (Park) position.
!
CAUTION:
Never place the selector lever in the "P" (Park) position unless the ve- hicle is fully stopped. Failure toobserve this caution will cause se- vere damage to the transaxle.
C090F01A-AAT o 2 (Second gear): Use for driving on a slippery road, hill climbing or engine braking downhill. "2" automatically shifts between first and second gears.C090H01A-GAT NOTE:
o For smooth and safe operation,
depress the brake pedal when shifting from "Neutral" position or "Park" position to a forward orreverse gear.