2010 HONDA RIDGELINE display
[x] Cancel search: displayPage 39 of 151
Navigation System39
Showing the Map of Current
Position
The Current Position selection
assumes that you are looking for a
destination in the immediate area. The
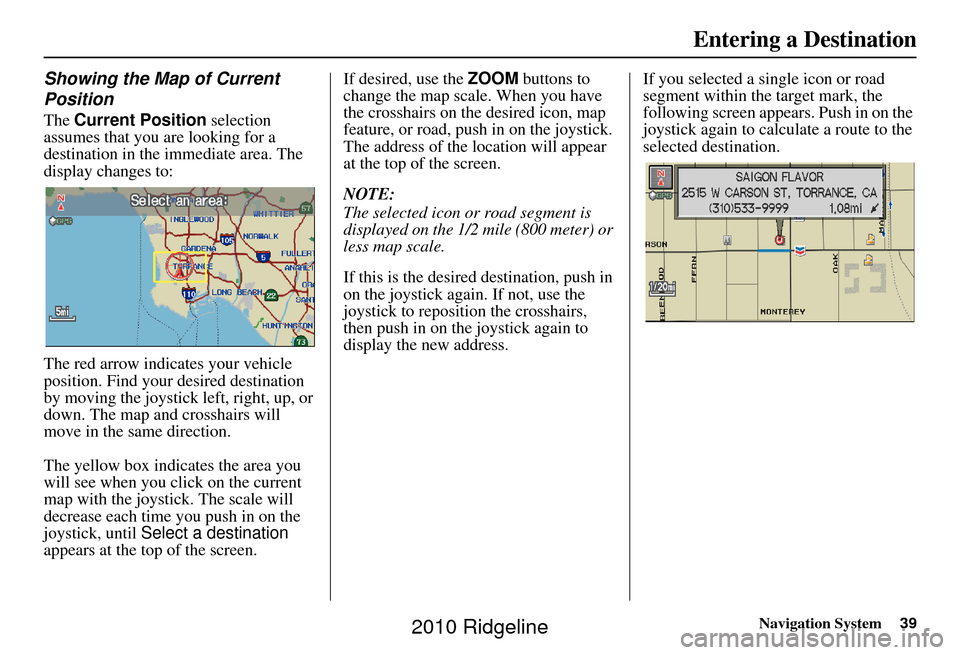
display changes to:
The red arrow indicates your vehicle
position. Find your desired destination
by moving the joystick left, right, up, or
down. The map and crosshairs will
move in the same direction.
The yellow box indicat es the area you
will see when you click on the current
map with the joystick. The scale will
decrease each time you push in on the
joystick, until Select a destination
appears at the top of the screen. If desired, use the
ZOOM buttons to
change the map scale. When you have
the crosshairs on the desired icon, map
feature, or road, push in on the joystick.
The address of the location will appear
at the top of the screen.
NOTE:
The selected icon or road segment is
displayed on the 1/2 mile (800 meter) or
less map scale.
If this is the desired destination, push in
on the joystick again. If not, use the
joystick to reposition the crosshairs,
then push in on the joystick again to
display the new address. If you selected a single icon or road
segment within the target mark, the
following screen appears. Push in on the
joystick again to calcu
late a route to the
selected destination.
Entering a Destination
2010 Ridgeline
Page 40 of 151
40Navigation System
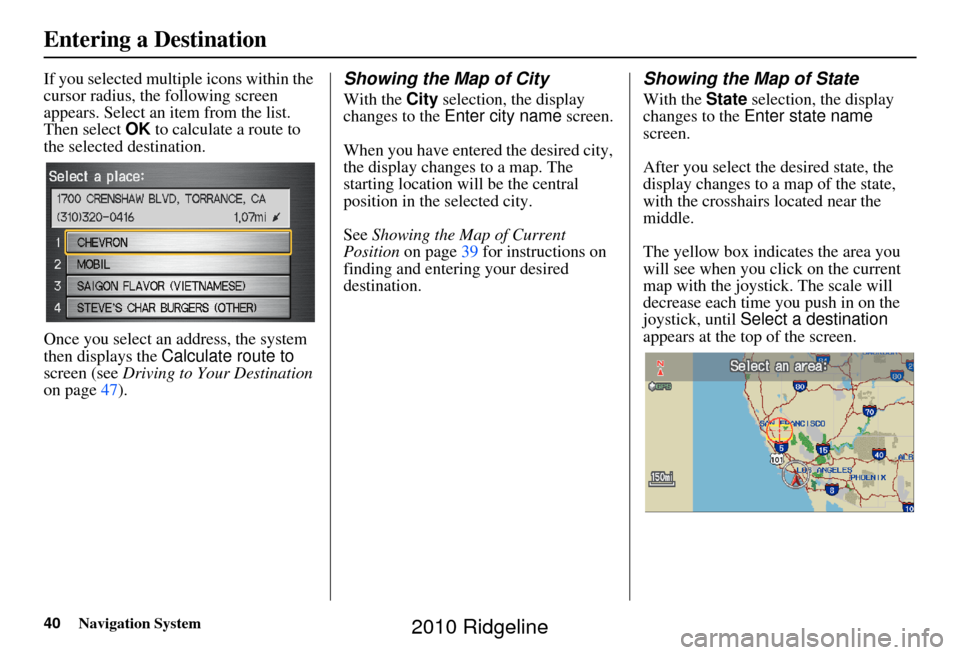
If you selected multiple icons within the
cursor radius, the following screen
appears. Select an item from the list.
Then select OK to calculate a route to
the selected destination.
Once you select an address, the system
then displays the Calculate route to
screen (see Driving to Your Destination
on page 47).Showing the Map of City
With the City selection, the display
changes to the Enter city name screen.
When you have entered the desired city,
the display changes to a map. The
starting location will be the central
position in the selected city.
See Showing the Map of Current
Position on page 39 for instructions on
finding and entering your desired
destination.
Showing the Map of State
With the State selection, the display
changes to the Enter state name
screen.
After you select the desired state, the
display changes to a map of the state,
with the crosshairs located near the
middle.
The yellow box indicates the area you
will see when you click on the current
map with the joystick. The scale will
decrease each time you push in on the
joystick, until Select a destination
appears at the top of the screen.
Entering a Destination
2010 Ridgeline
Page 41 of 151
Navigation System41
Use the joystick to move the crosshairs
to the area of the state close to your
intended destination. If desired, use the
ZOOM buttons to change the map scale.
When you have the crosshairs in the
desired area, push in on the joystick.
The address of the location you have
selected will appear at the top of the
screen.
NOTE:
The selected icon or road segment is
displayed on the 1/2 mile (800 meter) or
less map scale. If this is the desired address, push in on
the joystick again. If not, use the
joystick to reposition the crosshairs,
then push in on the joystick again to
display the new address.
If you selected a single icon or road
segment, push in on
the joystick again to
select the new address. If you selected
multiple icons within the cursor radius,
select an item from the list on the
screen.
Once you select an address, the system
then displays the Calculate route to
screen (see Driving to Your Destination
on page 47).Showing the Map of Continental
USA
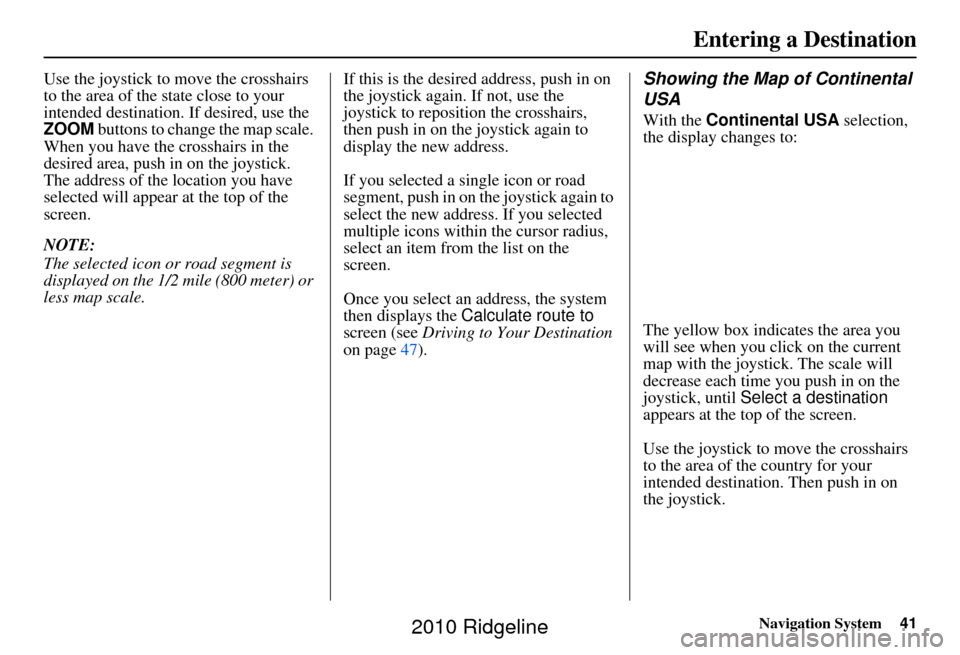
With the Continental USA selection,
the display changes to:
The yellow box indicates the area you
will see when you click on the current
map with the joystick. The scale will
decrease each time you push in on the
joystick, until Select a destination
appears at the top of the screen.
Use the joystick to move the crosshairs
to the area of the country for your
intended destination. Then push in on
the joystick.
Entering a Destination
2010 Ridgeline
Page 42 of 151
42Navigation System
Entering a Destination
If desired, use the ZOOM buttons to
change the map scale. When you have
the crosshairs on the desired icon, map
feature, or road, push in on the joystick.
The address of the location you have
selected will appear at the top of the
screen.
NOTE:
The selected icon or road segment is
displayed on the 1/2 mile (800 meter) or
less map scale.
If this is the desired address, push in on
the joystick again. If not, use the
joystick to reposition the crosshairs,
then push in on th e joystick again to
display the new address.
If you selected a single icon or road
segment, push in on the joystick again to
select the new address. If you selected
multiple icons within the cursor radius,
select an item from the list on the
screen.
Once you select an address, the system
then displays the Calculate route to
screen (see Driving to Your Destination
on page 47).By Previous Destinations
Every time you route to a destination,
that destination is saved by the system.
Up to 50 destinations can be stored.
Select Previous Destinations from
the Enter destination by screen to
choose one of those destinations.
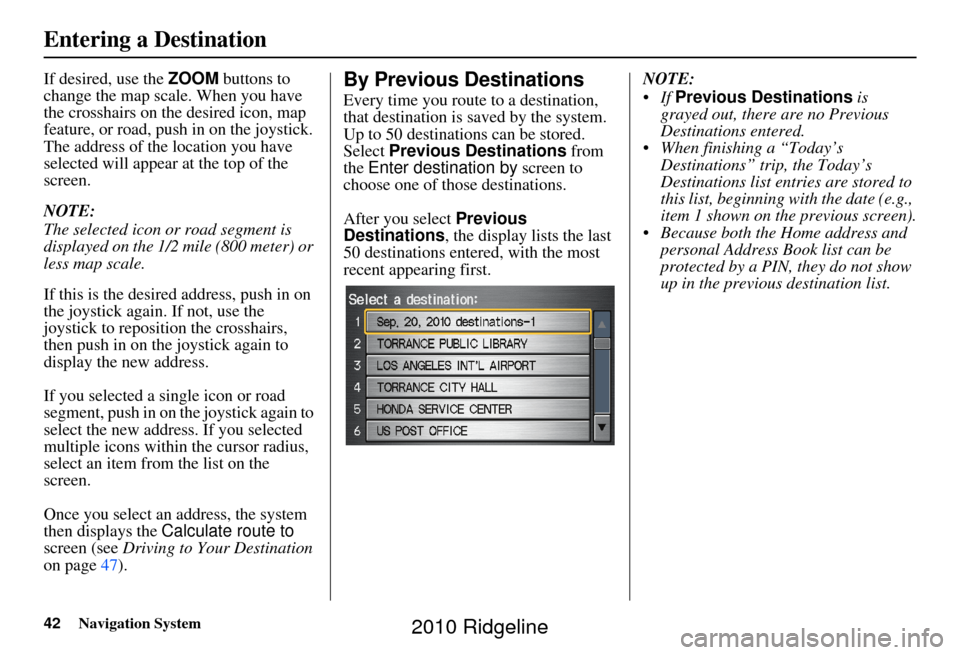
After you select Previous
Destinations , the display lists the last
50 destinations entered, with the most
recent appearing first. NOTE:
Previous Destinations is
grayed out, there are no Previous
Destinations entered.
When finishing a “Today’s Destinations” trip, the Today’s
Destinations list entries are stored to
this list, beginning with the date (e.g.,
item 1 shown on the previous screen).
Because both the Home address and personal Address Book list can be
protected by a PIN, they do not show
up in the previous destination list.
2010 Ridgeline
Page 43 of 151
Navigation System43
Entering a Destination
Scroll through the list and say the line
number (1-6) of the destination, or touch
the desired destination you want.
Once you select the desired destination,
the system then displays the Calculate
route to screen (see Driving to Your
Destination on page47).
NOTE:
Prior to departure, you can set areas to avoid. The system then includes
them in its calculations for the
destination you have entered. See
Edit Avoid Area on page 91.
For information on the available voice commands, see Voice
Command Index on page138.By Today’s Destinations
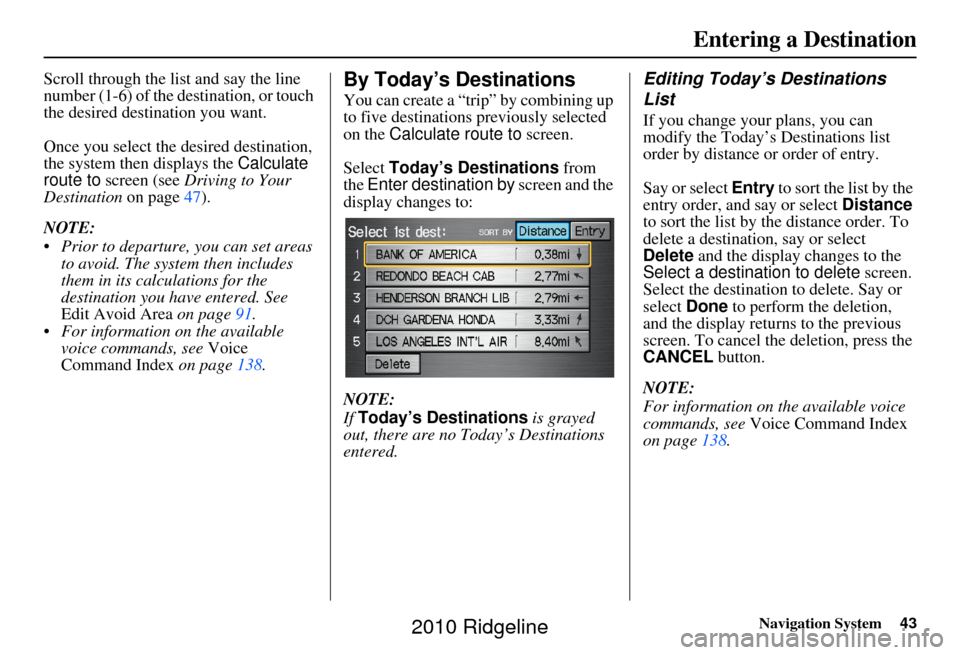
You can create a “trip” by combining up
to five destinations previously selected
on the Calculate route to screen.
Select Today’s Destinations from
the Enter destination by screen and the
display changes to:
NOTE:
If Today’s Destinations is grayed
out, there are no Today’s Destinations
entered.
Editing Today’s Destinations
List
If you change your plans, you can
modify the Today’s Destinations list
order by distance or order of entry.
Say or select Entry to sort the list by the
entry order, and say or select Distance
to sort the list by the distance order. To
delete a destination, say or select
Delete and the display changes to the
Select a destination to delete screen.
Select the destination to delete. Say or
select Done to perform the deletion,
and the display returns to the previous
screen. To cancel the deletion, press the
CANCEL button.
NOTE:
For information on the available voice
commands, see Voice Command Index
on page 138.
2010 Ridgeline
Page 44 of 151
44Navigation System
Entering a Destination
Adding Destinations to the List
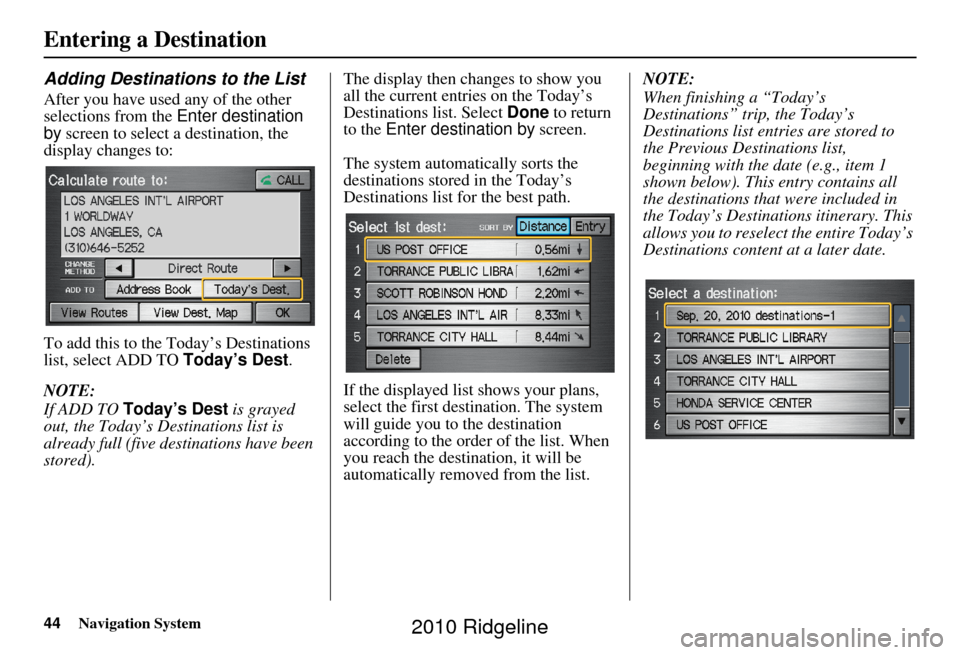
After you have used any of the other
selections from the Enter destination
by screen to select a destination, the
display changes to:
To add this to the Today’s Destinations
list, select ADD TO Today’s Dest.
NOTE:
If ADD TO Today’s Dest is grayed
out, the Today’s Destinations list is
already full (five destinations have been
stored). The display then changes to show you
all the current entr
ies on the Today’s
Destinations list. Select Done to return
to the Enter destination by screen.
The system automatically sorts the
destinations stored in the Today’s
Destinations list for the best path.
If the displayed list shows your plans,
select the first des tination. The system
will guide you to the destination
according to the order of the list. When
you reach the destination, it will be
automatically removed from the list. NOTE:
When finishing a “Today’s
Destinations” trip, the Today’s
Destinations list entries are stored to
the Previous Destinations list,
beginning with the date (e.g., item 1
shown below). This entry contains all
the destinations that
were included in
the Today’s Destinations itinerary. This
allows you to reselect the entire Today’s
Destinations content at a later date.
2010 Ridgeline
Page 45 of 151
Navigation System45
Entering a Destination
By Address Book
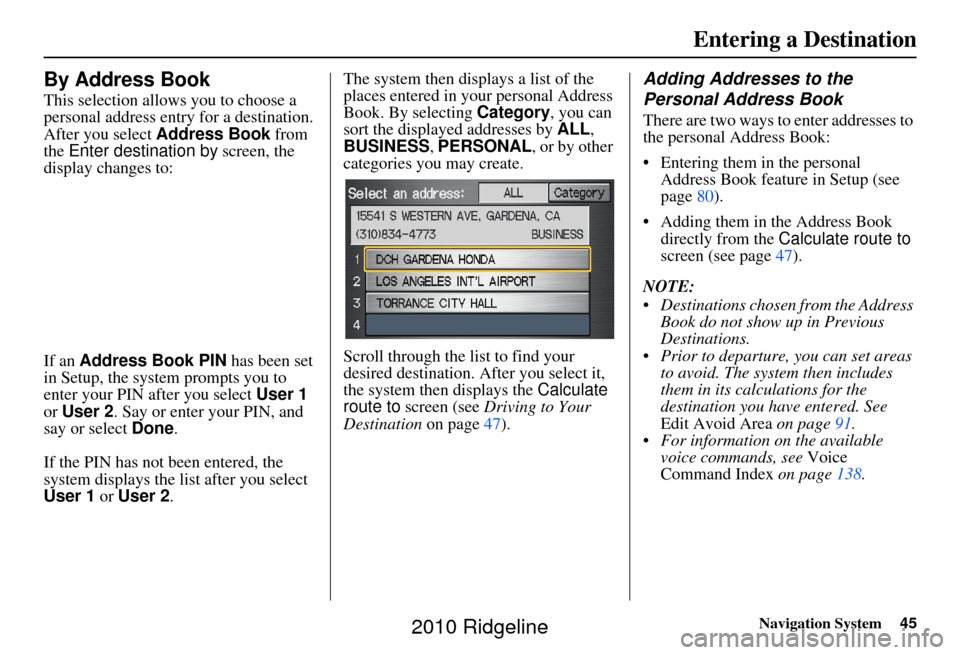
This selection allows you to choose a
personal address entry for a destination.
After you select Address Book from
the Enter destination by screen, the
display changes to:
If an Address Book PIN has been set
in Setup, the system prompts you to
enter your PIN af ter you select User 1
or User 2 . Say or enter your PIN, and
say or select Done.
If the PIN has not been entered, the
system displays the list after you select
User 1 or User 2 . The system then displays a list of the
places entered in your personal Address
Book. By selecting
Category, you can
sort the displayed addresses by ALL,
BUSINESS, PERSONAL, or by other
categories you may create.
Scroll through the list to find your
desired destination. After you select it,
the system then displays the Calculate
route to screen (see Driving to Your
Destination on page47).
Adding Addresses to the
Personal Address Book
There are two ways to enter addresses to
the personal Address Book:
• Entering them in the personal
Address Book feature in Setup (see
page 80).
• Adding them in the Address Book
directly from the Calculate route to
screen (see page 47).
NOTE:
Destinations chosen from the Address Book do not show up in Previous
Destinations.
Prior to departure, you can set areas to avoid. The system then includes
them in its calculations for the
destination you have entered. See
Edit Avoid Area on page91.
For information on the available voice commands, see Voice
Command Index on page138.
2010 Ridgeline
Page 46 of 151
46Navigation System
Entering a Destination
By Go Home
Selecting Go Home from the Enter
destination by screen takes you home
or to a frequently used address you have
chosen.
If a Go Home PIN has been set in
Setup, the system prompts you to enter
your PIN. Say or enter your PIN, and
say or select Done. The system will
then display the Calculate route to
screen (see Driving to Your Destination
on page 47).
If a Go Home PIN has not been set, the
system displays the Calculate route to
screen after you select Go Home (see
Driving to Your Destination on
page 47). NOTE:
To edit Home Address, see
Home
Address in System Setup on page 84.
Prior to departure, you can set areas to avoid. The system then includes
them in its calculations for the
destination you have entered. See
Edit Avoid Area on page91.
PINs are optional. If you choose to use a PIN, make sure you remember
it. If you forget your PIN, your dealer
will have to reset it for you.
If a PIN is desired, enter it using the Personal preference PIN number
feature in Setup.
See page 85 for information on
entering your Go Home PIN.
2010 Ridgeline