�Ý
�Û
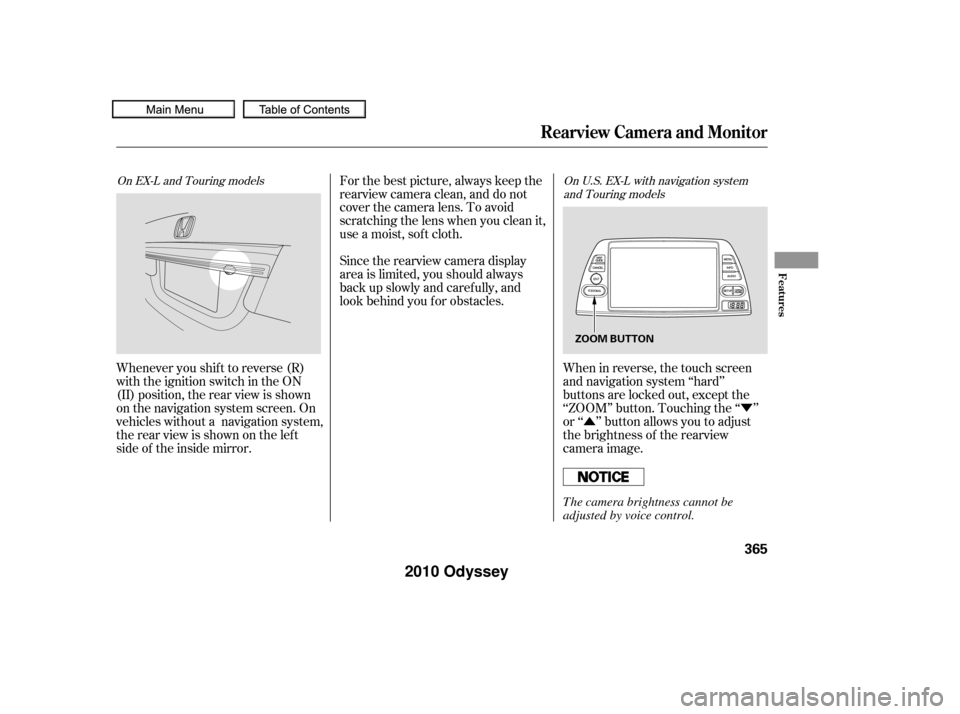
When in reverse, the touch screen
and navigation system ‘‘hard’’
buttons are locked out, except the
‘‘ZOOM’’ button. Touching the ‘‘ ’’
or ‘‘ ’’ button allows you to adjust
the brightness of the rearview
camera image.
For the best picture, always keep the
rearview camera clean, and do not
cover the camera lens. To avoid
scratching the lens when you clean it,
use a moist, sof t cloth.
Since the rearview camera display
area is limited, you should always
back up slowly and caref ully, and
look behind you f or obstacles.
Whenever you shif t to reverse (R)
with the ignition switch in the ON
(II) position, the rear view is shown
on the navigation system screen. On
vehicles without a navigation system,
the rear view is shown on the lef t
side of the inside mirror.
On EX-L and Touring models On U.S. EX-L with navigation system
and Touring models
Rearview Camera and Monitor
Features
365
ZOOM BUTTON
The camera brightness cannot be
adjusted by voice control.
�����—�����—�
���y�
�������������y���
�(�����������y���������y
2010 Odyssey
You can turn the monitor on and of f
by pressing the monitor of f button
when the shif t lever is in reverse.
The monitor turns on everytime you
shif t to reverse, even if you turned it
of f the last time.Monitor brightness is adjusted
automatically by sensors. If you use
the monitor continuously at high
temperature, the monitor will
gradually dim.
If a bright light (such as sunlight) is
shining on the inside mirror, the
image may be dif f icult to see. The inside mirror will be hot when
you use the monitor f or an extended
period of time.
On U.S. EX-L without navigation system
and Canadian EX-L models
Rearview Camera and Monitor
366
SENSOR
SENSOR MONITOR OFF BUTTON
REARVIEW MONITOR
�����—�����—�
���y�
�������������y���
�(�����������y�������
�y
2010 Odyssey
T he publications shown below can be purchased f rom Helm
Incorporated. You can order by phone or online:
If you are interested in other years or models, contact Helm Inc.
at 1-800-782-4356.Call Helm Inc. at 1-800-782-4356 (credit card orders only)
Go online atCovers maintenance and recommended procedures f or
repair to engine and chassis components. It is written
f or the journeyman mechanic, but it is simple enough
f or most mechanically inclined owners to understand.
Complements the Service Manual by providing in-depth
troubleshooting inf ormation f or each electrical circuit
in your vehicle.
Describes the procedures involved in the replacement
of damaged body parts.
Authorized Manuals
Purchasing Factory Authorized Manuals
Service Manual:
Electrical T roubleshooting Manual:
Body Repair Manual:
(U.S. only)
Authorized Manuals
511
Publication Form Number
61SHJ05
61SHJ04EL
61SHJ40
31SHJ650
31SHJ830
31SHJM50 31SHJQ50 HON-R Form Description
2007-10 Honda Odyssey Service Manual 2005-10 Honda Odyssey
Electrical Troubleshooting Manual
2005 Model Series Honda Odyssey Body Repair Manual
2010 Honda Odyssey Owner’s Manual 2010 Honda Odyssey
Navigation System Manual 2010 Honda Odyssey
Honda Service History 2010 Honda Odyssey
Technology Reference Guide
Order Form for Previous Years-Indicate Year and Model Desired
www. helminc. com
�����—�����—�
���y�
�������������y���
�(�����������y�����
���y
2010 Odyssey