Page 219 of 351

Fuel Economy Factors
The following factors can lower your
vehicle's fuel economy:● Aggressive driving (hard
acceleration and braking)
● Excessive idling, accelerating and
braking in stop-and-go traffic
● Cold engine operation (engines
are more efficient when warmedup)
● Driving with a heavy load or the air
conditioner running
● Improperly inflated tires Improving Fuel Economy
Vehicle Maintenance
A properly maintained vehicle
maximizes fuel economy. Poor
maintenance can significantly reduce
fuel economy. Always maintain your
vehicle according to the maintenance
messages displayed on the
information display (see
Owner's
Maintenance Checks on page 250).
For example:
● Use the recommended viscosity
motor oil, displaying the API
Certification Seal (see page253).
● Maintain proper tire inflation -
An under-inflated tire increases‘‘ rolling resistance, ’’which reduces
fuel economy.
● Avoid carrying excess weight in
your vehicle -It puts a heavier
load on the engine, increasing fuel consumption. ●
Keep your vehicle clean -In
particular, a build-up of snow or
mud on your vehicle's underside
adds weight and rolling resistance.
Frequent cleaning helps your fueleconomy.
Drive Efficiently● Drive moderately -Rapid
acceleration, abrupt cornering, and
hard braking increase fuelconsumption.
● Observe the speed limit -
Aerodynamic drag has a big effect
on fuel mileage at speeds above 45
mph (75 km/h). Reduce your
speed and you reduce the drag.
Trailers, car top carriers, roof
racks and bike racks are also big
contributors to increased drag.
● Always drive in the highest gearpossible -If your vehicle has a
manual transmission, you can
boost your fuel economy by up
shifting as early as possible.
Fuel Economy
204
Table of Contents
Page 224 of 351
Load Limits (Payload)
The maximum load for your vehicle
is 850 lbs (385 kg).
See Tire And Loading Information
label attached to the driver'sdoorjamb.Label Example
This figure includes the total weight
of all occupants, cargo, and
accessories, and the tongue load if
you are towing a trailer.
Overloading or improper
loading can affect handling and
stability and cause a crash in
which you can be hurt or killed.
Follow all load limits and other
loading guidelines in thismanual.Steps for Determining Correct LoadLimit
-
1. Locate the statement ‘‘The
combined weight of occupants and
cargo should never exceed XXX kg
or XXX lbs. ’’on your vehicle's
placard.
2. Determine the combined weight of the driver and passengers that will
be riding in your vehicle.
3. Subtract the combined weight of the driver and passengers from
XXX kg or XXX lbs.
CONTINUED
Carrying Cargo
209
Before Driving
Table of Contents
Page 225 of 351

4. The resulting figure equals theavailable amount of cargo and
luggage load capacity. For
example, if the ‘‘XXX ’’amount
equals 1,400 lbs. and there will be
five 150 lb. passengers in your
vehicle, the amount of available
cargo and luggage load capacity is
650 lbs.(1,400 -750 (5 ꭦ150) =650
lbs.)
5. Determine the combined weight of luggage and cargo being loaded on
the vehicle. That weight may not
safely exceed the available cargo
and luggage load capacity
calculated in Step 4.
6. If your vehicle will be towing a trailer, load from your trailer will
be transferred to your vehicle.
Consult this manual to determine
how this reduces the available
cargo and luggage load capacity of
your vehicle. Example 1
Example 2
Example 3
In addition, the total weight of the
vehicle, all occupants, accessories,
cargo, and trailer tongue load must
not exceed the Gross Vehicle Weight
Rating (GVWR) or the Gross Axle
Weight Rating (GAWR). Both are on
a label on the driver's doorjamb.
Max Load (850 lbs) Passenger Weight
(150 lbs x 2
=300 lbs) Cargo Weight
(550 lbs)
Max Load (850 lbs)
Passenger Weight
(150 lbs x 4
=600 lbs) Cargo Weight
(250 lbs)
Max Load (850 lbs)
Passenger Weight
(150 lbs x 5
=750 lbs) Cargo Weight
(100 lbs)
Carrying Cargo
210
Table of Contents
Page 268 of 351

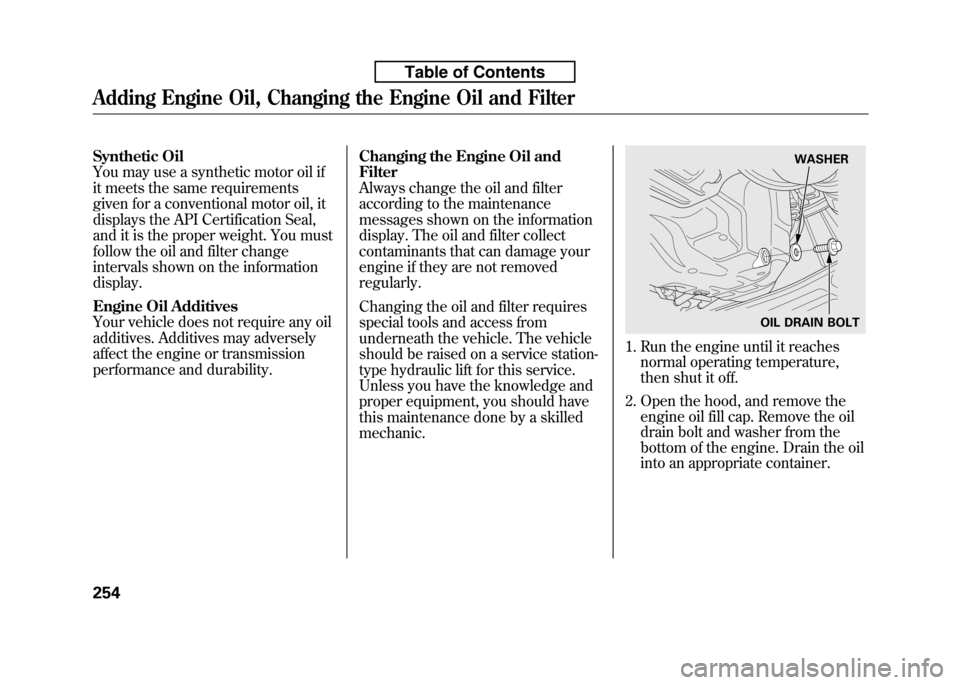
Unscrew and remove the engine oil
fill cap on the valve cover. Pour in the
oil slowly and carefully so you do not
spill any. Clean up any spills
immediately. Spilled oil could
damage components in the enginecompartment.
Reinstall the engine oil fill cap, and
tighten it securely. Wait a few
minutes, and recheck the oil level on
the engine oil dipstick. Do not fill
above the upper mark; you could
damage the engine.Recommended Engine Oil
Oil is a major contributor to your
engine's performance and longevity.
Always use a premium-grade 5W-20
detergent oil displaying the API
Certification Seal. This seal indicates
the oil is energy conserving, and that
it meets the American Petroleum
Institute's latest requirements.
Honda Motor Oil is the preferred
5W-20 lubricant for your vehicle. It is
highly recommended that you use
Honda Motor Oil in your vehicle for
optimum engine protection. Make
sure the API Certification Seal says‘‘
For Gasoline Engines. ’’
The oil viscosity or weight is
provided on the container's label.
5W-20 oil is formulated for year-
round protection of your vehicle to
improve cold weather starting and
fuel economy.
ENGINE OIL FILL CAPAPI CERTIFICATION SEAL
Ambient Temperature
CONTINUED
Adding Engine Oil
253
Maintenance
Table of Contents
Page 269 of 351

Synthetic Oil
You may use a synthetic motor oil if
it meets the same requirements
given for a conventional motor oil, it
displays the API Certification Seal,
and it is the proper weight. You must
follow the oil and filter change
intervals shown on the informationdisplay.
Engine Oil Additives
Your vehicle does not require any oil
additives. Additives may adversely
affect the engine or transmission
performance and durability.Changing the Engine Oil andFilter
Always change the oil and filter
according to the maintenance
messages shown on the information
display. The oil and filter collect
contaminants that can damage your
engine if they are not removedregularly.
Changing the oil and filter requires
special tools and access from
underneath the vehicle. The vehicle
should be raised on a service station-
type hydraulic lift for this service.
Unless you have the knowledge and
proper equipment, you should have
this maintenance done by a skilledmechanic.
1. Run the engine until it reaches
normal operating temperature,
then shut it off.
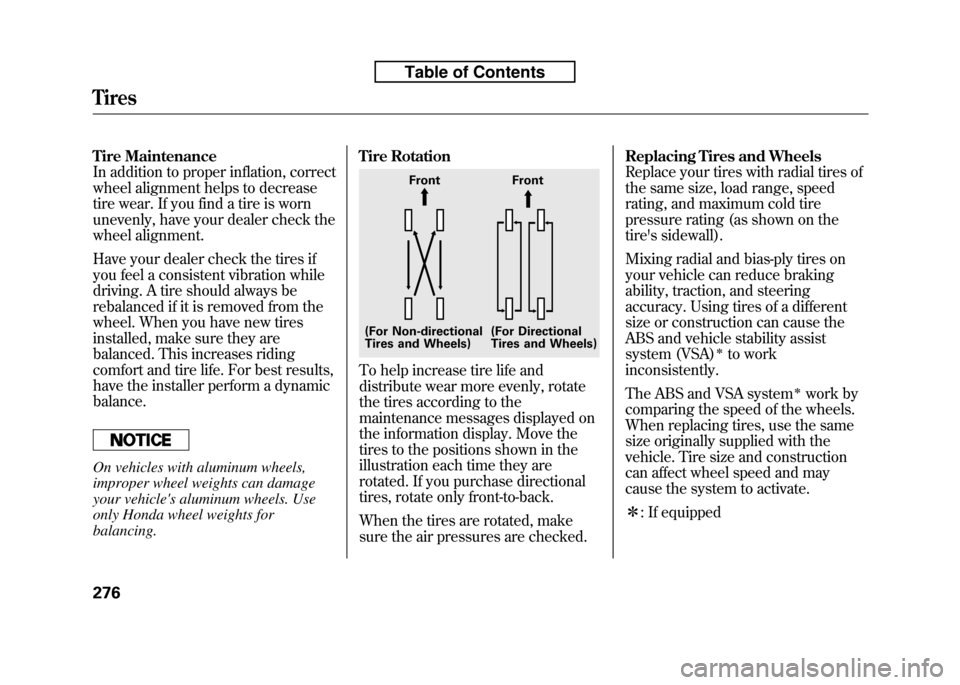
2. Open the hood, and remove the engine oil fill cap. Remove the oil
drain bolt and washer from the
bottom of the engine. Drain the oil
into an appropriate container.
WASHER
OIL DRAIN BOLT
Adding Engine Oil, Changing the Engine Oil and Filter
254
Table of Contents
Page 291 of 351

Tire Maintenance
In addition to proper inflation, correct
wheel alignment helps to decrease
tire wear. If you find a tire is worn
unevenly, have your dealer check the
wheel alignment.
Have your dealer check the tires if
you feel a consistent vibration while
driving. A tire should always be
rebalanced if it is removed from the
wheel. When you have new tires
installed, make sure they are
balanced. This increases riding
comfort and tire life. For best results,
have the installer perform a dynamicbalance.
On vehicles with aluminum wheels,
improper wheel weights can damage
your vehicle's aluminum wheels. Use
only Honda wheel weights forbalancing.Tire Rotation
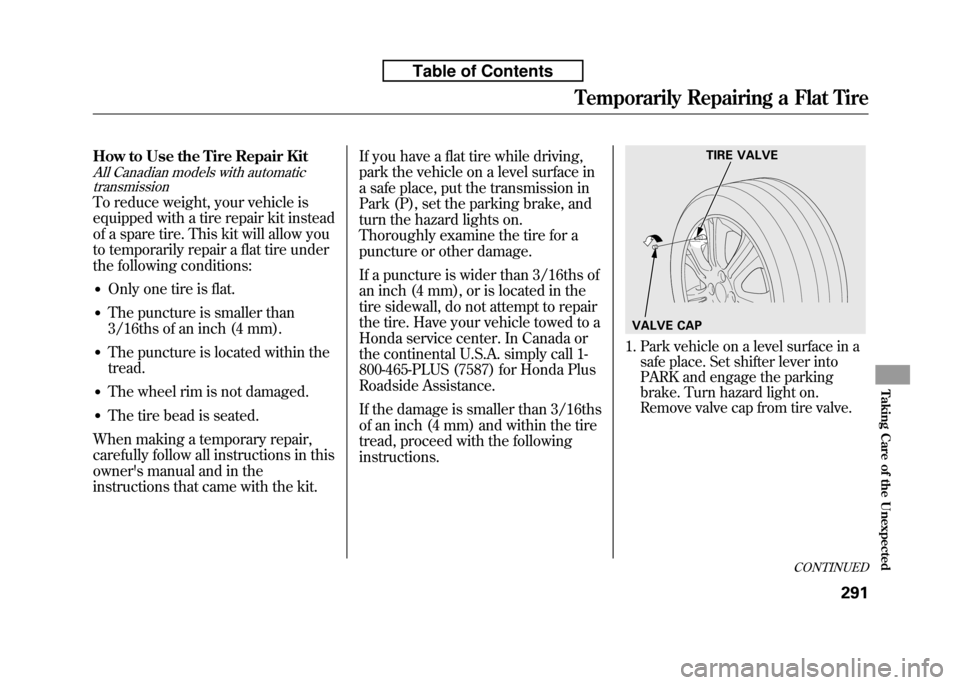
To help increase tire life and
distribute wear more evenly, rotate
the tires according to the
maintenance messages displayed on
the information display. Move the
tires to the positions shown in the
illustration each time they are
rotated. If you purchase directional
tires, rotate only front-to-back.
When the tires are rotated, make
sure the air pressures are checked.Replacing Tires and Wheels
Replace your tires with radial tires of
the same size, load range, speed
rating, and maximum cold tire
pressure rating (as shown on the
tire's sidewall).
Mixing radial and bias-ply tires on
your vehicle can reduce braking
ability, traction, and steering
accuracy. Using tires of a different
size or construction can cause the
ABS and vehicle stability assist
system (VSA)
ꭧto work
inconsistently.
The ABS and VSA system
ꭧwork by
comparing the speed of the wheels.
When replacing tires, use the same
size originally supplied with the
vehicle. Tire size and construction
can affect wheel speed and may
cause the system to activate. ꭧ : If equipped
Front Front
(For Non-directional
Tires and Wheels) (For Directional
Tires and Wheels)
Tires
276
Table of Contents
Page 306 of 351

How to Use the Tire Repair Kit
All Canadian models with automatictransmission
To reduce weight, your vehicle is
equipped with a tire repair kit instead
of a spare tire. This kit will allow you
to temporarily repair a flat tire under
the following conditions:
● Only one tire is flat.
● The puncture is smaller than
3/16ths of an inch (4 mm).
● The puncture is located within the tread.
● The wheel rim is not damaged.
● The tire bead is seated.
When making a temporary repair,
carefully follow all instructions in this
owner's manual and in the
instructions that came with the kit. If you have a flat tire while driving,
park the vehicle on a level surface in
a safe place, put the transmission in
Park (P), set the parking brake, and
turn the hazard lights on.
Thoroughly examine the tire for a
puncture or other damage.
If a puncture is wider than 3/16ths of
an inch (4 mm), or is located in the
tire sidewall, do not attempt to repair
the tire. Have your vehicle towed to a
Honda service center. In Canada or
the continental U.S.A. simply call 1-
800-465-PLUS (7587) for Honda Plus
Roadside Assistance.
If the damage is smaller than 3/16ths
of an inch (4 mm) and within the tire
tread, proceed with the followinginstructions.
1. Park vehicle on a level surface in a
safe place. Set shifter lever into
PARK and engage the parking
brake. Turn hazard light on.
Remove valve cap from tire valve.
TIRE VALVE
VALVE CAP
CONTINUED
Temporarily Repairing a Flat Tire
291
Taking Care of the Unexpected
Table of Contents
Page 327 of 351
Trying to lift or tow your vehicle by the
bumpers will cause serious damage.
The bumpers are not designed to
support the vehicle's weight.
The steering system can be damaged if
the steering wheel is locked. Leave the
ignition switch in the ACCESSORY (I)
position, and make sure the steering
wheel turns freely before you begin towing.If Your Vehicle Gets Stuck
If your vehicle gets stuck in sand,
mud, or snow, call a towing service to
pull it out (see page 311).
For very short distances, such as
freeing the vehicle, you can use the
detachable towing hook that mounts
on the anchor in the front bumper.
To use the towing hook:
1. Take the towing hook and the
extension out of the tool kit in the
cargo area.
2. Put a cloth on the notch of the cover. Using the extension,
carefully pry on the notch of the
cover to remove it.
Emergency Towing, If Your Vehicle Gets Stuck
312
Table of Contents