2010 GMC YUKON buttons
[x] Cancel search: buttonsPage 158 of 614

OFF:Press the bottom of the button for manual
operation of the power liftgate.
The taillamps will flash and a chime will sound when the
power liftgate is moving.
{WARNING:
You or others could be injured if caught in the
path of the power liftgate. Make sure there is no
one in the way of the liftgate as it is opening and
closing.
Notice: If you open the liftgate without checking for
overhead obstructions such as a garage door, you
could damage the liftgate or the liftgate glass.
Always check to make sure the area above and
behind the liftgate is clear before opening it. The power liftgate can be power opened and closed in
the following ways:
.Press and hold the power liftgate button on the
Remote Keyless Entry (RKE) transmitter until the
liftgate starts moving.
Remote Keyless Entry (RKE)
System Operation
on page 3‑5for more
information.
.Pressing the liftgate button on the overhead
console.
.Pressing the touchpad switch on the outside
liftgate handle.
Pressing the buttons, or touchpad switch a second time
while the liftgate is moving reverses the direction.
l: The liftgate can also be closed by pressing the
power liftgate button next to the liftgate latch.
Press the button a second time during liftgate operation
to reverse that operation.
3-16
Page 164 of 614

Programming the Power Windows
If the battery on the vehicle has been recharged,
disconnected, or is not working, you will need to
reprogram each front power window for the express-up
feature to work. Before reprogramming, replace or
recharge the vehicle's battery.
To program each front window, follow these steps:1. With the ignition in ACC/ACCESSORY, ON/RUN, or when Retained Accessory Power (RAP) is
active, close all doors.
2. Press and hold the power window switch until the window is fully open.
3. Pull the power window switch up until the window is fully closed.
4. Continue holding the switch up for approximately two seconds after the window is completely closed.
The window is now reprogrammed. Repeat the process
for the other windows.
Window Lockout
o (Window Lockout): The rear window lockout button
is located on the driver door near the window switches.
Press the right side of the button to disable the rear
window controls. The light on the button will illuminate,
indicating the feature is in use. The rear windows still
can be raised or lowered using the driver window
switches when the lockout feature is active.
To restore power to the rear windows, press the button
again. The light on the button will go out.
Sun Visors
Swing down the visor to block out glare. It can also be
detached from the center mount and moved to the side
to block glare from that direction.
The driver visor may also have buttons for a built-in
garage door opener. See Universal Home Remote
System
on page 3‑69for more information.
Lighted Visor Vanity Mirror
Pull the visor down and lift the cover to access the
mirror. A light comes on when the cover is lifted and
goes out when it is closed.
3-22
Page 175 of 614

Active Fuel Management™
Vehicles with V8 engines may have Active Fuel
Management™. This system allows the engine to
operate on either all or half of its cylinders, depending
on the driving conditions.
When less power is required, such as cruising at a
constant vehicle speed, the system will operate in the
half cylinder mode, allowing the vehicle to achieve
better fuel economy. When greater power demands
are required, such as accelerating from a stop, passing,
or merging onto a freeway, the system will maintain
full-cylinder operation.
If the vehicle has an Active Fuel Management™
indicator, seeDIC Operation and Displays (With DIC
Buttons)
on page 4‑48or DIC Operation and Displays
(Without DIC Buttons)on page 4‑55for more
information on using this display .
Automatic Transmission Operation
If the vehicle is a Two-mode Hybrid, see the Two-mode
Hybrid manual for more information.
If the vehicle is has an automatic transmission, it has an
electronic shift position indicator within the instrument
panel cluster. This display comes on when the ignition
key is turned to the ON/RUN position.
There are several different positions for the shift lever.
Hydra-Matic®4-Speed
Automatic Transmission
3-33
Page 180 of 614

To use this feature, do the following:1. Move the shift lever to M (Manual Mode).
2. Press the plus/minus buttons, located on the steering column shift lever, to select the desired
range of gears for the current driving conditions.
When M (Manual Mode) is selected a number displays
next to the M, indicating the current gear.
This number is the highest gear that can be used.
However, the vehicle can automatically shift to lower
gears as it adjusts to driving conditions. This means
that all gears below that number are available. When
5 (Fifth) is selected, 1 (First) through 5 (Fifth) gears are
automatically shifted by the vehicle, but 6 (Sixth) cannot
be used until the plus/minus button located on the
steering column lever is used to change to the gear.
Grade Braking is not available when Range Selection
Mode is active. See Tow/Haul Mode on page 3‑39. While using Range Selection Mode, cruise control and
the Tow/Haul mode can be used.
Notice:
Spinning the tires or holding the vehicle in
one place on a hill using only the accelerator pedal
may damage the transmission. The repair will not be
covered by the vehicle warranty. If you are stuck, do
not spin the tires. When stopping on a hill, use the
brakes to hold the vehicle in place.
Low Traction Mode
If the vehicle has the Hydra-Matic®6-Speed Automatic
Transmission, it has a Low Traction Mode that assists in
vehicle acceleration when road conditions are slippery,
such as with ice or snow. While the vehicle is at a stop,
select the second gear range using Range Selection
Mode. This will limit torque to the wheels after it detects
wheel slip, preventing the tires from spinning.
3-38
Page 196 of 614

Mirrors
Manual Rearview Mirror
Hold the inside rearview mirror in the center to move it
for a clearer view behind your vehicle. Adjust the mirror
to avoid glare from the headlamps behind you. Push the
tab forward for daytime use and pull it for nighttime use.
Automatic Dimming Rearview Mirror
The vehicle may have an automatic dimming rearview
mirror.
Vehicles with OnStar
®have three additional control
buttons for the OnStar®system. See your dealer for
more information about OnStar®and how to subscribe
to it. See the OnStar®owner's guide for more
information about the services OnStar®provides.
O(On/Off): Press to turn the dimming feature on or off.
The vehicle may also have a Rear Vision Camera
(RVC). See Rear Vision Camera (RVC)
on page 3‑64for more information.
If the vehicle has RVC, the
O(On/Off) button for
turning the automatic dimming feature on or off will
not be available.
Automatic Dimming Mirror Operation
Automatic dimming reduces the glare from the
headlamps of the vehicle behind you. The dimming
feature comes on and the indicator light illuminates
each time the ignition is turned to start.
Cleaning the Mirror
Do not spray glass cleaner directly on the mirror.
Use a soft towel dampened with water.
Outside Manual Mirrors
Adjust the outside mirror for a clearer view.
Manually fold the mirrors inward to prevent damage
when going through an automatic car wash. To fold,
push the mirror toward the vehicle. Push the mirror
outward, to return to its original position.
Using hood-mounted air deflectors and add-on convex
mirror attachments could decrease mirror performance.
3-54
Page 199 of 614

Outside Automatic Dimming Mirror
Vehicles with this feature have a driver outside mirror
that adjusts for the glare of headlamps behind you.
SeeAutomatic Dimming Rearview Mirror
on page 3‑54for more information.
Park Tilt Mirrors
Vehicles with the memory package have a passenger
and/or driver mirror that tilts to a preselected position
when the vehicle is in R (Reverse). This feature lets the
driver view the curb when parallel parking. The mirror(s)
return to the original position when the vehicle is shifted
out of R (Reverse), or the ignition is turned off.
Turn this feature on or off through the Driver Information
Center (DIC). See DIC Vehicle Customization (With DIC
Buttons)
on page 4‑72for more information.
Outside Convex Mirror
{WARNING:
A convex mirror can make things, like other
vehicles, look farther away than they really are.
If you cut too sharply into the right lane, you could
hit a vehicle on the right. Check the inside mirror
or glance over your shoulder before changing
lanes.
The passenger side mirror is convex shaped. A convex
mirror's surface is curved so more can be seen from the
driver seat.
3-57
Page 208 of 614

Adjusting the Brightness and Contrast of
the Screen
To adjust the brightness and contrast of the screen,
press the MENU button while the rear vision camera
image is on the display. Any adjustments made will only
affect the rear vision camera screen.
](Brightness) :Touch the + (plus) or –(minus)
screen buttons to increase or decrease the brightness
of the screen.
_(Contrast) : Touch the + (plus) or –(minus) screen
buttons to increase or decrease the contrast of the
screen.
Symbols
The navigation system may have a feature that lets the
driver view symbols on the navigation screen while
using the rear vision camera. The Ultrasonic Rear Park
Assist (URPA) system must not be disabled to use the
caution symbols. If URPA has been disabled and the
symbols have been turned on, the Rear Parking Assist
Symbols Unavailable error message may display. See
Ultrasonic Rear Parking Assist (URPA) on page 3‑58. The symbols appear when an object has been detected
by the URPA system. The symbol may cover the object
when viewing the navigation screen.
To turn the symbols on or off:
1. Make sure that URPA has not been disabled.
2. Shift into P (Park).
3. Press the MENU hard key to enter the configure menu options, then press the MENU hard key
repeatedly until Display is selected or touch the
Display screen button.
4. Select the Rear Camera Options screen button. The Rear Camera Options screen will display.
5. Touch the Symbols screen button. The screen button will be highlighted when on.
Rear Vision Camera Error Messages
Service Rear Vision Camera System: This message
can display when the system is not receiving
information it requires from other vehicle systems.
If any other problem occurs or if a problem persists, see
your dealer.
3-66
Page 211 of 614

Universal Home Remote
System
SeeRadio Frequency Statementon page 8‑19for information regarding Part 15 of the Federal
Communications Commission (FCC) Rules and
RSS-210/211 of Industry Canada.
Universal Home Remote System
Operation (With Three Round LED)
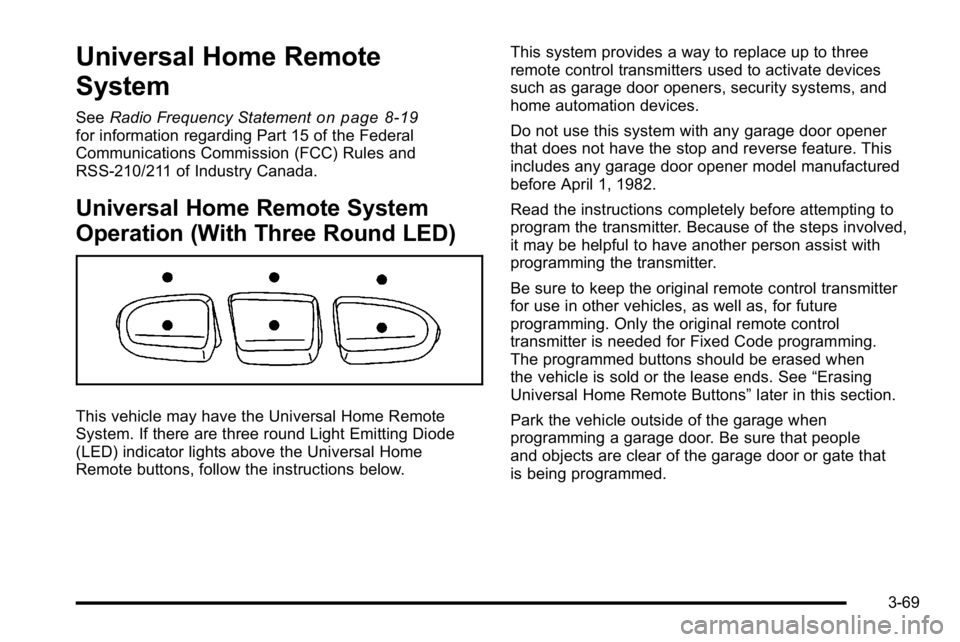
This vehicle may have the Universal Home Remote
System. If there are three round Light Emitting Diode
(LED) indicator lights above the Universal Home
Remote buttons, follow the instructions below. This system provides a way to replace up to three
remote control transmitters used to activate devices
such as garage door openers, security systems, and
home automation devices.
Do not use this system with any garage door opener
that does not have the stop and reverse feature. This
includes any garage door opener model manufactured
before April 1, 1982.
Read the instructions completely before attempting to
program the transmitter. Because of the steps involved,
it may be helpful to have another person assist with
programming the transmitter.
Be sure to keep the original remote control transmitter
for use in other vehicles, as well as, for future
programming. Only the original remote control
transmitter is needed for Fixed Code programming.
The programmed buttons should be erased when
the vehicle is sold or the lease ends. See
“Erasing
Universal Home Remote Buttons” later in this section.
Park the vehicle outside of the garage when
programming a garage door. Be sure that people
and objects are clear of the garage door or gate that
is being programmed.
3-69