2010 GMC SIERRA length
[x] Cancel search: lengthPage 81 of 630

Child Restraints
Older Children
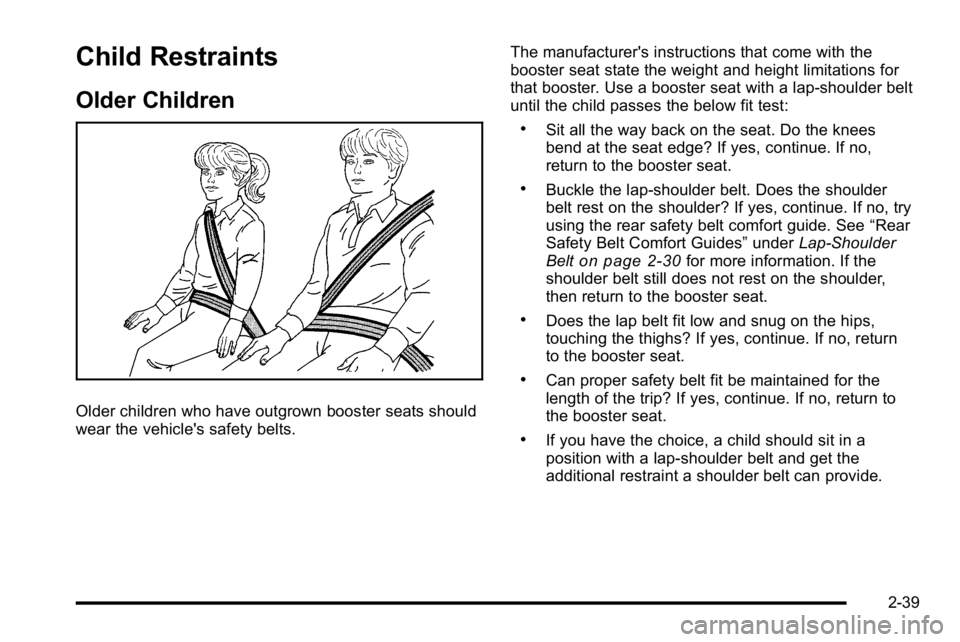
Older children who have outgrown booster seats should
wear the vehicle's safety belts.The manufacturer's instructions that come with the
booster seat state the weight and height limitations for
that booster. Use a booster seat with a lap-shoulder belt
until the child passes the below fit test:
.Sit all the way back on the seat. Do the knees
bend at the seat edge? If yes, continue. If no,
return to the booster seat.
.Buckle the lap-shoulder belt. Does the shoulder
belt rest on the shoulder? If yes, continue. If no, try
using the rear safety belt comfort guide. See
“Rear
Safety Belt Comfort Guides” underLap-Shoulder
Belt
on page 2‑30for more information. If the
shoulder belt still does not rest on the shoulder,
then return to the booster seat.
.Does the lap belt fit low and snug on the hips,
touching the thighs? If yes, continue. If no, return
to the booster seat.
.Can proper safety belt fit be maintained for the
length of the trip? If yes, continue. If no, return to
the booster seat.
.If you have the choice, a child should sit in a
position with a lap-shoulder belt and get the
additional restraint a shoulder belt can provide.
2-39
Page 163 of 630

To Use the Engine Coolant Heater
1. Turn off the engine.
2. Open the hood and unwrap the electrical cord.The cord is secured to the Engine Compartment
Fuse Block with a clip. Carefully remove the wire
tie which bundles the electrical plug. Do not cut the
electrical cord.
3. Plug the cord into a normal, grounded 110-volt AC outlet.
{WARNING:
Plugging the cord into an ungrounded outlet could
cause an electrical shock. Also, the wrong kind of
extension cord could overheat and cause a fire.
You could be seriously injured. Plug the cord into
a properly grounded three-prong 110-volt AC
outlet. If the cord will not reach, use a heavy-duty
three-prong extension cord rated for at least
15 amps.
4. Before starting the engine, be sure to unplug and store the cord as it was before to keep it away from
moving engine parts. If you do not, it could be
damaged. The length of time the heater should remain plugged in
depends on several factors. Ask a dealer/retailer in the
area where you will be parking the vehicle for the best
advice on this.
Active Fuel Management™
Vehicles with V8 engines may have Active Fuel
Management™. This system allows the engine to
operate on either all or half of its cylinders, depending
on the driving conditions.
When less power is required, such as cruising at a
constant vehicle speed, the system will operate in the
half cylinder mode, allowing the vehicle to achieve
better fuel economy. When greater power demands are
required, such as accelerating from a stop, passing,
or merging onto a freeway, the system will maintain
full-cylinder operation.
If the vehicle has an Active Fuel Management™
indicator, see
DIC Operation and Displays (With DIC
Buttons)
on page 4‑51or DIC Operation and Displays
(Without DIC Buttons)on page 4‑58for more
information on using this display .
3-27
Page 242 of 630

Automatic Operation
AUTO (Automatic) :When automatic operation is
active the system controls the inside temperature, the
air delivery, and the fan speed.
Use the steps below to place the entire system in
automatic mode:
1. Press the AUTO button. When AUTO is selected, the display changes to
show the current temperature(s) and AUTO is lit on
the display. The current air delivery mode and fan
speed are also displayed for about 5 seconds.
When AUTO is selected, the air conditioning
operation and air inlet are automatically controlled.
The air conditioning compressor may run when
the outside temperature is above freezing. The air
inlet will normally be set to outside air. If it is hot
outside, the air inlet may automatically switch to
the recirculate mode to help quickly cool down the
air inside the vehicle. The light on the button
comes on in recirculation. 2. Set the driver's and passenger's temperature.
To find your comfort setting, start with a 23°C
(74°F) temperature setting and allow about
20 minutes for the system to regulate. Use the
driver or passenger temperature buttons to
adjust the temperature setting as necessary. If a
temperature setting of 15°C (60°F) is chosen, the
system remains at the maximum cooling setting.
If a temperature setting of 32°C (90°F) is chosen,
the system remains at the maximum heat setting.
Choosing either maximum setting will not cause
the vehicle to heat or cool any faster.
Do not cover the solar sensor located on the top of the
instrument panel near the windshield. This sensor
regulates air temperature based on sun load. For more
information on the solar sensor, see “Sensors”later in
this section.
To avoid blowing cold air in cold weather, the system
delays turning the fan on until warm air is available.
The length of delay depends on the engine coolant
temperature. Pressing the fan switch overrides this
delay and changes the fan to a selected speed.
4-24
Page 388 of 630

Driving Across an Incline
An off-road trail will probably go across the incline of a
hill. To decide whether to try to drive across the incline,
consider the following:
{WARNING:
Driving across an incline that is too steep
will make your vehicle roll over. You could be
seriously injured or killed. If you have any doubt
about the steepness of the incline, do not drive
across it. Find another route instead.
.A hill that can be driven straight up or down
might be too steep to drive across. When going
straight up or down a hill, the length of the wheel
base—the distance from the front wheels to the
rear wheels —reduces the likelihood the vehicle
will tumble end over end. But when driving across
an incline, the narrower track width —the distance
between the left and right wheels —might not
prevent the vehicle from tilting and rolling over.
Driving across an incline puts more weight on the
downhill wheels which could cause a downhill slide
or a rollover.
.Surface conditions can be a problem. Loose
gravel, muddy spots, or even wet grass can cause
the tires to slip sideways, downhill. If the vehicle
slips sideways, it can hit something that will trip
it — a rock, a rut, etc. —and roll over.
.Hidden obstacles can make the steepness of the
incline even worse. If you drive across a rock with
the uphill wheels, or if the downhill wheels drop
into a rut or depression, the vehicle can tilt
even more.
For these reasons, carefully consider whether to try to
drive across an incline. Just because the trail goes
across the incline does not mean you have to drive it.
The last vehicle to try it might have rolled over.
If you feel the vehicle starting to slide sideways, turn
downhill. This should help straighten out the vehicle and
prevent the side slipping. The best way to prevent this
is to “walk the course” first, so you know what the
surface is like before driving it.
5-20
Page 403 of 630

{WARNING:
Things you put inside your vehicle can strike
and injure people in a sudden stop or turn,
or in a crash.
.Put things in the cargo area of your
vehicle. Try to spread the weight evenly.
.Never stack heavier things, like
suitcases, inside the vehicle so that some
of them are above the tops of the seats.
.Do not leave an unsecured child restraint
in your vehicle.
.When you carry something inside the
vehicle, secure it whenever you can.
.Do not leave a seat folded down unless
you need to.
There is also important loading information for
off-road driving in this manual. See “Loading Your
Vehicle for Off-Road Driving“ underOff-Road
Driving
on page 5‑11.
Two-Tiered Loading
Depending on the model of your pick‐up, you
can create an upper load platform by positioning
two or four 2 inches (5 cm) by 6 inches (15 cm)
wooden planks across the width of the pickup box.
The planks must be inserted in the pickup box
depressions. The length of the planks must allow
for at least a 3/4 inch (2 cm) bearing surface on
each end of the plank.
When using this upper load platform, be sure
the load is securely tied down to prevent it from
shifting. The load's center of gravity should be
positioned in a zone over the rear axle. The zone
is located in the area between the front of each
wheel well and the rear of each wheel well. The
center of gravity height must not extend above the
top of the pickup box flareboard.
Any load that extends beyond the vehicle's
taillamp area must be properly marked according
to local laws and regulations.
Remember not to exceed the Gross Axle Weight
Rating (GAWR) of the front or rear axle.
5-35