2010 GMC SIERRA weight
[x] Cancel search: weightPage 388 of 630
Driving Across an Incline
An off-road trail will probably go across the incline of a
hill. To decide whether to try to drive across the incline,
consider the following:
{WARNING:
Driving across an incline that is too steep
will make your vehicle roll over. You could be
seriously injured or killed. If you have any doubt
about the steepness of the incline, do not drive
across it. Find another route instead.
.A hill that can be driven straight up or down
might be too steep to drive across. When going
straight up or down a hill, the length of the wheel
base—the distance from the front wheels to the
rear wheels —reduces the likelihood the vehicle
will tumble end over end. But when driving across
an incline, the narrower track width —the distance
between the left and right wheels —might not
prevent the vehicle from tilting and rolling over.
Driving across an incline puts more weight on the
downhill wheels which could cause a downhill slide
or a rollover.
.Surface conditions can be a problem. Loose
gravel, muddy spots, or even wet grass can cause
the tires to slip sideways, downhill. If the vehicle
slips sideways, it can hit something that will trip
it — a rock, a rut, etc. —and roll over.
.Hidden obstacles can make the steepness of the
incline even worse. If you drive across a rock with
the uphill wheels, or if the downhill wheels drop
into a rut or depression, the vehicle can tilt
even more.
For these reasons, carefully consider whether to try to
drive across an incline. Just because the trail goes
across the incline does not mean you have to drive it.
The last vehicle to try it might have rolled over.
If you feel the vehicle starting to slide sideways, turn
downhill. This should help straighten out the vehicle and
prevent the side slipping. The best way to prevent this
is to “walk the course” first, so you know what the
surface is like before driving it.
5-20
Page 398 of 630
Loading the Vehicle
It is very important to know how much weight your
vehicle can carry. This weight is called the vehicle
capacity weight and includes the weight of all
occupants, cargo, and all nonfactory-installed
options. Two labels on your vehicle show how
much weight it was designed to carry, the Tire and
Loading Information label and the Certification/Tire
label.
{WARNING:
Do not load the vehicle any heavier than
the Gross Vehicle Weight Rating (GVWR),
or either the maximum front or rear Gross
Axle Weight Rating (GAWR). If you do, parts
on the vehicle can break, and it can change
the way the vehicle handles. These could
cause you to lose control and crash.
Also, overloading can shorten the life
of the vehicle.
Tire and Loading Information Label
Label Example
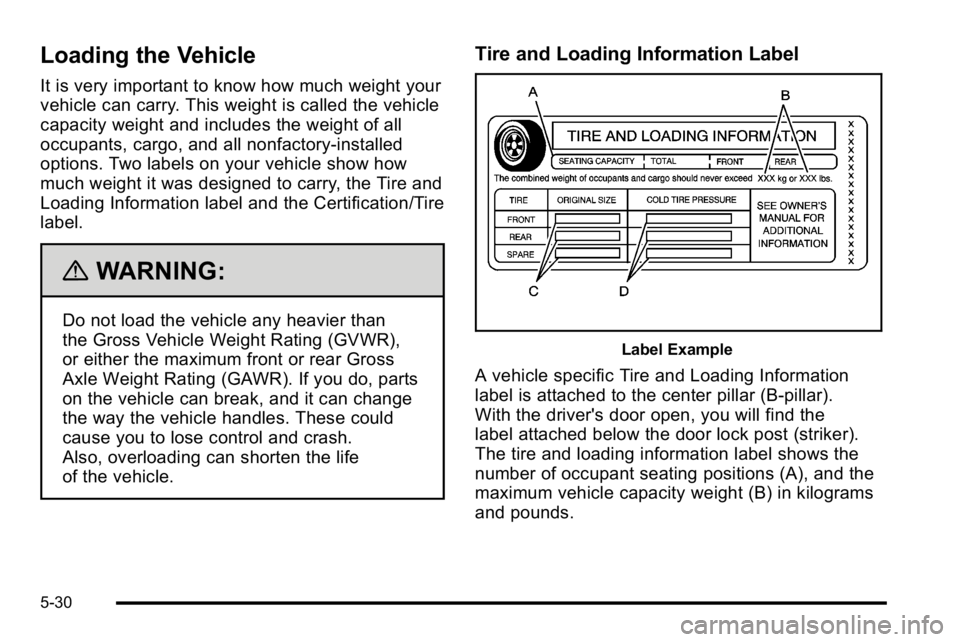
A vehicle specific Tire and Loading Information
label is attached to the center pillar (B-pillar).
With the driver's door open, you will find the
label attached below the door lock post (striker).
The tire and loading information label shows the
number of occupant seating positions (A), and the
maximum vehicle capacity weight (B) in kilograms
and pounds.
5-30
Page 399 of 630
The Tire and Loading Information label also
shows the size of the original equipment tires (C)
and the recommended cold tire inflation
pressures (D). For more information on tires and
inflation seeTires
on page 6‑64andInflation - Tire
Pressure
on page 6‑72.
There is also important loading information on the
vehicle Certification/Tire label. It tells you the
Gross Vehicle Weight Rating (GVWR) and the
Gross Axle Weight Rating (GAWR) for the front
and rear axles. See “Certification/Tire Label” later
in this section.
Steps for Determining Correct Load Limit
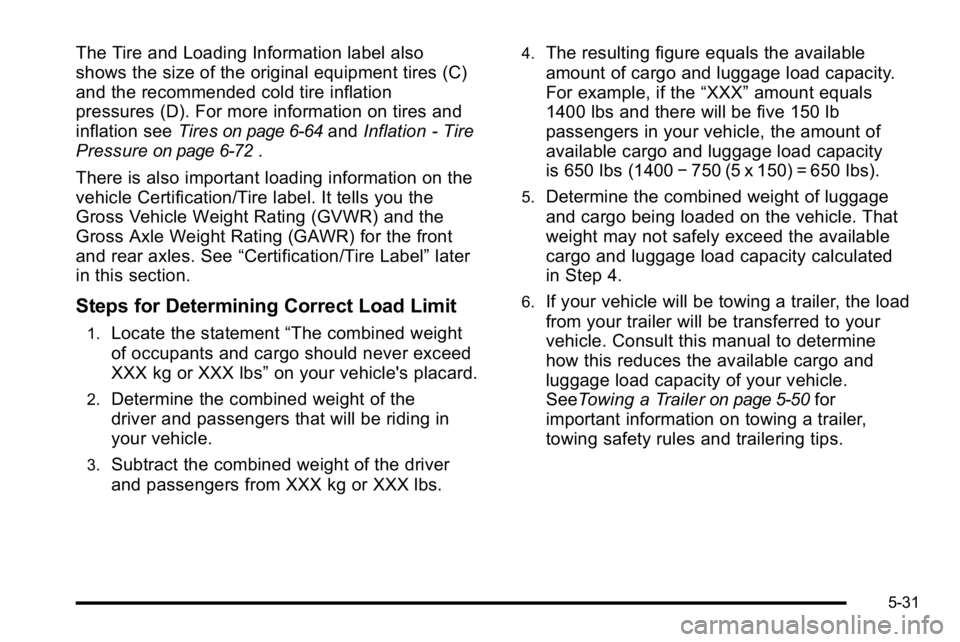
1.Locate the statement “The combined weight
of occupants and cargo should never exceed
XXX kg or XXX lbs” on your vehicle's placard.
2.Determine the combined weight of the
driver and passengers that will be riding in
your vehicle.
3.Subtract the combined weight of the driver
and passengers from XXX kg or XXX lbs.
4.The resulting figure equals the available
amount of cargo and luggage load capacity.
For example, if the“XXX”amount equals
1400 lbs and there will be five 150 lb
passengers in your vehicle, the amount of
available cargo and luggage load capacity
is 650 lbs (1400 −750 (5 x 150) = 650 lbs).
5.Determine the combined weight of luggage
and cargo being loaded on the vehicle. That
weight may not safely exceed the available
cargo and luggage load capacity calculated
in Step 4.
6.If your vehicle will be towing a trailer, the load
from your trailer will be transferred to your
vehicle. Consult this manual to determine
how this reduces the available cargo and
luggage load capacity of your vehicle.
SeeTowing a Trailer
on page 5‑50for
important information on towing a trailer,
towing safety rules and trailering tips.
5-31
Page 400 of 630
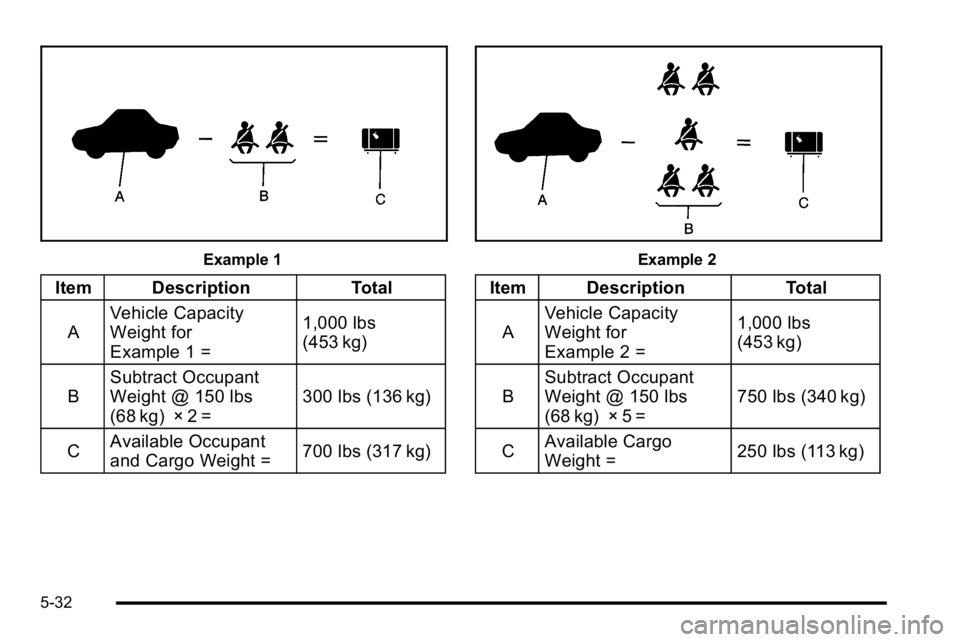
Example 1
Item DescriptionTotal
A Vehicle Capacity
Weight for
Example 1 = 1,000 lbs
(453 kg)
B Subtract Occupant
Weight @ 150 lbs
(68 kg) × 2 = 300 lbs (136 kg)
C Available Occupant
and Cargo Weight =
700 lbs (317 kg)
Example 2
Item Description
Total
A Vehicle Capacity
Weight for
Example 2 = 1,000 lbs
(453 kg)
B Subtract Occupant
Weight @ 150 lbs
(68 kg) × 5 = 750 lbs (340 kg)
C Available Cargo
Weight =
250 lbs (113 kg)
5-32
Page 401 of 630
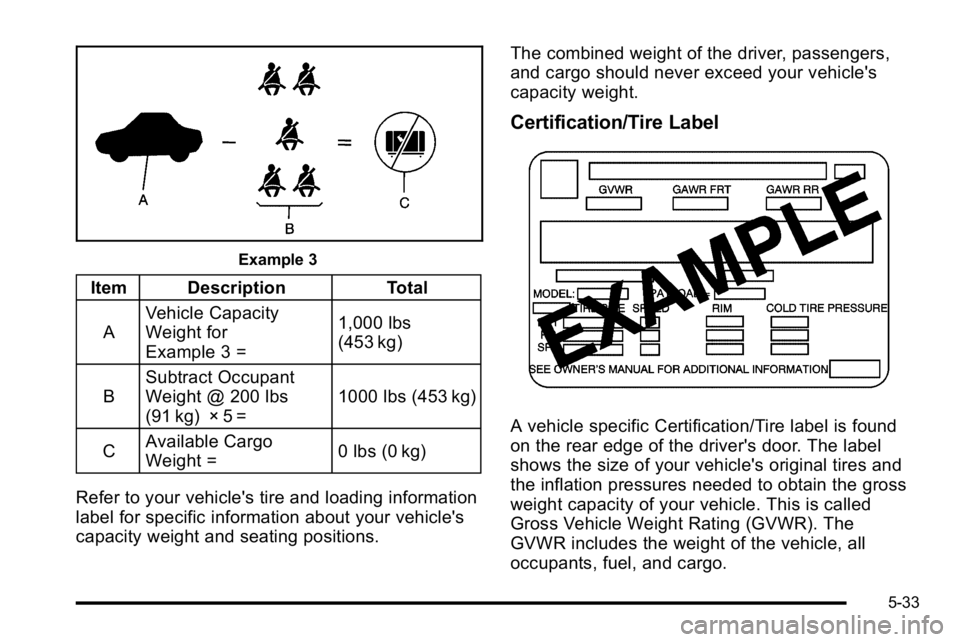
Example 3
Item DescriptionTotal
A Vehicle Capacity
Weight for
Example 3 = 1,000 lbs
(453 kg)
B Subtract Occupant
Weight @ 200 lbs
(91 kg) × 5 = 1000 lbs (453 kg)
C Available Cargo
Weight =
0 lbs (0 kg)
Refer to your vehicle's tire and loading information
label for specific information about your vehicle's
capacity weight and seating positions. The combined weight of the driver, passengers,
and cargo should never exceed your vehicle's
capacity weight.
Certification/Tire Label
A vehicle specific Certification/Tire label is found
on the rear edge of the driver's door. The label
shows the size of your vehicle's original tires and
the inflation pressures needed to obtain the gross
weight capacity of your vehicle. This is called
Gross Vehicle Weight Rating (GVWR). The
GVWR includes the weight of the vehicle, all
occupants, fuel, and cargo.
5-33
Page 402 of 630
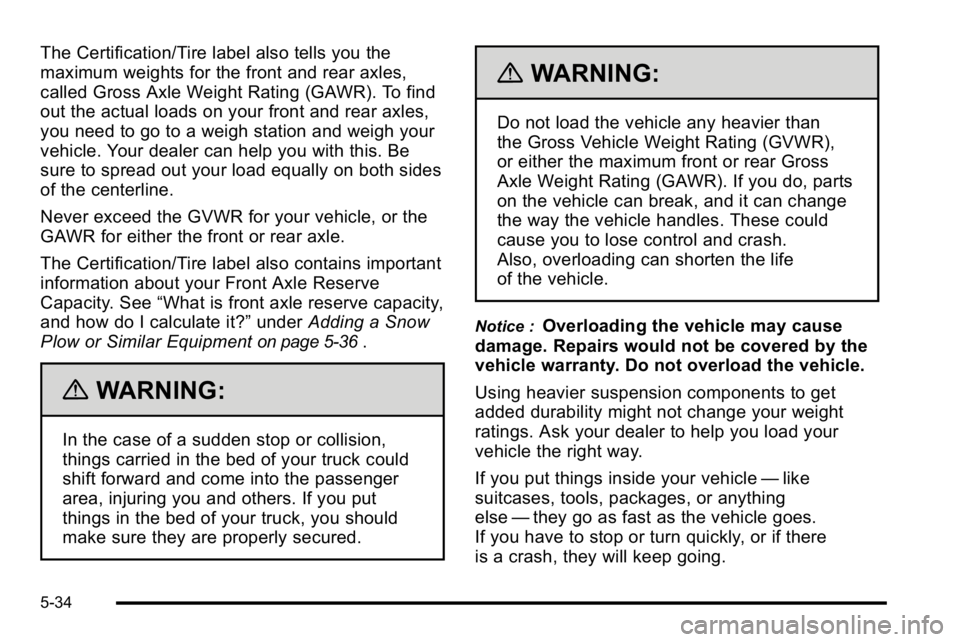
The Certification/Tire label also tells you the
maximum weights for the front and rear axles,
called Gross Axle Weight Rating (GAWR). To find
out the actual loads on your front and rear axles,
you need to go to a weigh station and weigh your
vehicle. Your dealer can help you with this. Be
sure to spread out your load equally on both sides
of the centerline.
Never exceed the GVWR for your vehicle, or the
GAWR for either the front or rear axle.
The Certification/Tire label also contains important
information about your Front Axle Reserve
Capacity. See“What is front axle reserve capacity,
and how do I calculate it?” underAdding a Snow
Plow or Similar Equipment
on page 5‑36.
{WARNING:
In the case of a sudden stop or collision,
things carried in the bed of your truck could
shift forward and come into the passenger
area, injuring you and others. If you put
things in the bed of your truck, you should
make sure they are properly secured.
{WARNING:
Do not load the vehicle any heavier than
the Gross Vehicle Weight Rating (GVWR),
or either the maximum front or rear Gross
Axle Weight Rating (GAWR). If you do, parts
on the vehicle can break, and it can change
the way the vehicle handles. These could
cause you to lose control and crash.
Also, overloading can shorten the life
of the vehicle.
Notice :Overloading the vehicle may cause
damage. Repairs would not be covered by the
vehicle warranty. Do not overload the vehicle.
Using heavier suspension components to get
added durability might not change your weight
ratings. Ask your dealer to help you load your
vehicle the right way.
If you put things inside your vehicle —like
suitcases, tools, packages, or anything
else —they go as fast as the vehicle goes.
If you have to stop or turn quickly, or if there
is a crash, they will keep going.
5-34
Page 403 of 630
{WARNING:
Things you put inside your vehicle can strike
and injure people in a sudden stop or turn,
or in a crash.
.Put things in the cargo area of your
vehicle. Try to spread the weight evenly.
.Never stack heavier things, like
suitcases, inside the vehicle so that some
of them are above the tops of the seats.
.Do not leave an unsecured child restraint
in your vehicle.
.When you carry something inside the
vehicle, secure it whenever you can.
.Do not leave a seat folded down unless
you need to.
There is also important loading information for
off-road driving in this manual. See “Loading Your
Vehicle for Off-Road Driving“ underOff-Road
Driving
on page 5‑11.
Two-Tiered Loading
Depending on the model of your pick‐up, you
can create an upper load platform by positioning
two or four 2 inches (5 cm) by 6 inches (15 cm)
wooden planks across the width of the pickup box.
The planks must be inserted in the pickup box
depressions. The length of the planks must allow
for at least a 3/4 inch (2 cm) bearing surface on
each end of the plank.
When using this upper load platform, be sure
the load is securely tied down to prevent it from
shifting. The load's center of gravity should be
positioned in a zone over the rear axle. The zone
is located in the area between the front of each
wheel well and the rear of each wheel well. The
center of gravity height must not extend above the
top of the pickup box flareboard.
Any load that extends beyond the vehicle's
taillamp area must be properly marked according
to local laws and regulations.
Remember not to exceed the Gross Axle Weight
Rating (GAWR) of the front or rear axle.
5-35
Page 404 of 630
Add-On Equipment
When you carry removable items, you may need
to put a limit on how many people you carry inside
your vehicle. Be sure to weigh your vehicle before
you buy and install the new equipment.
Notice :Overloading the vehicle may cause
damage. Repairs would not be covered by the
vehicle warranty. Do not overload the vehicle.
Remember not to exceed the Gross Axle Weight
Rating (GAWR) of the front or rear axle.
* Equipment Maximum Weight
Ladder Rack
and Cargo 750 lbs (340 kg)
Cross Toolbox
and Cargo 400 lbs (181 kg)
Side Boxes
and Cargo 250 lbs per side
(113 kg per side)
* The combined weight for all rail‐mounted
equipment should not exceed 1,000 lbs (454 kg).
Adding a Snow Plow or Similar
Equipment
Before installing a snow plow on the vehicle, here are
some things you need to know:
Notice: If your vehicle does not have the snow plow
prep package, adding a plow can damage your
vehicle, and the repairs would not be covered by
warranty. Unless your vehicle was built to carry a
snow plow, do not add one to your vehicle. If your
vehicle has the snow plow prep package, called
RPO VYU, then the payload your vehicle can carry
will be reduced when a snow plow is installed. Your
vehicle can be damaged if either the front or rear
axle ratings or the Gross Vehicle Weight (GVW) are
exceeded.
Some vehicles are built with a special snow plow prep
package, called RPO VYU. If your vehicle has this
option, you can add a plow to it, provided certain
weights, such as the weights on the vehicle's axles and
the Gross Vehicle Weight (GVW), are not exceeded.
5-36