2010 GMC SIERRA ad blue
[x] Cancel search: ad bluePage 348 of 630

Using the Call Command
1. Press and holdbgfor two seconds. The system
responds with “Ready”followed by a tone.
2. Say “Call”. The system responds with “Call using
by a tone.
3. Say the name tag of the person to call.
.If the system clearly recognizes the name tag it
responds with “OK, calling,
dials the number.
.If the system is unsure it recognizes the right
name tag, it confirms the name tag followed by
a tone. If the name tag is correct, say “Yes”.
The system responds with “OK, calling,
not correct, say “No”. The system will ask for
the name tag to be re‐entered.
Once connected, the person called will be heard
through the audio speakers.
Using the Re‐dial Command
1. Press and holdb gfor two seconds. The system
responds with “Ready”followed by a tone.
2. After the tone, say “Re‐dial”. The system responds
with “Re‐dial using
the last number called from the connected
Bluetooth phone.
Once connected, the person called will be heard
through the audio speakers.
Receiving a Call
When an incoming call is received, the audio system
mutes and a ring tone is heard in the vehicle.
.Pressb gand begin speaking to answer the call.
.Pressc xto ignore a call.
4-130
Page 349 of 630

Call Waiting
Call waiting must be supported on the Bluetooth phone
and enabled by the wireless service carrier to work.
.Pressbgto answer an incoming call when
another call is active. The original call is placed
on hold.
.Pressb gagain to return to the original call.
.To ignore the incoming call, continue with the
original call with no action.
.Pressc xto disconnect the current call and
switch to the call on hold.
Three‐Way Calling
Three‐Way Calling must be supported on the Bluetooth
phone and enabled by the wireless service carrier
to work.
1. While on a call press
b g. The system responds
with “Ready” followed by a tone.
2. Say “Three‐way call”. The system responds with
“Three‐way call, please say dial or call”. 3. Use the dial or call command to dial the number of
the third party to be called.
4. Once the call is connected, press
b gto link all
the callers together.
Ending a Call
Pressc xto end a call.
Muting a Call
During a call, all sounds from inside the vehicle can
be muted so that the person on the other end of the
call cannot hear them.
To Mute a call
1. Pressbg. The system responds with
“Ready” followed by a tone.
2. Say “Mute Call”. The system responds with
“Call muted”.
To Cancel Mute
1. Pressb g. The system responds with
“Ready” followed by a tone.
2. After the tone, say “Mute Call”. The system
responds with “Resuming call”.
4-131
Page 350 of 630

Transferring a Call
Audio can be transferred between the in‐vehicle
Bluetooth system and the cell phone.
To Transfer Audio to the Cell Phone
During a call with the audio in the vehicle:1. Press
b g. The system responds with “Ready”
followed by a tone.
2. Say “Transfer Call.” The system responds with
“Transferring call” and the audio will switch from
the vehicle to the cell phone.
To Transfer Audio to the In-Vehicle
Bluetooth System
The cellular phone must be paired and connected
with the Bluetooth system before a call can be
transferred. The connection process can take up
to two minutes after the key is turned to the
ON/RUN or ACC/ACCESSORY position.
During a call with the audio on the cell phone,
press
b gfor more than two seconds. The audio
switches from the cell phone to the vehicle.
Voice Pass-Thru
Voice Pass‐Thru allows access to the voice recognition
commands on the cell phone. See the cell phone
manufacturers user guide to see if the cell phone
supports this feature. This feature can be used to
verbally access contacts stored in the cell phone.
1. Press and hold
b gfor two seconds. The system
responds with “Ready”followed by a tone.
2. Say “Bluetooth”. The system responds with
“Bluetooth ready” followed by a tone.
3. Say “Voice”. The system responds with
“OK, accessing
.The cell phone's normal prompt messages will
go through its cycle according to the phone's
operating instructions.
Dual Tone Multi-Frequency (DTMF)
Tones
The in‐vehicle Bluetooth system can send numbers and
numbers stored as name tags during a call. This is used
when calling a menu driven phone system. Account
numbers can be programmed into the phonebook for
retrieval during menu driven calls.
4-132
Page 351 of 630

Sending a Number During a Call
1. Pressbg. The system responds with “Ready”
followed by a tone.
2. Say “Dial”. The system responds with “Say a
number to send tones” followed by a tone.
3. Say the number to send.
.If the system clearly recognizes the number it
responds with “OK, Sending Number” and the
dial tones are sent and the call continues.
.If the system is not sure it recognized the
number properly, it responds “Dial Number,
Please say yes or no?” followed by a tone.
If the number is correct, say “Yes”. The system
responds with “OK, Sending Number” and the
dial tones are sent and the call continues.
Sending a Stored Name Tag During a Call
1. Pressb g. The system responds with “Ready”
followed by a tone.
2. Say “Send name tag.” The system responds with
“Say a name tag to send tones” followed by a tone.3. Say the name tag to send.
.If the system clearly recognizes the name tag it
responds with
“OK, Sending
the dial tones are sent and the call continues.
.If the system is not sure it recognized the name
tag properly, it responds “Dial
Please say yes or no?” followed by a tone.
If the name tag is correct, say “Yes”. The
system responds with “OK, Sending
continues.
Clearing the System
Unless information is deleted out of the in‐vehicle
Bluetooth system, it will be retained indefinitely. This
includes all saved name tags in the phonebook and
phone pairing information. For information on how to
delete this information, see the above sections on
Deleting a Paired Phone and Deleting Name Tags.
Other Information
The Bluetooth®word mark and logos are owned by the
Bluetooth®SIG, Inc. and any use of such marks by
General Motors is under license. Other trademarks and
trade names are those of their respective owners.
See Radio Frequency Statement
on page 8‑19for
FCC information.
4-133
Page 365 of 630

Navigating an iPod or USB Device on the
Main Audio Screen (Vehicles with a
Navigation System)
Press and releaseworxto select the next or
previous track within the selected category.
Press and hold
worxto move quickly through the
tracks.
Press and release
¨to move up one track within the
selected category.
Navigating an iPod or USB Device on the
Music Navigator Screen (Vehicles with a
Navigation System)
Press and releaseworxto select the next or
previous track within the selected category.
Press and hold
worxto move quickly through the
tracks within the selected category.
Press and release
¨to move up one track within the
selected category.
b g(Mute/Push to Talk): Press to silence the vehicle
speakers only. Press again to turn the sound on.
For vehicles with Bluetooth or OnStar
®systems, press
and hold for longer than two seconds to interact with
those systems. See Bluetooth
®on page 4‑123and the
OnStar Owner's Guide for more information.
c(End): Press to reject an incoming call, or end a
current call.
SRCE (Source/Voice Recognition) : Press to switch
between the radio, CD, and for vehicles with, DVD, front
auxiliary, and rear auxiliary.
For vehicles with the navigation system, press and hold
this button for longer than one second to initiate voice
recognition. See “Voice Recognition” in the Navigation
System manual for more information.
4-147
Page 442 of 630

Maintenance When Trailer Towing
The vehicle needs service more often when pulling a
trailer. See this manual's Maintenance Schedule or
Index for more information. Things that are especially
important in trailer operation are automatic transmission
fluid, engine oil, axle lubricant, belts, cooling system
and brake system. It is a good idea to inspect these
before and during the trip.
Check periodically to see that all hitch nuts and bolts
are tight.
Trailer Wiring Harness
The vehicle is equipped with one of the following wiring
harnesses for towing a trailer or hauling a slide-in
camper.
Basic Trailer Wiring
All regular, extended cab and crew cab pickups have a
seven‐wire trailer towing harness.
For vehicles not equipped with heavy duty trailering, the
harness is secured to the vehicle's frame behind the
spare tire mount. The harness requires the installation
of a trailer connector, which is available through your
dealer/retailer.
If towing a light‐duty trailer with a standard four‐way
round pin connector, an adapter is available from your
dealer/retailer.
Heavy-DutyTrailer Wiring Harness
Package
For vehicles equipped with heavy duty trailering, the
harness is connected to a bracket on the hitch platform.
The seven-wire harness contains the following trailer
circuits:
.Yellow: Left Stop/Turn Signal
.Dark Green: Right Stop/Turn Signal
.Brown: Taillamps
.White: Ground
.Light Green: Back-up Lamps
.Red: Battery Feed*
.Dark Blue: Trailer Brake*
5-74
Page 443 of 630

*The fuses for these two circuits are installed in the
underhood electrical center, but the wires are not
connected. They should be connected by your dealer/
retailer or a qualified service center. The fuse and wire
for the ITBC is factory installed and connected if the
vehicle is equipped with an ITBC. The fuse for the
battery feed is not required if the vehicle has an
auxiliary battery. If the vehicle does not have an
auxiliary battery, have your dealer/retailer or authorized
service center install the required fuse.
If charging a remote (non-vehicle) battery, press the
Tow/Haul mode button, if equipped, located at the end
of the shift lever. This will boost the vehicle system
voltage and properly charge the battery. If the trailer is
too light for Tow/Haul mode, or the vehicle is not
equipped with Tow/Haul, turn on the headlamps as a
second way to boost the vehicle system and charge
the battery.Camper/Fifth-Wheel Trailer Wiring Package
The seven-wire camper harness is located under the
front edge of the pickup box on the drivers side of the
vehicle, attached to the frame bracket. A connector
must be added to the wiring harness which connects to
the camper.
The harness contains the following camper/trailer
circuits:
.Yellow: Left Stop/Turn Signal
.Dark Green: Right Stop/Turn Signal
.Brown: Taillamps
.White: Ground
.Light Green: Back-up Lamps
.Red: Battery Feed
.Dark Blue: Trailer Brake
5-75
Page 444 of 630

If the vehicle is equipped with the“Heavy-Duty
Trailering” option, please refer to “Heavy-Duty Trailer
Wiring Package” earlier in this section.
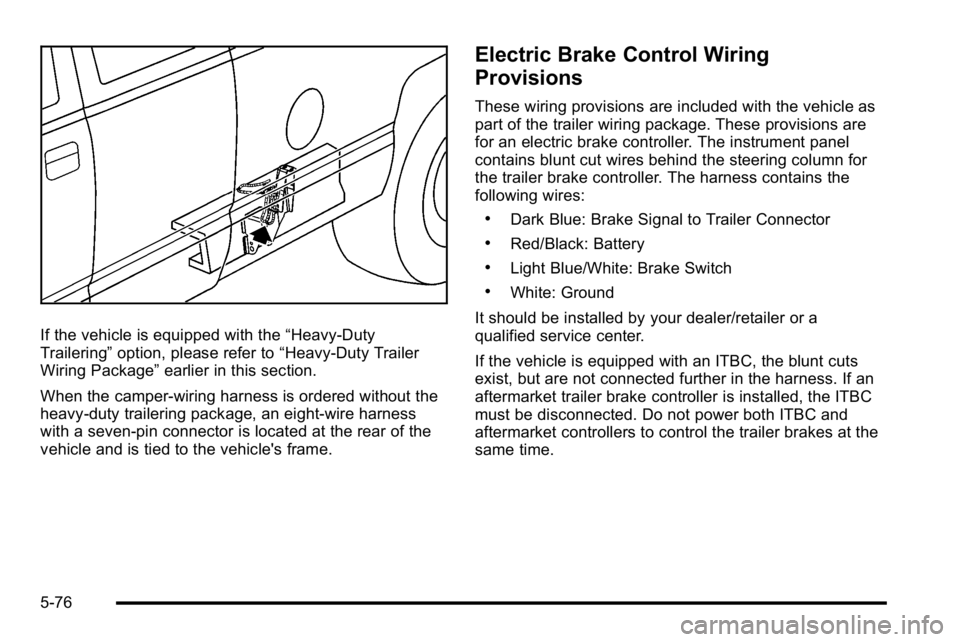
When the camper-wiring harness is ordered without the
heavy-duty trailering package, an eight-wire harness
with a seven-pin connector is located at the rear of the
vehicle and is tied to the vehicle's frame.
Electric Brake Control Wiring
Provisions
These wiring provisions are included with the vehicle as
part of the trailer wiring package. These provisions are
for an electric brake controller. The instrument panel
contains blunt cut wires behind the steering column for
the trailer brake controller. The harness contains the
following wires:
.Dark Blue: Brake Signal to Trailer Connector
.Red/Black: Battery
.Light Blue/White: Brake Switch
.White: Ground
It should be installed by your dealer/retailer or a
qualified service center.
If the vehicle is equipped with an ITBC, the blunt cuts
exist, but are not connected further in the harness. If an
aftermarket trailer brake controller is installed, the ITBC
must be disconnected. Do not power both ITBC and
aftermarket controllers to control the trailer brakes at the
same time.
5-76