2010 GMC SIERRA warning
[x] Cancel search: warningPage 220 of 630

Section 4 Instrument Panel
Tire Pressure Light . . . . . . . . . . . . . . . . . . . . . . . . . . . . 4-42
Malfunction Indicator Lamp . . . . . . . . . . . . . . . . . . . . 4-42
Oil Pressure Gage . . . . . . . . . . . . . . . . . . . . . . . . . . . . . 4-46
Oil Pressure Light . . . . . . . . . . . . . . . . . . . . . . . . . . . . . 4-47
Security Light . . . . . . . . . . . . . . . . . . . . . . . . . . . . . . . . . . 4-48
Fog Lamp Light . . . . . . . . . . . . . . . . . . . . . . . . . . . . . . . . 4-48
Cruise Control Light . . . . . . . . . . . . . . . . . . . . . . . . . . . 4-48
Highbeam On Light . . . . . . . . . . . . . . . . . . . . . . . . . . . . 4-48
Four-Wheel-Drive Light . . . . . . . . . . . . . . . . . . . . . . . . 4-49
Tow/Haul Mode Light . . . . . . . . . . . . . . . . . . . . . . . . . . 4-49
Fuel Gage . . . . . . . . . . . . . . . . . . . . . . . . . . . . . . . . . . . . . 4-49
Low Fuel Warning Light . . . . . . . . . . . . . . . . . . . . . . . . 4-50
Driver Information Center (DIC) . . . . . . . . . . . . . . . . . .4-51
DIC Operation and Displays (With DIC Buttons) . . . . . . . . . . . . . . . . . . . . . . . . . . 4-51
DIC Operation and Displays (Without DIC Buttons) . . . . . . . . . . . . . . . . . . . . . . . 4-58
DIC Compass . . . . . . . . . . . . . . . . . . . . . . . . . . . . . . . . . . 4-62
DIC Warnings and Messages . . . . . . . . . . . . . . . . . . 4-65
DIC Vehicle Customization (With DIC Buttons) . . . . . . . . . . . . . . . . . . . . . . . . . . 4-75 Audio System(s)
. . . . . . . . . . . . . . . . . . . . . . . . . . . . . . . . . . 4-84
Setting the Clock . . . . . . . . . . . . . . . . . . . . . . . . . . . . . . 4-84
Radio(s) . . . . . . . . . . . . . . . . . . . . . . . . . . . . . . . . . . . . . . . 4-87
Using an MP3 (Radios with CD) . . . . . . . . . . . . . . 4-107
Using an MP3 (Radios with CD and DVD) . . . . 4-114
XM Radio Messages . . . . . . . . . . . . . . . . . . . . . . . . . 4-122
Navigation/Radio System . . . . . . . . . . . . . . . . . . . . . 4-123
Bluetooth
®. . . . . . . . . . . . . . . . . . . . . . . . . . . . . . . . . . . . 4-123
Rear Seat Entertainment (RSE) System . . . . . . 4-134
Rear Seat Audio (RSA) . . . . . . . . . . . . . . . . . . . . . . . 4-143
Theft-Deterrent Feature . . . . . . . . . . . . . . . . . . . . . . 4-145
Audio Steering Wheel Controls . . . . . . . . . . . . . . . 4-145
Radio Reception . . . . . . . . . . . . . . . . . . . . . . . . . . . . . . 4-148
Fixed Mast Antenna . . . . . . . . . . . . . . . . . . . . . . . . . . 4-149
XM™ Satellite Radio Antenna System . . . . . . . . 4-149
4-2
Page 221 of 630
Instrument Panel Overview
Hazard Warning Flashers
|(Hazard Warning Flasher):Press this button
located on top of the steering column, to make the front
and rear turn signal lamps flash on and off. This warns
others that you are having trouble. Press again to turn
the flashers off.
When the hazard warning flashers are on, the vehicle's
turn signals will not work.
Horn
To sound the horn, press the horn symbols located on
the steering wheel.
Tilt Wheel
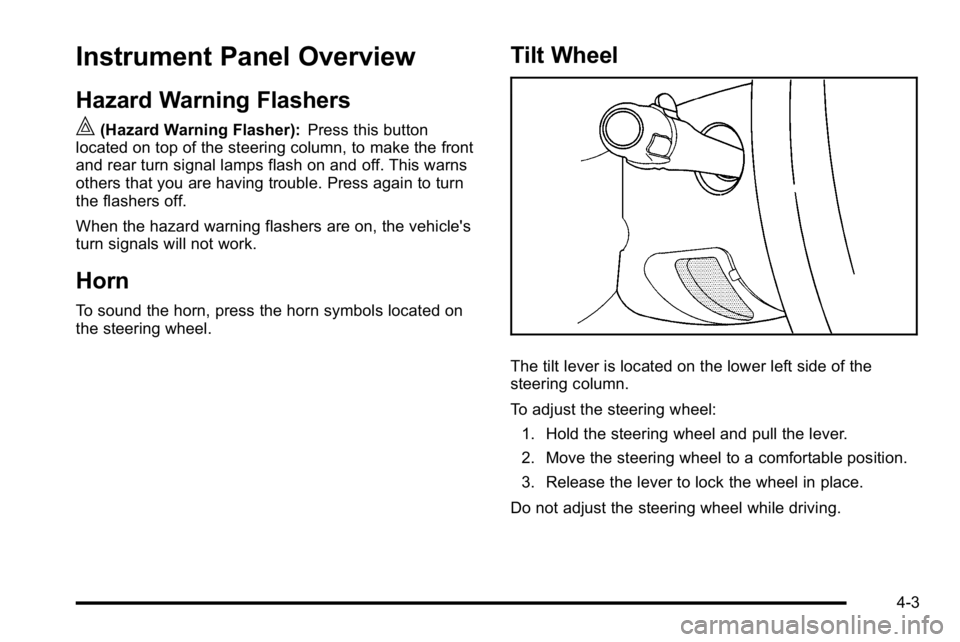
The tilt lever is located on the lower left side of the
steering column.
To adjust the steering wheel:
1. Hold the steering wheel and pull the lever.
2. Move the steering wheel to a comfortable position.
3. Release the lever to lock the wheel in place.
Do not adjust the steering wheel while driving.
4-3
Page 224 of 630
Windshield Wipers
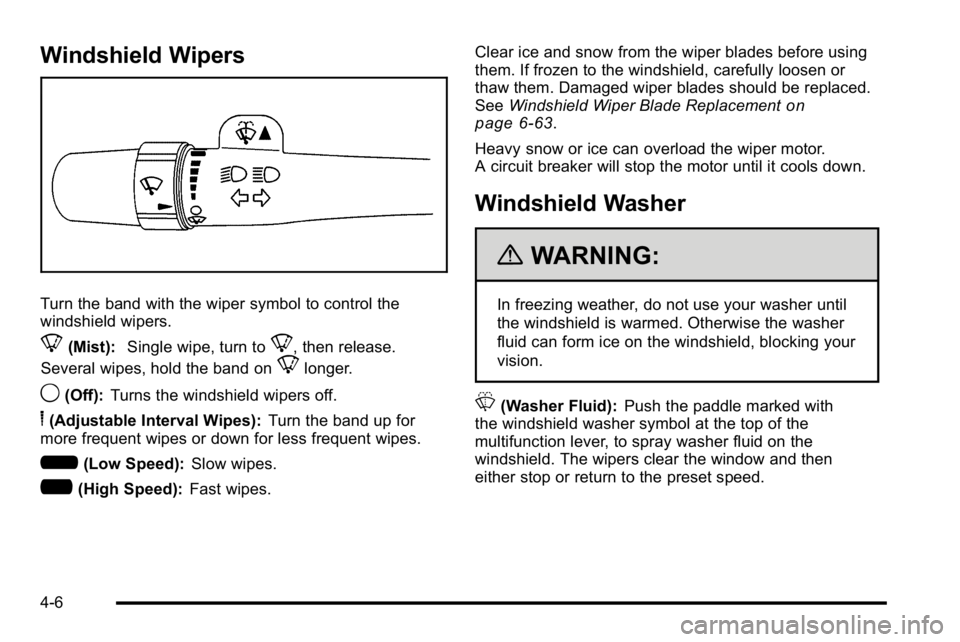
Turn the band with the wiper symbol to control the
windshield wipers.
8(Mist):Single wipe, turn to8, then release.
Several wipes, hold the band on
8longer.
9(Off): Turns the windshield wipers off.
6(Adjustable Interval Wipes): Turn the band up for
more frequent wipes or down for less frequent wipes.
6(Low Speed): Slow wipes.
?(High Speed): Fast wipes. Clear ice and snow from the wiper blades before using
them. If frozen to the windshield, carefully loosen or
thaw them. Damaged wiper blades should be replaced.
See
Windshield Wiper Blade Replacement
on
page 6‑63.
Heavy snow or ice can overload the wiper motor.
A circuit breaker will stop the motor until it cools down.
Windshield Washer
{WARNING:
In freezing weather, do not use your washer until
the windshield is warmed. Otherwise the washer
fluid can form ice on the windshield, blocking your
vision.
L(Washer Fluid): Push the paddle marked with
the windshield washer symbol at the top of the
multifunction lever, to spray washer fluid on the
windshield. The wipers clear the window and then
either stop or return to the preset speed.
4-6
Page 225 of 630
Cruise Control
{WARNING:
Cruise control can be dangerous where you
cannot drive safely at a steady speed. So, do not
use the cruise control on winding roads or in
heavy traffic.
Cruise control can be dangerous on slippery
roads. On such roads, fast changes in tire traction
can cause excessive wheel slip, and you could
lose control. Do not use cruise control on slippery
roads.
For vehicles with cruise control, a speed of about
40 km/h (25 mph) or more can be maintained without
keeping your foot on the accelerator. Cruise control
does not work at speeds below about 40 km/h (25 mph). When the brakes are applied, cruise control is
turned off.
For vehicles with an Allison
®or Hydra‐Matic 6‐speed
automatic transmission, see “Grade Braking and Cruise
Grade Braking (Allison Transmission) under Tow/Haul
Mode
on page 3‑34for an explanation of how cruise
control interacts with the Range Selection Mode,
tow/haul and grade braking systems.
For vehicles with the StabiliTrak
®system that begins
to limit wheel spin while you are using cruise control,
the cruise control will automatically disengage.
See StabiliTrak
®Systemon page 5‑6. When road
conditions allow the cruise control to be safely used
again, it can be turned back on.
4-7
Page 226 of 630
The cruise control buttons
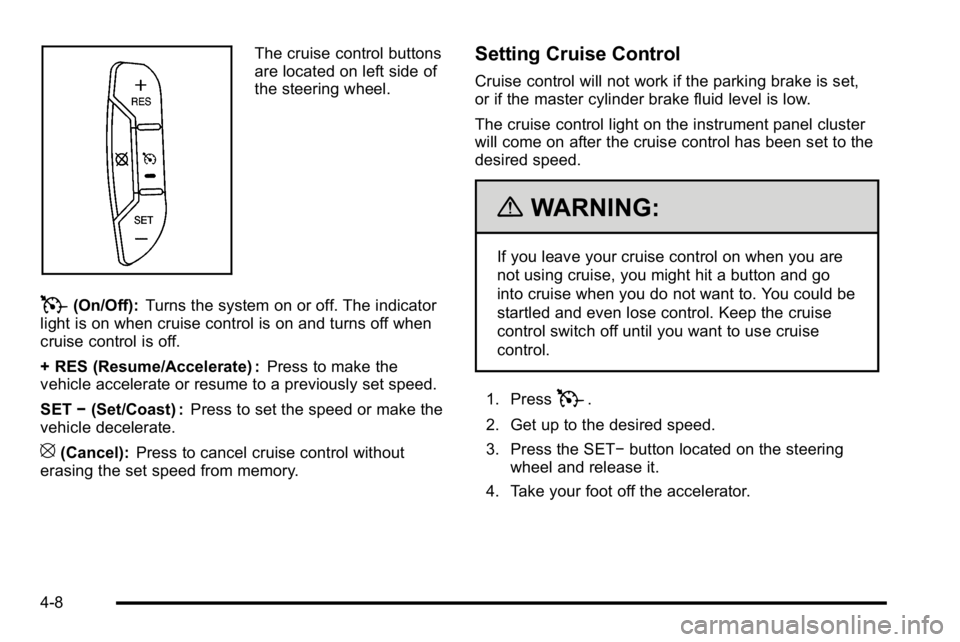
are located on left side of
the steering wheel.
T(On/Off):Turns the system on or off. The indicator
light is on when cruise control is on and turns off when
cruise control is off.
+ RES (Resume/Accelerate) : Press to make the
vehicle accelerate or resume to a previously set speed.
SET −(Set/Coast) : Press to set the speed or make the
vehicle decelerate.
[(Cancel): Press to cancel cruise control without
erasing the set speed from memory.
Setting Cruise Control
Cruise control will not work if the parking brake is set,
or if the master cylinder brake fluid level is low.
The cruise control light on the instrument panel cluster
will come on after the cruise control has been set to the
desired speed.
{WARNING:
If you leave your cruise control on when you are
not using cruise, you might hit a button and go
into cruise when you do not want to. You could be
startled and even lose control. Keep the cruise
control switch off until you want to use cruise
control.
1. Press
T.
2. Get up to the desired speed.
3. Press the SET− button located on the steering
wheel and release it.
4. Take your foot off the accelerator.
4-8
Page 234 of 630
Electric Power Management
The vehicle has Electric Power Management (EPM) that
estimates the battery's temperature and state of charge.
It then adjusts the voltage for best performance and
extended life of the battery.
When the battery's state of charge is low, the voltage is
raised slightly to quickly bring the charge back up.
When the state of charge is high, the voltage is lowered
slightly to prevent overcharging. If the vehicle has a
voltmeter gage or a voltage display on the Driver
Information Center (DIC), you may see the voltage
move up or down. This is normal. If there is a problem,
an alert will be displayed.
The battery can be discharged at idle if the electrical
loads are very high. This is true for all vehicles. This is
because the generator (alternator) may not be spinning
fast enough at idle to produce all the power that is
needed for very high electrical loads.
A high electrical load occurs when several of the
following are on, such as: headlamps, high beams, fog
lamps, rear window defogger, climate control fan at high
speed, heated seats, engine cooling fans, trailer loads,
and loads plugged into accessory power outlets.EPM works to prevent excessive discharge of the
battery. It does this by balancing the generator's output
and the vehicle's electrical needs. It can increase
engine idle speed to generate more power, whenever
needed. It can temporarily reduce the power demands
of some accessories.
Normally, these actions occur in steps or levels,
without being noticeable. In rare cases at the highest
levels of corrective action, this action may be noticeable
to the driver. If so, a Driver Information Center (DIC)
message might be displayed, such as BATTERY
SAVER ACTIVE, BATTERY VOLTAGE LOW, or
LOW BATTERY. If this message is displayed, it is
recommended that the driver reduce the electrical loads
as much as possible. See
DIC Warnings and Messages
on page 4‑65.
Battery Run-Down Protection
This feature shuts off the dome and reading lamps,
if they are left on for more than 10 minutes after the
ignition is turned off. The cargo lamp shuts off after
20 minutes. This prevents the battery from
running down.
4-16
Page 247 of 630

Outlet Adjustment
Use the air outlets located in the center and on the side
of the instrument panel to direct the airflow. Use the
thumbwheels near the air outlets to open or close off
the airflow.
Operation Tips
.Clear away any ice, snow, or leaves from air inlets
at the base of the windshield that could block the
flow of air into the vehicle.
.Keep the path under the front seats clear of
objects to help circulate the air inside of the vehicle
more effectively.
.Use of non‐GM approved hood deflectors can
adversely affect the performance of the system.
Check with your dealer/retailer before adding
equipment to the outside of the vehicle.
Warning Lights, Gages, and
Indicators
Warning lights and gages can signal that something is
wrong before it becomes serious enough to cause an
expensive repair or replacement. Paying attention to the
warning lights and gages could prevent injury.
Warning lights come on when there might be or there is
a problem with one of the vehicle's functions. Some
warning lights come on briefly when the engine is
started to indicate they are working.
Gages can indicate when there might be or there is a
problem with one of the vehicle's functions. Often gages
and warning lights work together to indicate a problem
with the vehicle.
When one of the warning lights comes on and stays on
while driving, or when one of the gages shows there
could be a problem, check the section that explains
what to do. Follow this manual's advice. Waiting to do
repairs can be costly and even dangerous.
4-29
Page 250 of 630
Safety Belt Reminders
Driver Safety Belt Reminder Light
When the engine is started, a chime sounds for several
seconds to remind a driver to fasten the safety belt,
unless the driver safety belt is already buckled.
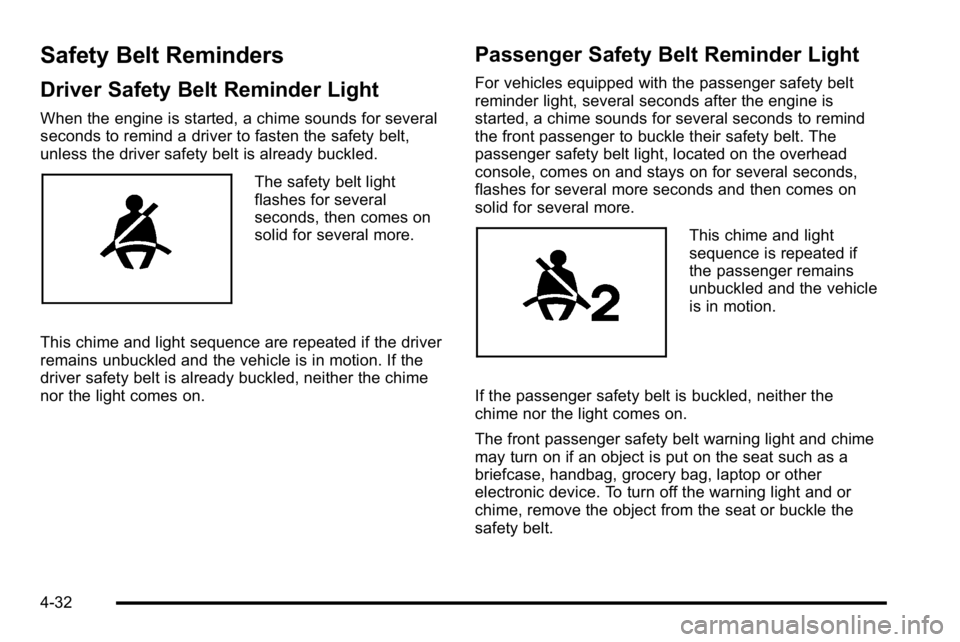
The safety belt light
flashes for several
seconds, then comes on
solid for several more.
This chime and light sequence are repeated if the driver
remains unbuckled and the vehicle is in motion. If the
driver safety belt is already buckled, neither the chime
nor the light comes on.
Passenger Safety Belt Reminder Light
For vehicles equipped with the passenger safety belt
reminder light, several seconds after the engine is
started, a chime sounds for several seconds to remind
the front passenger to buckle their safety belt. The
passenger safety belt light, located on the overhead
console, comes on and stays on for several seconds,
flashes for several more seconds and then comes on
solid for several more.
This chime and light
sequence is repeated if
the passenger remains
unbuckled and the vehicle
is in motion.
If the passenger safety belt is buckled, neither the
chime nor the light comes on.
The front passenger safety belt warning light and chime
may turn on if an object is put on the seat such as a
briefcase, handbag, grocery bag, laptop or other
electronic device. To turn off the warning light and or
chime, remove the object from the seat or buckle the
safety belt.
4-32