2010 GMC SIERRA check transmission fluid
[x] Cancel search: check transmission fluidPage 393 of 630

Hill and Mountain Roads
Driving on steep hills or through mountains is different
than driving on flat or rolling terrain. Tips for driving in
these conditions include:
.Keep the vehicle serviced and in good shape.
.Check all fluid levels and brakes, tires, cooling
system, and transmission.
.Going down steep or long hills, shift to a
lower gear.
{WARNING:
If you do not shift down, the brakes could get so
hot that they would not work well. You would then
have poor braking or even none going down a hill.
You could crash. Shift down to let the engine
assist the brakes on a steep downhill slope.
{WARNING:
Coasting downhill in N (Neutral) or with the
ignition off is dangerous. The brakes will have to
do all the work of slowing down and they could
get so hot that they would not work well. You
would then have poor braking or even none going
down a hill. You could crash. Always have the
engine running and the vehicle in gear when
going downhill.
.Stay in your own lane. Do not swing wide or cut
across the center of the road. Drive at speeds that
let you stay in your own lane.
.Top of hills: Be alert—something could be in your
lane (stalled car, accident).
.Pay attention to special road signs (falling rocks
area, winding roads, long grades, passing or
no-passing zones) and take appropriate action.
See Off-Road Driving
on page 5‑11for information
about driving off-road.
5-25
Page 432 of 630

vehicle is unloaded. Such a selection when unloaded
may result in unpleasant engine and transmission
driving characteristics and reduced fuel economy.
Tow/Haul is recommended only when pulling a heavy
trailer or a large or heavy load.
Trailer Brakes
A loaded trailer that weighs more than 2,000 lbs
(900 kg) needs to have its own brake system that is
adequate for the weight of the trailer. Be sure to read
and follow the instructions for the trailer brakes so they
are installed, adjusted and maintained properly.
If the vehicle is equipped with StabiliTrak
®, the trailer
cannot tap into the vehicle's hydraulic brake system.
The trailer brake system can tap into the vehicle's
hydraulic brake system only if:
.The trailer parts can withstand 3,000 psi
(20 650 kPa) of pressure.
.The trailer's brake system will use less than
0.02 cubic inch (0.3 cc) of fluid from the vehicle's
master cylinder. Otherwise, both braking systems
will not work well or at all.
If everything checks out this far, make the brake tap at
the port on the master cylinder that sends the fluid to
the rear brakes. Use only steel brake tubing to make
the tap.
Integrated Trailer Brake Control System
The vehicle may have an
Integrated Trailer Brake
Control (ITBC) system for
electric trailer brakes.
This symbol is located on the Trailer Brake Control
Panel on vehicles with an Integrated Trailer Brake
Control System. The power output to the trailer brakes
is based on the amount of brake pressure being applied
by the vehicle’ s brake system. This available power
output to the trailer brakes can be adjusted to a wide
range of trailering situations.
The ITBC system is integrated with the vehicle’s brake,
anti‐lock brake and StabiliTrak (if equipped) systems.
In trailering conditions that cause the vehicle’s anti‐lock
brake or StabiliTrak systems to activate, power sent to
the trailer's brakes will be automatically adjusted to
minimize trailer wheel lock-up. This does not imply that
the trailer has the StabiliTrak system.
5-64
Page 442 of 630

Maintenance When Trailer Towing
The vehicle needs service more often when pulling a
trailer. See this manual's Maintenance Schedule or
Index for more information. Things that are especially
important in trailer operation are automatic transmission
fluid, engine oil, axle lubricant, belts, cooling system
and brake system. It is a good idea to inspect these
before and during the trip.
Check periodically to see that all hitch nuts and bolts
are tight.
Trailer Wiring Harness
The vehicle is equipped with one of the following wiring
harnesses for towing a trailer or hauling a slide-in
camper.
Basic Trailer Wiring
All regular, extended cab and crew cab pickups have a
seven‐wire trailer towing harness.
For vehicles not equipped with heavy duty trailering, the
harness is secured to the vehicle's frame behind the
spare tire mount. The harness requires the installation
of a trailer connector, which is available through your
dealer/retailer.
If towing a light‐duty trailer with a standard four‐way
round pin connector, an adapter is available from your
dealer/retailer.
Heavy-DutyTrailer Wiring Harness
Package
For vehicles equipped with heavy duty trailering, the
harness is connected to a bracket on the hitch platform.
The seven-wire harness contains the following trailer
circuits:
.Yellow: Left Stop/Turn Signal
.Dark Green: Right Stop/Turn Signal
.Brown: Taillamps
.White: Ground
.Light Green: Back-up Lamps
.Red: Battery Feed*
.Dark Blue: Trailer Brake*
5-74
Page 447 of 630

Section 6 Service and Appearance Care
Service. . . . . . . . . . . . . . . . . . . . . . . . . . . . . . . . . . . . . . . . . . . . . 6-4
Accessories and Modifications . . . . . . . . . . . . . . . . . . 6-4
California Proposition 65 Warning . . . . . . . . . . . . . . . 6-5
California Perchlorate Materials Requirements . . . . . . . . . . . . . . . . . . . . . . . . . . . . . . . . . 6-5
Doing Your Own Service Work . . . . . . . . . . . . . . . . . . 6-5
Adding Equipment to the Outside of the Vehicle . . . . . . . . . . . . . . . . . . . . . . . . . . . . . . . . . 6-6
Fuel . . . . . . . . . . . . . . . . . . . . . . . . . . . . . . . . . . . . . . . . . . . . . . . . . 6-6
Gasoline Octane . . . . . . . . . . . . . . . . . . . . . . . . . . . . . . . . 6-7
Gasoline Specifications . . . . . . . . . . . . . . . . . . . . . . . . . 6-7
California Fuel . . . . . . . . . . . . . . . . . . . . . . . . . . . . . . . . . . 6-8
Additives . . . . . . . . . . . . . . . . . . . . . . . . . . . . . . . . . . . . . . . . 6-8
Fuel E85 (85% Ethanol) . . . . . . . . . . . . . . . . . . . . . . . . . 6-9
Fuels in Foreign Countries . . . . . . . . . . . . . . . . . . . . . 6-11
Filling the Tank . . . . . . . . . . . . . . . . . . . . . . . . . . . . . . . . . 6-11
Filling a Portable Fuel Container . . . . . . . . . . . . . . . 6-13 Checking Things Under the Hood
. . . . . . . . . . . . . . .6-14
Hood Release . . . . . . . . . . . . . . . . . . . . . . . . . . . . . . . . . 6-15
Engine Compartment Overview . . . . . . . . . . . . . . . . 6-16
Engine Oil . . . . . . . . . . . . . . . . . . . . . . . . . . . . . . . . . . . . . 6-18
Engine Oil Life System . . . . . . . . . . . . . . . . . . . . . . . . 6-20
Engine Air Cleaner/Filter . . . . . . . . . . . . . . . . . . . . . . . 6-21
Automatic Transmission Fluid (4-Speed Transmission) . . . . . . . . . . . . . . . . . . . . . 6-23
Automatic Transmission Fluid (6-Speed Transmission) . . . . . . . . . . . . . . . . . . . . . 6-26
Cooling System . . . . . . . . . . . . . . . . . . . . . . . . . . . . . . . . 6-30
Engine Coolant . . . . . . . . . . . . . . . . . . . . . . . . . . . . . . . . 6-31
Engine Overheating . . . . . . . . . . . . . . . . . . . . . . . . . . . 6-34
Overheated Engine Protection Operating Mode . . . . . . . . . . . . . . . . . . . . . . . . . . . . . 6-36
Engine Fan Noise . . . . . . . . . . . . . . . . . . . . . . . . . . . . . 6-37
Power Steering Fluid . . . . . . . . . . . . . . . . . . . . . . . . . . 6-37
Windshield Washer Fluid . . . . . . . . . . . . . . . . . . . . . . 6-38
Brakes . . . . . . . . . . . . . . . . . . . . . . . . . . . . . . . . . . . . . . . . . 6-39
Battery . . . . . . . . . . . . . . . . . . . . . . . . . . . . . . . . . . . . . . . . . 6-43
Jump Starting . . . . . . . . . . . . . . . . . . . . . . . . . . . . . . . . . . 6-44
6-1
Page 463 of 630

A.Engine Air Cleaner/Filter on page 6‑21.
B. Coolant Surge Tank and Pressure Cap. See Cooling System on page 6‑30.
C. Positive (+) Terminal. See Jump Starting
on
page 6‑44.
D. Battery on page 6‑43.
E. Engine Oil Fill Cap. See “When to Add Engine Oil”
under Engine Oil on page 6‑18.
F. Automatic Transmission Dipstick. See “Checking
the Fluid Level” underAutomatic Transmission
Fluid (4-Speed Transmission)
on page 6‑23or
Automatic Transmission Fluid (6-Speed
Transmission) on page 6‑26.
G. Remote Negative (−) Terminal (Out of View). See Jump Starting on page 6‑44. H. Engine Oil Dipstick (Out of View). See
“Checking
Engine Oil” underEngine Oil on page 6‑18.
I. Engine Cooling Fan. See Cooling System
on
page 6‑30.
J. Power Steering Fluid Reservoir. See Power
Steering Fluid on page 6‑37.
K. Brake Master Cylinder Reservoir. See “Brake
Fluid” under Brakes on page 6‑39.
L. Underhood Fuse Block on page 6‑122.
M. Windshield Washer Fluid Reservoir. See “Adding
Washer Fluid” underWindshield Washer Fluid
on
page 6‑38.
6-17
Page 469 of 630

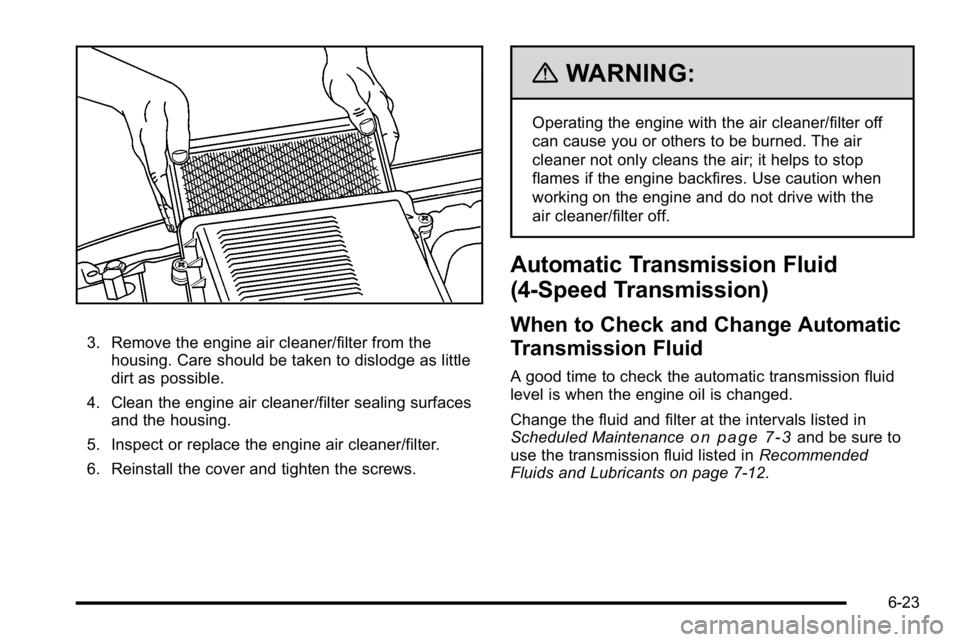
3. Remove the engine air cleaner/filter from thehousing. Care should be taken to dislodge as little
dirt as possible.
4. Clean the engine air cleaner/filter sealing surfaces and the housing.
5. Inspect or replace the engine air cleaner/filter.
6. Reinstall the cover and tighten the screws.
{WARNING:
Operating the engine with the air cleaner/filter off
can cause you or others to be burned. The air
cleaner not only cleans the air; it helps to stop
flames if the engine backfires. Use caution when
working on the engine and do not drive with the
air cleaner/filter off.
Automatic Transmission Fluid
(4-Speed Transmission)
When to Check and Change Automatic
Transmission Fluid
A good time to check the automatic transmission fluid
level is when the engine oil is changed.
Change the fluid and filter at the intervals listed in
Scheduled Maintenance
on page 7‑3and be sure to
use the transmission fluid listed in Recommended
Fluids and Lubricants on page 7‑12.
6-23
Page 470 of 630

How to Check Automatic Transmission
Fluid
Because this operation can be a little difficult, you may
choose to have this done at the dealer/retailer service
department.
If you do it yourself, be sure to follow all the instructions
here or you could get a false reading on the dipstick.
Notice:Too much or too little fluid can damage your
transmission. Too much can mean that some of the
fluid could come out and fall on hot engine parts or
exhaust system parts, starting a fire. Too little fluid
could cause the transmission to overheat. Be sure
to get an accurate reading if you check your
transmission fluid.
Wait at least 30 minutes before checking the
transmission fluid level if you have been driving:
.When outside temperatures are above
32°C (90°F).
.At high speed for quite a while.
.In heavy traffic —especially in hot weather.
.While pulling a trailer.
To get the right reading, the fluid should be at
normal operating temperature, which is
82°C to 93°C (180°F to 200°F). Get the vehicle warmed up by driving about
24 km (15 miles) when outside temperatures are
above 10°C (50°F). If it is colder than 10°C (50°F), drive
the vehicle in 3 (Third) until the engine temperature
gage moves and then remains steady for 10 minutes.
A cold fluid check can be made after the vehicle has
been sitting for eight hours or more with the engine off,
but this is used only as a reference. Let the engine
run at idle for five minutes if outside temperatures are
10°C (50°F) or more. If it is colder than 10°C (50°F),
you may have to idle the engine longer. Should the fluid
level be low during this cold check, you must check the
fluid hot before adding fluid. Checking the fluid hot will
give you a more accurate reading of the fluid level.
Checking the Fluid Level
Prepare the vehicle as follows:
1. Park the vehicle on a level place. Keep the engine running.
2. With the parking brake applied, place the shift lever in P (Park).
3. With your foot on the brake pedal, move the shift lever through each gear range, pausing for about
three seconds in each range. Then, position the
shift lever in P (Park).
4. Let the engine run at idle for three minutes or more.
6-24
Page 471 of 630

Then, without shutting off the engine, follow
these steps:
1. Locate thetransmission dipstick
handle with this
graphic which is
located at the
rear of the engine
compartment, on
the passenger side
of the vehicle.
See Engine Compartment Overview
on page 6‑16for more information on location.
2. Flip the handle up and then pull out the dipstick and wipe it with a clean rag or paper towel.
3. Push it back in all the way, wait three seconds and then pull it back out again.4. Check both sides of the dipstick, and read
the lower level. The fluid level must be in the
COLD area, below the cross-hatched area, for a
cold check or in the HOT or cross-hatched area for
a hot check. Be sure to keep the dipstick pointed
down to get an accurate reading.
5. If the fluid level is in the acceptable range, push the dipstick back in all the way; then flip the handle
down to lock the dipstick in place.
Consistency of Readings
Always check the fluid level at least twice using
the procedure described previously. Consistency
(repeatable readings) is important to maintaining proper
fluid level. If readings are still inconsistent, contact your
dealer/retailer.
6-25