2010 GMC SIERRA DENALI ECU
[x] Cancel search: ECUPage 129 of 550
The theft-deterrent system will not activate if the doors
are locked with the vehicle's key or the manual door
lock. It activates only if you use the power door lock
switch with the door open or the RKE transmitter. You
should also remember that you can start your vehicle
with the correct ignition key if the alarm has been
set off.
To avoid setting off the alarm by accident:
.If you do not want to activate the theft-deterrent
system, the vehicle should be locked with the door
key after the doors are closed.
.Always unlock a door with the RKE transmitter.
Unlocking a door any other way will set off the
alarm if the system has been armed.
If you set off the alarm by accident, press unlock on the
RKE transmitter or place the key in the ignition and turn
it to START to turn it off.
Testing the Alarm
To test the alarm: 1. From inside the vehicle, lower the driver's window and open the driver's door.
2. Activate the system by locking the doors with the RKE transmitter.
3. Get out of the vehicle, close the door and wait for the security light to go out.
4. Then reach in through the window, unlock the door with the manual door lock and open the door. This
should set off the alarm.
If the alarm does not sound when it should but the
headlamps flash, check to see if the horn works. The
horn fuse may be blown. To replace the fuse, see Fuses
and Circuit Breakers on page 6‑114.
If the alarm does not sound or the headlamps do not
flash, see your dealer/retailer for service.
3-19
Page 130 of 550

PASS-Key®III+ Electronic
Immobilizer
See Radio Frequency Statementon page 8‑20for
information regarding Part 15 of the Federal
Communications Commission (FCC) Rules and
RSS-210/211 of Industry and Science Canada.
PASS-Key®III+ Electronic
Immobilizer Operation
Your vehicle has PASS-Key®III+ (Personalized
Automotive Security System) theft-deterrent system.
PASS-Key
®III+ is a passive theft-deterrent system.
The system is automatically armed when the key is
removed from the ignition.
The system is automatically disarmed when the key is
turned to ON/RUN, ACC/ACCESSORY or START from
the LOCK/OFF position. You do not have to manually arm or disarm the system.
The security light will come on if there is a problem with
arming or disarming the theft-deterrent system.
When the PASS-Key
®III+ system senses that someone
is using the wrong key, it prevents the vehicle from
starting. Anyone using a trial-and-error method to start
the vehicle will be discouraged because of the high
number of electrical key codes.
If the engine does not start and the security light on the
instrument panel cluster comes on when trying to start
the vehicle, there may be a problem with your
theft-deterrent system. Turn the ignition off and try
again.
If the engine still does not start, and the key appears to
be undamaged, try another ignition key. At this time,
you may also want to check the fuse, see Fuses and
Circuit Breakers
on page 6‑114. If the engine still does
not start with the other key, your vehicle needs service.
If your vehicle does start, the first key may be faulty.
See your dealer/retailer who can service the
PASS-Key
®III+ to have a new key made. In an
emergency, contact Roadside Assistance.
3-20
Page 131 of 550
It is possible for the PASS-Key®III+ decoder to learn
the transponder value of a new or replacement key.
Up to 10 keys may be programmed for the vehicle. The
following procedure is for programming additional keys
only. If all the currently programmed keys are lost or do
not operate, you must see your dealer/retailer or a
locksmith who can service PASS-Key
®III+ to have keys
made and programmed to the system.
See your dealer/retailer or a locksmith who can service
PASS-Key
®III+ to get a new key blank that is cut
exactly as the ignition key that operates the system.
To program the new additional key:
1. Verify that the new key has a
1stamped on it.
2. Insert the original, already programmed, key in the ignition and start the engine. If the engine will not
start, see your dealer/retailer for service. 3. After the engine has started, turn the key to LOCK/
OFF, and remove the key.
4. Insert the new key to be programmed and turn it to the ON/RUN position within five seconds of turning
the ignition to the LOCK/OFF position in Step 3.
The security light will turn off once the key has
been programmed.
5. Repeat Steps 1 through 4 if additional keys are to be programmed.
If you lose or damage your PASS-Key
®III+ key, see
your dealer/retailer or a locksmith who can service
PASS-Key
®III+ to have a new key made.
Do not leave the key or device that disarms or
deactivates the theft deterrent system in the vehicle.
3-21
Page 136 of 550
Adjustable Throttle and Brake Pedal
On vehicles with this feature, you can change the
position of the throttle and brake pedals.
No adjustment to the pedals can be made when the
vehicle is in R (Reverse) or while using the cruise
control.
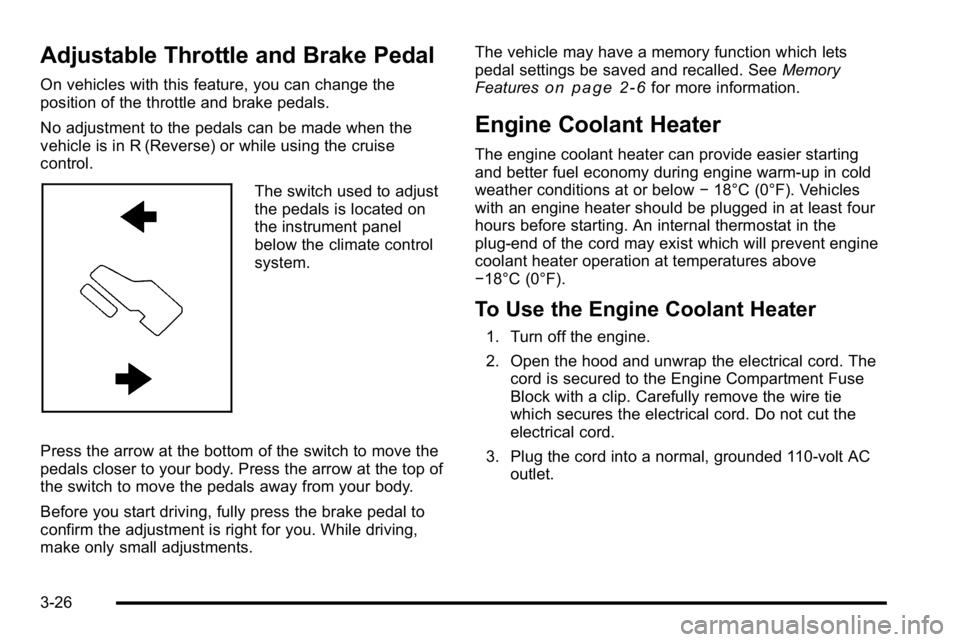
The switch used to adjust
the pedals is located on
the instrument panel
below the climate control
system.
Press the arrow at the bottom of the switch to move the
pedals closer to your body. Press the arrow at the top of
the switch to move the pedals away from your body.
Before you start driving, fully press the brake pedal to
confirm the adjustment is right for you. While driving,
make only small adjustments. The vehicle may have a memory function which lets
pedal settings be saved and recalled. See
Memory
Features
on page 2‑6for more information.
Engine Coolant Heater
The engine coolant heater can provide easier starting
and better fuel economy during engine warm-up in cold
weather conditions at or below −18°C (0°F). Vehicles
with an engine heater should be plugged in at least four
hours before starting. An internal thermostat in the
plug-end of the cord may exist which will prevent engine
coolant heater operation at temperatures above
−18°C (0°F).
To Use the Engine Coolant Heater
1. Turn off the engine.
2. Open the hood and unwrap the electrical cord. The cord is secured to the Engine Compartment Fuse
Block with a clip. Carefully remove the wire tie
which secures the electrical cord. Do not cut the
electrical cord.
3. Plug the cord into a normal, grounded 110-volt AC outlet.
3-26
Page 159 of 550
Disconnecting the Rear Vision Camera
To disconnect the camera:1. Remove the license plate.
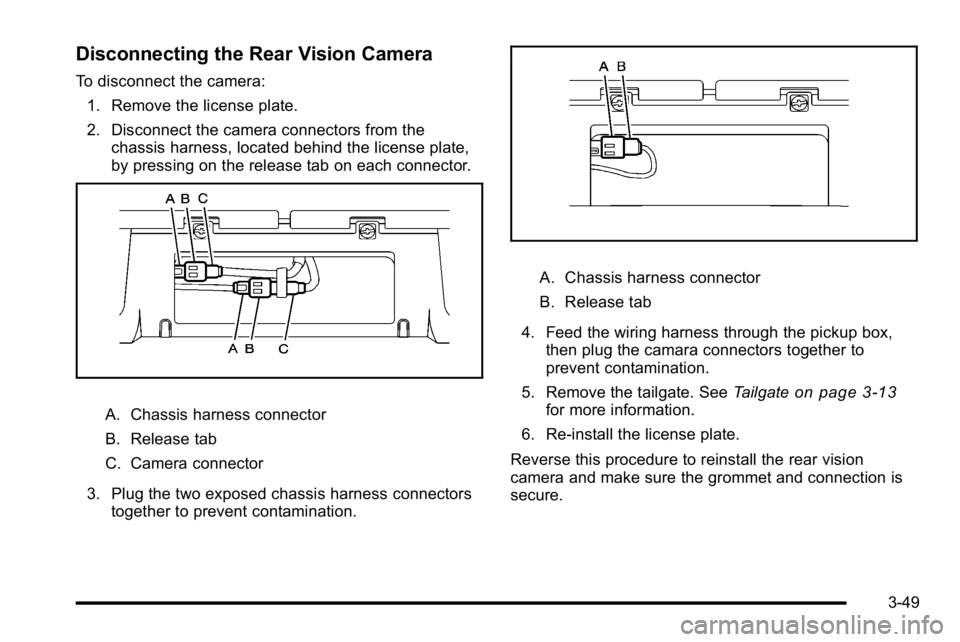
2. Disconnect the camera connectors from the chassis harness, located behind the license plate,
by pressing on the release tab on each connector.
A. Chassis harness connector
B. Release tab
C. Camera connector
3. Plug the two exposed chassis harness connectors together to prevent contamination.
A. Chassis harness connector
B. Release tab
4. Feed the wiring harness through the pickup box, then plug the camara connectors together to
prevent contamination.
5. Remove the tailgate. See Tailgate
on page 3‑13for more information.
6. Re‐install the license plate.
Reverse this procedure to reinstall the rear vision
camera and make sure the grommet and connection is
secure.
3-49
Page 161 of 550
Universal Home Remote
System
SeeRadio Frequency Statementon page 8‑20for
information regarding Part 15 of the Federal
Communications Commission (FCC) Rules and
RSS-210/211 of Industry and Science Canada.
Universal Home Remote System
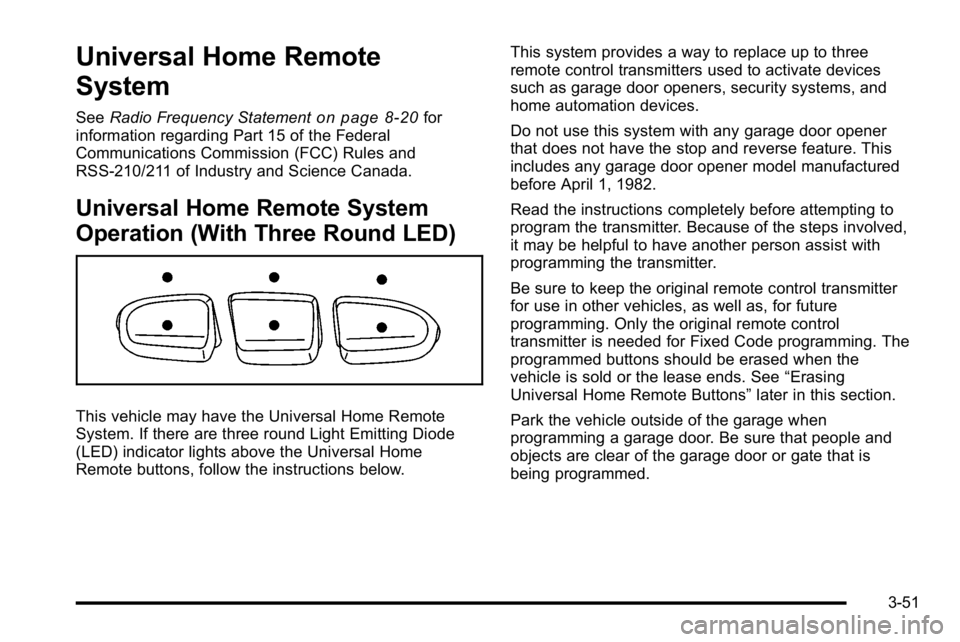
Operation (With Three Round LED)
This vehicle may have the Universal Home Remote
System. If there are three round Light Emitting Diode
(LED) indicator lights above the Universal Home
Remote buttons, follow the instructions below. This system provides a way to replace up to three
remote control transmitters used to activate devices
such as garage door openers, security systems, and
home automation devices.
Do not use this system with any garage door opener
that does not have the stop and reverse feature. This
includes any garage door opener model manufactured
before April 1, 1982.
Read the instructions completely before attempting to
program the transmitter. Because of the steps involved,
it may be helpful to have another person assist with
programming the transmitter.
Be sure to keep the original remote control transmitter
for use in other vehicles, as well as, for future
programming. Only the original remote control
transmitter is needed for Fixed Code programming. The
programmed buttons should be erased when the
vehicle is sold or the lease ends. See
“Erasing
Universal Home Remote Buttons” later in this section.
Park the vehicle outside of the garage when
programming a garage door. Be sure that people and
objects are clear of the garage door or gate that is
being programmed.
3-51
Page 163 of 550
3. Immediately return to the vehicle. Press and holdthe Universal Home Remote button that will be
used to control the garage door until the garage
door moves. The indicator light, above the selected
button, should slowly blink. This button may need
to be held for up to 20 seconds.
4. Immediately, within one second, release the button when the garage door moves. The indicator light
will blink rapidly until programming is complete.
5. Press and release the same button again. The garage door should move, confirming that
programming is successful and complete.
To program another Rolling Code device such as an
additional garage door opener, a security device,
or home automation device, repeat Steps 1 through 5,
choosing a different function button in Step 3 than what
was used for the garage door opener.
If these instructions do not work, the garage door
opener is probably a Fixed Code unit. Follow the
Programming instructions that follow for a Fixed Code
garage door opener.Programming Universal Home
Remote —Fixed Code
For questions or help programming the Universal Home
Remote System, call 1-866-572-2728 or go to
learcar2u.com.
Most garage door openers sold before 1996 are Fixed
Code units.
Programming a garage door opener involves
time-sensitive actions, so read the entire procedure
before starting. Otherwise, the device will time out and
the procedure will have to be repeated.
3-53
Page 166 of 550
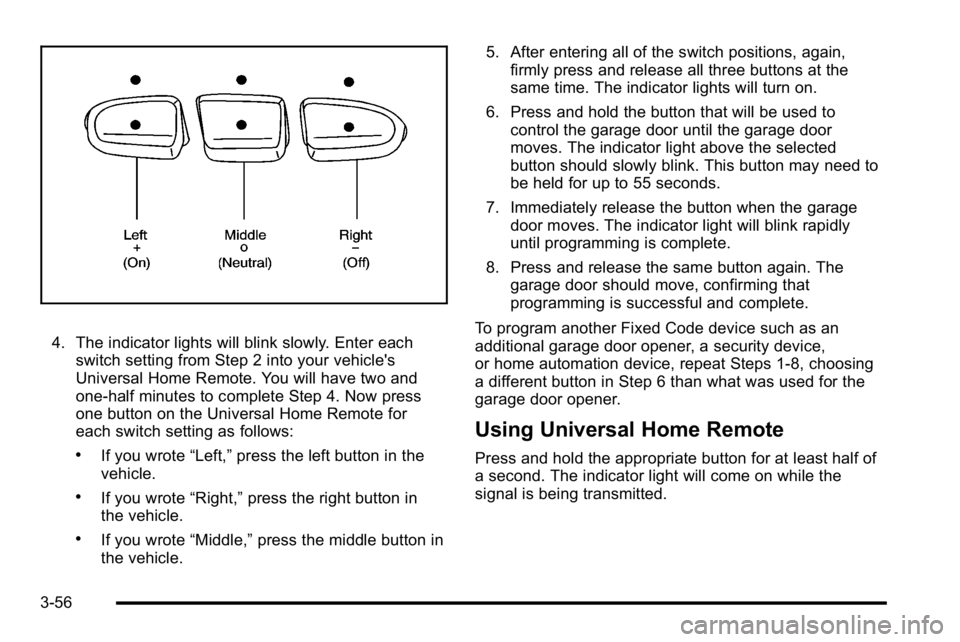
4. The indicator lights will blink slowly. Enter eachswitch setting from Step 2 into your vehicle's
Universal Home Remote. You will have two and
one-half minutes to complete Step 4. Now press
one button on the Universal Home Remote for
each switch setting as follows:
.If you wrote “Left,”press the left button in the
vehicle.
.If you wrote “Right,”press the right button in
the vehicle.
.If you wrote “Middle,”press the middle button in
the vehicle. 5. After entering all of the switch positions, again,
firmly press and release all three buttons at the
same time. The indicator lights will turn on.
6. Press and hold the button that will be used to control the garage door until the garage door
moves. The indicator light above the selected
button should slowly blink. This button may need to
be held for up to 55 seconds.
7. Immediately release the button when the garage door moves. The indicator light will blink rapidly
until programming is complete.
8. Press and release the same button again. The garage door should move, confirming that
programming is successful and complete.
To program another Fixed Code device such as an
additional garage door opener, a security device,
or home automation device, repeat Steps 1-8, choosing
a different button in Step 6 than what was used for the
garage door opener.
Using Universal Home Remote
Press and hold the appropriate button for at least half of
a second. The indicator light will come on while the
signal is being transmitted.
3-56