2010 GMC SIERRA DENALI instrument cluster
[x] Cancel search: instrument clusterPage 173 of 550
Section 4 Instrument Panel
Instrument Panel Overview. . . . . . . . . . . . . . . . . . . . . . . .4-3
Hazard Warning Flashers . . . . . . . . . . . . . . . . . . . . . . . 4-3
Horn . . . . . . . . . . . . . . . . . . . . . . . . . . . . . . . . . . . . . . . . . . . . 4-3
Tilt Wheel . . . . . . . . . . . . . . . . . . . . . . . . . . . . . . . . . . . . . . . 4-3
Turn Signal/Multifunction Lever . . . . . . . . . . . . . . . . . . 4-4
Turn and Lane-Change Signals . . . . . . . . . . . . . . . . . 4-4
Headlamp High/Low-Beam Changer . . . . . . . . . . . . 4-5
Flash-to-Pass . . . . . . . . . . . . . . . . . . . . . . . . . . . . . . . . . . . 4-5
Windshield Wipers . . . . . . . . . . . . . . . . . . . . . . . . . . . . . . 4-6
Windshield Washer . . . . . . . . . . . . . . . . . . . . . . . . . . . . . 4-6
Cruise Control . . . . . . . . . . . . . . . . . . . . . . . . . . . . . . . . . . 4-7
Exterior Lamps . . . . . . . . . . . . . . . . . . . . . . . . . . . . . . . . 4-10
Headlamps on Reminder . . . . . . . . . . . . . . . . . . . . . . . 4-11
Daytime Running Lamps (DRL) . . . . . . . . . . . . . . . . 4-11
Automatic Headlamp System . . . . . . . . . . . . . . . . . . 4-12
Puddle Lamps . . . . . . . . . . . . . . . . . . . . . . . . . . . . . . . . . 4-13
Fog Lamps . . . . . . . . . . . . . . . . . . . . . . . . . . . . . . . . . . . . 4-13
Instrument Panel Brightness . . . . . . . . . . . . . . . . . . . 4-13
Dome Lamps . . . . . . . . . . . . . . . . . . . . . . . . . . . . . . . . . . 4-13
Dome Lamp Override . . . . . . . . . . . . . . . . . . . . . . . . . . 4-14
Entry Lighting . . . . . . . . . . . . . . . . . . . . . . . . . . . . . . . . . . 4-14
Exit Lighting . . . . . . . . . . . . . . . . . . . . . . . . . . . . . . . . . . . 4-14
Reading Lamps . . . . . . . . . . . . . . . . . . . . . . . . . . . . . . . . 4-14
Cargo Lamp . . . . . . . . . . . . . . . . . . . . . . . . . . . . . . . . . . . 4-14
Electric Power Management . . . . . . . . . . . . . . . . . . . 4-15 Battery Run-Down Protection . . . . . . . . . . . . . . . . . . 4-15
Accessory Power Outlet(s) . . . . . . . . . . . . . . . . . . . . . 4-16
Ashtray(s) and Cigarette Lighter . . . . . . . . . . . . . . . 4-17
Climate Controls . . . . . . . . . . . . . . . . . . . . . . . . . . . . . . . . . . 4-17
Climate Control System (With Air
Conditioning) . . . . . . . . . . . . . . . . . . . . . . . . . . . . . . . . 4-17
Climate Control System (With Heater Only) . . . . 4-20
Dual Automatic Climate Control System . . . . . . . 4-21
Outlet Adjustment . . . . . . . . . . . . . . . . . . . . . . . . . . . . . . 4-27
Warning Lights, Gages, and Indicators . . . . . . . . . .4-27
Instrument Panel Cluster . . . . . . . . . . . . . . . . . . . . . . . 4-28
Speedometer and Odometer . . . . . . . . . . . . . . . . . . . 4-29
Trip Odometer . . . . . . . . . . . . . . . . . . . . . . . . . . . . . . . . . 4-29
Tachometer . . . . . . . . . . . . . . . . . . . . . . . . . . . . . . . . . . . . 4-29
Safety Belt Reminders . . . . . . . . . . . . . . . . . . . . . . . . . 4-30
Airbag Readiness Light . . . . . . . . . . . . . . . . . . . . . . . . 4-31
Passenger Airbag Status Indicator . . . . . . . . . . . . . 4-32
Charging System Light . . . . . . . . . . . . . . . . . . . . . . . . 4-33
Voltmeter Gage . . . . . . . . . . . . . . . . . . . . . . . . . . . . . . . . 4-33
Brake System Warning Light . . . . . . . . . . . . . . . . . . . 4-34
Antilock Brake System (ABS) Warning Light . . . 4-36
StabiliTrak
®Indicator Light . . . . . . . . . . . . . . . . . . . . . 4-36
Engine Coolant Temperature Gage . . . . . . . . . . . . 4-37
Tire Pressure Light . . . . . . . . . . . . . . . . . . . . . . . . . . . . 4-37
4-1
Page 176 of 550
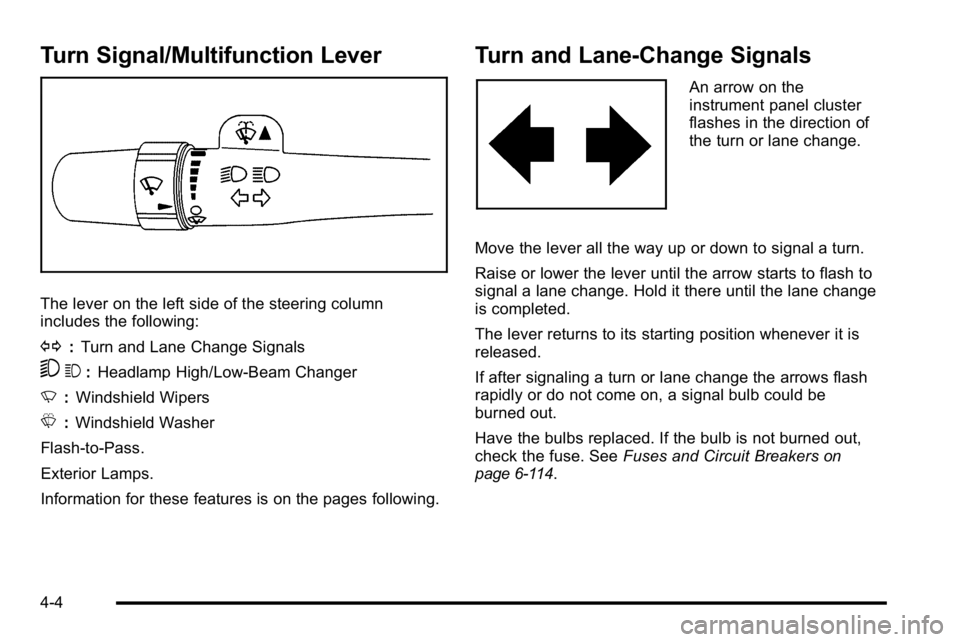
Turn Signal/Multifunction Lever
The lever on the left side of the steering column
includes the following:
G:Turn and Lane Change Signals
53 :Headlamp High/Low-Beam Changer
N :Windshield Wipers
L :Windshield Washer
Flash-to-Pass.
Exterior Lamps.
Information for these features is on the pages following.
Turn and Lane-Change Signals
An arrow on the
instrument panel cluster
flashes in the direction of
the turn or lane change.
Move the lever all the way up or down to signal a turn.
Raise or lower the lever until the arrow starts to flash to
signal a lane change. Hold it there until the lane change
is completed.
The lever returns to its starting position whenever it is
released.
If after signaling a turn or lane change the arrows flash
rapidly or do not come on, a signal bulb could be
burned out.
Have the bulbs replaced. If the bulb is not burned out,
check the fuse. See Fuses and Circuit Breakers
on
page 6‑114.
4-4
Page 177 of 550
Turn Signal On Chime
If the turn signal is left on for more than 3/4 of a mile
(1.2 km), a chime sounds at each flash of the turn signal
and the message TURN SIGNAL ON also appears in
the Driver Information Center (DIC). Move the turn
signal lever to the off position, to turn the chime and
message off.
Headlamp High/Low-Beam Changer
53(Headlamp High/Low Beam Changer) : Push the
lever toward the instrument panel, to change the
headlamps from low to high beam.
Pull the multifunction lever toward you and release it, to
return to low-beam headlamps.
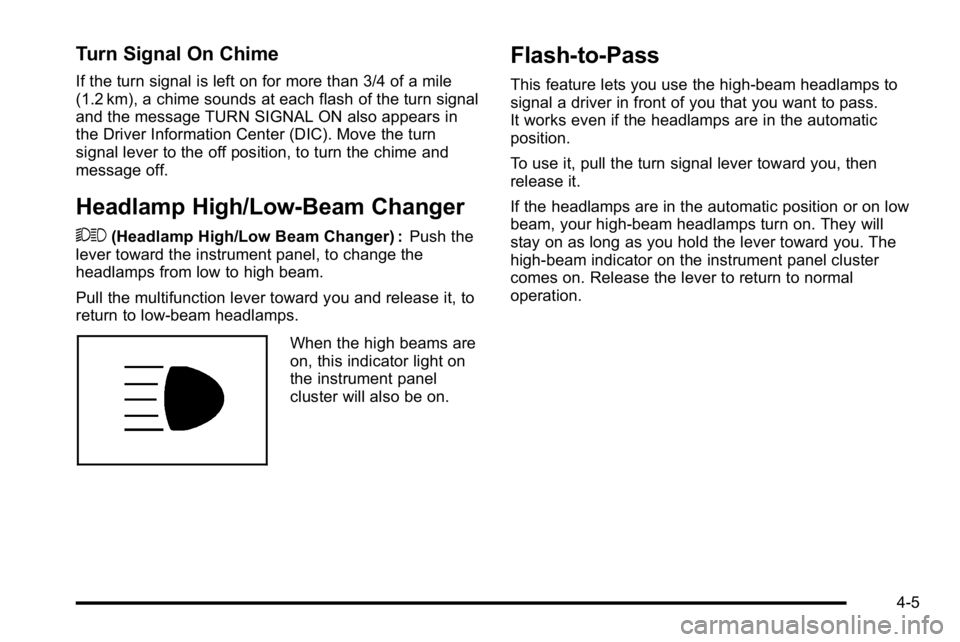
When the high beams are
on, this indicator light on
the instrument panel
cluster will also be on.
Flash-to-Pass
This feature lets you use the high-beam headlamps to
signal a driver in front of you that you want to pass.
It works even if the headlamps are in the automatic
position.
To use it, pull the turn signal lever toward you, then
release it.
If the headlamps are in the automatic position or on low
beam, your high-beam headlamps turn on. They will
stay on as long as you hold the lever toward you. The
high-beam indicator on the instrument panel cluster
comes on. Release the lever to return to normal
operation.
4-5
Page 180 of 550
Setting Cruise Control
Cruise control will not work if the parking brake is set,
or if the master cylinder brake fluid level is low.
The cruise control light on the instrument panel cluster
comes on after the cruise control has been set to the
desired speed.
{WARNING:
If you leave your cruise control on when you are
not using cruise, you might hit a button and go
into cruise when you do not want to. You could be
startled and even lose control. Keep the cruise
control switch off until you want to use cruise
control.
1. Press
T.
2. Get up to the desired speed.
3. Press the SET− button located on the steering
wheel and release it.
4. Take your foot off the accelerator.
Resuming a Set Speed
If the brakes are applied while the cruise control is set,
the cruise control is disengaged. But it does not need to
be reset.
Once the vehicle speed reaches about 40 km/h
(25 mph) or more, press the +RES button on the
steering wheel. The vehicle will go back to the previous
set speed and stay there.
Increasing Speed While Using Cruise
Control
To increase the cruise speed while using cruise control:
.Press and hold the +RES button on the steering
wheel until the new desired speed is reached, then
release it.
.To increase vehicle speed in small increments,
press the +RES button. Each time this is done, the
vehicle goes about 1.6 km/h (1 mph) faster.
4-8
Page 184 of 550

Automatic Headlamp System
When it is dark enough outside, the automatic
headlamp system turns on the headlamps at the normal
brightness, along with the taillamps, sidemarker, parking
lamps, and the instrument panel lights. The radio lights
will also be dim.
To turn off the automatic headlamp system, turn the
exterior lamps switch to the off position and then
release it. For vehicles first sold in Canada, the
transmission must be in the P (Park) position, before the
automatic headlamp system can be turned off.
The vehicle has a light sensor located on the top of the
instrument panel in the defroster grille that regulates
when the automatic headlamps turn on. Do not cover
the sensor or the headlamps will come on whenever the
ignition is on.
The system may also turn on the headlamps when
driving through a parking garage, heavy overcast
weather, or a tunnel. This is normal.
There is a delay in the transition between the daytime
and nighttime operation of the Daytime Running Lamps
(DRL) and the automatic headlamp systems so that
driving under bridges or bright overhead street lightsdoes not affect the system. The DRL and automatic
headlamp system is only affected when the light sensor
detects a change in lighting lasting longer than the
delay.
If the vehicle is started in a dark garage, the automatic
headlamp system will come on immediately. Once the
vehicle leaves the garage, it takes approximately
one minute for the automatic headlamp system to
change to DRL if it is bright enough outside. During that
delay, the instrument panel cluster may not be as bright
as usual. Make sure the instrument panel brightness
control is in the full bright position. See
Instrument
Panel Brightness on page 4‑13.
To idle the vehicle with the automatic headlamp system
off, turn the control to the off position.
The headlamps will also stay on after you exit the
vehicle. This feature can be programmed using the
Driver Information Center (DIC). See DIC Vehicle
Customization (With DIC Buttons) on page 4‑67.
The regular headlamp system can be turned on when
needed.
4-12
Page 200 of 550
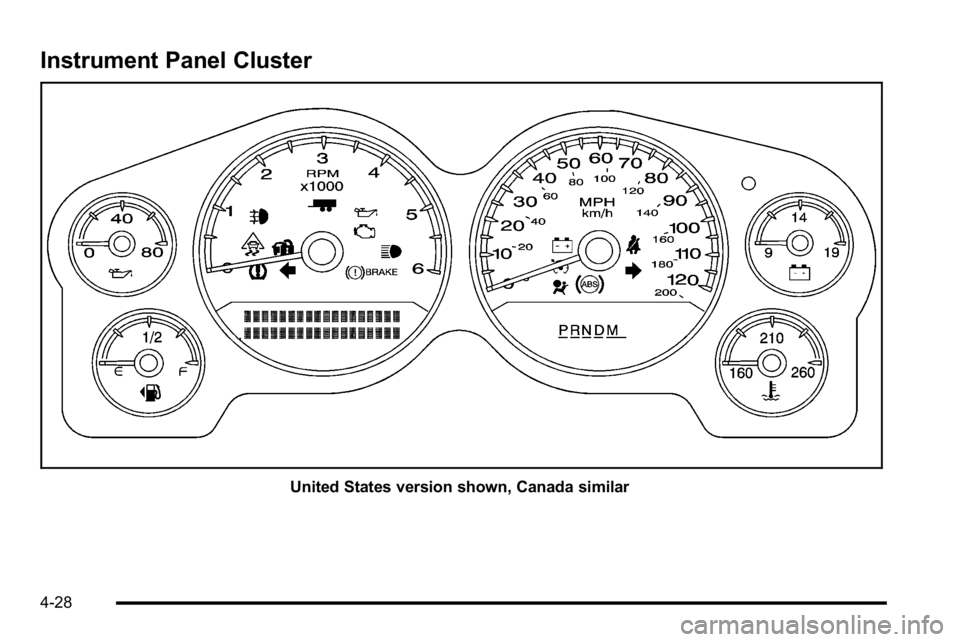
Instrument Panel Cluster
United States version shown, Canada similar
4-28
Page 201 of 550
Speedometer and Odometer
The speedometer shows the vehicle speed in both
miles per hour (mph) and kilometers per hour (km/h).
The odometer shows how far the vehicle has been
driven, in either miles (used in the United States) or
kilometers (used in Canada).
Engine Hour Meter Display
The Driver Information Center (DIC) can also display
the number of hours the engine has run. To display the
engine hours, turn the ignition off, press and hold the
reset button for at least four seconds. The hour meter
displays for up to 30 seconds, or until the ignition is
turned on. SeeDIC Operation and Displays (Using Trip
Odometer Reset Stem)
on page 4‑44or DIC Operation
and Displays (Using DIC Buttons)on page 4‑48for
more information.
Trip Odometer
The trip odometer shows how far the vehicle has been
driven since the trip odometer was last set to zero.
Press the reset button, located on the instrument panel
cluster next to the voltmeter, to toggle between the trip
odometer and the regular odometer. Holding the reset
button for approximately one second while the trip
odometer is displayed will reset it. To display the odometer reading with the ignition off,
press the reset button.
See
DIC Operation and Displays (Using Trip Odometer
Reset Stem)
on page 4‑44or DIC Operation and
Displays (Using DIC Buttons)on page 4‑48for more
information.
Tachometer
The tachometer displays the engine speed in
revolutions per minute (rpm).
Notice: If the engine is operated with the
tachometer in the solid red area, the vehicle could
be damaged. The damages would not be covered by
the vehicle warranty. Do not operate the engine in
the solid red area.
4-29
Page 216 of 550
Here are some situations customers may experience
with the fuel gage. None of these indicate a problem
with the fuel gage.
.At the gas station, the fuel pump shuts off before
the gage reads full.
.It takes a little more or less fuel to fill up than the
fuel gage indicated. For example, the gage may
have indicated the tank was half full, but it actually
took a little more or less than half the tank's
capacity to fill the tank.
.The gage goes back to empty when the ignition is
turned off.
Driver Information Center (DIC)
Your vehicle has a Driver Information Center (DIC).
The DIC displays information about your vehicle. It also
displays warning messages if a system problem is
detected.
All messages will appear in the DIC display located
below the tachometer in the instrument panel cluster.
The DIC comes on when the ignition is on. After a short
delay, the DIC will display the information that was last
displayed before the engine was turned off.For the displays available using DIC buttons, see
“DIC
Operation and Displays (Using DIC Buttons)” later in
this section and DIC Vehicle Customization (With DIC
Buttons) on page 4‑67.
For the displays available using the trip odometer reset
stem, see “DIC Operation and Displays (Using Trip
Odometer Reset Stem)” later in this section.
DIC Operation and Displays (Using
Trip Odometer Reset Stem)
The DIC has different displays which can be accessed
by pressing the trip odometer reset stem located on the
instrument panel cluster. Pressing the trip odometer
reset stem will also turn off, or acknowledge, DIC
messages.
You can use the trip odometer reset stem to view the
following displays: language selection, trip odometer,
trailer brake gain and output information for vehicles
with the Integrated Trailer Brake Control (ITBC) system,
compass zone setting, compass recalibration, oil life,
Tire Pressure Monitor System (TPMS) programming for
vehicles with the TPMS, and Remote Keyless Entry
(RKE) transmitter programming.
4-44