2010 GMC SAVANA automatic transmission
[x] Cancel search: automatic transmissionPage 261 of 424

Leaving After Parking on a Hill
1. Apply and hold the brake pedal while you:
•start the engine,
•shift into a gear, and
•release the parking brake.
2. Let up on the brake pedal.
3. Drive slowly until the trailer is clear of the chocks.
4. Stop and have someone pick up and store the
chocks.
Maintenance When Trailer Towing
The vehicle needs service more often when pulling a
trailer. See this manual’s Maintenance Schedule
or Index for more information. Things that are especially
important in trailer operation are automatic transmission
fluid, engine oil, axle lubricant, belts, cooling system
and brake system. It is a good idea to inspect
these before and during the trip.
Check periodically to see that all hitch nuts and bolts
are tight.
Trailer Wiring Harness
The optional heavy-duty trailer wiring package includes
a wiring harness, with a seven-pin connector at the
rear of the vehicle and a four-wire harness assembly
under the driver side of the instrument panel. The
four-wire harness assembly comes without a connector.
If the vehicle does not have a trailer hitch, the
seven-wire harness assembly with connector is taped
together and located in a frame pocket at the driver side
rear left corner of the frame.
If the vehicle has a trailer hitch, the seven-wire harness
assembly with connector is attached to a bracket on
the hitch platform. In both cases, the seven-wire harness
has a connector and includes a 30-amp feed wire.
5-37
Page 263 of 424

Service............................................................6-3
Accessories and Modifications..........................6-3
California Proposition 65 Warning.....................6-4
California Perchlorate Materials Requirements.....6-4
Doing Your Own Service Work.........................6-4
Adding Equipment to the Outside of the
Vehicle......................................................6-5
Fuel................................................................6-5
Gasoline Octane............................................6-6
Gasoline Specifications....................................6-6
California Fuel...............................................6-7
Additives.......................................................6-7
Fuel E85 (85% Ethanol)..................................6-8
Fuels in Foreign Countries...............................6-9
Filling the Tank............................................6-10
Filling a Portable Fuel Container.....................6-12
Checking Things Under the Hood....................6-12
Hood Release..............................................6-13
Engine Compartment Overview.......................6-14
Engine Oil...................................................6-15
Engine Oil Life System..................................6-18
Engine Air Cleaner/Filter................................6-19
Automatic Transmission Fluid (4-Speed
Transmission)...........................................6-20
Automatic Transmission Fluid (6-Speed
Transmission)...........................................6-23Cooling System............................................6-26
Engine Coolant.............................................6-28
Engine Overheating.......................................6-33
Engine Fan Noise.........................................6-34
Power Steering Fluid.....................................6-35
Windshield Washer Fluid................................6-36
Brakes........................................................6-37
Battery........................................................6-40
Jump Starting...............................................6-41
All-Wheel Drive.............................................
.6-45
Rear Axle.......................................................6-46
Front Axle......................................................6-46
Noise Control System.....................................6-47
Tampering with Noise Control System
Prohibited.................................................6-47
Bulb Replacement..........................................6-48
Halogen Bulbs..............................................6-49
Headlamps..................................................6-49
Front Turn Signal, Sidemarker and Parking
Lamps .....................................................6-51
Center High-Mounted Stoplamp (CHMSL).........6-51
Taillamps.....................................................6-52
License Plate Lamp......................................6-53
Replacement Bulbs.......................................6-53
Windshield Wiper Blade Replacement..............6-54
Section 6 Service and Appearance Care
6-1
Page 277 of 424
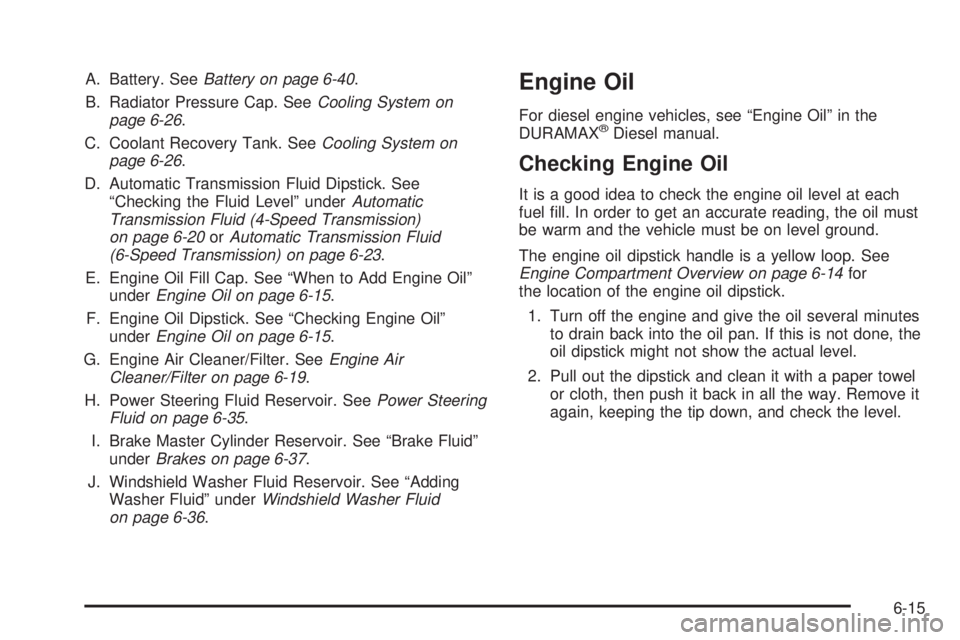
A. Battery. SeeBattery on page 6-40.
B. Radiator Pressure Cap. SeeCooling System on
page 6-26.
C. Coolant Recovery Tank. SeeCooling System on
page 6-26.
D. Automatic Transmission Fluid Dipstick. See
“Checking the Fluid Level” underAutomatic
Transmission Fluid (4-Speed Transmission)
on page 6-20orAutomatic Transmission Fluid
(6-Speed Transmission) on page 6-23.
E. Engine Oil Fill Cap. See “When to Add Engine Oil”
underEngine Oil on page 6-15.
F. Engine Oil Dipstick. See “Checking Engine Oil”
underEngine Oil on page 6-15.
G. Engine Air Cleaner/Filter. SeeEngine Air
Cleaner/Filter on page 6-19.
H. Power Steering Fluid Reservoir. SeePower Steering
Fluid on page 6-35.
I. Brake Master Cylinder Reservoir. See “Brake Fluid”
underBrakes on page 6-37.
J. Windshield Washer Fluid Reservoir. See “Adding
Washer Fluid” underWindshield Washer Fluid
on page 6-36.Engine Oil
For diesel engine vehicles, see “Engine Oil” in the
DURAMAX®Diesel manual.
Checking Engine Oil
It is a good idea to check the engine oil level at each
fuel fill. In order to get an accurate reading, the oil must
be warm and the vehicle must be on level ground.
The engine oil dipstick handle is a yellow loop. See
Engine Compartment Overview on page 6-14for
the location of the engine oil dipstick.
1. Turn off the engine and give the oil several minutes
to drain back into the oil pan. If this is not done, the
oil dipstick might not show the actual level.
2. Pull out the dipstick and clean it with a paper towel
or cloth, then push it back in all the way. Remove it
again, keeping the tip down, and check the level.
6-15
Page 282 of 424
When to Inspect the Engine Air
Cleaner/Filter
Inspect the air cleaner/filter at the MaintenanceII
intervals and replace it at the first oil change after each
50,000 mile (80 000 km) interval. SeeScheduled
Maintenance on page 7-3for more information. If you
are driving in dusty/dirty conditions, inspect the filter
at each engine oil change.
How to Inspect the Engine Air
Cleaner/Filter
To inspect the air cleaner/filter, remove the filter from
the vehicle and lightly shake the filter to release
loose dust and dirt. If the filter remains caked with dirt, a
new filter is required. Never use compressed air to
clean the filter.
To inspect or replace the engine air cleaner/filter, do the
following:
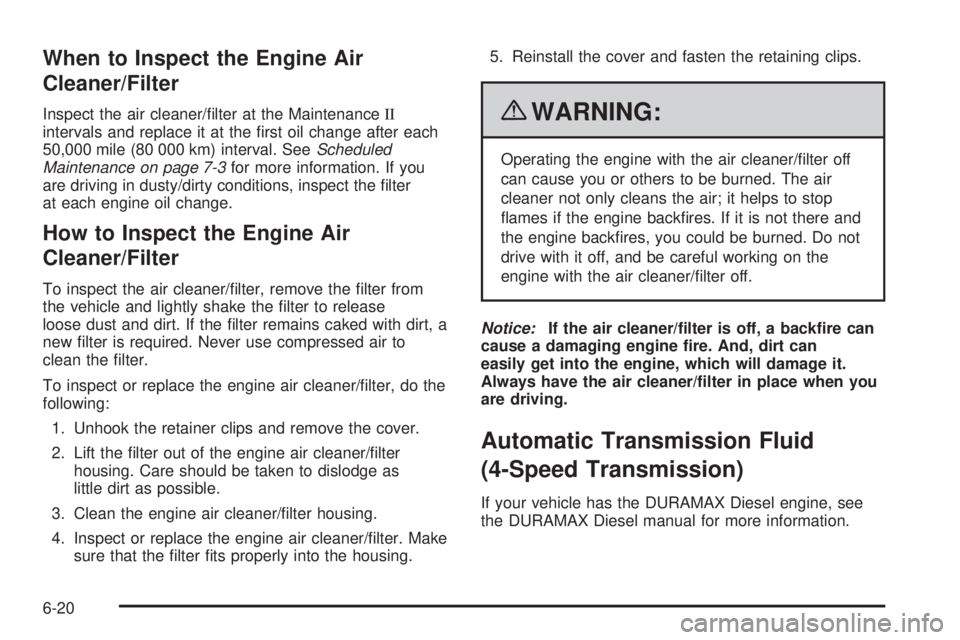
1. Unhook the retainer clips and remove the cover.
2. Lift the filter out of the engine air cleaner/filter
housing. Care should be taken to dislodge as
little dirt as possible.
3. Clean the engine air cleaner/filter housing.
4. Inspect or replace the engine air cleaner/filter. Make
sure that the filter fits properly into the housing.5. Reinstall the cover and fasten the retaining clips.
{WARNING:
Operating the engine with the air cleaner/filter off
can cause you or others to be burned. The air
cleaner not only cleans the air; it helps to stop
flames if the engine backfires. If it is not there and
the engine backfires, you could be burned. Do not
drive with it off, and be careful working on the
engine with the air cleaner/filter off.
Notice:If the air cleaner/lter is off, a backre can
cause a damaging engine re. And, dirt can
easily get into the engine, which will damage it.
Always have the air cleaner/lter in place when you
are driving.
Automatic Transmission Fluid
(4-Speed Transmission)
If your vehicle has the DURAMAX Diesel engine, see
the DURAMAX Diesel manual for more information.
6-20
Page 283 of 424

When to Check and Change Automatic
Transmission Fluid
A good time to check your automatic transmission fluid
level is when the engine oil is changed.
Change the fluid and filter at the intervals listed in
Scheduled Maintenance on page 7-3, and be sure to
use the transmission fluid listed inRecommended Fluids
and Lubricants on page 7-11.
How to Check Automatic Transmission
Fluid
Because this operation can be a little difficult, you may
choose to have this done at the dealer/retailer service
department.
If you do it yourself, be sure to follow all the instructions
here, or you could get a false reading on the dipstick.
Notice:Too much or too little uid can damage
your transmission. Too much can mean that some
of the uid could come out and fall on hot engine
parts or exhaust system parts, starting a re.
Too little uid could cause the transmission to
overheat. Be sure to get an accurate reading if
you check your transmission uid.Wait at least 30 minutes before checking the
transmission fluid level if you have been driving:
•When outside temperatures are above 32°C (90°F).
•At high speed for quite a while.
•In heavy traffic — especially in hot weather.
•While pulling a trailer.
To get the right reading, the fluid should be at
normal operating temperature, which is 82°C to 93°C
(180°F to 200°F).
Get the vehicle warmed up by driving about 24 km
(15 miles) when outside temperatures are above
10°C (50°F). If it is colder than 10°C (50°F), drive the
vehicle in D (DRIVE) until the engine temperature gage
moves and then remains steady for 10 minutes.
A cold fluid check can be made after the vehicle has
been sitting for eight hours or more with the engine off,
but this is used only as a reference. Let the engine
run at idle for five minutes if outside temperatures are
50°F (10°C) or more. If it is colder than 10°C (50°F), you
may have to idle the engine longer. Should the fluid
level be low during this cold check, you must check the
fluid hot before adding fluid. Checking the fluid hot
will give you a more accurate reading of the fluid level.
6-21
Page 285 of 424
How to Add Automatic Transmission
Fluid
Refer to the Maintenance Schedule to determine what
kind of transmission fluid to use. SeeRecommended
Fluids and Lubricants on page 7-11.
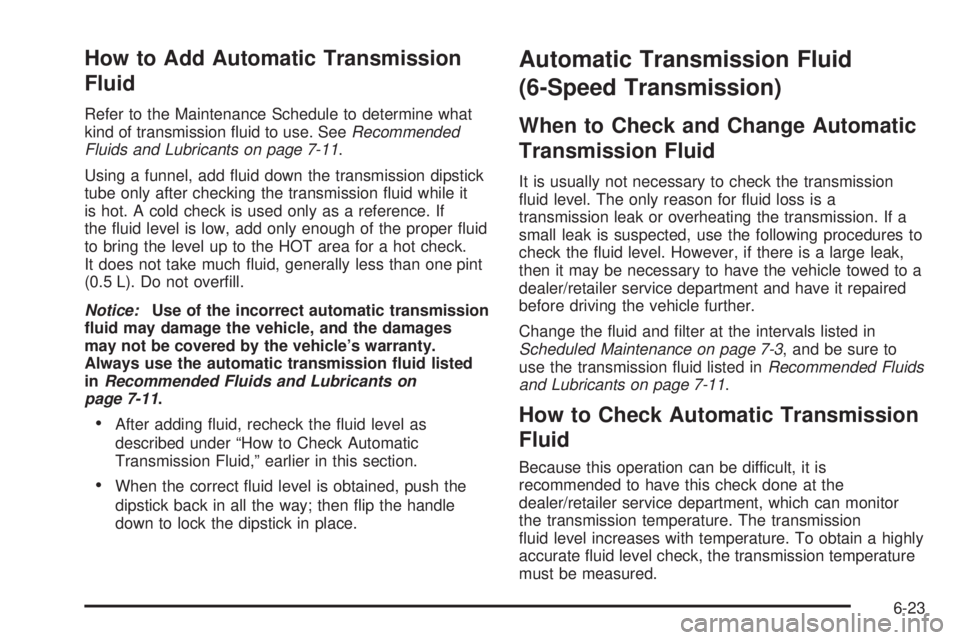
Using a funnel, add fluid down the transmission dipstick
tube only after checking the transmission fluid while it
is hot. A cold check is used only as a reference. If
the fluid level is low, add only enough of the proper fluid
to bring the level up to the HOT area for a hot check.
It does not take much fluid, generally less than one pint
(0.5 L). Do not overfill.
Notice:Use of the incorrect automatic transmission
uid may damage the vehicle, and the damages
may not be covered by the vehicle’s warranty.
Always use the automatic transmission uid listed
inRecommended Fluids and Lubricants on
page 7-11.
•After adding fluid, recheck the fluid level as
described under “How to Check Automatic
Transmission Fluid,” earlier in this section.
•When the correct fluid level is obtained, push the
dipstick back in all the way; then flip the handle
down to lock the dipstick in place.
Automatic Transmission Fluid
(6-Speed Transmission)
When to Check and Change Automatic
Transmission Fluid
It is usually not necessary to check the transmission
fluid level. The only reason for fluid loss is a
transmission leak or overheating the transmission. If a
small leak is suspected, use the following procedures to
check the fluid level. However, if there is a large leak,
then it may be necessary to have the vehicle towed to a
dealer/retailer service department and have it repaired
before driving the vehicle further.
Change the fluid and filter at the intervals listed in
Scheduled Maintenance on page 7-3, and be sure to
use the transmission fluid listed inRecommended Fluids
and Lubricants on page 7-11.
How to Check Automatic Transmission
Fluid
Because this operation can be difficult, it is
recommended to have this check done at the
dealer/retailer service department, which can monitor
the transmission temperature. The transmission
fluid level increases with temperature. To obtain a highly
accurate fluid level check, the transmission temperature
must be measured.
6-23
Page 288 of 424

How to Add Automatic Transmission
Fluid
Refer to the Maintenance Schedule to determine what
kind of transmission fluid to use. SeeRecommended
Fluids and Lubricants on page 7-11.
A. WARM Range
B. HOT Range
Using a funnel, add fluid down the transmission dipstick
tube only after checking the transmission fluid while it
is warm or hot. A cold check is used only as a reference.
If the fluid level is low, add only enough of the proper
fluid to bring the level up to the middle of the WARM (A)
or HOT (B) range depending on the ambient
temperature and prior driving conditions. Refer to “Howto Check Automatic Transmission Fluid”, earlier in this
section for instructions on driving to achieve warm or hot
transmission fluid. It does not take much fluid, generally
less than 0.5 L (one pint). Do not overfill.
Notice:Use of the incorrect automatic transmission
uid may damage the vehicle, and the damages
may not be covered by the vehicle’s warranty.
Always use the automatic transmission uid listed
inRecommended Fluids and Lubricants on
page 7-11.
•After adding fluid, recheck the fluid level as
described under “How to Check Automatic
Transmission Fluid,” earlier in this section.
•When the correct fluid level is obtained, push the
dipstick back in all the way; then flip the handle
down to lock the dipstick in place.
Cooling System
If your vehicle has a diesel engine, see “Van Models”
under “Cooling System” in the DURAMAX®Diesel
Supplement.
The Cooling System allows the engine to maintain the
correct working temperature.
6-26
Page 303 of 424

Jump Starting
If the vehicle battery has run down, you may want to
use another vehicle and some jumper cables to
start your vehicle. Be sure to use the following steps to
do it safely.
{WARNING:
Batteries can hurt you. They can be dangerous
because:
•They contain acid that can burn you.
•They contain gas that can explode or ignite.
•They contain enough electricity to burn you.
If you do not follow these steps exactly, some or
all of these things can hurt you.
Notice:Ignoring these steps could result in costly
damage to the vehicle that would not be covered
by the warranty.
Trying to start the vehicle by pushing or pulling it
will not work, and it could damage the vehicle.
1. Check the other vehicle. It must have a 12-volt
battery with a negative ground system.Notice:If the other vehicle’s system is not a 12-volt
system with a negative ground, both vehicles can
be damaged. Only use vehicles with 12-volt systems
with negative grounds to jump start your vehicle.
2. Get the vehicles close enough so the jumper cables
can reach, but be sure the vehicles are not touching
each other. If they are, it could cause a ground
connection you do not want. You would not be able
to start your vehicle, and the bad grounding
could damage the electrical systems.
To avoid the possibility of the vehicles rolling, set
the parking brake firmly on both vehicles involved in
the jump start procedure. Put an automatic
transmission in P (Park) or a manual transmission
in N (Neutral) before setting the parking brake.
Notice:If you leave the radio or other accessories
on during the jump starting procedure, they
could be damaged. The repairs would not be
covered by the warranty. Always turn off the radio
and other accessories when jump starting the
vehicle.
3. Turn off the ignition on both vehicles. Unplug
unnecessary accessories plugged into the cigarette
lighter or the accessory power outlet. Turn off
the radio and all lamps that are not needed. This
will avoid sparks and help save both batteries. And
it could save the radio!
6-41