2010 GMC CANYON reset
[x] Cancel search: resetPage 198 of 448

Finding a Station
AM FM (AM-FM Radio):Press to switch between FM1,
FM2, or AM. The selection displays.
BAND:Press to switch between FM1, FM2, AM, or
XM1 or XM2 (if equipped). The selection displays.
qrTUNE:Turn to select radio stations.
qSEEKr:Press to go to the previous or to the next
station and stay there.
To scan stations, press and hold either arrow for
two seconds until a beep sounds. The radio goes to a
station, plays for a few seconds, then goes to the next
station. Press either arrow again to stop scanning.
To scan preset stations, press and hold either arrow for
more than four seconds until two beeps sound. The radio
goes to the first preset station stored on the pushbuttons,
plays for a few seconds, then goes to the next preset
station. Press either arrow again to stop scanning
presets.
qSCANr:Press and hold for more than
two seconds. SCAN or SCN displays and the radio
produces one beep. The radio goes to a station, plays
for a few seconds, then goes to the next station. Press
either SCAN arrow again, to stop scanning presets.
To scan preset stations, press and hold either SCAN
arrow for more than four seconds. PSCN or PSC displays
and the radio produces one beep or depending on the
radio, two beeps. The radio goes to a preset station,
plays for a few seconds, then goes to the next preset
station. Press either SCAN arrow again, to stop scanning
presets.
The radio only scans stations with a strong signal that are
in the selected band.
4-46
Page 199 of 448

Setting Preset Stations
If the radio does not have XM, up to 18 stations
(six FM1, six FM2, and six AM) can be programmed on
the six numbered pushbuttons.
If the radio has XM, up to 30 stations (six FM1, six FM2,
six AM, six XM1 and six XM2) can be programmed on
the six numbered pushbuttons.
To program either radio:
1. Turn the radio on.
2. Press BAND to select FM1, FM2, AM, or XM1 or
XM2 (if equipped).
•For the AM-FM Radio, press AM FM to select
FM1, FM2, or AM.
3. Tune in the desired station.
4. Press and hold one of the six numbered pushbuttons
until the radio beeps once. When that numbered
pushbutton is pressed again, the station that was
stored, returns.
5. Repeat the steps for each pushbutton.
Setting the Tone (Bass/Treble)
AUDIO:Push and release until BASS/TREB, or
depending on the radio, BASS, MID, or TREB displays.
Turn to increase or to decrease. The tone display shows
the bass or the treble level. If a station is weak or has
static, decrease the treble.
•For the AM-FM Radio, press and hold
the
wxarrows to increase or to decrease
the tone.
To adjust the bass/treble or bass/midrange/treble to
the middle position, press and hold the AUDIO knob.
The radio produces one beep and adjusts the display
level to the middle position.
•For the AM-FM Radio, adjust bass or treble to the
middle position, select BAS (bass) or TRE (treble).
Then press and hold for more than two seconds
until a beep sounds. B (balance) and a zero
or T (treble) and a zero displays.
4-47
Page 202 of 448
If the radio cannot find the desired program type, NONE
displays and the radio returns to the last tuned station.
SCAN:To scan PTYs, press and hold the SEEK /
SCAN until a beep sounds. The radio goes to a station,
plays for a few seconds, then goes to the next station.
BAND (Alternate Frequency):Alternate frequency
lets the radio switch to a stronger station with the same
program type. To turn alternate frequency on, press and
hold BAND for two seconds. AF ON displays. The radio
could switch to stations with a stronger frequency.
To turn alternate frequency off, press and hold BAND
again for two seconds. AF OFF displays. The radio does
not switch to other stations.
This function does not apply for XM Satellite Radio
Service.Setting Preset PTYs (RDS) Only
For the Radio with CD player, the six pushbuttons
have factory PTY presets. Up to 12 PTYs (six FM1
and six FM2), can be programmed on the numbered
pushbuttons. To program PTYs:
1. Press BAND to select FM1 or FM2.
2. Turn the P-TYPE knob to activate program type
select mode. TYPE and the last selected PTY
displays.
3. Turn the P-TYPE knob to select a PTY.
4. Press and hold one of the six numbered
pushbuttons until a beep sounds. When that
numbered pushbutton is pressed, the PTY that
was set, returns.
5. Repeat the steps for each pushbutton.
4-50
Page 212 of 448
BAND:Press this button to listen to the radio when a
CD is playing. The inactive CD remains inside the radio
for future listening.
CD AUX (Auxiliary):Press this button to play a CD
when listening to the radio. The CD symbol illuminates
on the display when a CD is loaded.
Z(Eject):Press this button to eject a CD. Eject can
activate while either the ignition or radio is off. CDs can
be loaded with the ignition and radio off if this button is
pressed first.
XM Radio Messages
XL (Explicit Language Channels):These channels,
or any others, can be blocked at a customer’s request,
by calling 1-800-852-XMXM (9696).
Updating:The encryption code in the receiver is being
updated, and no action is required. This process
should take no longer than 30 seconds.
No Signl:The system is functioning correctly, but the
vehicle is in a location that is blocking the XM signal.
When the vehicle is moved into an open area, the signal
should return.Loading:The radio system is acquiring and processing
audio and text data. No action is needed. This message
should disappear shortly.
Off Air:This channel is not currently in service.
Tune to another channel.
CH Unavl:This previously assigned channel is no
longer assigned. Tune to another station. If this station
was one of the presets, choose another station for
that preset button.
Unauth:This channel is blocked or cannot be received
with your XM Subscription package.
No Info:No artist, song title, category, or text
information is available at this time on this channel.
The system is working properly.
NotFound:No artist, song title, category, or text
information is available at this time on this channel.
The system is working properly.
XM Lock:The XM receiver in your vehicle could
have previously been in another vehicle. For security
purposes, XM receivers cannot be swapped between
vehicles. If this message is received after having your
vehicle serviced, check with your dealer/retailer.
4-60
Page 223 of 448
StabiliTrak and Traction Control (TCS) come on
automatically whenever the vehicle is started and the
systems are reset with each ignition cycle. However,
when the transfer case is placed in Four-Wheel-Low
mode, StabiliTrak is automatically disabled. See
Four-Wheel Drive on page 3-25for more information.
It is recommended to leave the system on for normal
driving conditions, but it may be necessary to turn
the TCS portion of the system off if the vehicle is stuck
in sand, mud, ice, or snow, and it is necessary to
“rock” the vehicle to attempt to free it. If traction control
is turned off, only the brake-traction control portion
of traction control will work. The engine speed
management will be disabled. In this mode, engine
power is not reduced automatically and the drive wheels
can spin more freely. This can cause the brake-traction
control to activate constantly. SeeIf Your Vehicle is
Stuck in Sand, Mud, Ice, or Snow on page 5-31.
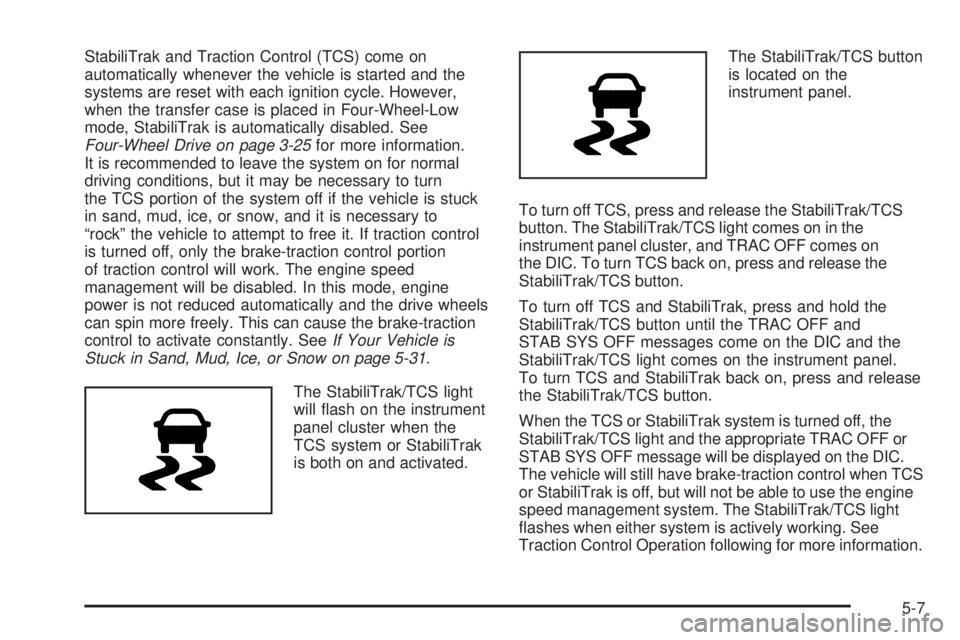
The StabiliTrak/TCS light
will flash on the instrument
panel cluster when the
TCS system or StabiliTrak
is both on and activated.The StabiliTrak/TCS button
is located on the
instrument panel.
To turn off TCS, press and release the StabiliTrak/TCS
button. The StabiliTrak/TCS light comes on in the
instrument panel cluster, and TRAC OFF comes on
the DIC. To turn TCS back on, press and release the
StabiliTrak/TCS button.
To turn off TCS and StabiliTrak, press and hold the
StabiliTrak/TCS button until the TRAC OFF and
STAB SYS OFF messages come on the DIC and the
StabiliTrak/TCS light comes on the instrument panel.
To turn TCS and StabiliTrak back on, press and release
the StabiliTrak/TCS button.
When the TCS or StabiliTrak system is turned off, the
StabiliTrak/TCS light and the appropriate TRAC OFF or
STAB SYS OFF message will be displayed on the DIC.
The vehicle will still have brake-traction control when TCS
or StabiliTrak is off, but will not be able to use the engine
speed management system. The StabiliTrak/TCS light
flashes when either system is actively working. See
Traction Control Operation following for more information.
5-7
Page 294 of 448
Engine Oil Additives / Engine Oil
Flushes
Do not add anything to the oil. The recommended
oils with the starburst symbol that meet GM Standard
GM6094M are all that is needed for good performance
and engine protection.
Engine oil system flushes are not recommended and
could cause engine damage not covered by the vehicle
warranty.
Engine Oil Life System
When to Change Engine Oil
This vehicle has a computer system that indicates when
to change the engine oil and filter. This is based on
engine revolutions and engine temperature, and not on
mileage. Based on driving conditions, the mileage at
which an oil change is indicated can vary considerably.
For the oil life system to work properly, the system
must be reset every time the oil is changed.When the system has calculated that oil life has been
diminished, it indicates that an oil change is necessary.
A CHANGE OIL message comes on. SeeDIC Warnings
and Messages on page 4-37. Change the oil as soon
as possible within the next 600 miles (1 000 km). It is
possible that, if driving under the best conditions, the
oil life system might not indicate that an oil change is
necessary for over a year. However, the engine oil and
filter must be changed at least once a year and at this
time the system must be reset. Your dealer/retailer has
trained people who will perform this work using genuine
parts and reset the system. It is also important to check
the oil regularly and keep it at the proper level.
If the system is ever reset accidentally, the oil must be
changed at 3,000 miles (5 000 km) since the last oil
change. Remember to reset the oil life system whenever
the oil is changed.
6-18
Page 295 of 448

How to Reset the Engine Oil Life
System
The Engine Oil Life System calculates when to change
the engine oil and filter based on vehicle use. Whenever
the oil is changed, reset the system so it can calculate
when the next oil change is required. If a situation occurs
where the oil is changed prior to a CHANGE OIL
message being turned on, reset the system.
To reset the Engine Oil Life system:
1. With the engine off, turn the ignition to ON/RUN.
2. Press and release the stem in the lower center
of the instrument cluster until the OIL LIFE
message is displayed.
3. Once the alternating OIL LIFE and RESET
messages appear, press and hold the stem
until several beeps sound. This confirms that
the oil life system has been reset.
4. Turn the key to LOCK/OFF.
If the CHANGE OIL message comes back on when the
vehicle is started, the engine oil life system has not
reset. Repeat the procedure. SeeDIC Warnings
and Messages on page 4-37.
What to Do with Used Oil
Used engine oil contains certain elements that can be
unhealthy for your skin and could even cause cancer.
Do not let used oil stay on your skin for very long. Clean
your skin and nails with soap and water, or a good hand
cleaner. Wash or properly dispose of clothing or rags
containing used engine oil. See the manufacturer’s
warnings about the use and disposal of oil products.
Used oil can be a threat to the environment. If you
change your own oil, be sure to drain all the oil from the
filter before disposal. Never dispose of oil by putting it
in the trash, pouring it on the ground, into sewers, or into
streams or bodies of water. Recycle it by taking it to a
place that collects used oil.
6-19
Page 326 of 448
Headlamp Aiming
Headlamp aim has been preset at the factory and
should need no further adjustment.
However, if your vehicle is damaged in a crash, the
headlamp aim may be affected. Aim adjustment to the
low-beam headlamps may be necessary if oncoming
drivers flash their high-beam headlamps at you
(for vertical aim).
If the headlamps need to be re-aimed, it is
recommended that you take the vehicle to your
dealer/retailer for service.
Bulb Replacement
For the proper type of replacement bulbs, see
Replacement Bulbs on page 6-54.
For any bulb changing procedure not listed in this
section, contact your dealer/retailer.
Halogen Bulbs
{WARNING:
Halogen bulbs have pressurized gas inside and
can burst if you drop or scratch the bulb. You or
others could be injured. Be sure to read and follow
the instructions on the bulb package.
6-50