2010 FORD SUPER DUTY key
[x] Cancel search: keyPage 189 of 407
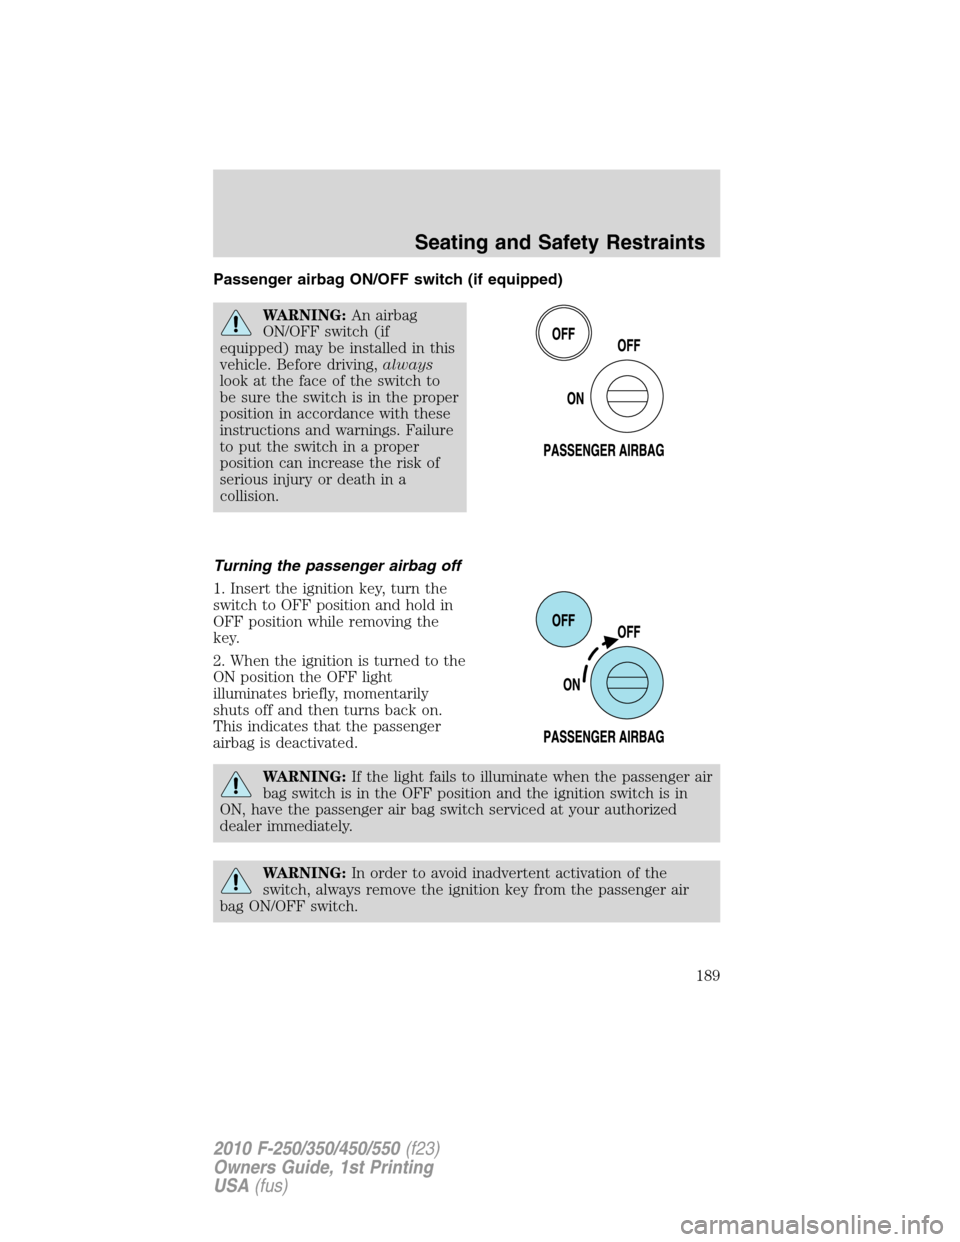
Passenger airbag ON/OFF switch (if equipped)
WARNING:An airbag
ON/OFF switch (if
equipped) may be installed in this
vehicle. Before driving,always
look at the face of the switch to
be sure the switch is in the proper
position in accordance with these
instructions and warnings. Failure
to put the switch in a proper
position can increase the risk of
serious injury or death in a
collision.
Turning the passenger airbag off
1. Insert the ignition key, turn the
switch to OFF position and hold in
OFF position while removing the
key.
2. When the ignition is turned to the
ON position the OFF light
illuminates briefly, momentarily
shuts off and then turns back on.
This indicates that the passenger
airbag is deactivated.
WARNING:If the light fails to illuminate when the passenger air
bag switch is in the OFF position and the ignition switch is in
ON, have the passenger air bag switch serviced at your authorized
dealer immediately.
WARNING:In order to avoid inadvertent activation of the
switch, always remove the ignition key from the passenger air
bag ON/OFF switch.
Seating and Safety Restraints
189
2010 F-250/350/450/550(f23)
Owners Guide, 1st Printing
USA(fus)
Page 190 of 407
WARNING:An infant in a rear-facing seat faces a high risk of
serious or fatal injuries from a deploying passenger airbag. Rear
facing infant seats should NEVER be placed in the front seats, unless
the passenger airbag is turned off.
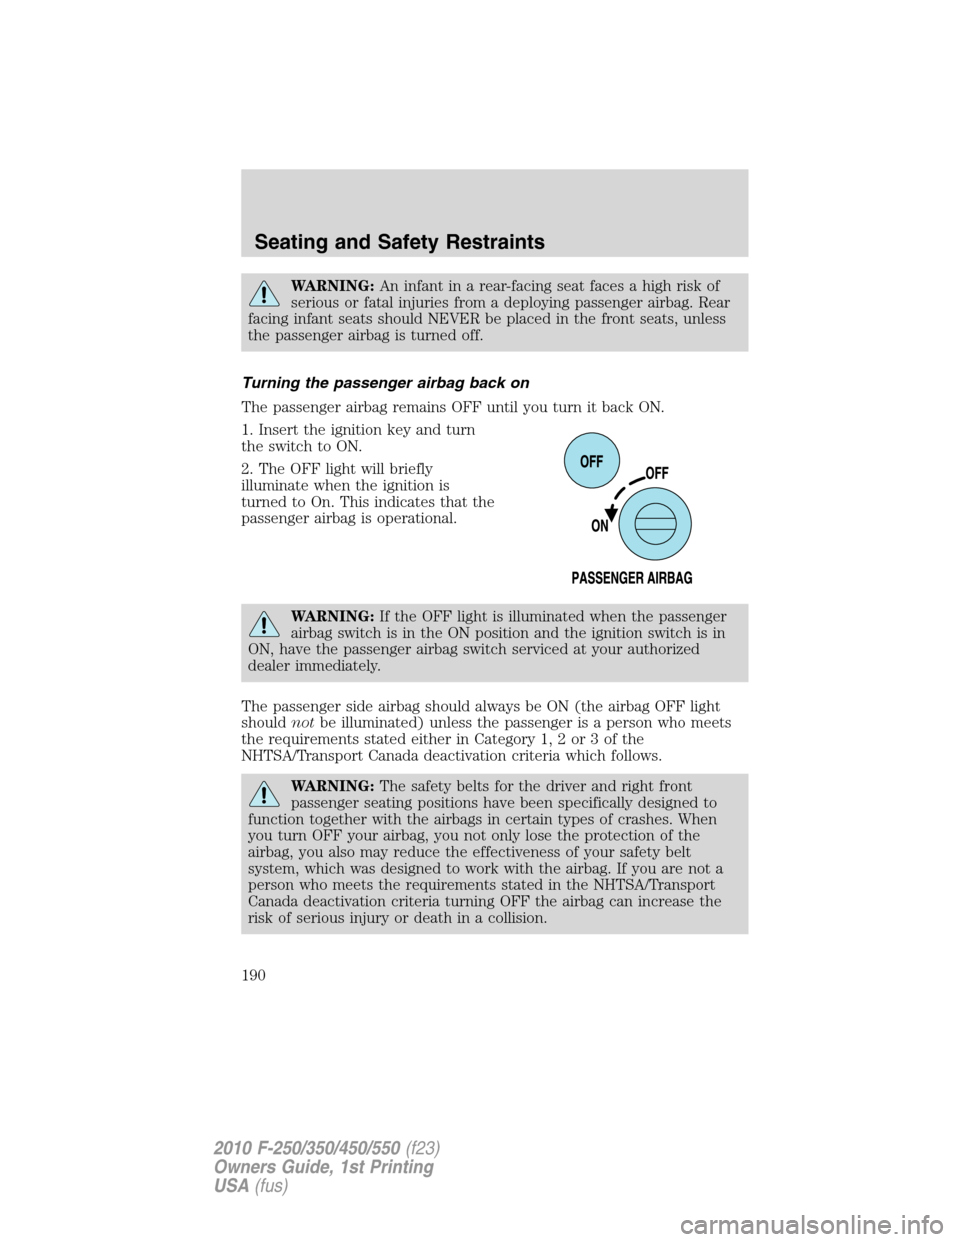
Turning the passenger airbag back on
The passenger airbag remains OFF until you turn it back ON.
1. Insert the ignition key and turn
the switch to ON.
2. The OFF light will briefly
illuminate when the ignition is
turned to On. This indicates that the
passenger airbag is operational.
WARNING:If the OFF light is illuminated when the passenger
airbag switch is in the ON position and the ignition switch is in
ON, have the passenger airbag switch serviced at your authorized
dealer immediately.
The passenger side airbag should always be ON (the airbag OFF light
shouldnotbe illuminated) unless the passenger is a person who meets
the requirements stated either in Category 1, 2 or 3 of the
NHTSA/Transport Canada deactivation criteria which follows.
WARNING:The safety belts for the driver and right front
passenger seating positions have been specifically designed to
function together with the airbags in certain types of crashes. When
you turn OFF your airbag, you not only lose the protection of the
airbag, you also may reduce the effectiveness of your safety belt
system, which was designed to work with the airbag. If you are not a
person who meets the requirements stated in the NHTSA/Transport
Canada deactivation criteria turning OFF the airbag can increase the
risk of serious injury or death in a collision.
Seating and Safety Restraints
190
2010 F-250/350/450/550(f23)
Owners Guide, 1st Printing
USA(fus)
Page 240 of 407
TPMS reset procedure
The TPMS reset procedure needs to be performed after each tire
rotation on vehicles that require different recommended tire
pressures in the front tires as compared to the rear tires.
WARNING:To determine the required pressure(s) for your
vehicle – refer to the Safety Compliance Certification Label or
Tire Label located on the B-Pillar or the edge of the driver’s door. See
Vehicle Loadingin this chapter for more information.
Overview
To provide the vehicle’s load carrying capability, some vehicles require
different recommended tire pressures in the front tires as compared to
the rear tires. The Tire Pressure Monitoring System (TPMS) equipped on
these vehicles is designed to illuminate the Low Tire Pressure Warning
indicator at two different pressures; one for the front tires and one for
the rear tires.
Since tires need to be rotated to provide consistent performance and
maximum tire life, the Tire Pressure Monitoring System needs to know
when the tires are rotated to determine which set of tires are on the
front and which are on the rear. With this information, the system can
detect and properly warn of low tire pressures.
TPMS reset tips:
•To reduce the chances of interference from another vehicle, the TPMS
reset procedure should be performed at least 3 feet (1 meter) away
from another Ford Motor Company vehicle undergoing the TPMS reset
procedure at the same time.
•Do not wait more than two (2) minutes between resetting each tire
sensor or the system will timeout and the entire procedure will have
to be repeated on all four wheels.
•A double horn chirp indicates the need to repeat the procedure.
Performing the TPMS reset procedure
It is recommended that you read the entire procedure before attempting.
1. Drive the vehicle above 20 mph (32 km/h) for at least 2 minutes and
then park in a safe location where you can easily get to all four tires and
have access to an air pump.
2. Place the ignition in the off position and keep the key in the ignition.
Tires, Wheels and Loading
240
2010 F-250/350/450/550(f23)
Owners Guide, 1st Printing
USA(fus)
Page 263 of 407
STARTING
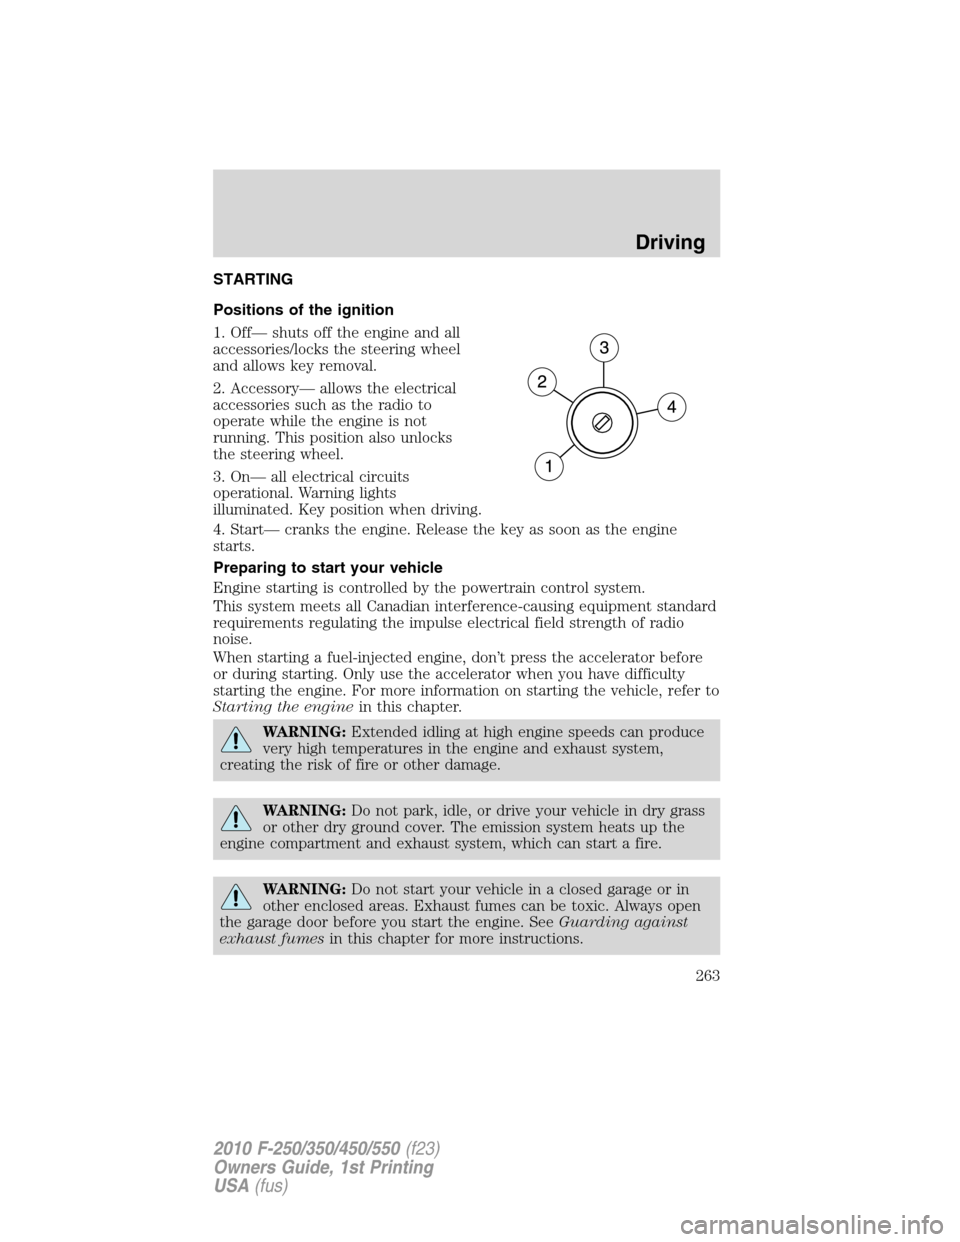
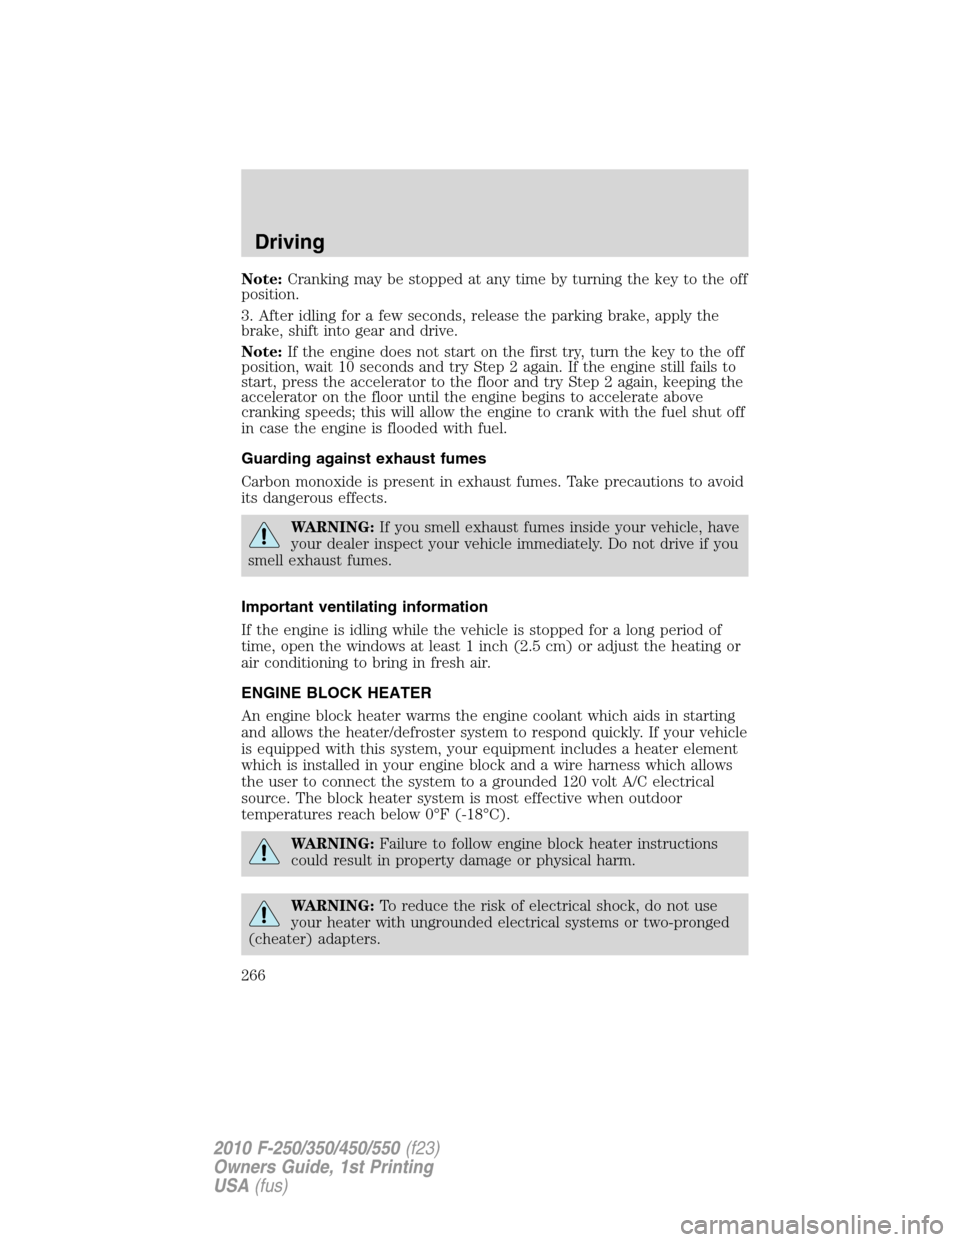
Positions of the ignition
1. Off— shuts off the engine and all
accessories/locks the steering wheel
and allows key removal.
2. Accessory— allows the electrical
accessories such as the radio to
operate while the engine is not
running. This position also unlocks
the steering wheel.
3. On— all electrical circuits
operational. Warning lights
illuminated. Key position when driving.
4. Start— cranks the engine. Release the key as soon as the engine
starts.
Preparing to start your vehicle
Engine starting is controlled by the powertrain control system.
This system meets all Canadian interference-causing equipment standard
requirements regulating the impulse electrical field strength of radio
noise.
When starting a fuel-injected engine, don’t press the accelerator before
or during starting. Only use the accelerator when you have difficulty
starting the engine. For more information on starting the vehicle, refer to
Starting the enginein this chapter.
WARNING:Extended idling at high engine speeds can produce
very high temperatures in the engine and exhaust system,
creating the risk of fire or other damage.
WARNING:Do not park, idle, or drive your vehicle in dry grass
or other dry ground cover. The emission system heats up the
engine compartment and exhaust system, which can start a fire.
WARNING:Do not start your vehicle in a closed garage or in
other enclosed areas. Exhaust fumes can be toxic. Always open
the garage door before you start the engine. SeeGuarding against
exhaust fumesin this chapter for more instructions.
Driving
263
2010 F-250/350/450/550(f23)
Owners Guide, 1st Printing
USA(fus)
Page 265 of 407
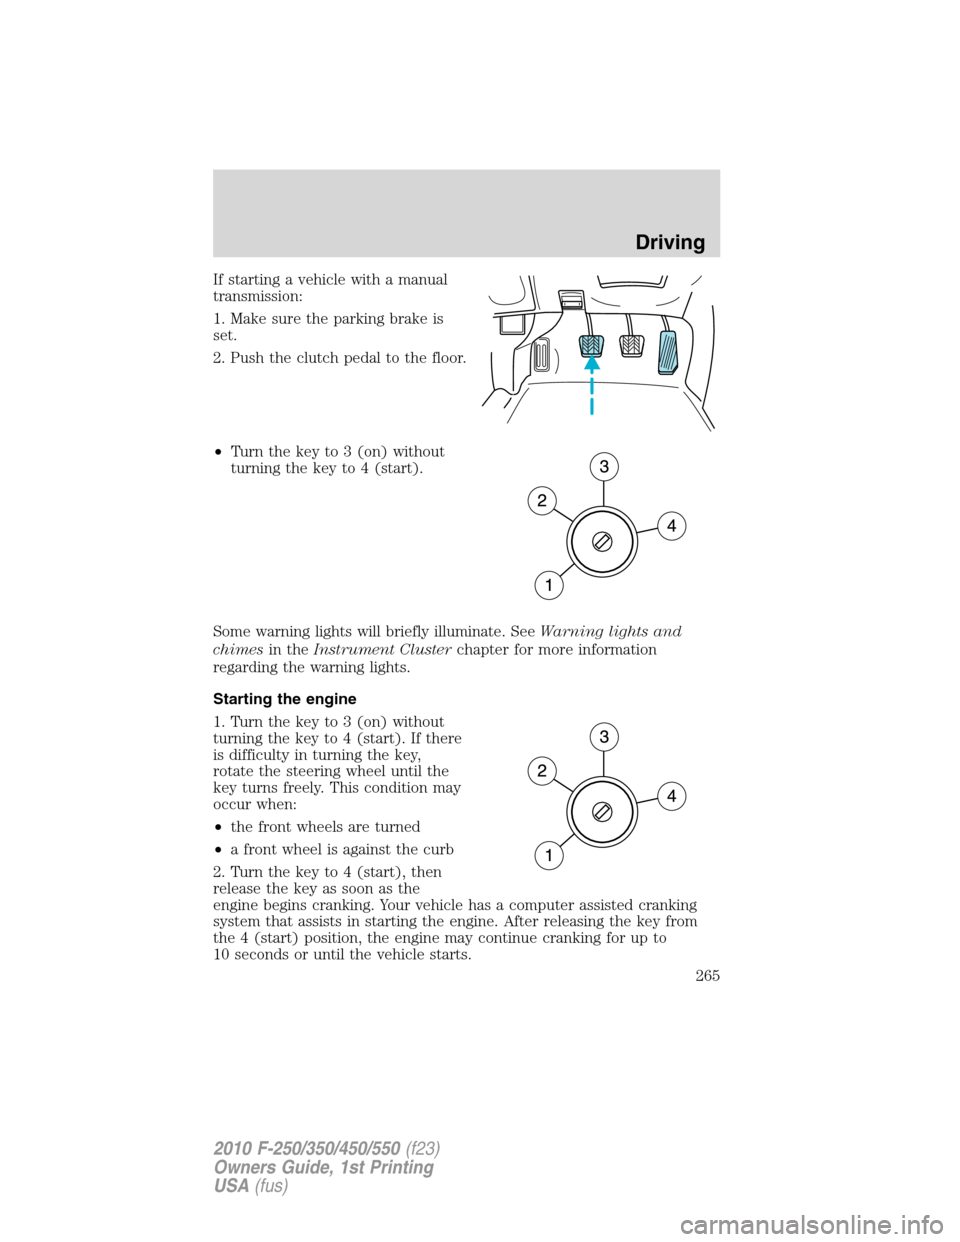
If starting a vehicle with a manual
transmission:
1. Make sure the parking brake is
set.
2. Push the clutch pedal to the floor.
•Turn the key to 3 (on) without
turning the key to 4 (start).
Some warning lights will briefly illuminate. SeeWarning lights and
chimesin theInstrument Clusterchapter for more information
regarding the warning lights.
Starting the engine
1. Turn the key to 3 (on) without
turning the key to 4 (start). If there
is difficulty in turning the key,
rotate the steering wheel until the
key turns freely. This condition may
occur when:
•the front wheels are turned
•a front wheel is against the curb
2. Turn the key to 4 (start), then
release the key as soon as the
engine begins cranking. Your vehicle has a computer assisted cranking
system that assists in starting the engine. After releasing the key from
the 4 (start) position, the engine may continue cranking for up to
10 seconds or until the vehicle starts.
Driving
265
2010 F-250/350/450/550(f23)
Owners Guide, 1st Printing
USA(fus)
Page 266 of 407
Note:Cranking may be stopped at any time by turning the key to the off
position.
3. After idling for a few seconds, release the parking brake, apply the
brake, shift into gear and drive.
Note:If the engine does not start on the first try, turn the key to the off
position, wait 10 seconds and try Step 2 again. If the engine still fails to
start, press the accelerator to the floor and try Step 2 again, keeping the
accelerator on the floor until the engine begins to accelerate above
cranking speeds; this will allow the engine to crank with the fuel shut off
in case the engine is flooded with fuel.
Guarding against exhaust fumes
Carbon monoxide is present in exhaust fumes. Take precautions to avoid
its dangerous effects.
WARNING:If you smell exhaust fumes inside your vehicle, have
your dealer inspect your vehicle immediately. Do not drive if you
smell exhaust fumes.
Important ventilating information
If the engine is idling while the vehicle is stopped for a long period of
time, open the windows at least 1 inch (2.5 cm) or adjust the heating or
air conditioning to bring in fresh air.
ENGINE BLOCK HEATER
An engine block heater warms the engine coolant which aids in starting
and allows the heater/defroster system to respond quickly. If your vehicle
is equipped with this system, your equipment includes a heater element
which is installed in your engine block and a wire harness which allows
the user to connect the system to a grounded 120 volt A/C electrical
source. The block heater system is most effective when outdoor
temperatures reach below 0°F (-18°C).
WARNING:Failure to follow engine block heater instructions
could result in property damage or physical harm.
WARNING:To reduce the risk of electrical shock, do not use
your heater with ungrounded electrical systems or two-pronged
(cheater) adapters.
Driving
266
2010 F-250/350/450/550(f23)
Owners Guide, 1st Printing
USA(fus)
Page 274 of 407
If the fuse is not blown and the brakelamps are working properly, the
following procedure will allow you to move the gearshift lever from P
(Park):
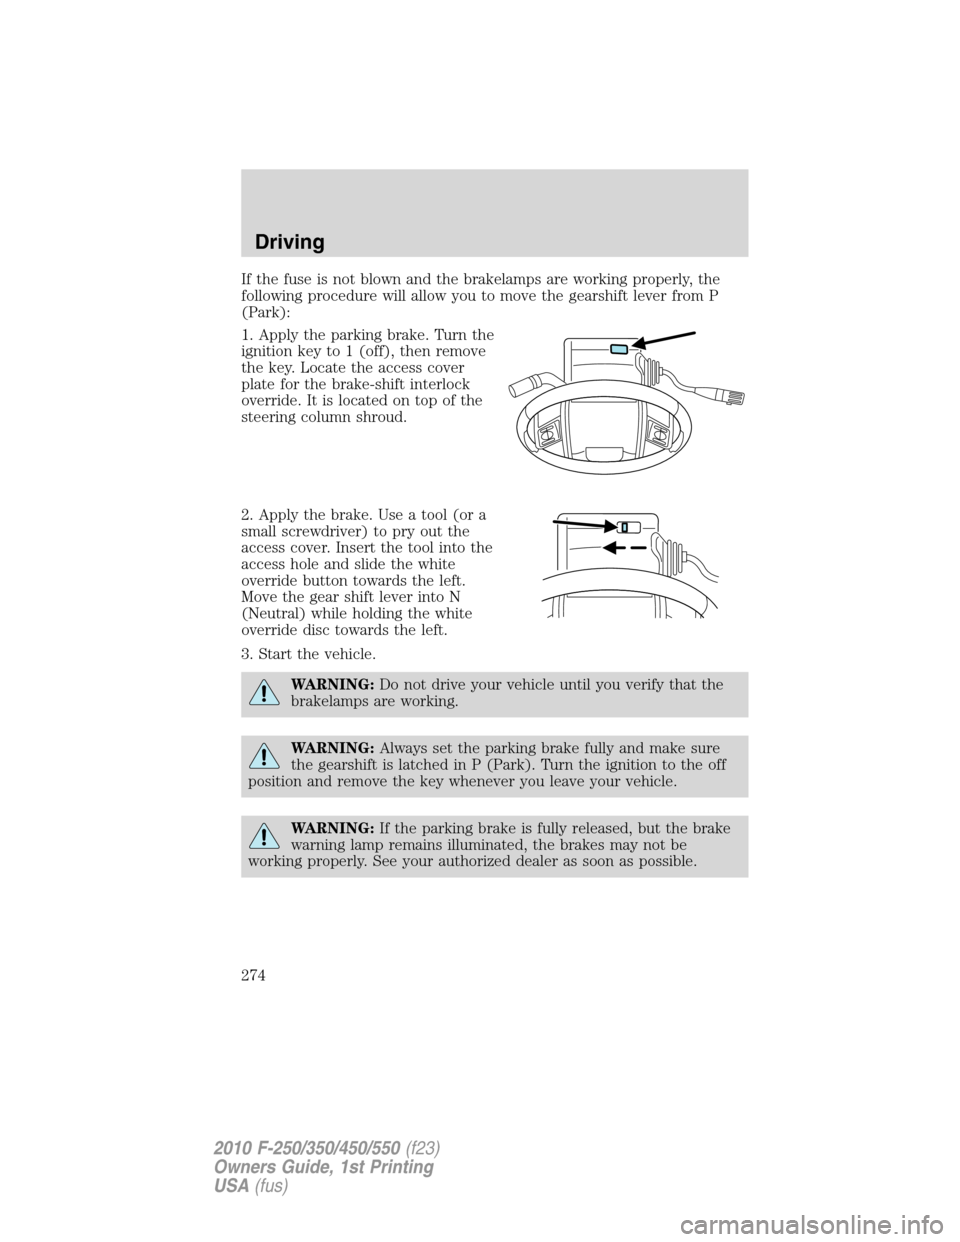
1. Apply the parking brake. Turn the
ignition key to 1 (off), then remove
the key. Locate the access cover
plate for the brake-shift interlock
override. It is located on top of the
steering column shroud.
2. Apply the brake. Use a tool (or a
small screwdriver) to pry out the
access cover. Insert the tool into the
access hole and slide the white
override button towards the left.
Move the gear shift lever into N
(Neutral) while holding the white
override disc towards the left.
3. Start the vehicle.
WARNING:Do not drive your vehicle until you verify that the
brakelamps are working.
WARNING:Always set the parking brake fully and make sure
the gearshift is latched in P (Park). Turn the ignition to the off
position and remove the key whenever you leave your vehicle.
WARNING:If the parking brake is fully released, but the brake
warning lamp remains illuminated, the brakes may not be
working properly. See your authorized dealer as soon as possible.
Driving
274
2010 F-250/350/450/550(f23)
Owners Guide, 1st Printing
USA(fus)
Page 275 of 407
AUTOMATIC TRANSMISSION OPERATION (IF EQUIPPED)
Understanding the shift positions of the 5–speed automatic
transmission
This vehicle is equipped with an adaptive Transmission Shift Strategy.
Adaptive Shift Strategy offers the optimal transmission operation and
shift quality. When the vehicle’s battery has been disconnected for any
type of service or repair, the transmission will need to relearn the normal
shift strategy parameters, much like having to reset your radio stations
when your vehicle battery has been disconnected. The Adaptive
Transmission Strategy allows the transmission to relearn these operating
parameters. This learning process could take several transmission
upshifts and downshifts; during this learning process, slightly firmer
shifts may occur. After this learning process, normal shift feel and shift
scheduling will resume.
P (Park)
This position locks the transmission and prevents the rear wheels from
turning.
To put your vehicle in gear:
•Start the engine
•Press the brake pedal
•Move the gearshift lever into the desired gear
To put your vehicle in P (Park):
•Come to a complete stop
•Move the gearshift lever and securely latch it in P (Park)
WARNING:Always set the parking brake fully and make sure
the gearshift is latched in P (Park). Turn the ignition to the off
position and remove the key whenever you leave your vehicle.
R (Reverse)
With the gearshift lever in R (Reverse), the vehicle will move backward.
Always come to a complete stop before shifting into and out of R
(Reverse).
Driving
275
2010 F-250/350/450/550(f23)
Owners Guide, 1st Printing
USA(fus)