Page 67 of 407

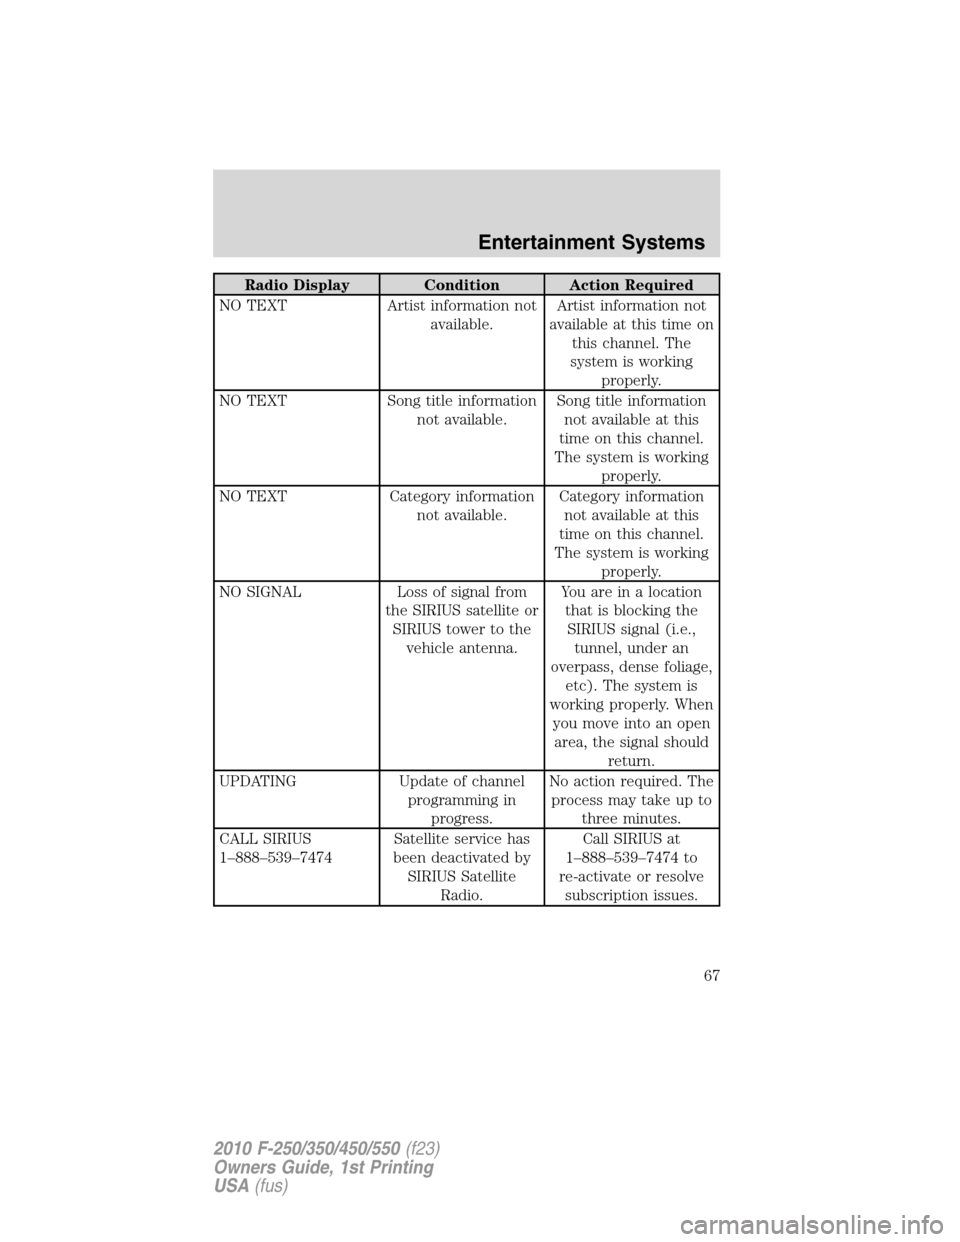
Radio Display Condition Action Required
NO TEXT Artist information not
available.Artist information not
available at this time on
this channel. The
system is working
properly.
NO TEXT Song title information
not available.Song title information
not available at this
time on this channel.
The system is working
properly.
NO TEXT Category information
not available.Category information
not available at this
time on this channel.
The system is working
properly.
NO SIGNAL Loss of signal from
the SIRIUS satellite or
SIRIUS tower to the
vehicle antenna.You are in a location
that is blocking the
SIRIUS signal (i.e.,
tunnel, under an
overpass, dense foliage,
etc). The system is
working properly. When
you move into an open
area, the signal should
return.
UPDATING Update of channel
programming in
progress.No action required. The
process may take up to
three minutes.
CALL SIRIUS
1–888–539–7474Satellite service has
been deactivated by
SIRIUS Satellite
Radio.Call SIRIUS at
1–888–539–7474 to
re-activate or resolve
subscription issues.
Entertainment Systems
67
2010 F-250/350/450/550(f23)
Owners Guide, 1st Printing
USA(fus)
Page 79 of 407
Headphones
Wireless headphones
WARNING:The driver should never use the headphones while
driving the vehicle. Using headphones may prevent the driver
from hearing audible warnings such as horns or emergency sirens,
which could result in a crash causing serious injury. Give your full
attention to driving and to the road.
Your FES system is equipped with
two sets of battery powered,
infrared wireless headphones. Two
AAA batteries are needed to operate
the headphones. (Batteries are
included.)
Additional infrared wireless
headphones may be purchased for
use with the system. Also, wired
headphones may be purchased and
plugged in where indicated on the
left and right hand sides of the
system. Refer toWired
Headphonesfollowing.
Entertainment Systems
79
2010 F-250/350/450/550(f23)
Owners Guide, 1st Printing
USA(fus)
Page 99 of 407
3. Set the fan speed to the highest setting.
4. Direct the outer instrument panel vents towards the side windows.
To increase airflow to the outer instrument panel vents, close the vents
located in the middle of the instrument panel.
MANUAL HEATING AND AIR CONDITIONING SYSTEMS
(IF EQUIPPED)
•Manual heating and air
conditioning system
•Manual heating and air
conditioning system with heated
mirrors
•Manual heating and air
conditioning system with heated
mirrors and heated seats
1.Fan speed adjustment:Controls the volume of air circulated in the
vehicle.
Climate Controls
99
2010 F-250/350/450/550(f23)
Owners Guide, 1st Printing
USA(fus)
Page 101 of 407

•Do not put objects under the front seats that will interfere with the
airflow to the rear seats.
•Remove any snow, ice or leaves from the air intake area at the base of
the windshield.
•To improve the A/C cool down, drive with the windows slightly open
for 2–3 minutes after start up or until the vehicle has been “aired out.”
During extreme high ambient temperatures when idling stationary for
extended periods of time in gear, it is recommended to run the A/C in
the MAX A/C position, reduce blower fan speed from the highest setting
and put the vehicle’s transmission into the P (PARK) gear position
(automatic transmission only) to continue to receive cool air from your
A/C system.
For maximum cooling performance in MAX A/C mode:
1. Move the temperature control to the coolest setting.
2. Set the fan to the highest speed initially, then adjust in order to
maintain comfort.
To aid in side window defogging and demisting in cold weather:
1. Select
.
2. Select A/C.
3. Set the temperature control to maintain comfort.
4. Set the fan speed to highest setting.
5. Direct the outer instrument panel vents towards the side windows.
Climate Controls
101
2010 F-250/350/450/550(f23)
Owners Guide, 1st Printing
USA(fus)
Page 106 of 407
In(panel) or(panel/floor) modes:
1. Move temperature control to full cold.
2. Select A/C and
(recirculated air). Use recirculated air with A/C to
provide colder airflow.
3. Set highest fan speed initially, then adjust to maintain comfort.
To aid in side window defogging/demisting in cold weather:
1. Select
.
2. Select A/C.
3. Adjust the temperature control to maintain comfort.
4. Set the fan speed to the highest setting.
5. Direct the outer instrument panel vents towards the side windows.
To increase airflow to the outer instrument panel vents, close the vents
located in the middle of the instrument panel.
Climate Controls
106
2010 F-250/350/450/550(f23)
Owners Guide, 1st Printing
USA(fus)
Page 107 of 407

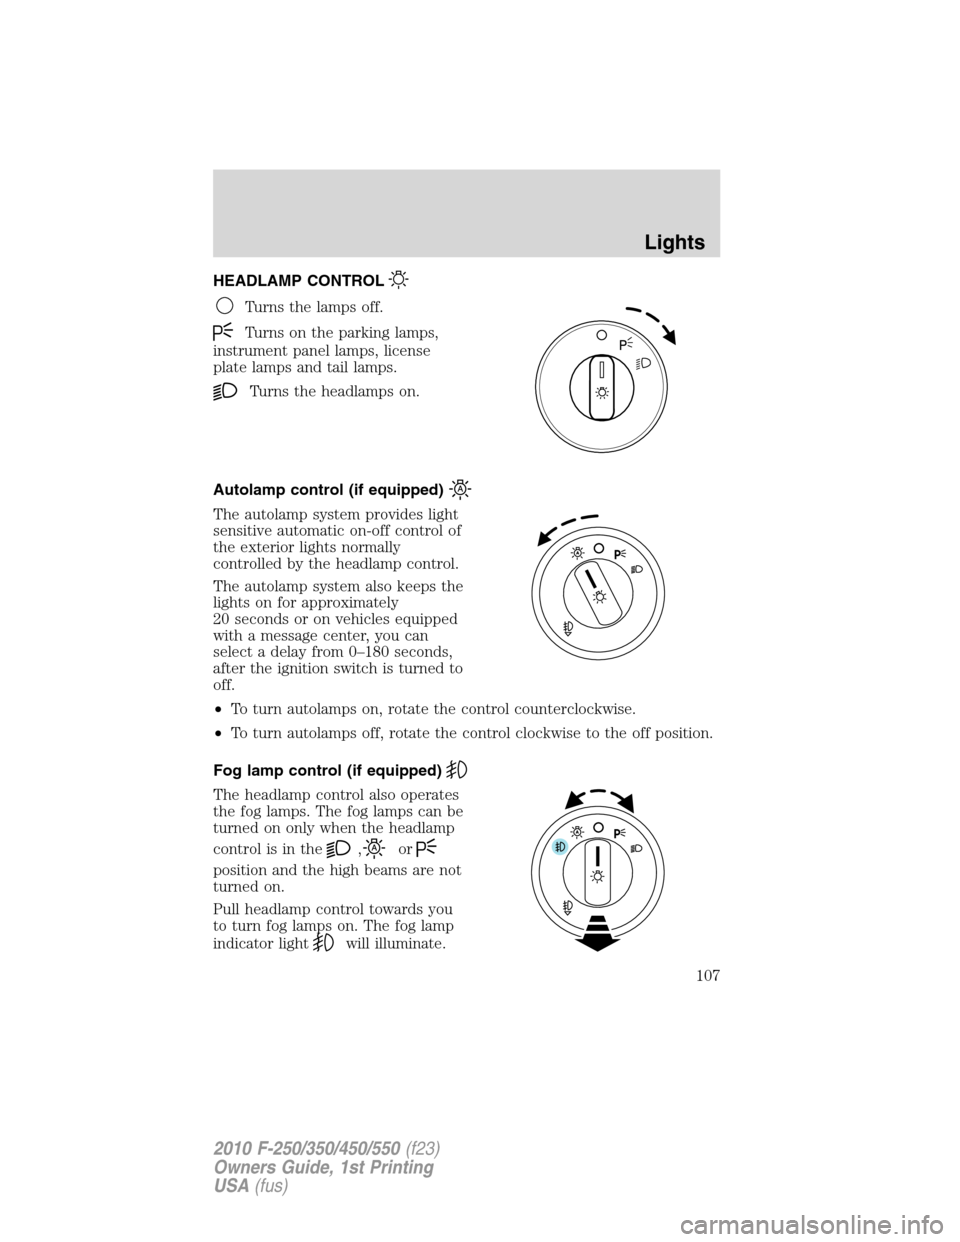
HEADLAMP CONTROL
Turns the lamps off.
Turns on the parking lamps,
instrument panel lamps, license
plate lamps and tail lamps.
Turns the headlamps on.
Autolamp control (if equipped)
The autolamp system provides light
sensitive automatic on-off control of
the exterior lights normally
controlled by the headlamp control.
The autolamp system also keeps the
lights on for approximately
20 seconds or on vehicles equipped
with a message center, you can
select a delay from 0–180 seconds,
after the ignition switch is turned to
off.
•To turn autolamps on, rotate the control counterclockwise.
•To turn autolamps off, rotate the control clockwise to the off position.
Fog lamp control (if equipped)
The headlamp control also operates
the fog lamps. The fog lamps can be
turned on only when the headlamp
control is in the
,or
position and the high beams are not
turned on.
Pull headlamp control towards you
to turn fog lamps on. The fog lamp
indicator light
will illuminate.
Lights
107
2010 F-250/350/450/550(f23)
Owners Guide, 1st Printing
USA(fus)
Page 108 of 407
Daytime running lamps (DRL) (if equipped)
Turns the headlamps on with a reduced output.
To activate:
•the ignition must be in the on position,
•the headlamp control is in the off or parking lamp position and
•the parking brake must be disengaged.
WARNING:Always remember to turn on your headlamps at
dusk or during inclement weather. The Daytime Running Lamp
(DRL) system does not activate the tail lamps and generally may not
provide adequate lighting during these conditions. Failure to activate
your headlamps under these conditions may result in a collision.
High beams
Push the lever toward the
instrument panel to activate. Pull
the lever towards you to deactivate.
Flash to pass
Pull toward you slightly to activate
and release to deactivate.
O
F
F
Lights
108
2010 F-250/350/450/550(f23)
Owners Guide, 1st Printing
USA(fus)
Page 112 of 407

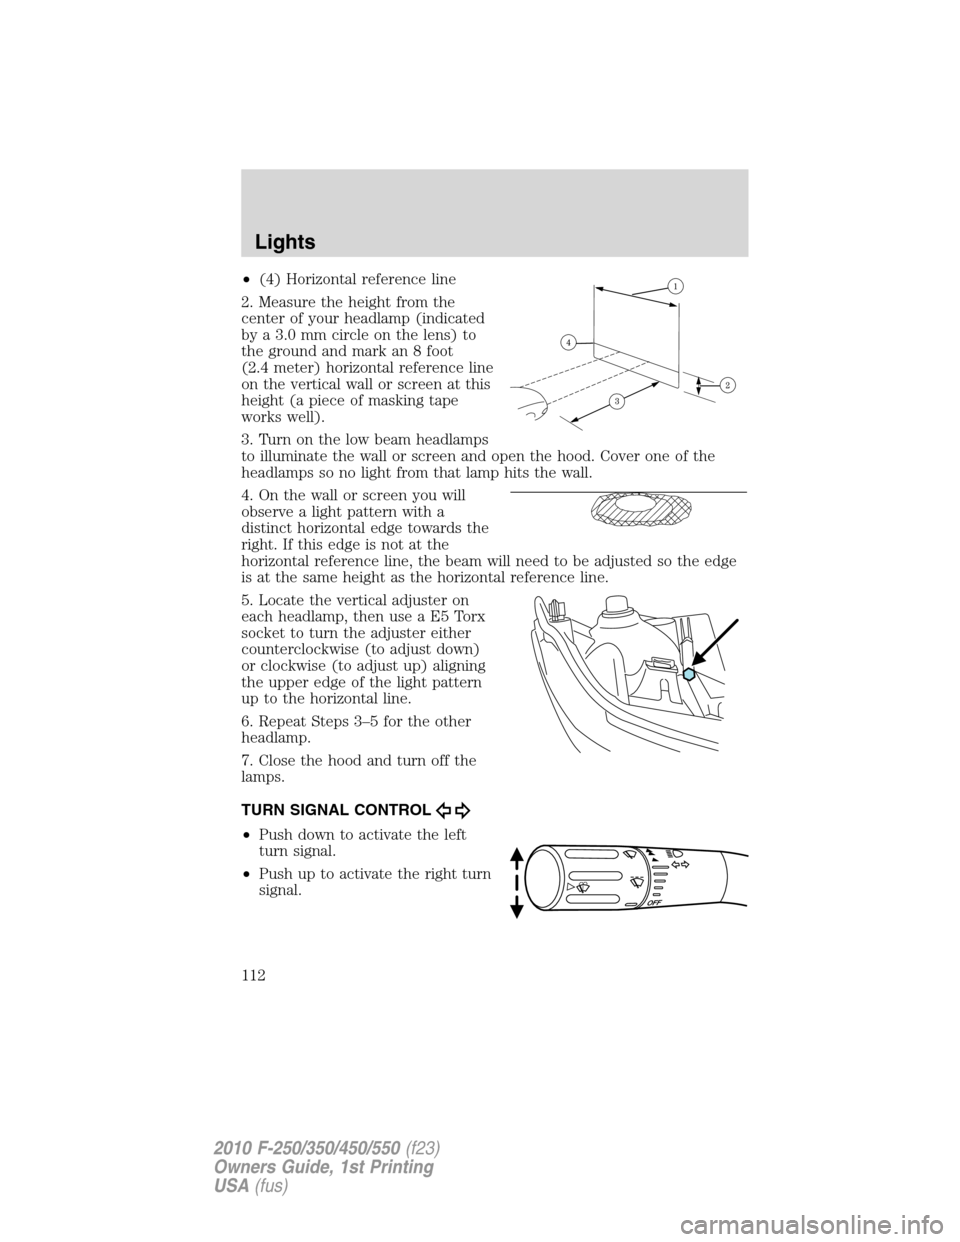
•(4) Horizontal reference line
2. Measure the height from the
center of your headlamp (indicated
by a 3.0 mm circle on the lens) to
the ground and mark an 8 foot
(2.4 meter) horizontal reference line
on the vertical wall or screen at this
height (a piece of masking tape
works well).
3. Turn on the low beam headlamps
to illuminate the wall or screen and open the hood. Cover one of the
headlamps so no light from that lamp hits the wall.
4. On the wall or screen you will
observe a light pattern with a
distinct horizontal edge towards the
right. If this edge is not at the
horizontal reference line, the beam will need to be adjusted so the edge
is at the same height as the horizontal reference line.
5. Locate the vertical adjuster on
each headlamp, then use a E5 Torx
socket to turn the adjuster either
counterclockwise (to adjust down)
or clockwise (to adjust up) aligning
the upper edge of the light pattern
up to the horizontal line.
6. Repeat Steps 3–5 for the other
headlamp.
7. Close the hood and turn off the
lamps.
TURN SIGNAL CONTROL
•Push down to activate the left
turn signal.
•Push up to activate the right turn
signal.
Lights
112
2010 F-250/350/450/550(f23)
Owners Guide, 1st Printing
USA(fus)