2010 FORD SUPER DUTY climate control
[x] Cancel search: climate controlPage 105 of 407
Operating tips
•To reduce fog build up on the windshield during humid weather, place
the air flow selector in the
position.
•To reduce humidity build up inside the vehicle, do not drive with the
system off, or with recirculated air
engaged and A/C off.
•Do not put objects under the front seats that will interfere with the
airflow to the back seats.
•Remove any snow, ice or leaves from the air intake area at the base of
the windshield.
•To improve the A/C cool down, drive with the windows slightly open
for 2-3 minutes after start up or until the vehicle has been “aired out”.
During extreme high ambient temperatures when idling stationary for
extended periods of time in gear, it is recommended to run the A/C in
the max A/C position, reduce blower fan speed from the highest setting
and put the vehicle’s transmission into the P (PARK) gear position
(automatic transmission only) to continue to receive cool air from your
A/C system.
For maximum cooling performance (MAX A/C):
Automatic operation:
1. Press AUTO for full automatic operation.
2. Do not override A/C or
(recirculated air).
3. Set the temperature to 60°F (16°C).
Override operation:
1. Select air distribution.
2. Select A/C and
(recirculated air). Use(recirculated air) with
A/C to provide colder airflow.
3. Set the temperature to 60°F (16°C).
4. Set highest fan speed initially, then adjust to maintain comfort.
Climate Controls
105
2010 F-250/350/450/550(f23)
Owners Guide, 1st Printing
USA(fus)
Page 106 of 407
In(panel) or(panel/floor) modes:
1. Move temperature control to full cold.
2. Select A/C and
(recirculated air). Use recirculated air with A/C to
provide colder airflow.
3. Set highest fan speed initially, then adjust to maintain comfort.
To aid in side window defogging/demisting in cold weather:
1. Select
.
2. Select A/C.
3. Adjust the temperature control to maintain comfort.
4. Set the fan speed to the highest setting.
5. Direct the outer instrument panel vents towards the side windows.
To increase airflow to the outer instrument panel vents, close the vents
located in the middle of the instrument panel.
Climate Controls
106
2010 F-250/350/450/550(f23)
Owners Guide, 1st Printing
USA(fus)
Page 127 of 407
Do not clean the housing or glass of any mirror with harsh
abrasives, fuel or other petroleum-based cleaning products.
Note:If equipped with a rearview camera system (RCS), a video image
will display in the mirror or the navigation system (if equipped) when
the vehicle is put in (R) Reverse. As you shift into any other gear from R
(Reverse), the image will remain for a few seconds and then turn off.
Refer toRearview camera system (RCS)in theDrivingchapter.
EXTERIOR MIRRORS
Power side view mirrors (if equipped)
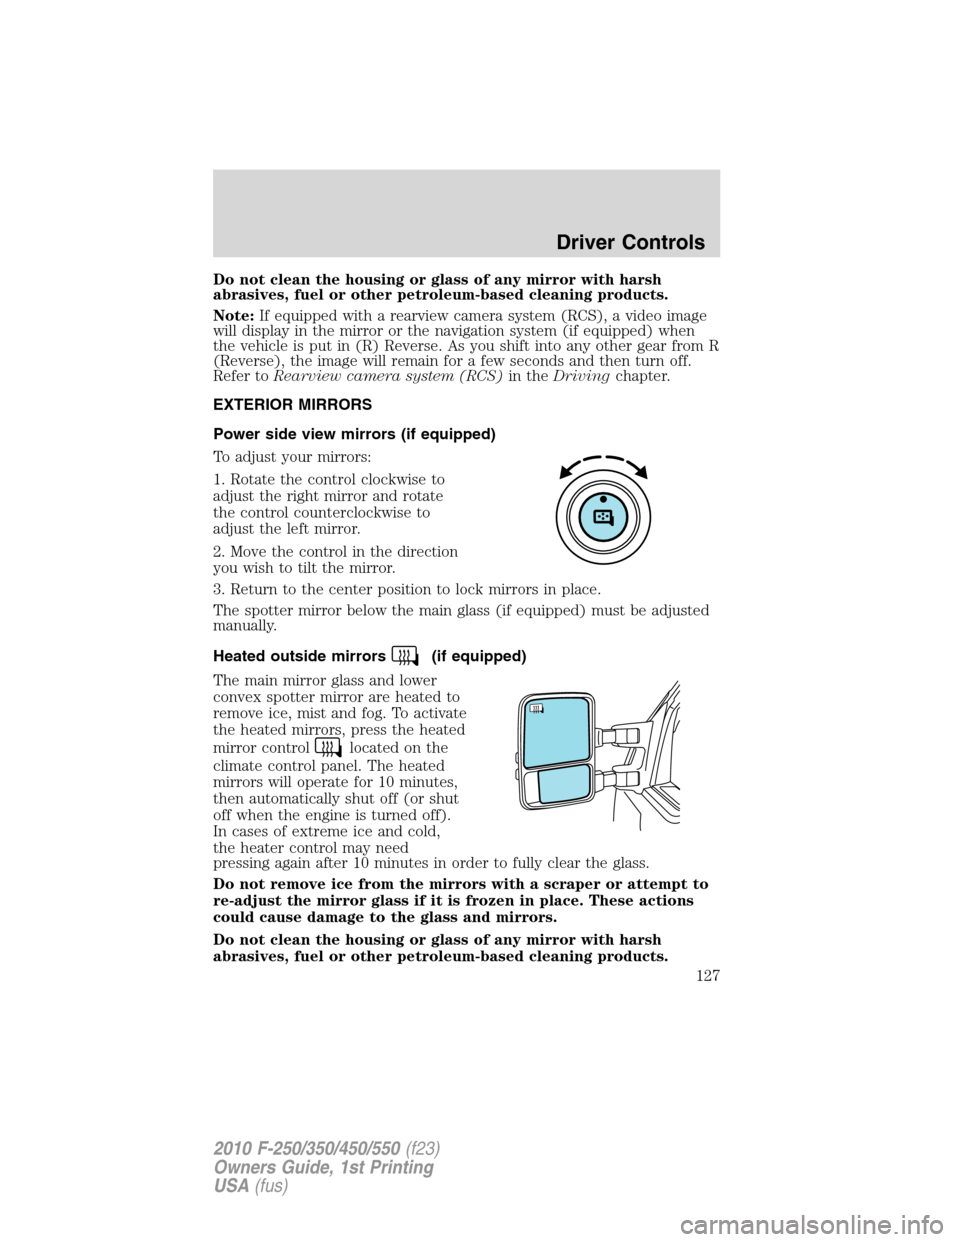
To adjust your mirrors:
1. Rotate the control clockwise to
adjust the right mirror and rotate
the control counterclockwise to
adjust the left mirror.
2. Move the control in the direction
you wish to tilt the mirror.
3. Return to the center position to lock mirrors in place.
The spotter mirror below the main glass (if equipped) must be adjusted
manually.
Heated outside mirrors
(if equipped)
The main mirror glass and lower
convex spotter mirror are heated to
remove ice, mist and fog. To activate
the heated mirrors, press the heated
mirror control
located on the
climate control panel. The heated
mirrors will operate for 10 minutes,
then automatically shut off (or shut
off when the engine is turned off).
In cases of extreme ice and cold,
the heater control may need
pressing again after 10 minutes in order to fully clear the glass.
Do not remove ice from the mirrors with a scraper or attempt to
re-adjust the mirror glass if it is frozen in place. These actions
could cause damage to the glass and mirrors.
Do not clean the housing or glass of any mirror with harsh
abrasives, fuel or other petroleum-based cleaning products.
Driver Controls
127
2010 F-250/350/450/550(f23)
Owners Guide, 1st Printing
USA(fus)
Page 134 of 407
Turning off speed control
There are two ways to turn off the speed control:
•Depress the brake pedal. This will not erase your vehicle’s previously
set speed.
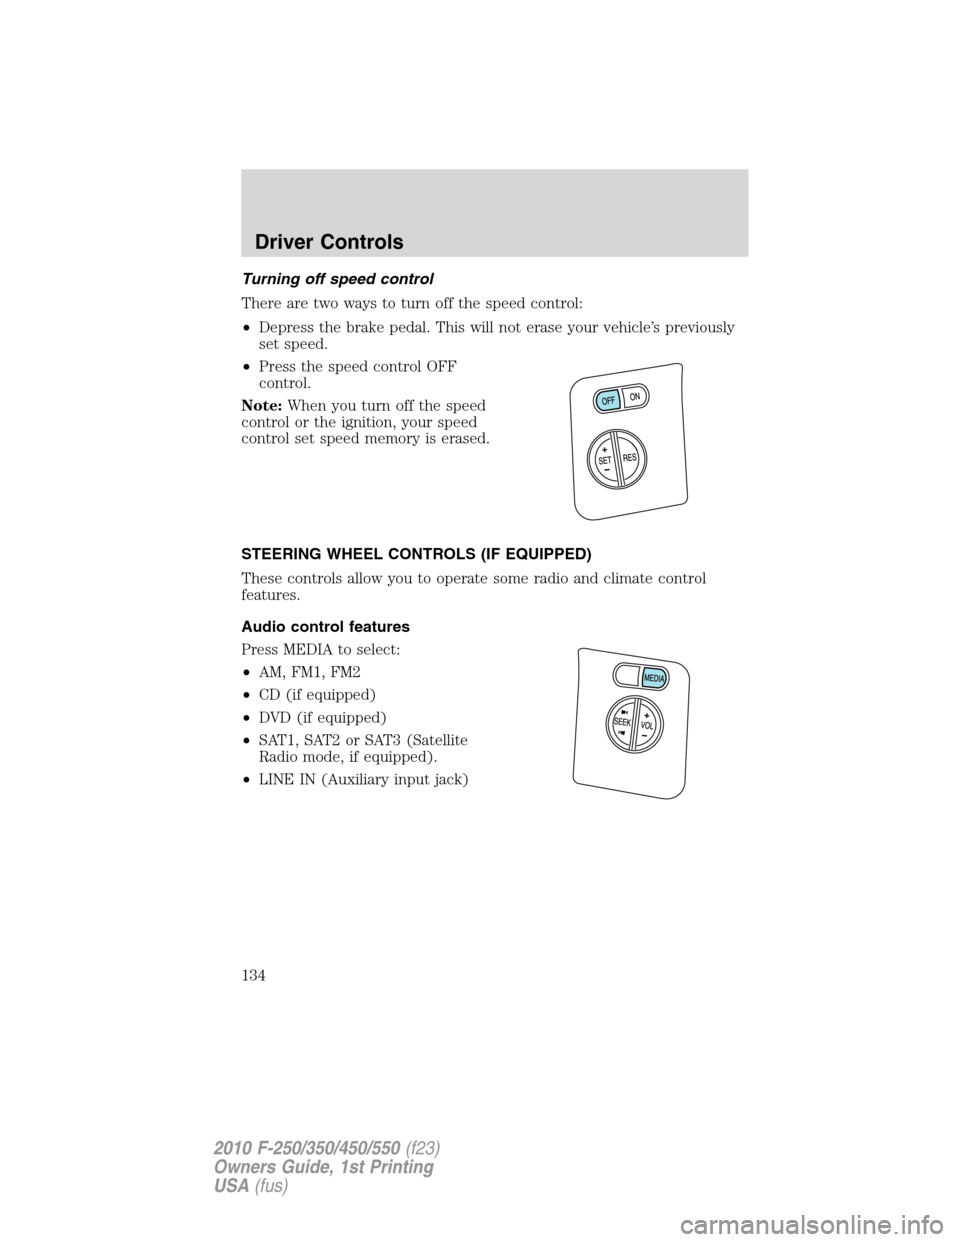
•Press the speed control OFF
control.
Note:When you turn off the speed
control or the ignition, your speed
control set speed memory is erased.
STEERING WHEEL CONTROLS (IF EQUIPPED)
These controls allow you to operate some radio and climate control
features.
Audio control features
Press MEDIA to select:
•AM, FM1, FM2
•CD (if equipped)
•DVD (if equipped)
•SAT1, SAT2 or SAT3 (Satellite
Radio mode, if equipped).
•LINE IN (Auxiliary input jack)
Driver Controls
134
2010 F-250/350/450/550(f23)
Owners Guide, 1st Printing
USA(fus)
Page 168 of 407
Heated seats (if equipped)
The heated seat control is located on the climate control panel.
WARNING:Persons who are unable to feel pain to the skin
because of advanced age, chronic illness, diabetes, spinal cord
injury, medication, alcohol use, exhaustion, or other physical
conditions, must exercise care when using the seat heater. The seat
heater may cause burns even at low temperatures, especially if used
for long periods of time. Do not place anything on the seat that
insulates against heat, such as a blanket or cushion, because this may
cause the seat heater to overheat. Do not puncture the seat with pins,
needles, or other pointed objects because this may damage the heating
element which may cause the seat heater to overheat. An overheated
seat may cause serious personal injury.
Note:Do not do the following:
•Place heavy objects on the seat.
•Operate the seat heater if water or any other liquid is spilled on the
seat. Allow the seat to dry thoroughly.
To operate the heated seats, do the following (engine must be running):
Press
to activate; pushagain to deactivate.
The indicator light on the control will illuminate when activated.
Memory seats/power mirrors/adjustable pedals (if equipped)
This system allows automatic
positioning of the driver seat, power
mirrors, and adjustable pedals to
two programmable positions.
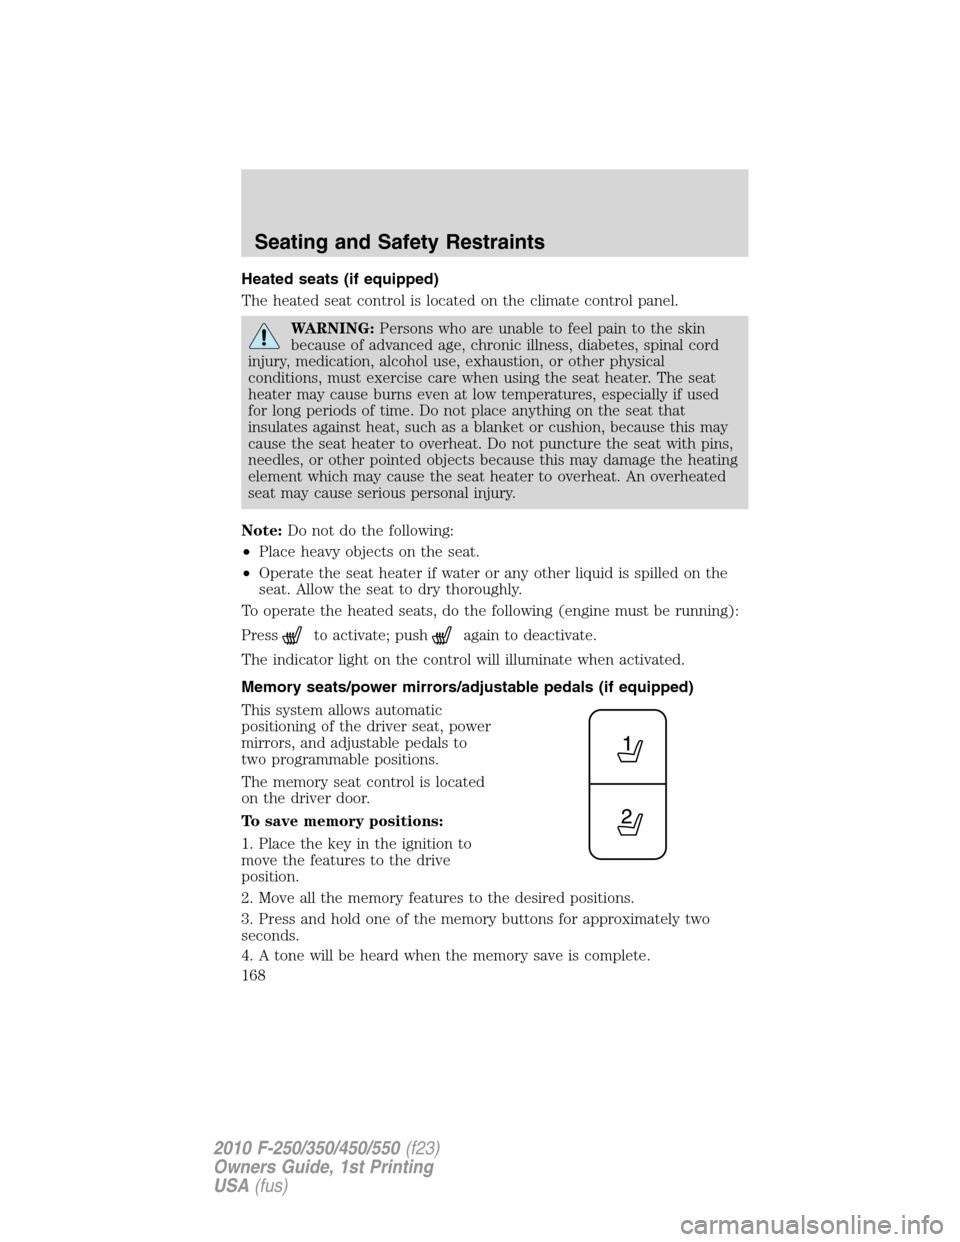
The memory seat control is located
on the driver door.
To save memory positions:
1. Place the key in the ignition to
move the features to the drive
position.
2. Move all the memory features to the desired positions.
3. Press and hold one of the memory buttons for approximately two
seconds.
4. A tone will be heard when the memory save is complete.
Seating and Safety Restraints
168
2010 F-250/350/450/550(f23)
Owners Guide, 1st Printing
USA(fus)
Page 218 of 407
INFORMATION ABOUT UNIFORM TIRE QUALITY GRADING
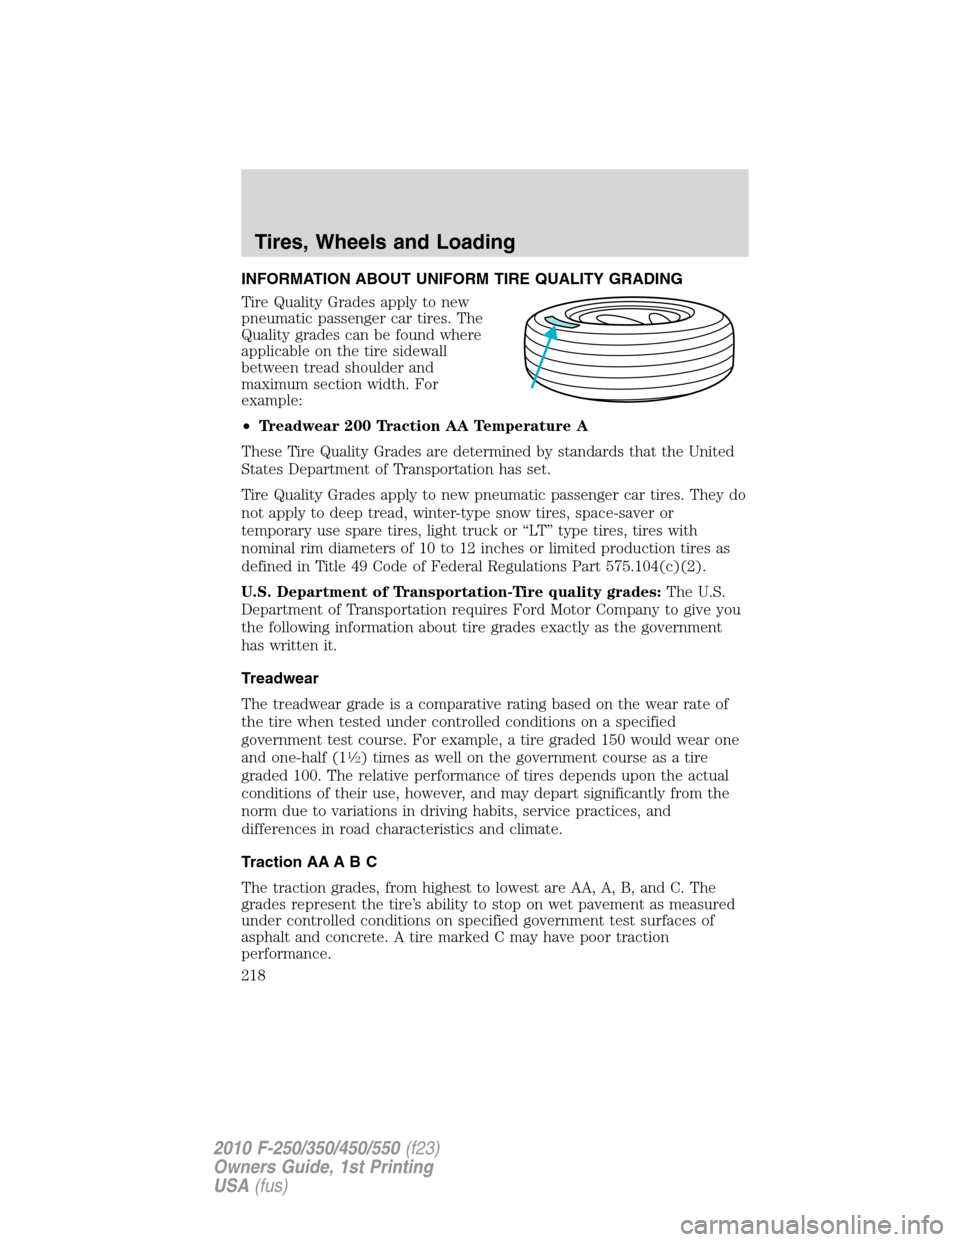
Tire Quality Grades apply to new
pneumatic passenger car tires. The
Quality grades can be found where
applicable on the tire sidewall
between tread shoulder and
maximum section width. For
example:
•Treadwear 200 Traction AA Temperature A
These Tire Quality Grades are determined by standards that the United
States Department of Transportation has set.
Tire Quality Grades apply to new pneumatic passenger car tires. They do
not apply to deep tread, winter-type snow tires, space-saver or
temporary use spare tires, light truck or “LT” type tires, tires with
nominal rim diameters of 10 to 12 inches or limited production tires as
defined in Title 49 Code of Federal Regulations Part 575.104(c)(2).
U.S. Department of Transportation-Tire quality grades:The U.S.
Department of Transportation requires Ford Motor Company to give you
the following information about tire grades exactly as the government
has written it.
Treadwear
The treadwear grade is a comparative rating based on the wear rate of
the tire when tested under controlled conditions on a specified
government test course. For example, a tire graded 150 would wear one
and one-half (1
1�2) times as well on the government course as a tire
graded 100. The relative performance of tires depends upon the actual
conditions of their use, however, and may depart significantly from the
norm due to variations in driving habits, service practices, and
differences in road characteristics and climate.
Traction AA A B C
The traction grades, from highest to lowest are AA, A, B, and C. The
grades represent the tire’s ability to stop on wet pavement as measured
under controlled conditions on specified government test surfaces of
asphalt and concrete. A tire marked C may have poor traction
performance.
Tires, Wheels and Loading
218
2010 F-250/350/450/550(f23)
Owners Guide, 1st Printing
USA(fus)
Page 242 of 407
8. Remove the valve cap from the valve stem on the right rear tire.
Decrease the air pressure until the horn sounds.
9. Remove the valve cap from the valve stem on the left rear tire.
Decrease the air pressure until the horn sounds.
Training is complete after the horn sounds for the last tire trained
(driver’s side rear tire), the TPMS tell tale stops flashing, and the
message center (if equipped) displays:
TRAINING COMPLETE.
10. Turn the ignition off. If two short horn beeps are heard, the reset
procedure was unsuccessful and must be repeated.
If after repeating the procedure and two short beeps are heard when the
ignition is turned to off, seek assistance from your authorized dealer.
11. Set all four tires to the recommended air pressure as indicated on
the Safety Compliance Certification Label or Tire Label located on the
B-Pillar or the edge of the driver’s door. SeeVehicle Loadingin this
chapter for more information.
SNOW TIRES AND CHAINS
WARNING:Snow tires must be the same size, load index, speed
rating as those originally provided by Ford. Use of any tire or
wheel not recommended by Ford can affect the safety and
performance of your vehicle, which could result in an increased risk of
loss of vehicle control, vehicle rollover, personal injury and death.
Additionally, the use of non-recommended tires and wheels could
cause steering, suspension, axle or transfer case/power transfer unit
failure.
Note:Do not use snow chains on vehicles with 20 inch wheels and tires.
The tires on your vehicle have all weather treads to provide traction in
rain and snow. However, in some climates, you may need to use snow
tires and chains. If you need to use chains, it is recommended that steel
wheels (of the same size and specifications) be used, as chains may chip
aluminum wheels.
Follow these guidelines when using snow tires and chains:
•Use only SAE Class S chains.
•Install chains securely, verifying that the chains do not touch any
wiring, brake lines or fuel lines.
Tires, Wheels and Loading
242
2010 F-250/350/450/550(f23)
Owners Guide, 1st Printing
USA(fus)
Page 262 of 407
RECREATIONAL TOWING
Follow these guidelines if you have a need for recreational (RV) towing.
An example of recreational towing would be towing your vehicle behind
a motorhome. These guidelines are designed to ensure that your
transmission is not damaged.
Note:Put your climate control system in recirculated air mode to
prevent exhaust fumes from entering the vehicle. Refer to theClimate
controlschapter for more information.
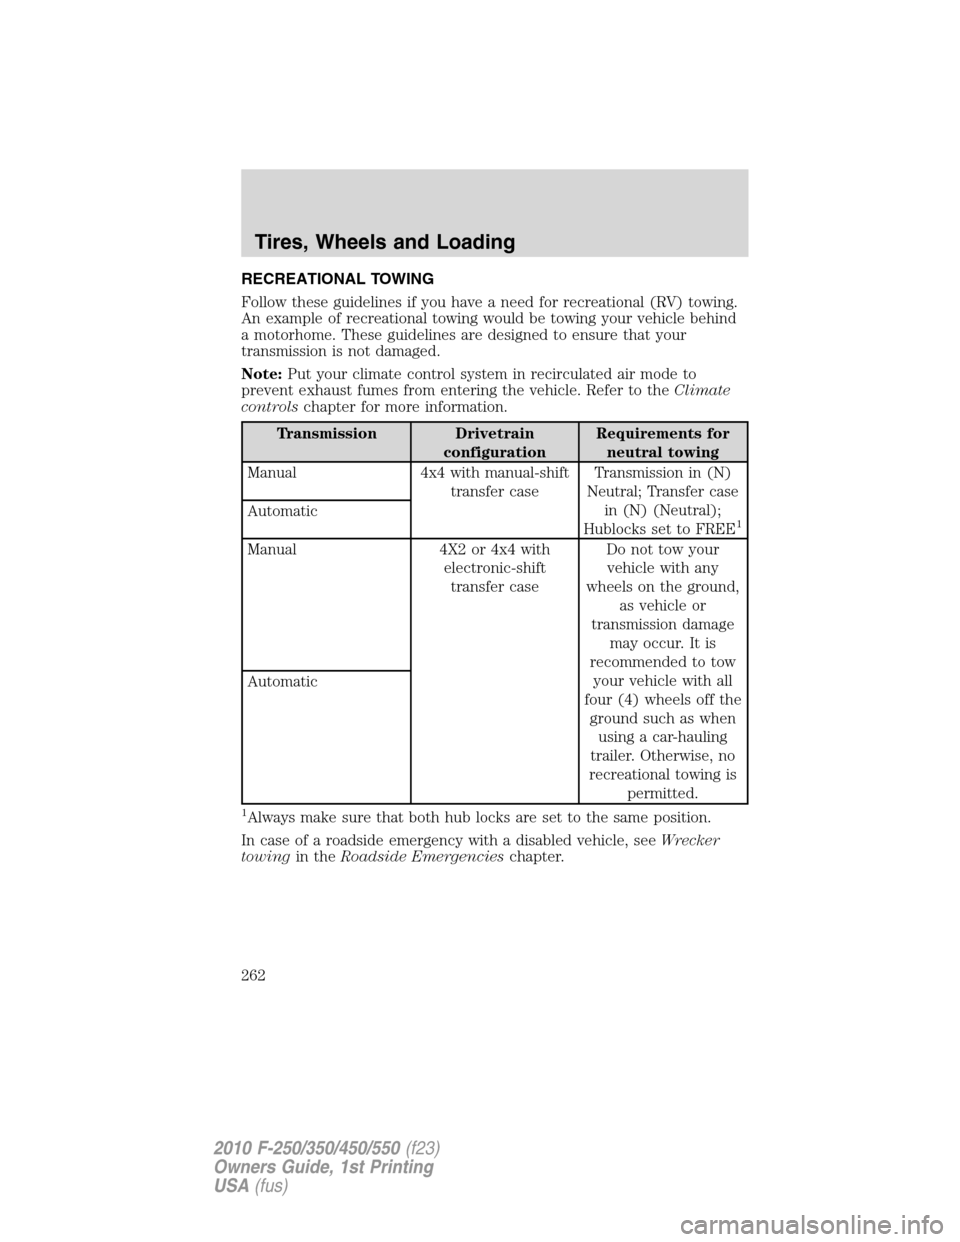
Transmission Drivetrain
configurationRequirements for
neutral towing
Manual 4x4 with manual-shift
transfer caseTransmission in (N)
Neutral; Transfer case
in (N) (Neutral);
Hublocks set to FREE
1Automatic
Manual 4X2 or 4x4 with
electronic-shift
transfer caseDo not tow your
vehicle with any
wheels on the ground,
as vehicle or
transmission damage
may occur. It is
recommended to tow
your vehicle with all
four (4) wheels off the
ground such as when
using a car-hauling
trailer. Otherwise, no
recreational towing is
permitted. Automatic
1Always make sure that both hub locks are set to the same position.
In case of a roadside emergency with a disabled vehicle, seeWrecker
towingin theRoadside Emergencieschapter.
Tires, Wheels and Loading
262
2010 F-250/350/450/550(f23)
Owners Guide, 1st Printing
USA(fus)