2010 FORD F750 automatic transmission
[x] Cancel search: automatic transmissionPage 124 of 274
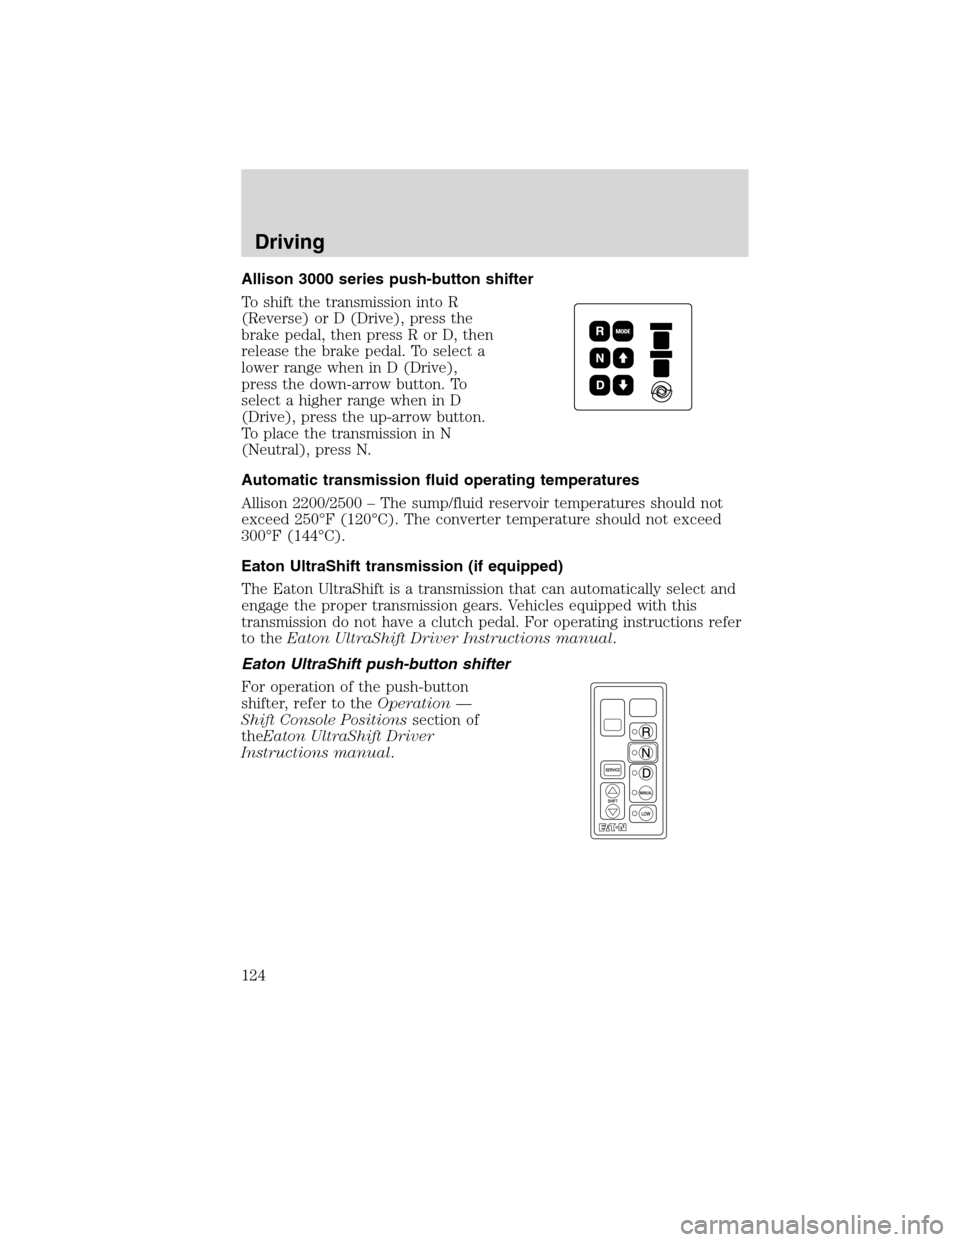
Allison 3000 series push-button shifter
To shift the transmission into R
(Reverse) or D (Drive), press the
brake pedal, then press R or D, then
release the brake pedal. To select a
lower range when in D (Drive),
press the down-arrow button. To
select a higher range when in D
(Drive), press the up-arrow button.
To place the transmission in N
(Neutral), press N.
Automatic transmission fluid operating temperatures
Allison 2200/2500 – The sump/fluid reservoir temperatures should not
exceed 250°F (120°C). The converter temperature should not exceed
300°F (144°C).
Eaton UltraShift transmission (if equipped)
The Eaton UltraShift is a transmission that can automatically select and
engage the proper transmission gears. Vehicles equipped with this
transmission do not have a clutch pedal. For operating instructions refer
to theEaton UltraShift Driver Instructions manual.
Eaton UltraShift push-button shifter
For operation of the push-button
shifter, refer to theOperation —
Shift Console Positionssection of
theEaton UltraShift Driver
Instructions manual.
Driving
124
2010 F-650/750(f67)
Supplement(supplement), 1st Printing
USA(fus)
Page 129 of 274
To go forward
With the engine idling, press the clutch pedal in and shift into 1 (First).
Engage the clutch while pressing the accelerator to start forward.
Operate the clutch and upshift as required by driving conditions.
To go backward
Reverse is obtained by putting the gearshift lever in R (Reverse) and
engaging the clutch while pressing lightly on the accelerator.
Operating the Spicer ES56-7B and ES066-7B 7-speed
transmissions
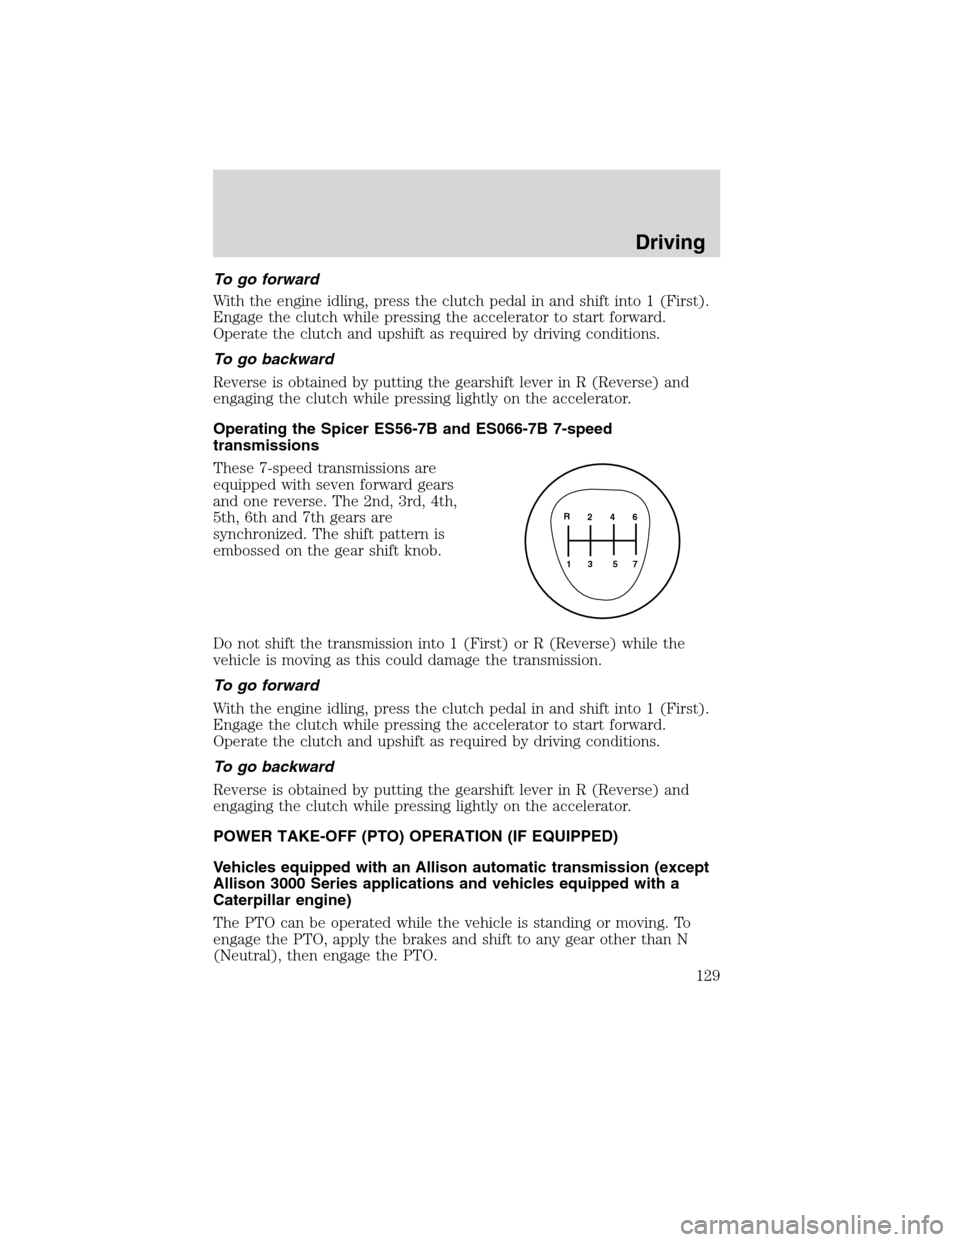
These 7-speed transmissions are
equipped with seven forward gears
and one reverse. The 2nd, 3rd, 4th,
5th, 6th and 7th gears are
synchronized. The shift pattern is
embossed on the gear shift knob.
Do not shift the transmission into 1 (First) or R (Reverse) while the
vehicle is moving as this could damage the transmission.
To go forward
With the engine idling, press the clutch pedal in and shift into 1 (First).
Engage the clutch while pressing the accelerator to start forward.
Operate the clutch and upshift as required by driving conditions.
To go backward
Reverse is obtained by putting the gearshift lever in R (Reverse) and
engaging the clutch while pressing lightly on the accelerator.
POWER TAKE-OFF (PTO) OPERATION (IF EQUIPPED)
Vehicles equipped with an Allison automatic transmission (except
Allison 3000 Series applications and vehicles equipped with a
Caterpillar engine)
The PTO can be operated while the vehicle is standing or moving. To
engage the PTO, apply the brakes and shift to any gear other than N
(Neutral), then engage the PTO.
2 4 6
3 5 71 R
Driving
129
2010 F-650/750(f67)
Supplement(supplement), 1st Printing
USA(fus)
Page 131 of 274

Vehicles equipped with an Allison 3000 Series automatic
transmission
The PTO drive gear is engine-driven and provides direct engine power.
The PTO can be operated when the vehicle is either stationary or
moving.
The PTO gear is in constant mesh with the drive gear in the torque
converter housing. A friction clutch or constant drive is used to transmit
power to the PTO.
Vehicles equipped with a Caterpillar engine
The PTO will only operate if the transmission is in N (Neutral). This
feature can be overridden by a special service tool; see your dealer or
service representative for more information.
Vehicles equipped with a manual transmission
Transmission-mounted PTO units are available for local installation on
your vehicle. See yourBody Builder’s Layout Bookfor restrictions on
use and installation of PTO units.
To engage the PTO unit, stop the vehicle and place the transmission in N
(Neutral). Press the clutch and allow the gears to stop rotating, then
engage the PTO unit. The PTO can also be selected with the
transmission in gear as long as the clutch is pressed.
When operating the PTO with the vehicle stationary, first set the parking
brake (chock the wheels if the vehicle is on a hill or another uneven
surface).
REAR AXLE INFORMATION
Axle operating temperature normally will not exceed 100°F (38°C). If
the operating temperature exceeds 230°F (110°C), the rate of axle
lubrication oxidation will increase and shorten the life of the lubricant
and seals, requiring axle lubrication changes to become more frequent to
preserve the axle. Extreme Pressure (EP) lubricants should not be run
consistently above 230°F (110°C).
Gross axle weight
Your truck has gross axle weight, gross vehicle weight and gross
combination weight ratings. Do not exceed these ratings.
Driving
131
2010 F-650/750(f67)
Supplement(supplement), 1st Printing
USA(fus)
Page 133 of 274
When the differential is locked, the vehicle’s turning radius will increase
(vehicle will “under-steer”)
The differential can be locked or unlocked when the vehicle is moving at
a constant speed of less than 25 mph (40 km/h) and while the wheels
are not slipping. The differential must not be locked when the vehicle is
traveling down steep grades and traction is minimal.
Note:Never use the differential lock at vehicle speeds above 25 mph
(40 km/h).
The differential lock and differential lock light will automatically
disengage at speeds above 25 mph (40 km/h). The differential lock will
remain off until either the vehicle is restarted or the differential lock
switch is turned off then back on.
Axle conversions
It is not recommended, or approved, for axle conversions to be
performed. However, it is understood that, on occasion, aftermarket
add-on axles are installed by others on the truck chassis which allow
operator control for weight transfer from other axles (i.e., air lift axles).
WARNING:When operating a loaded vehicle, the driver must
keep all adjustable axles on the ground at all times, supporting
their share of the vehicle’s load. Failure to do so can overload other
axles, tires, wheels, springs, steering components, brakes and frames,
resulting in early component failure, loss of vehicle control, possible
property damage and personal injury.
TWO-SPEED REAR AXLE (IF EQUIPPED)
A two-speed rear axle allows the driver to select a LO range for greater
pulling power and a HI range for greater road speed and fuel economy.
These ranges can also be used to provide additional steps between
transmission shifts when driving on steep grades and/or fuel economy
may be factors.
Note:Do not shift between ranges when the speed control is on.
WARNING:Never shift a two-speed axle when descending a
steep grade as this may cause loss of vehicle control and result
in personal injury.
Driving
133
2010 F-650/750(f67)
Supplement(supplement), 1st Printing
USA(fus)
Page 134 of 274
Axle shifting
Manual transmissions:
•To downshift,select the next lower gear, release and press the
accelerator pedal rapidly, or while holding the accelerator pedal down,
release and engage the clutch rapidly.Note:The clutch method is
recommended when driving at slower speeds.
•To upshift,keep the accelerator pedal down, select the next higher
gear, release the accelerator and pause until the axle upshifts.Note:
De-clutch for smoother axle upshifts when driving at slower speeds.
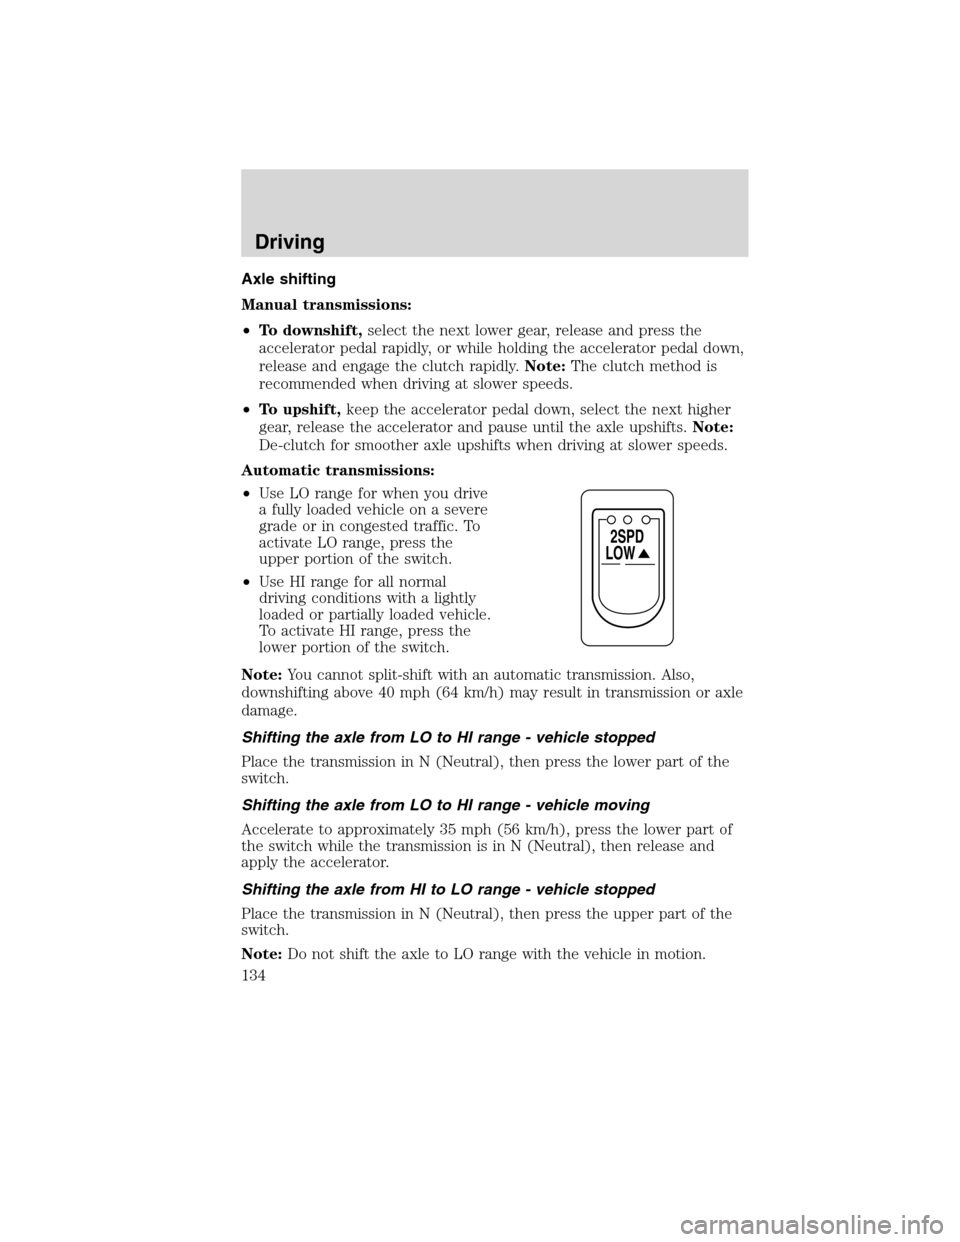
Automatic transmissions:
•Use LO range for when you drive
a fully loaded vehicle on a severe
grade or in congested traffic. To
activate LO range, press the
upper portion of the switch.
•Use HI range for all normal
driving conditions with a lightly
loaded or partially loaded vehicle.
To activate HI range, press the
lower portion of the switch.
Note:You cannot split-shift with an automatic transmission. Also,
downshifting above 40 mph (64 km/h) may result in transmission or axle
damage.
Shifting the axle from LO to HI range - vehicle stopped
Place the transmission in N (Neutral), then press the lower part of the
switch.
Shifting the axle from LO to HI range - vehicle moving
Accelerate to approximately 35 mph (56 km/h), press the lower part of
the switch while the transmission is in N (Neutral), then release and
apply the accelerator.
Shifting the axle from HI to LO range - vehicle stopped
Place the transmission in N (Neutral), then press the upper part of the
switch.
Note:Do not shift the axle to LO range with the vehicle in motion.
LOW
2SPD
Driving
134
2010 F-650/750(f67)
Supplement(supplement), 1st Printing
USA(fus)
Page 139 of 274

•To eliminate excessive transmission shifting, use a lower gear. This will
also assist in transmission cooling.
•Anticipate stops and brake gradually.
•Do not exceed the GCWR rating or transmission damage may occur.
Servicing after towing
If you tow a trailer for long distances, your vehicle will require more
frequent service intervals. Refer to yourScheduled Maintenance Guide
for more information.
Trailer towing tips
•Practice turning, stopping and backing up before starting on a trip to
get the feel of the vehicle trailer combination. When turning, make
wider turns so the trailer wheels will clear curbs and other obstacles.
•Allow more distance for stopping with a trailer attached.
•If you are driving down a long or steep hill, shift to a lower gear. Do
not apply the brakes continuously, as they may overheat and become
less effective.
•The trailer tongue weight should be 10–15% of the loaded trailer
weight.
•If you will be towing a trailer frequently in hot weather, hilly
conditions, at GCW, or any combination of these factors, consider
refilling your rear axle with synthetic gear lube if not already so
equipped. Refer toLubricant specificationsin theMaintenance and
Specificationschapter for the lubricant specification. Remember that
regardless of the rear axle lube used, do not tow a trailer for the first
500 miles (800 km) of a new vehicle, and that the first 500 miles
(800 km) of towing be done at no faster than 70 mph (112 km/h) with
no full throttle starts.
•After you have traveled 50 miles (80 km), thoroughly check your
hitch, electrical connections and trailer wheel lug nuts.
•To aid in engine/transmission cooling and A/C efficiency during hot
weather while stopped in traffic, place the gearshift lever in P (Park)
(if available on your automatic transmission) or N (Neutral) (manual
transmissions and automatic transmissions withoutaP[Park]
position).
•Vehicles with trailers should not be parked on a grade. If you must
park on a grade, place wheel chocks under the trailer’s wheels.
Driving
139
2010 F-650/750(f67)
Supplement(supplement), 1st Printing
USA(fus)
Page 151 of 274

Inline fuses
Your vehicle may have several inline fuses located in/on the battery
cables located in the battery box depending on application.
•All Allison transmission equipped vehicles have a 10 Amp fuse located
in the clean power cables located in the battery box.
•All Caterpillar engine equipped vehicles have a 40 Amp fuse located in
the clean power cables located in the battery box.
•All Cummins engine equipped vehicles have a 30 Amp fused located in
the clean power cables located in the battery box.
•All vehicles equipped with an Eaton Ultra Shift transmission have a
30 Amp fuse located in the clean power cables located in the battery
box.
•All Hydraulic brake equipped vehicles have a 40 Amp fuse located in
the clean power cables located in the battery box and in addition
another 30 Amp fuse located in a fuse holder just above the power
distribution center located in the vehicles engine compartment.
JUMP STARTING
WARNING:The gases around the battery can explode if
exposed to flames, sparks, or lit cigarettes. An explosion could
result in injury or vehicle damage.
WARNING:Batteries contain sulfuric acid which can burn skin,
eyes and clothing, if contacted.
Do not attempt to push-start your automatic transmission
vehicle. Automatic transmissions do not have push-start
capability. Attempting to push-start a vehicle with an automatic
transmission may cause transmission damage.
Before connecting a fast-charger, booster battery or installing a new
battery, make sure the ground polarities of the fast-charger, booster
battery or alternator (when installing a battery) are matched to the
ground polarity of the vehicle battery. Improper usage of the
fast-charger, hook-up of booster battery or installation of a new battery
can cause damage to the electrical system or to the alternator. Do not
attempt to polarize the alternator.
Roadside Emergencies
151
2010 F-650/750(f67)
Supplement(supplement), 1st Printing
USA(fus)
Page 178 of 274
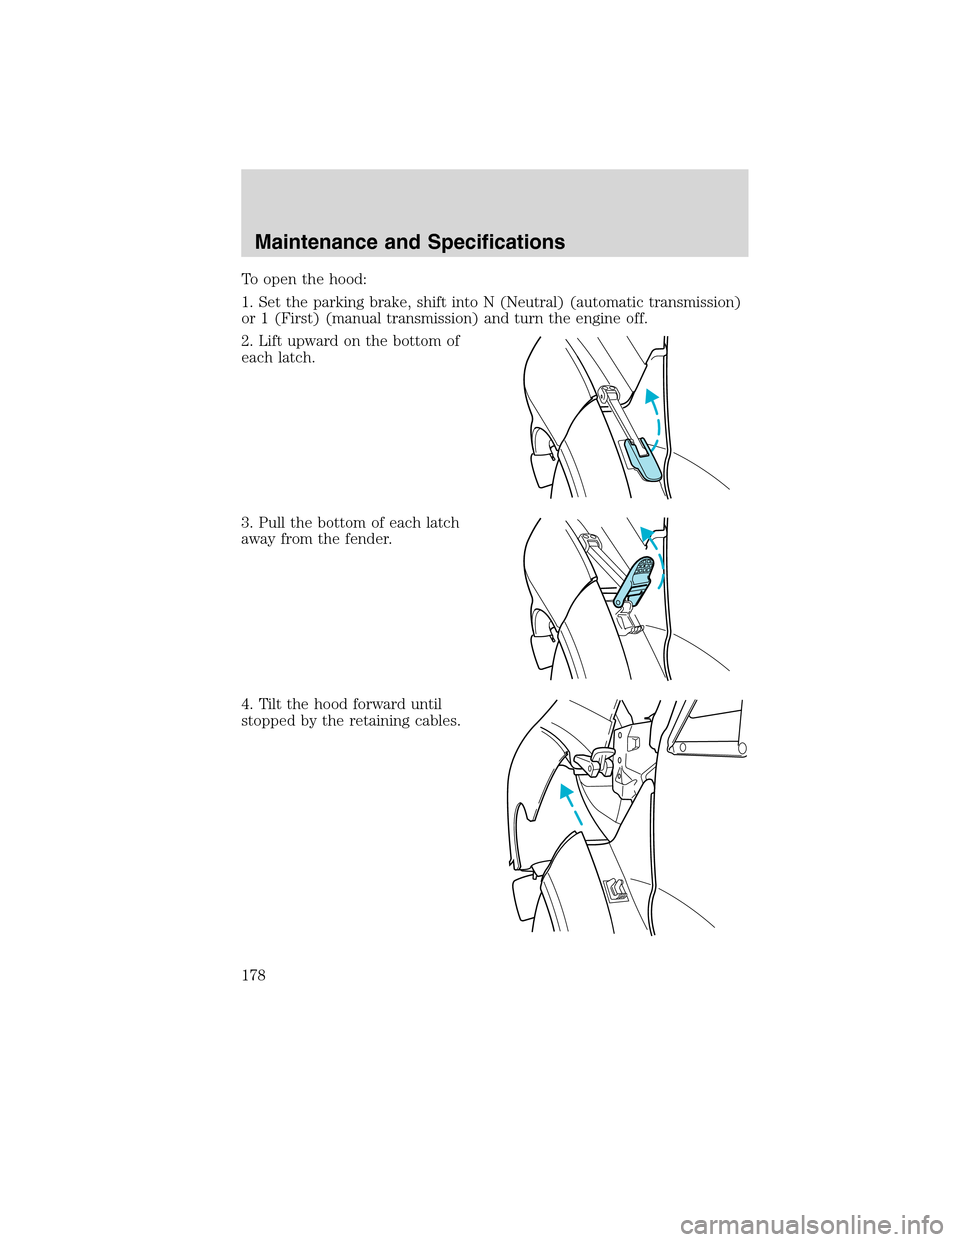
To open the hood:
1. Set the parking brake, shift into N (Neutral) (automatic transmission)
or 1 (First) (manual transmission) and turn the engine off.
2. Lift upward on the bottom of
each latch.
3. Pull the bottom of each latch
away from the fender.
4. Tilt the hood forward until
stopped by the retaining cables.
Maintenance and Specifications
178
2010 F-650/750(f67)
Supplement(supplement), 1st Printing
USA(fus)