2010 FORD F650 lock
[x] Cancel search: lockPage 157 of 274

Removing axle shafts before towing
1. Shift the main differential to the unlocked (disengaged) position. The
differential lock light will turn off.
2. Remove the capscrews and washers or stud nuts and washers from
flanges of both axle shafts.
3. Loosen the tapered dowels in the flanges of both axle shafts by
holding a 1
1�2inch diameter brass drift or hammer against the axle shaft
center and hitting it with a five or six pound hammer.Note:Do not use
a chisel or wedge to loosen the axle shafts and dowels. Use of a chisel or
wedge can damage the hub, axle shafts and oil seals.
4. Remove the tapered dowels and both axle shafts from the axle
assembly.
5. Assemble a cover over openings of both wheels ends to prevent loss of
lubricant and keep dirt away from the wheel bearing cavities.
Note:One of the axle shafts has two sets of splines. One set to engage
with the differential side gear and one set to engage with the shift collar
for the differential lock. It may be necessary to rotate the shaft slightly
to align the gear spline teeth with the shift collar teeth in order to
remove the axle shaft.
Installing the axle shafts
1. Remove the covers from the wheel ends.
2. Shift the differential lock to the unlocked position (disengaged)
position.
3. Install the axle shafts.
•Place the gaskets on the wheel hub studs.
•Push the right-hand axle shaft and gasket into the wheel end and
housing until the shaft stops against the differential shift collar.
•Push down and in on the axle shaft flange and rotate the shaft until
the splines of the shaft and shift collar are engaged.
•Push the axle shaft further into the housing until the shaft stops
against the differential side gear.
•Push down on the axle shaft flange and rotate the shaft until the
splines of the shaft and side gear are engaged.
•Push the axle shaft completely into the housing until the axle shaft
flange and the gasket are flush against the wheel hub.
•Install the left-hand axle shaft and gasket into the wheel end.
Roadside Emergencies
157
2010 F-650/750(f67)
Supplement(supplement), 1st Printing
USA(fus)
Page 158 of 274

4. If tapered dowels are required, install them at each stud and into the
flange of the axle shaft. Use a punch or drift and hammer, if needed.
5. Install the fasteners and tighten to correct torque value. Refer to the
Service Manual.
Towing the vehicle with the rear wheels suspended
Note:To avoid damage to the cab roof or air deflector when towing the
vehicle backward (rear wheels suspended) the air deflector must be
removed.
Whenever possible, it is preferable to tow a disabled vehicle from the
rear by raising the rear of the chassis. When towing a vehicle with the
rear of the chassis suspended, the front wheels must be locked in the
straight-ahead position.
Vehicles equipped with a manual transmission must have at least 1.0 pint
(0.5L) of transmission fluid drained from the case. This will prevent the
transmission fluid from entering the clutch housing and fluid saturating
the clutch discs. Make sure that the transmission fluid is replaced before
the vehicle is returned to service.
Roadside Emergencies
158
2010 F-650/750(f67)
Supplement(supplement), 1st Printing
USA(fus)
Page 165 of 274

•Remove particles such as bird droppings, tree sap, insect deposits, tar
spots, road salt and industrial fallout before repairing paint chips.
•Always read the instructions before using the products.
ALUMINUM WHEELS AND COVERS
•Clean with Motorcraft Wheel and Tire Cleaner (ZC-37–A), which is
available from your dealer.
•Never apply any cleaning chemical to hot or warm wheel rims or
covers.
•Some automatic car washes may cause damage to the finish on your
wheel rims or covers. Chemical-strength cleaners, or cleaning
chemicals, in combination with brush agitation to remove brake dust
and dirt, could wear away the clearcoat finish over time.
•Do not use hydrofluoric acid-based or high caustic-based wheel
cleaners, steel wool, fuels or strong household detergent.
•To remove tar and grease, use Motorcraft Bug and Tar Remover
(ZC-42), available from your dealer.
ENGINE
Engines are more efficient when they are clean because grease and dirt
buildup keep the engine warmer than normal. When washing:
•Take care when using a power washer to clean the engine. The
high-pressure fluid could penetrate the sealed parts and cause
damage.
Note:To prevent damage to the engine control module, never
spray-wash it directly. Never spray any connector.
•Do not spray a hot engine with cold water to avoid cracking the
engine block or other engine components.
•Spray Motorcraft Engine Shampoo and Degreaser (ZC-20) on all parts
that require cleaning and pressure rinse clean.
•Never wash or rinse the engine while it is running; water in the
running engine may cause internal damage.
PLASTIC (NON-PAINTED) EXTERIOR PARTS
Use only approved products to clean plastic parts. These products are
available from your dealer.
•For routine cleaning, use Motorcraft Detail Wash (ZC-3–A).
•If tar or grease spots are present, use Motorcraft Bug and Tar
Remover (ZC-42).
Cleaning
165
2010 F-650/750(f67)
Supplement(supplement), 1st Printing
USA(fus)
Page 171 of 274

Check to make sure that the axle mounting U-bolt nuts, attaching or
mounting bolts and nuts are securely tightened. Regularly check front
axle for damage, binding, worn parts and adequate lubrication.
At regular intervals, or during other scheduled maintenance, (tire
rotation/service, wheel bearing service, alignment, etc.) the kingpins
should be checked for excessive wear. Refer to the service manual for
proper procedures.
Toe-in setting - general inspection
Inspecting steer axle tires in the first 3,000–10,000 service miles
(4,800–16,000 service km) will generally show if tires are wearing
normally.
Rapid outside shoulder wear on both tires indicates too much toe-in.
Rapid inside shoulder wear on both tires indicates too much toe-out. In
P&D-type service, left-to-right steer tire tread life differentials up to 40%
can be observed depending on routes and other variables.
Follow the tire manufacturer’s recommended cold inflation pressure for
the tire size, load range (ply rating) and steer axle loading typical for
their operation (each steer axle tire will equal
1�2steer axle loading).
Special applications may warrant a setting based on past experience with
the type of tire operating loads and conditions. Radial tires are more
sensitive to toe-in setting than bias ply tires. While not insensitive to
vehicle alignment, fine tuning school bus alignment to line-haul truck
standards will not drastically improve tire tread life.
It is essential that correct toe-in and tire pressure be maintained for
optimum tire wear.
Rear axle - general inspection
Check to make sure that the axle mounting U-bolts, attaching or
mounting bolts and nuts are securely tightened. Refer toU-bolt nut
torquein this chapter. Regularly check the rear axle for damaged,
binding or worn parts.
NoSpin Detroit Locker positive locking differential
Vehicles equipped with this type differential have the operator’s manual
supplied with the vehicle. Refer to this manual for maintenance checks.
Maintenance and Specifications
171
2010 F-650/750(f67)
Supplement(supplement), 1st Printing
USA(fus)
Page 173 of 274

Periodic checking of push rod travel or brake adjustment is essential for
effective braking. Push rod travel should be checked every service
interval to determine if adjustment is correct. Brake chamber push rods
on original equipment chambers now incorporate a stroke indicator to
aid in adjustment checks; an orange paint marker near the base of the
push rod. If the push rod is clean and the brakes are out of adjustment,
the orange marker can be seen protruding from the chamber when the
brakes are applied.
WARNING:Do not manually adjust the automatic slack
adjusters to correct excessive push rod stroke as it may result in
reduced brake effectiveness and a vehicle crash. Excessive push rod
stroke indicates that a problem exists with the automatic adjuster, with
the installation of the adjuster, or with foundation brake components
that manual adjustment will not remedy. Seek service from a qualified
facility for excessive push rod stroke.
Inspect the brake lining every maintenance interval. When brake lining or
blocks are worn to within 1/16 inch (1.6 mm) of rivets, brake lining must
be replaced. This inspection or adjustment should only be performed by
a qualified technician and must be in accordance with instructions
provided by the service manual.
Do not back off or disconnect the front brakes so that they are less
effective, letting the rear brakes do all the stopping of the vehicle. Do
not overlook the brakes on the trailer, either. Brake condition on the
trailer is just as important as the tractor. Proper brake balance on trucks
and tractor-trailers is essential for effective braking.
Once a year, the entire brake system must be inspected. Check the
following:
•Any rubber as it may deteriorate whenever used. Rubber brake
components should be inspected by a qualified technician and
replaced as necessary. Replacement intervals vary according to the
severity and length of vehicle service.
•Condition of brake drums, brake chambers and slack adjusters.
•System for air leaks.
•Hose or pipes for rust, damage and deterioration.
•Operation of service and parking brakes.
Some parts such as air brake chamber diaphragm, air compressor and air
cleaner should be inspected periodically and replaced if considered
unserviceable.
Maintenance and Specifications
173
2010 F-650/750(f67)
Supplement(supplement), 1st Printing
USA(fus)
Page 176 of 274

Air induction system
Once each year, perform a complete inspection of the air induction
system. In areas where road salt is used, the inspection consists of
disassembling the joints of each aluminum component and inspecting for
salt build-up, presence of chlorine that can cause aluminum particles to
flake off and enter the engine combustion chambers.
If evidence of corrosion is found (usually at the pipe connections), use a
wire brush to clean the inside of the pipes and inside the rubber hoses.
If the intake pipes are pitted at the joint ends, use Motorcraft Silicone
Gasket and Sealant TA-30 to seal the joints. Be certain that no excess
material is on the inside of the pipes that can be pulled into the engine.
If the service condition of the pipes, hoses or clamps is questionable,
replace the defective part(s).
Be sure that prior to reassembly all dust and debris has been cleaned out
of the pipes and couplings with a clean, damp rag.
WARNING:When performing maintenance to any turbocharged
engine with engine air inlet piping disconnected, keep loose
clothing, jewelry and long hair away from the engine air inlet piping. A
turbocharger compressor air inlet protective shield should be installed
over the turbocharger air inlet to reduce the risk of personal injury or
death.
Steering - general inspection
•Ask your service technician to examine the steering mechanism. Only
minor adjustments may be necessary.
•Check tie rod, drag link end clamp bolts and ball joints. They must be
tight.
•Check for installation and spread of cotter pins and tightness of nuts
at both ends of the tie rod and drag link.
•Check that pitman arm (steering arm at steering gear) mounting is
tight and locked. Check system for leaks or hose chafing. Repair at
once.
•Maintain proper steering gear and power steering pump lubricant
levels.
•Regularly inspect steering column joint bolts and steering linkage,
particularly for body-to-chassis clearance.
Maintenance and Specifications
176
2010 F-650/750(f67)
Supplement(supplement), 1st Printing
USA(fus)
Page 179 of 274

To lower the hood:
1. Push the hood rearward at the top center of the hood above the grille
until closed.
2. Engage the latch on each fender.
3. Push down on the bottom of each latch until locked.
WINDSHIELD WASHER FLUID
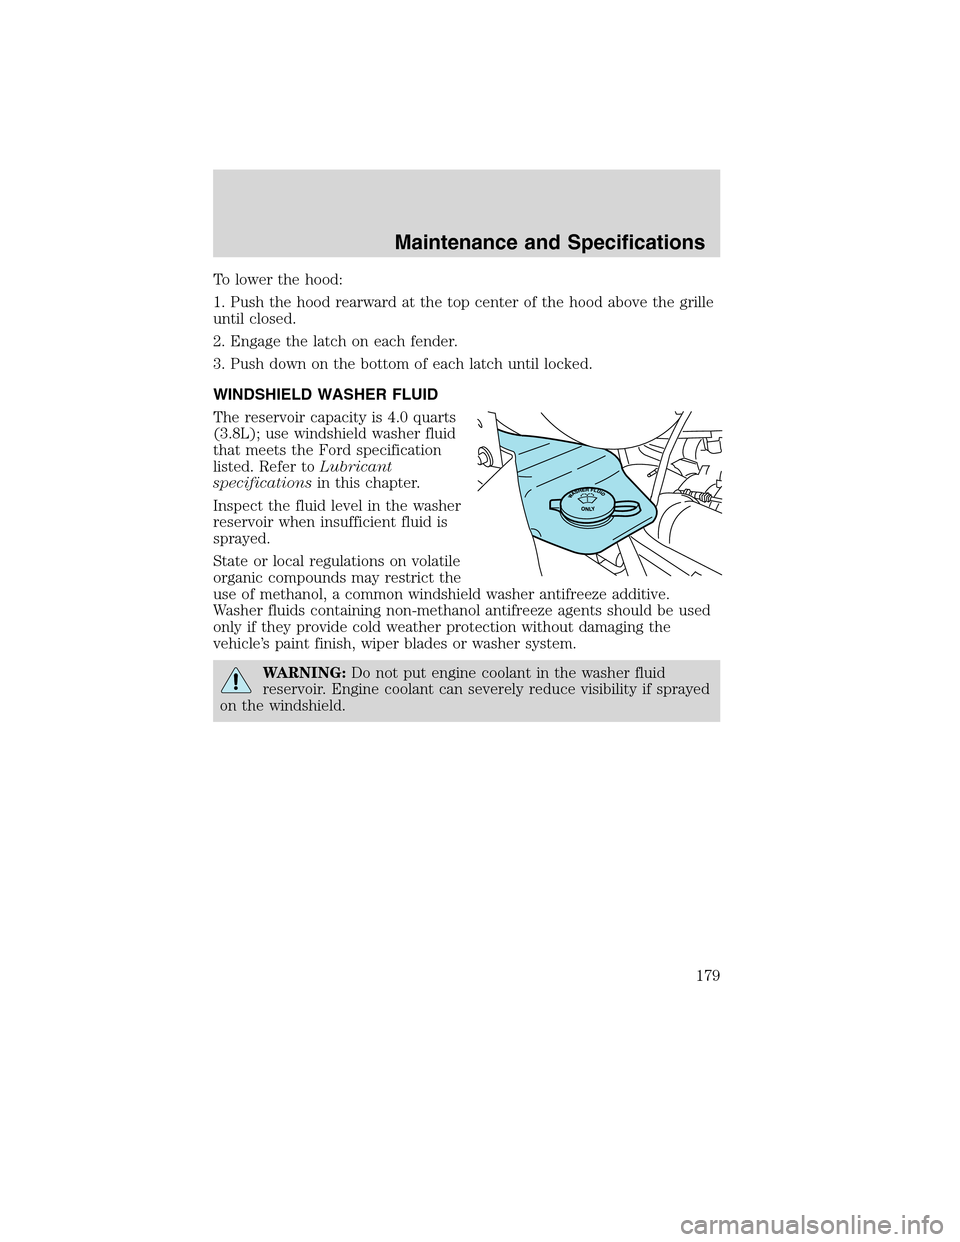
The reservoir capacity is 4.0 quarts
(3.8L); use windshield washer fluid
that meets the Ford specification
listed. Refer toLubricant
specificationsin this chapter.
Inspect the fluid level in the washer
reservoir when insufficient fluid is
sprayed.
State or local regulations on volatile
organic compounds may restrict the
use of methanol, a common windshield washer antifreeze additive.
Washer fluids containing non-methanol antifreeze agents should be used
only if they provide cold weather protection without damaging the
vehicle’s paint finish, wiper blades or washer system.
WARNING:Do not put engine coolant in the washer fluid
reservoir. Engine coolant can severely reduce visibility if sprayed
on the windshield.
Maintenance and Specifications
179
2010 F-650/750(f67)
Supplement(supplement), 1st Printing
USA(fus)
Page 180 of 274

CHANGING THE WIPER BLADES
To replace the wiper blades:
1. Pull the wiper arm away from the
windshield and lock into the service
position.
2. Turn the blade at an angle from
the wiper arm. Press the lock pin
manually to release the blade and
pull the wiper blade down toward
the windshield to remove it from the
arm.
3. Attach the new wiper to the
wiper arm and press it into place
until a click is heard.
ENGINE OIL
Refer to your engine operator’s manual for information on checking and
adding engine oil as well as engine oil specifications, capacities and
required maintenance.
BATTERY
Your vehicle is equipped with two or three maintenance-free batteries
which are mounted in a covered tray and located on the left frame rail.
The covered battery tray, depending upon application, may also have one
or two steps attached.
WARNING:This vehicle is equipped with more than one
battery, removal of cable from only one battery does not
disconnect the vehicle electrical system. Be sure to disconnect cables
from all batteries when disconnecting power. Failure to do so may
cause serious personal injury or property damage.
Maintenance and Specifications
180
2010 F-650/750(f67)
Supplement(supplement), 1st Printing
USA(fus)